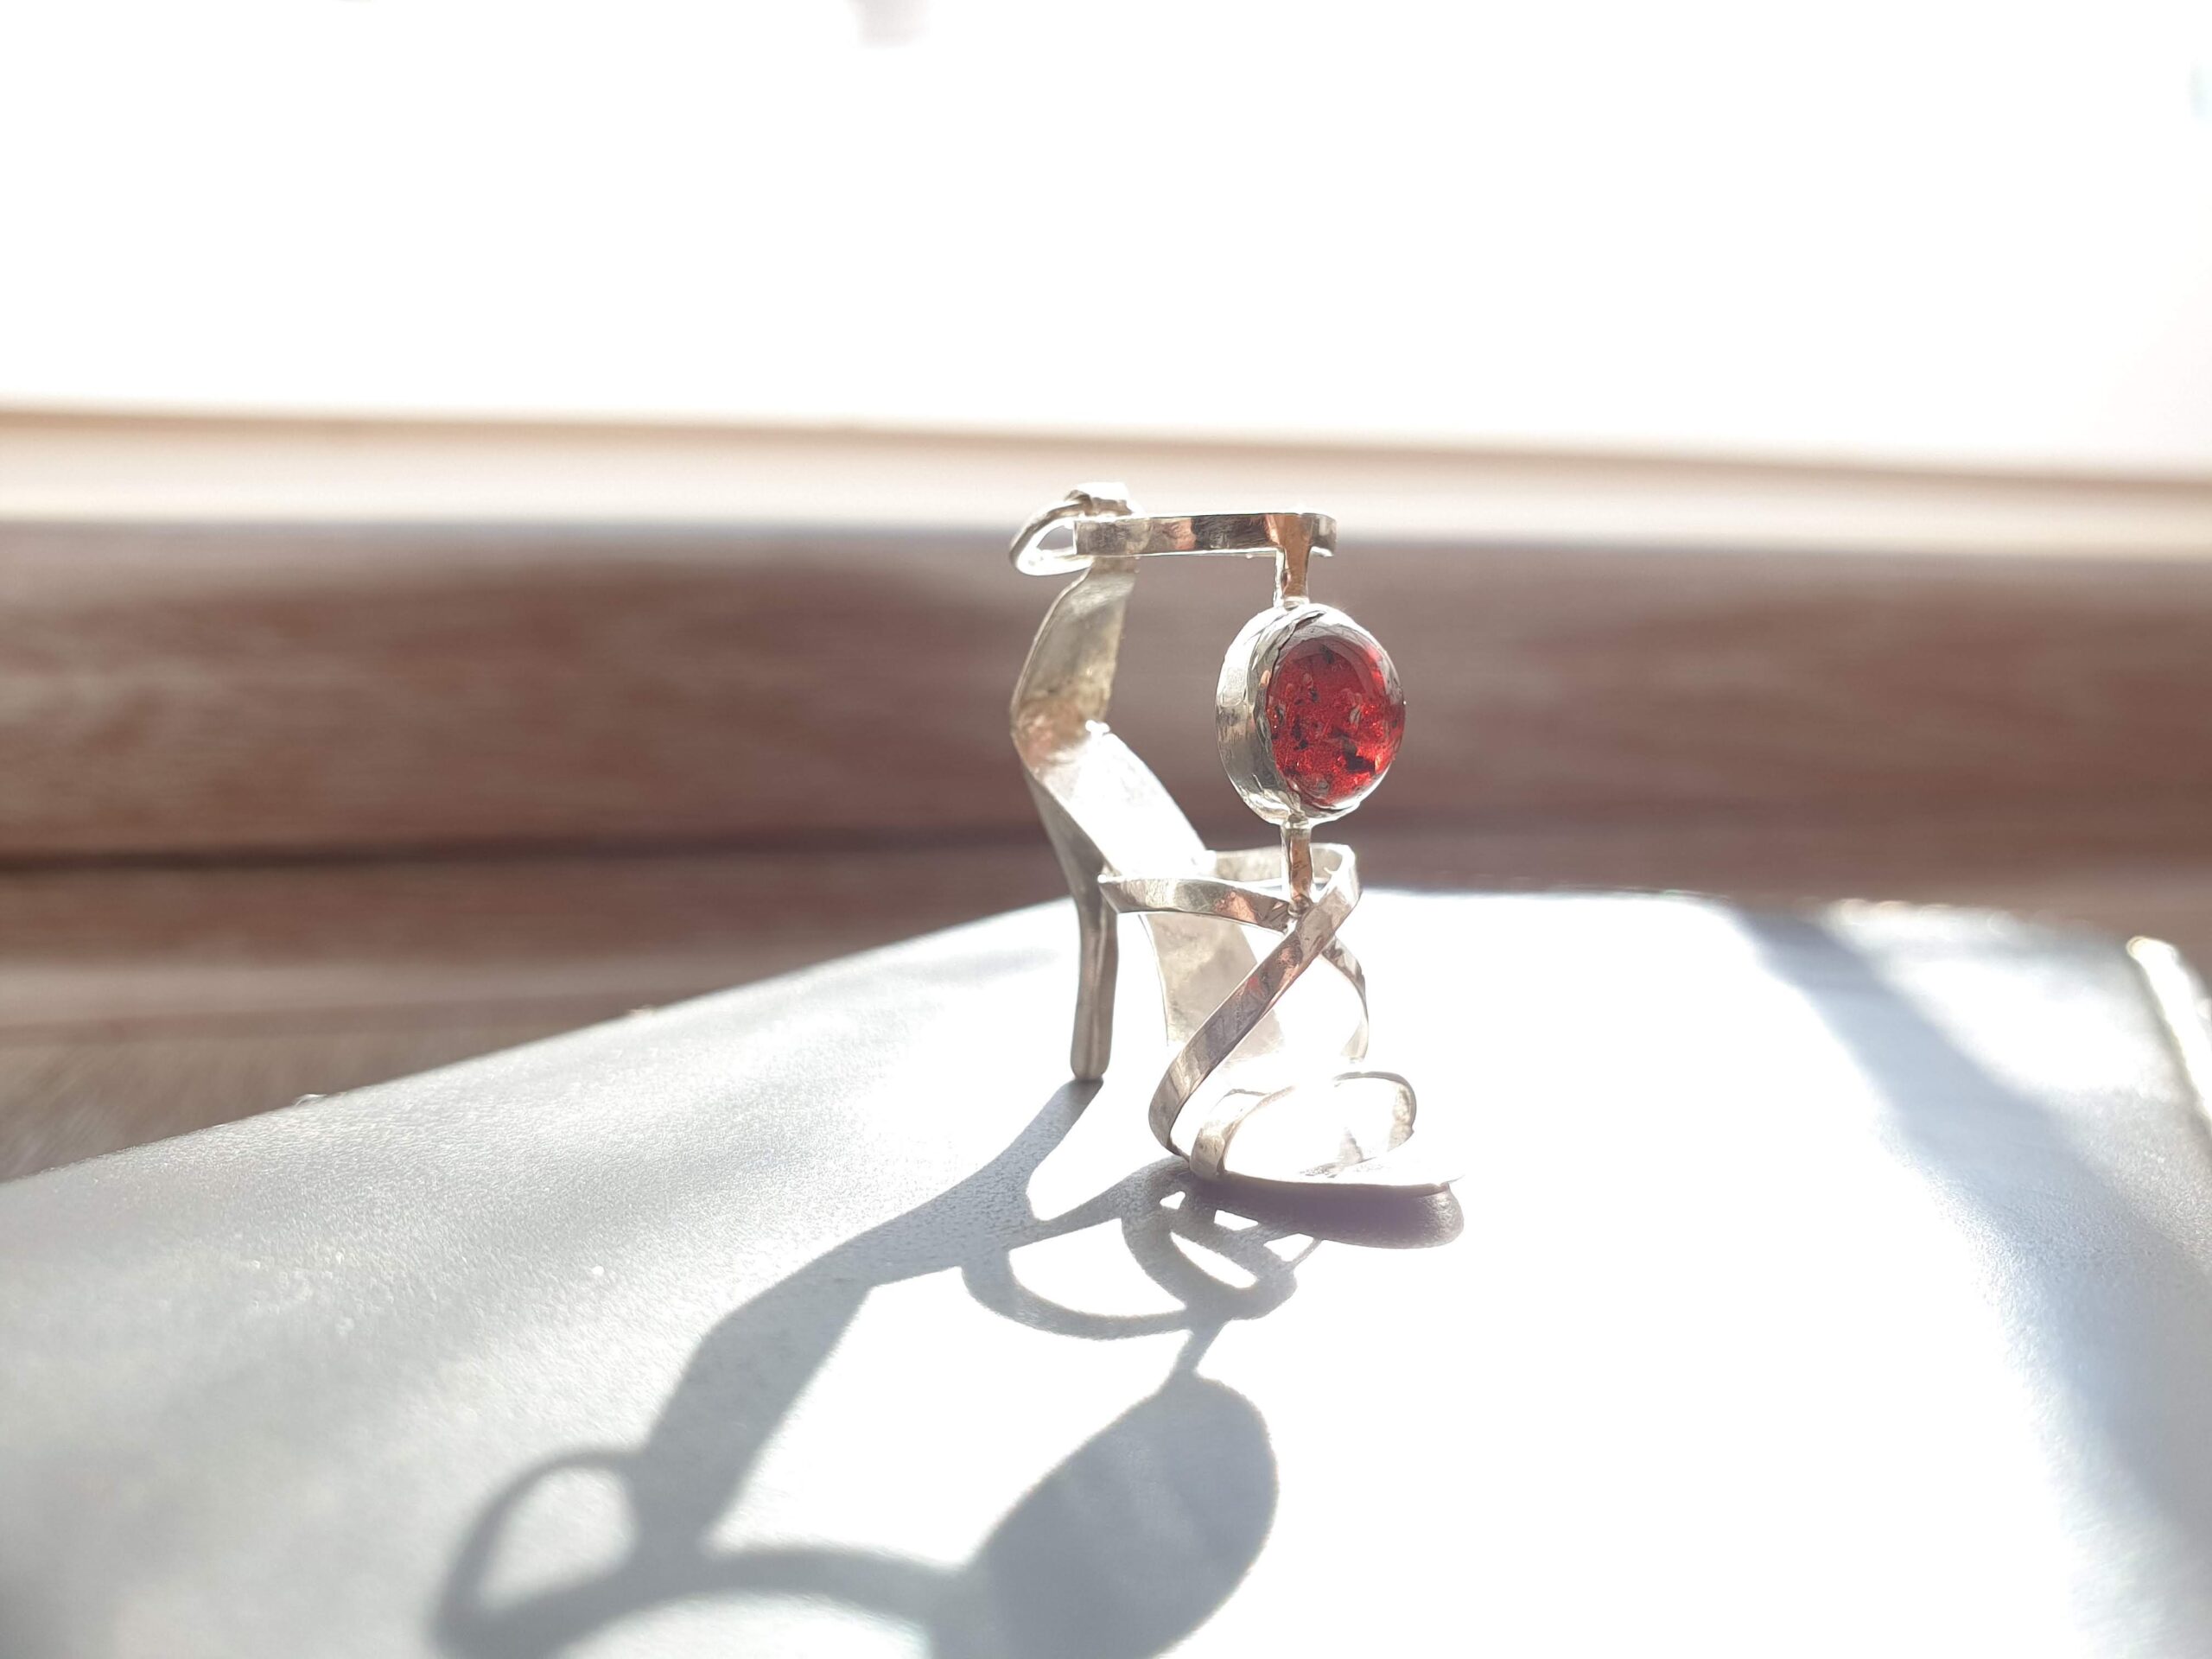
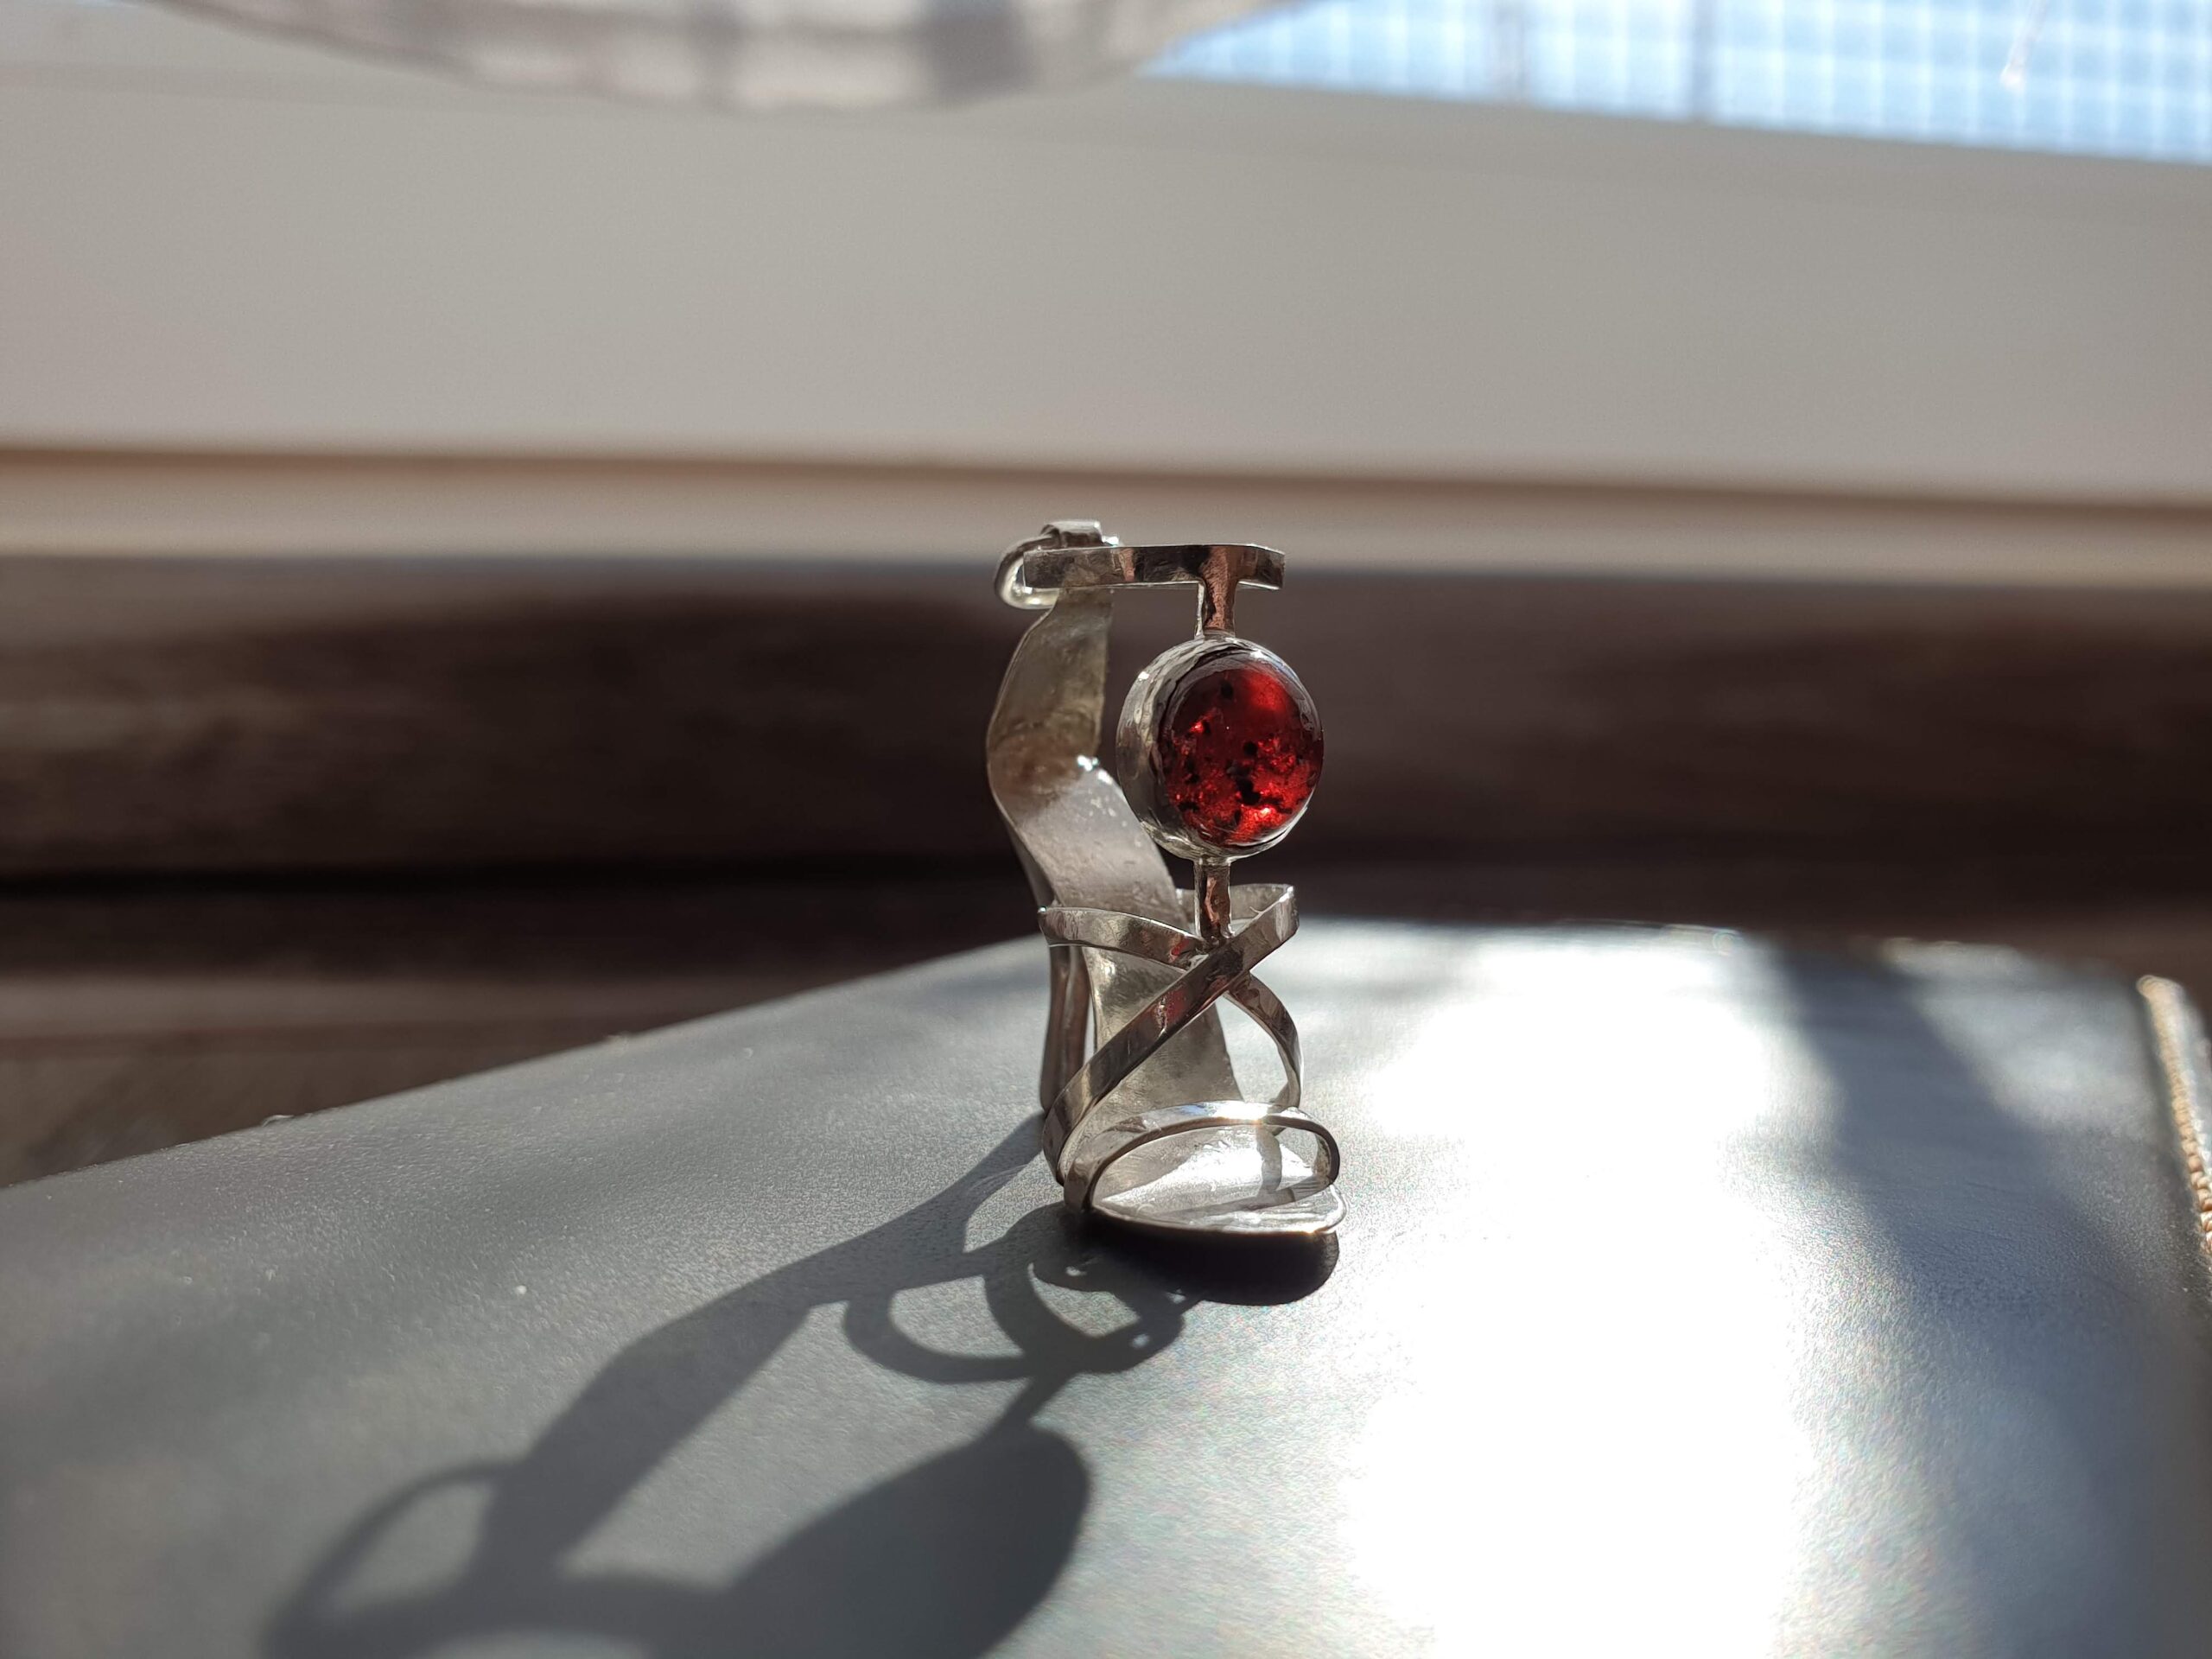
Let me take you on a journey about handcrafting a strappy high heeled silver pendant with a lovely garnet cabochon. This would be a fifth creation inspired by my fascination to the shoes. My previous high heeled projects you can find as High Heeled Amethyst Earrings, High-heeled sandal with clasp and filigree strap, Stiletto high heeled sandal pendant and High-heeled filigree pendant.
Sole making
As any other project it starts with a basic shape. In this case the shape is a shoe sole. This time I did go extra mile and outlined a sole of real high heeled sandal. Not being sure about the right scale of a future pendant I placed few outlines beside each other to compare.
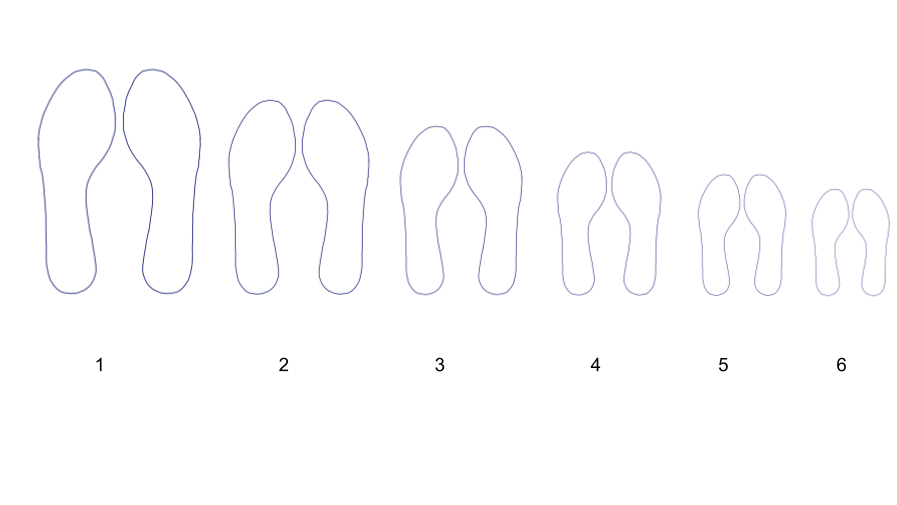
I knew for sure that this shoe must be bigger than previous ones I made. The reason is simply because the flattened silver wire I have looks clumsy on a smaller sole. So I printed the scale sheet and cut out few outlines. It seemed that number 5 would be good enough.
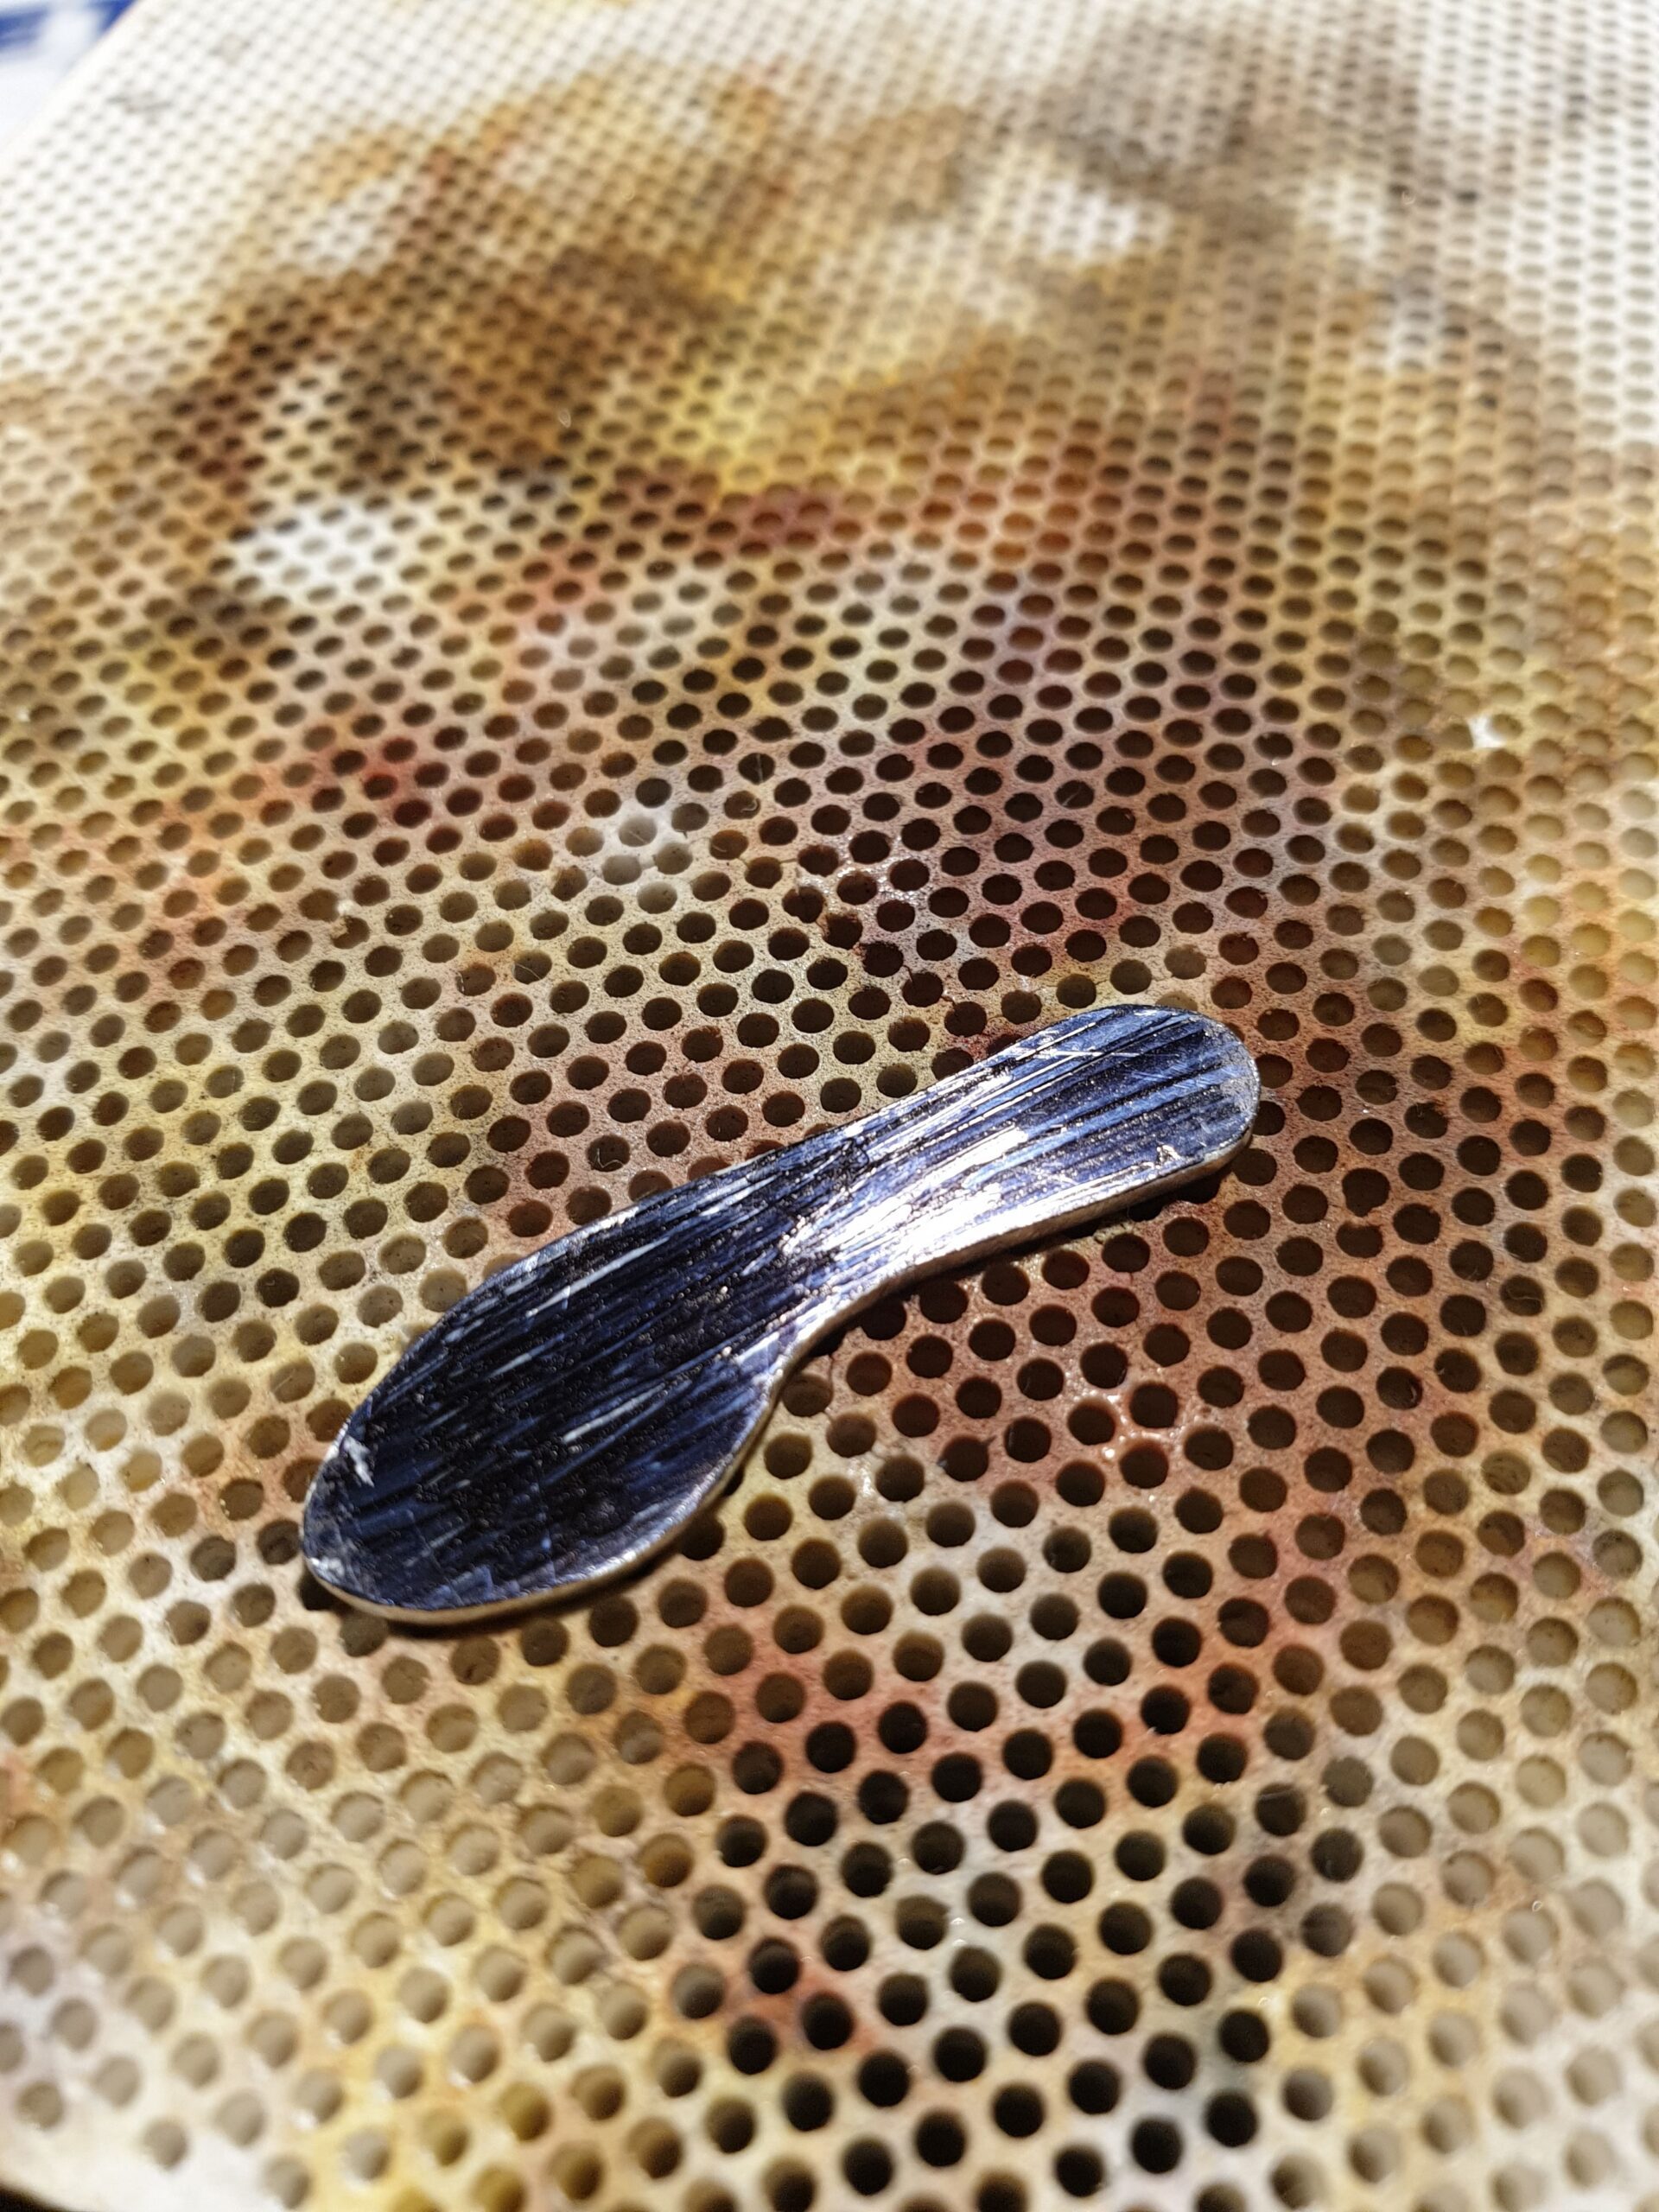
Next step is to glue the paper sole to a silver plate. I have a nice 1mm thick silver sheet, which is perfect for this project. With a good jigsaw a sole appears in no time. Important point here is to give it a very good polish as you wouldn’t have access to the inner sole surface later on. Also it is much easier to accomplish while the sole is still flat.
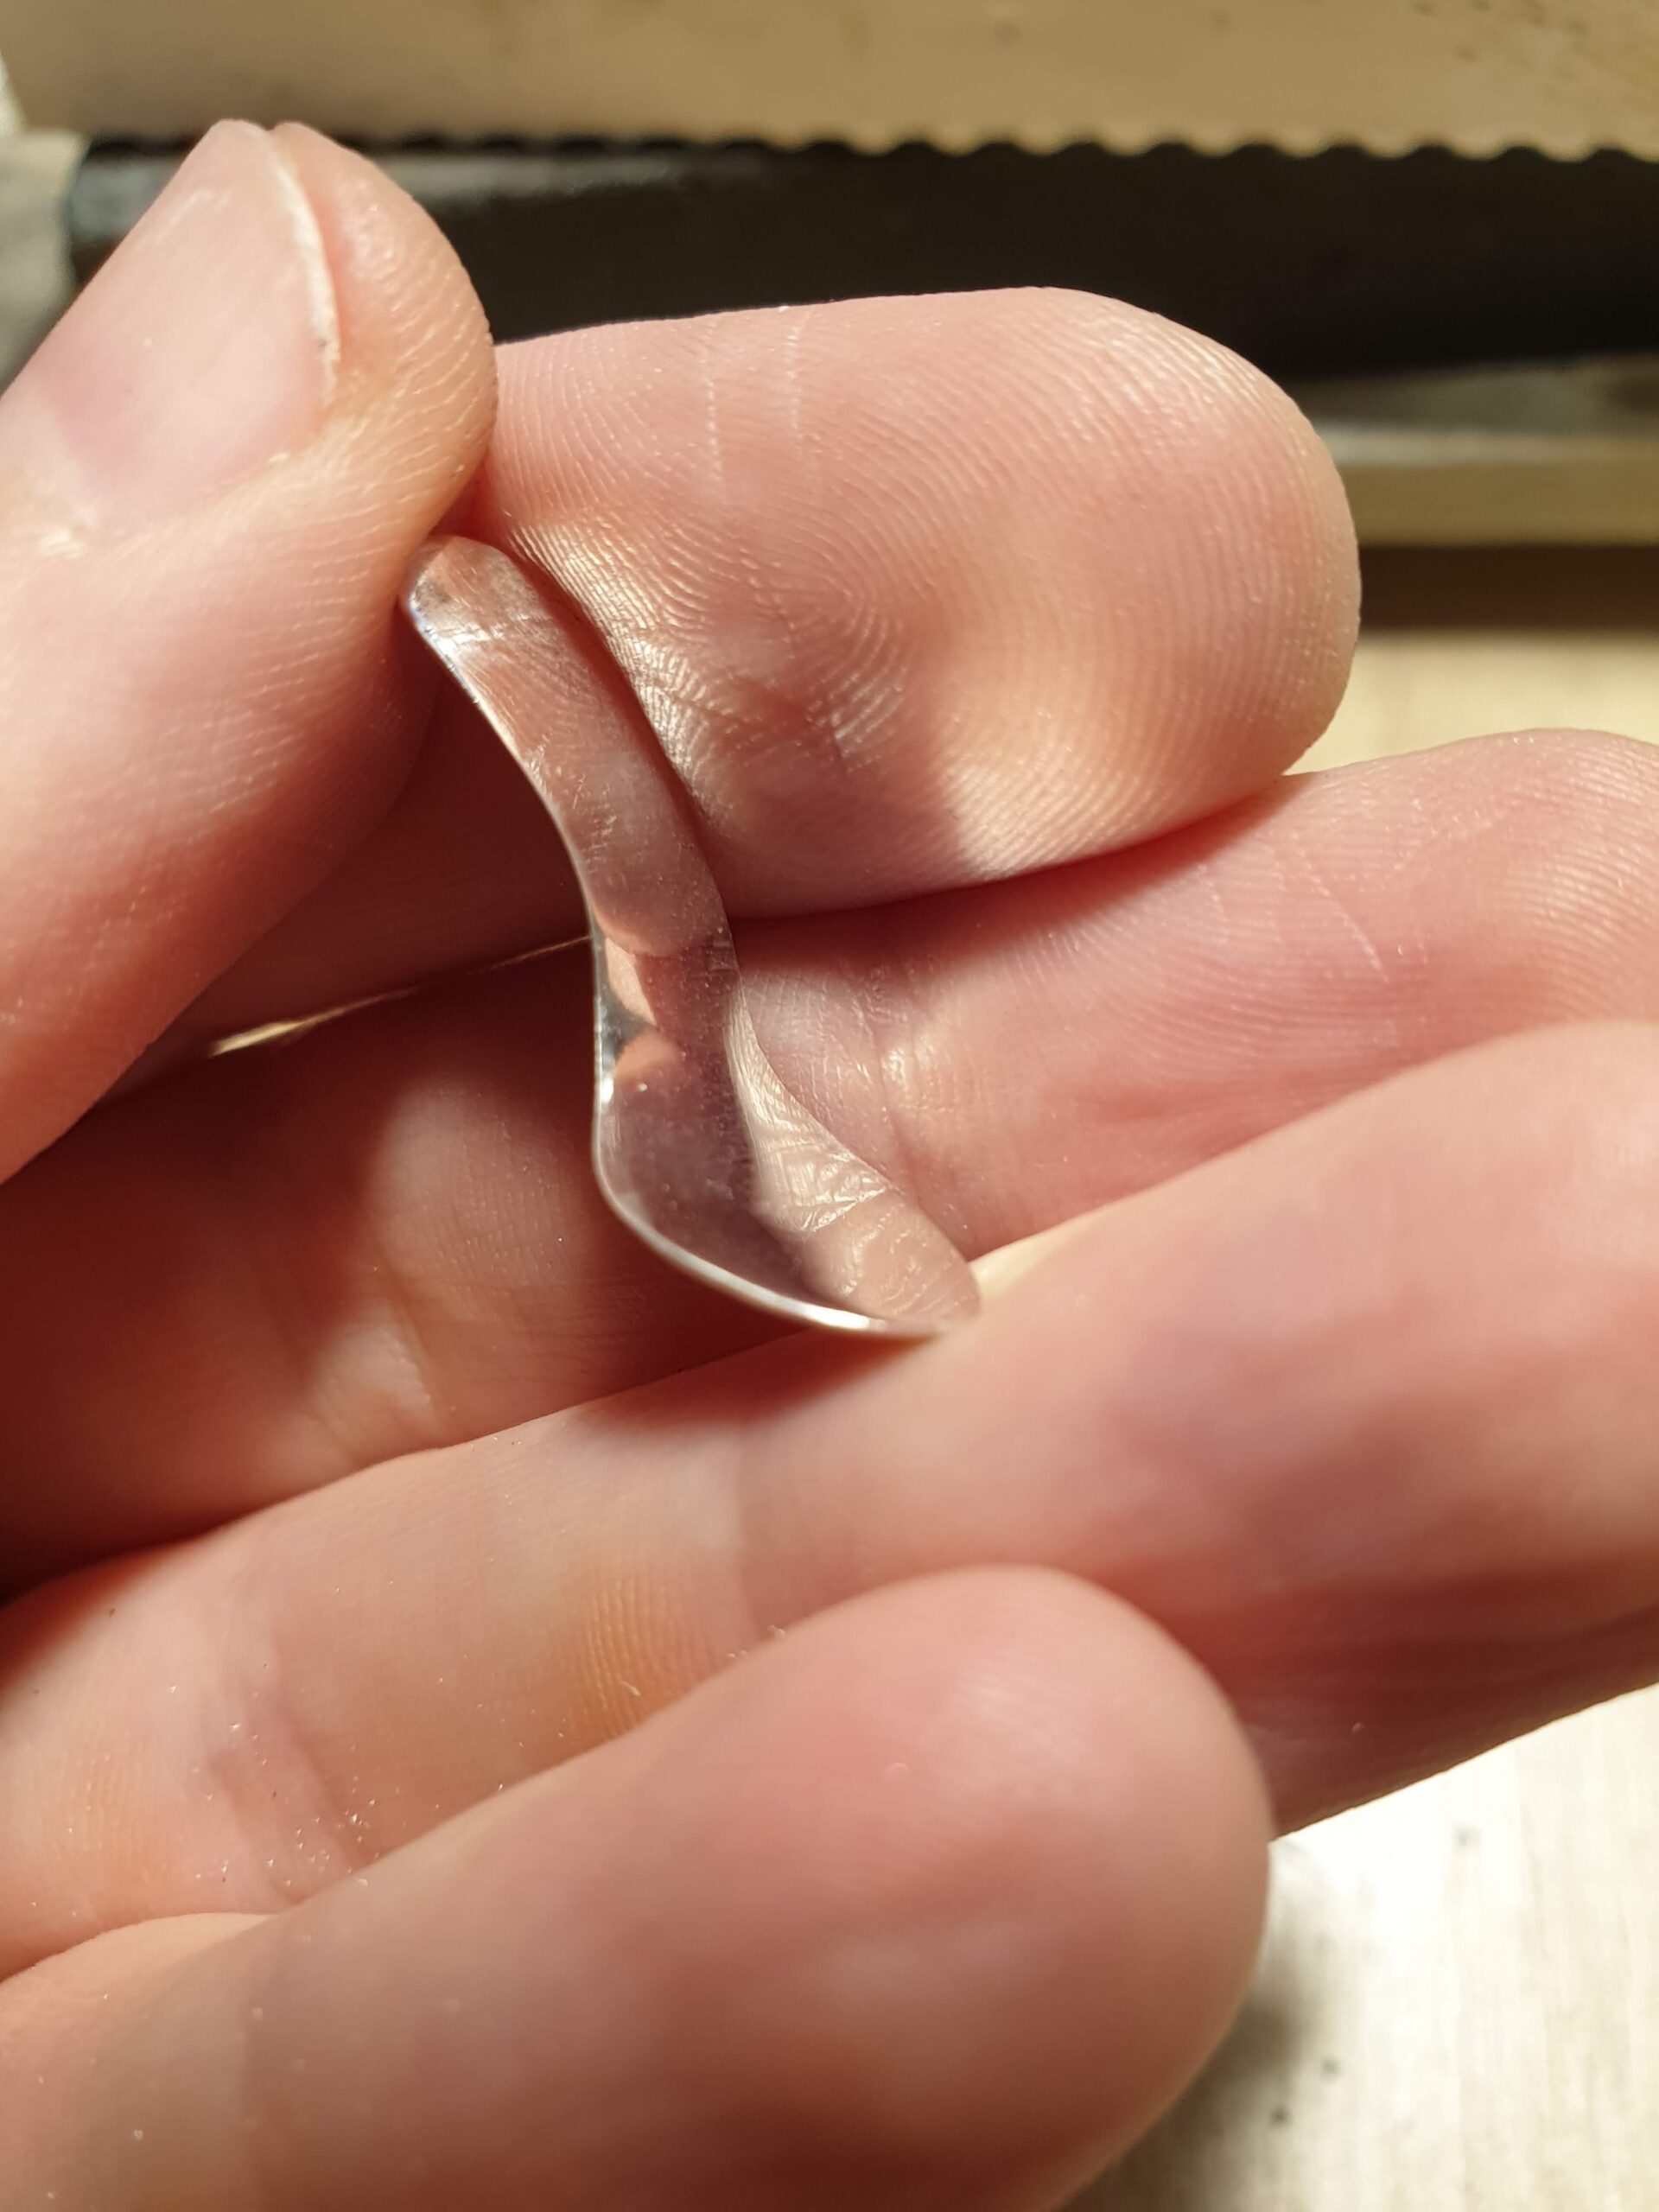
Another trick is to grind off the edge on a lower sole surface. In engineering terms it is called fillet, but it is not crucial to keep a perfect radius around the entire circumference of the sole to make it look great. Once you happy with the fillet the sole is ready for the main bending. I use a pair of soft jaws pliers to protect the surface during this operation. Also it is important to remember to stamp a logo before the bending, in my case it is “SL” on the bottom of the sole.
Modelling the heel
Then comes the fun part – making a heel. The difficulty here is that the heel is geometrically complex object, which cannot be easily produced by basic operations like bending, flattening or sawing. This one requires moulding. Silver moulding is not easy to master at home, but there are shortcuts. I took a piece of candle wax, warmed it up in my hands and modelled a heel directly onto the sole.
After few iterations of the wax heel it finally looked good enough. So it was the time to make a mould. I used a common gypsum powder, the one you could find in any home appliance store. When the mixture was getting a sour creme consistency I stick the sole with wax heel right inside the gypsum cast. I gave a few days to dry and harden and then I heated it up with a blow torch, let the wax out and poured melted silver into the cavity.
Even though the result was not perfect it was still fine to go forward. I did realise that there will be a lot of grinding and filing to get to the shape of the shoe I envisioned.
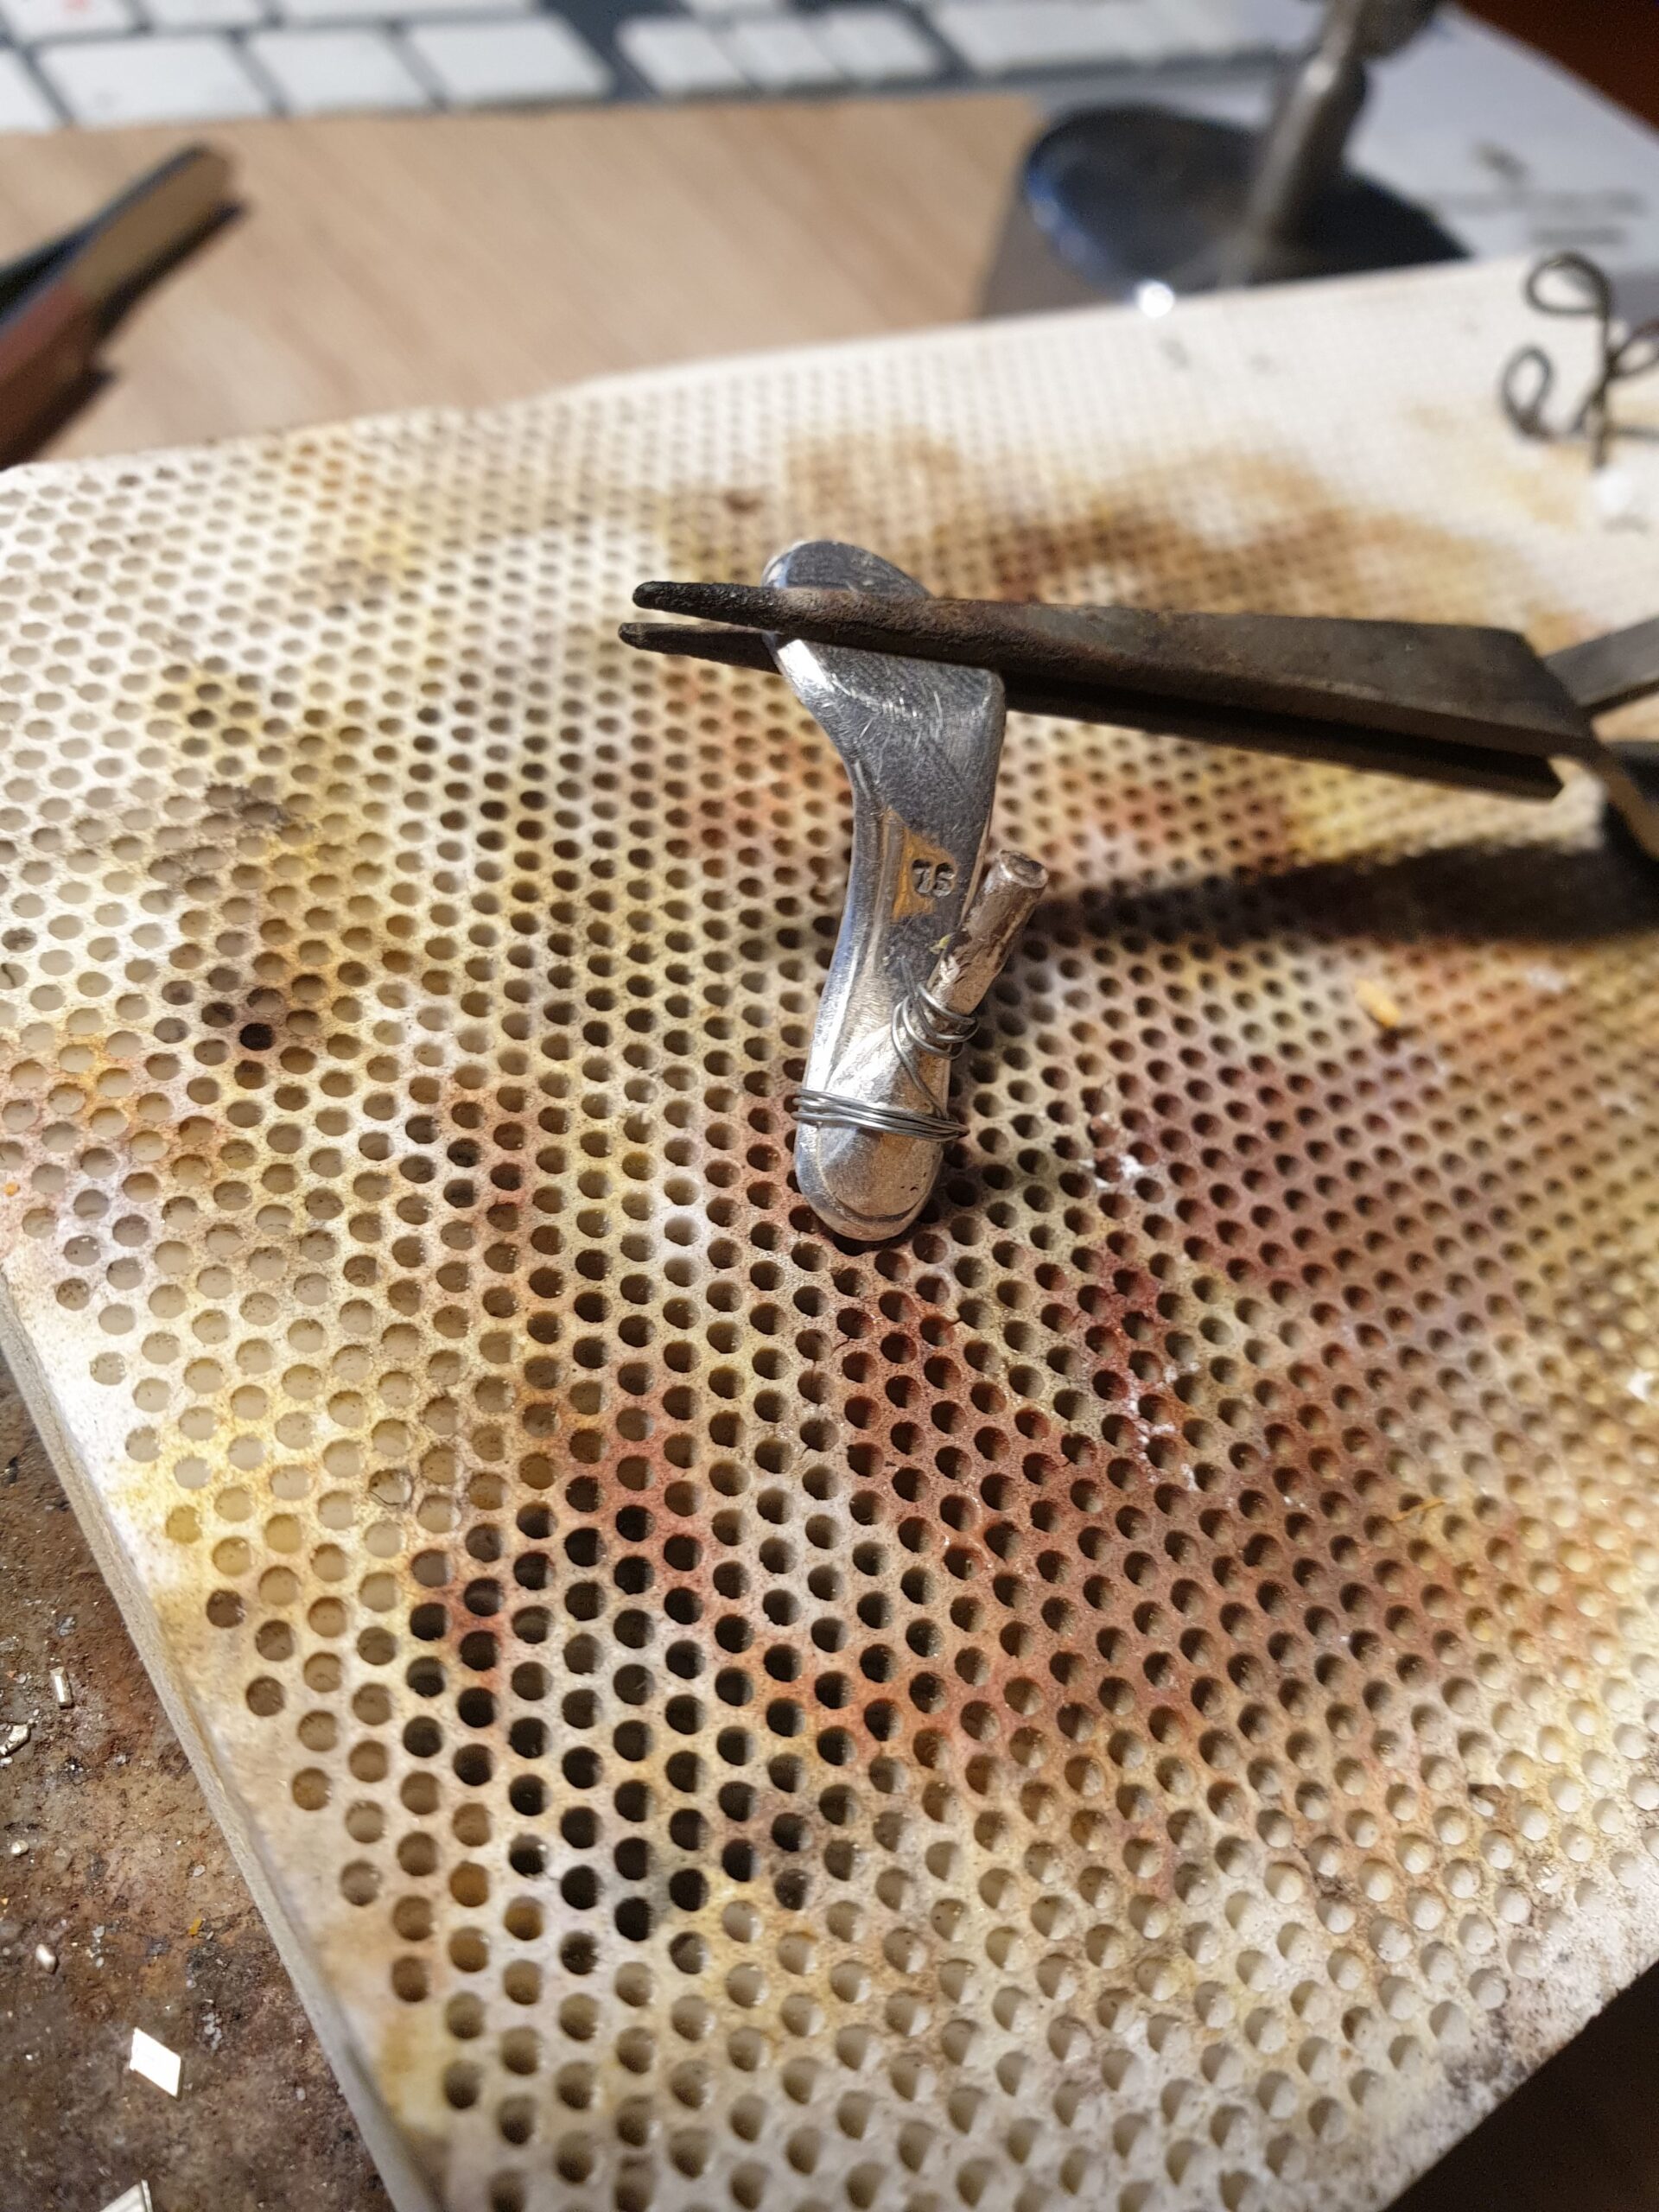
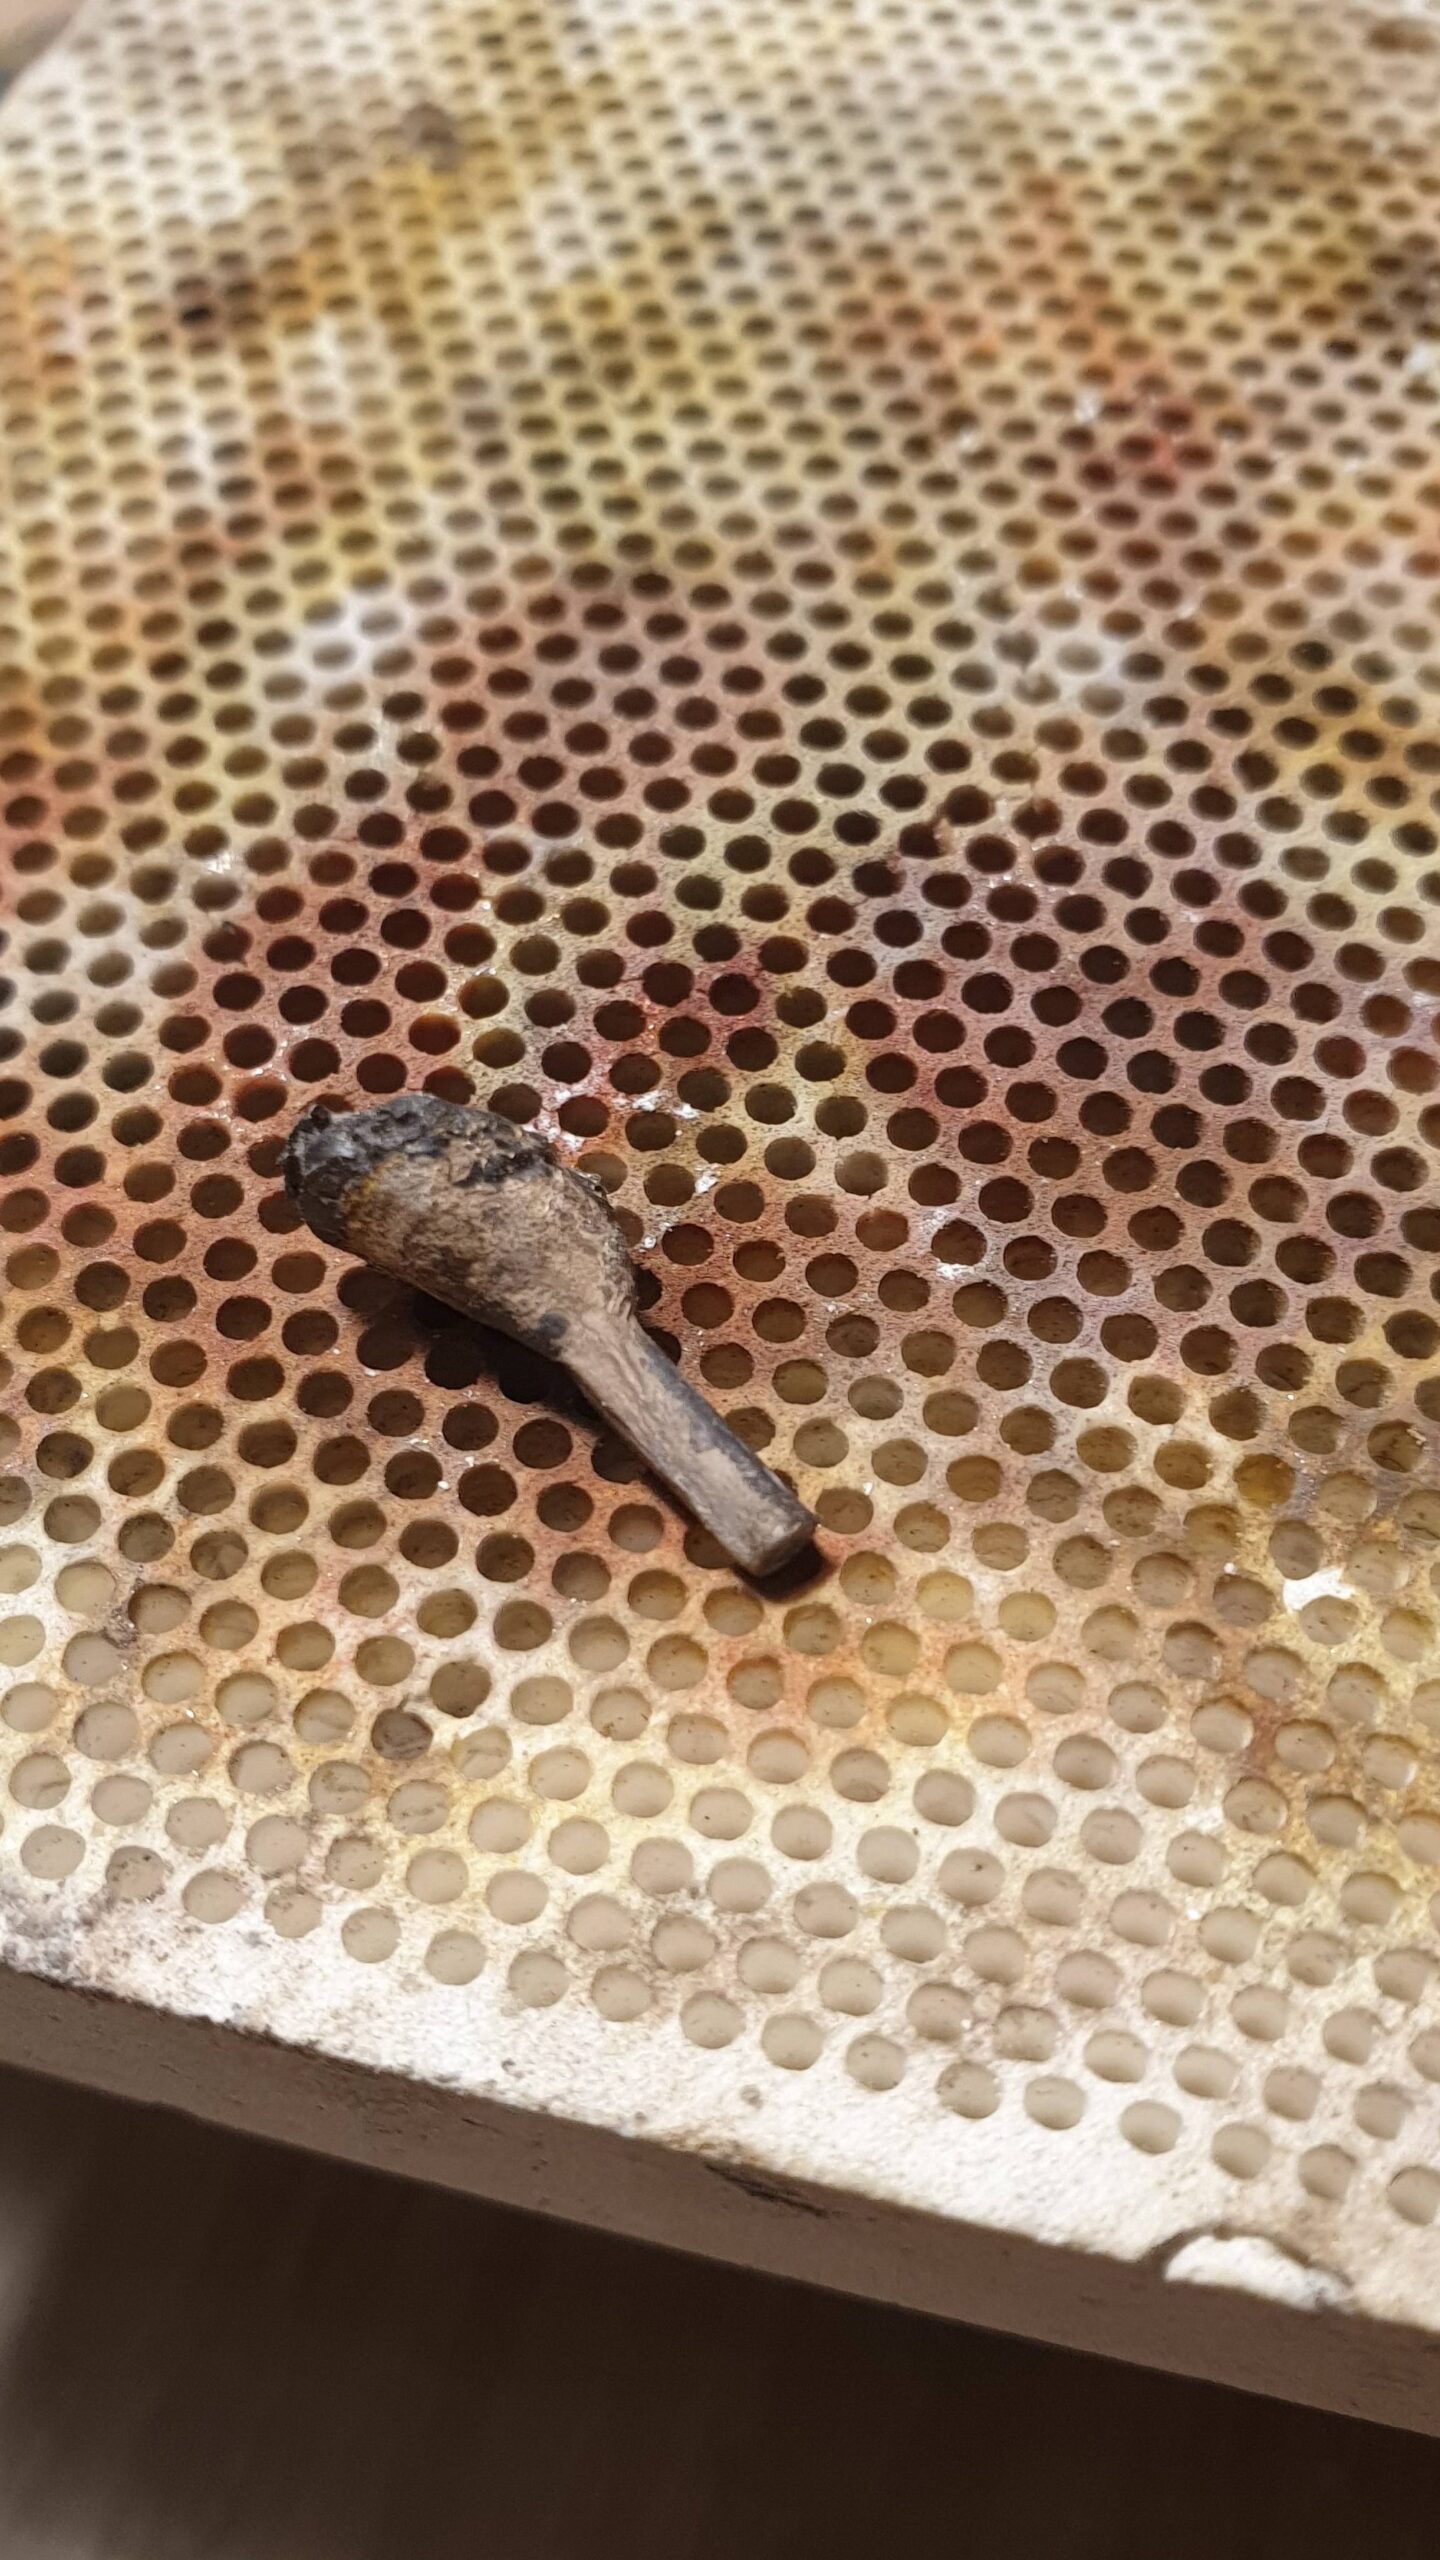
It took some effort to grind all the imperfections off the homemade silver moulded heel. And even then I knew it would need more work. Nevertheless I decided to leave it to the latest phase of the project. I needed to connect the heel to the sole in order to proceed. Steel wire came very handy while soldering the pieces.
Decorating the slipper
I call a sole with soldered heel a “blank slipper”, which is a huge milestone in a project like this. If you can get it right – the next step should be easier. However, I figured that it might be a bit boring to decorate the slipper with only silver strips. So I decided to add a stone as a decoration. Luckily there was a lovely garnet cabochon in my stones collection which would fit perfectly onto a sandal I was making.
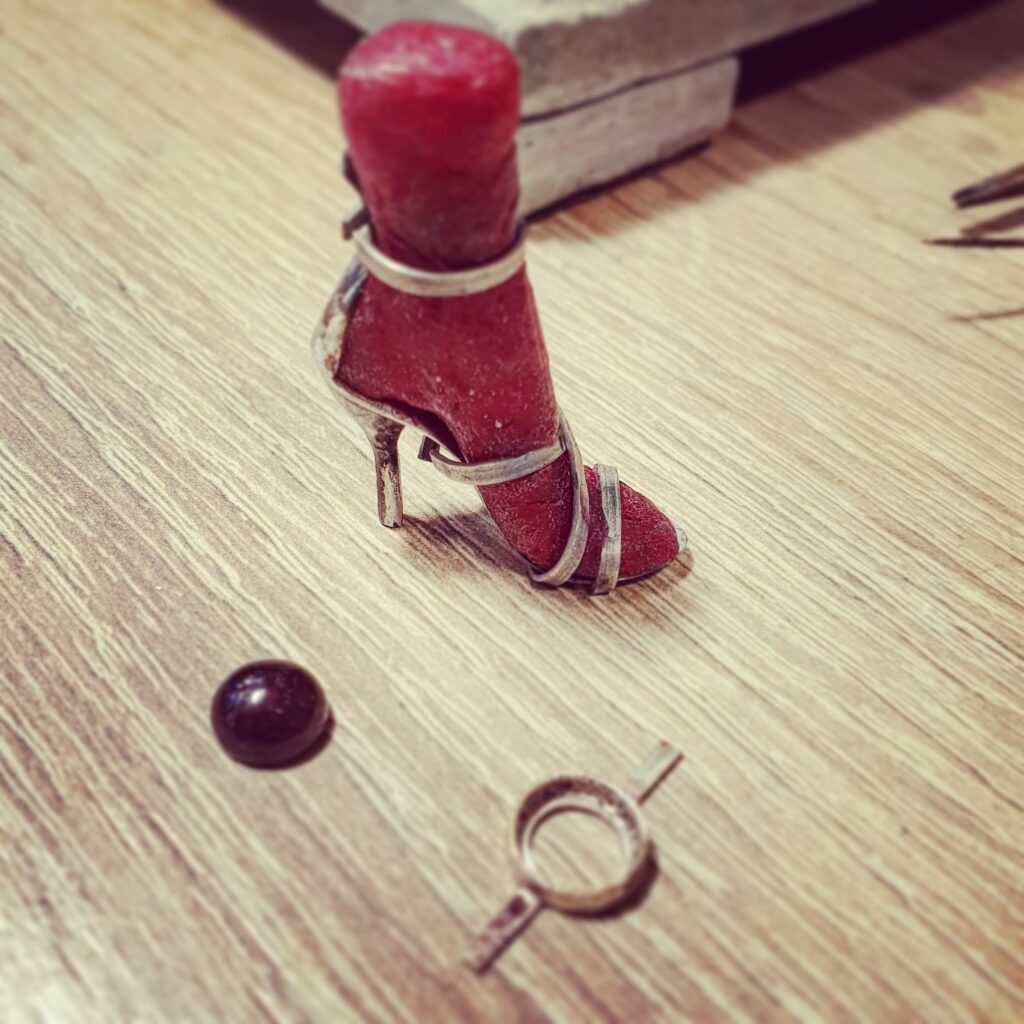
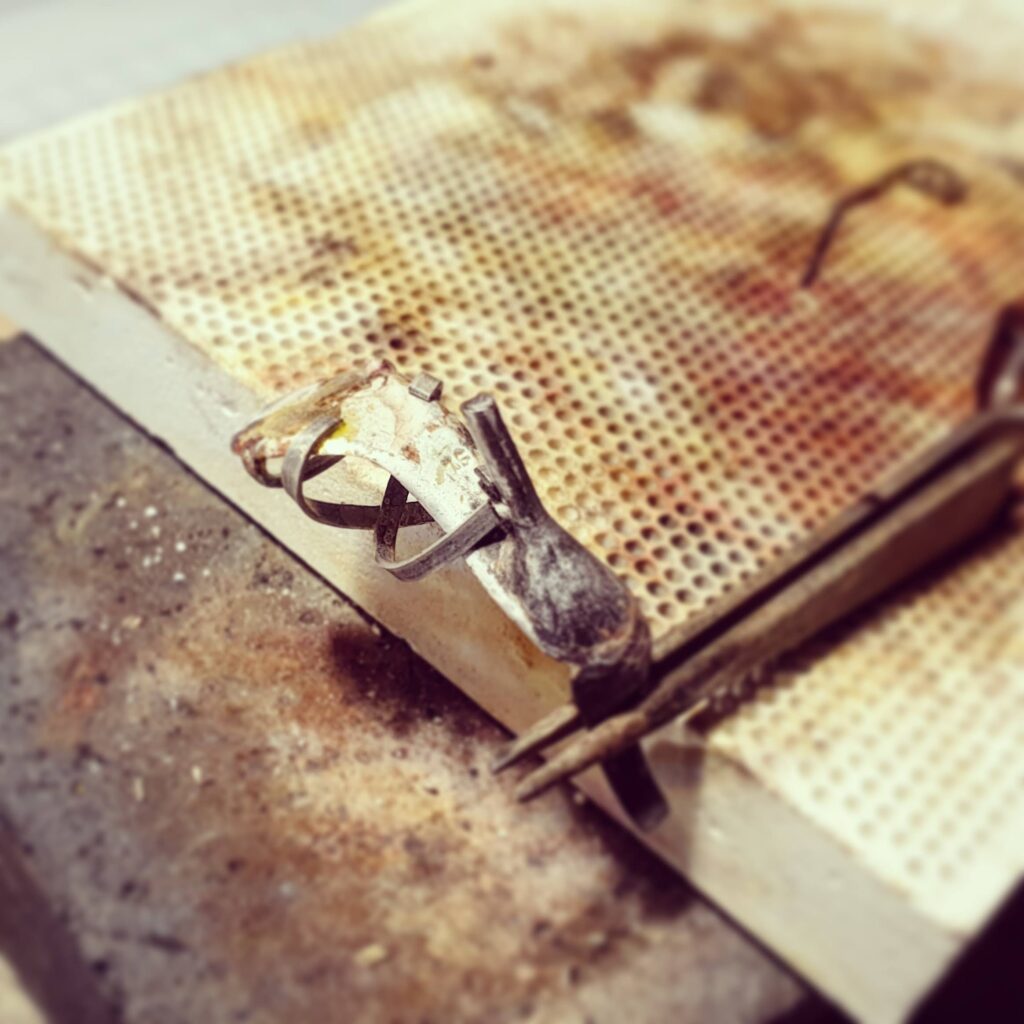
The aim was to make this miniature shoe a bit more realistic than my previous creations. Not like it will ever hold a foot in it, but I still wanted to get the details right. So I modelled a tiny leg out of the same wax I used for a heel before and attached it to the slipper. Now all the straps started to look much more vibrant and gave me a clearer visualisation how could it look like in the real life.
Soldering such small and complex pieces is always tricky. I had to scrap a lot of flattened wire to get all the soldering work right. When I completed the last joint I figured that it was a middle of a night, that’s how I got an idea to shoot a video of citric acid cleaning bath.
Setting the garnet
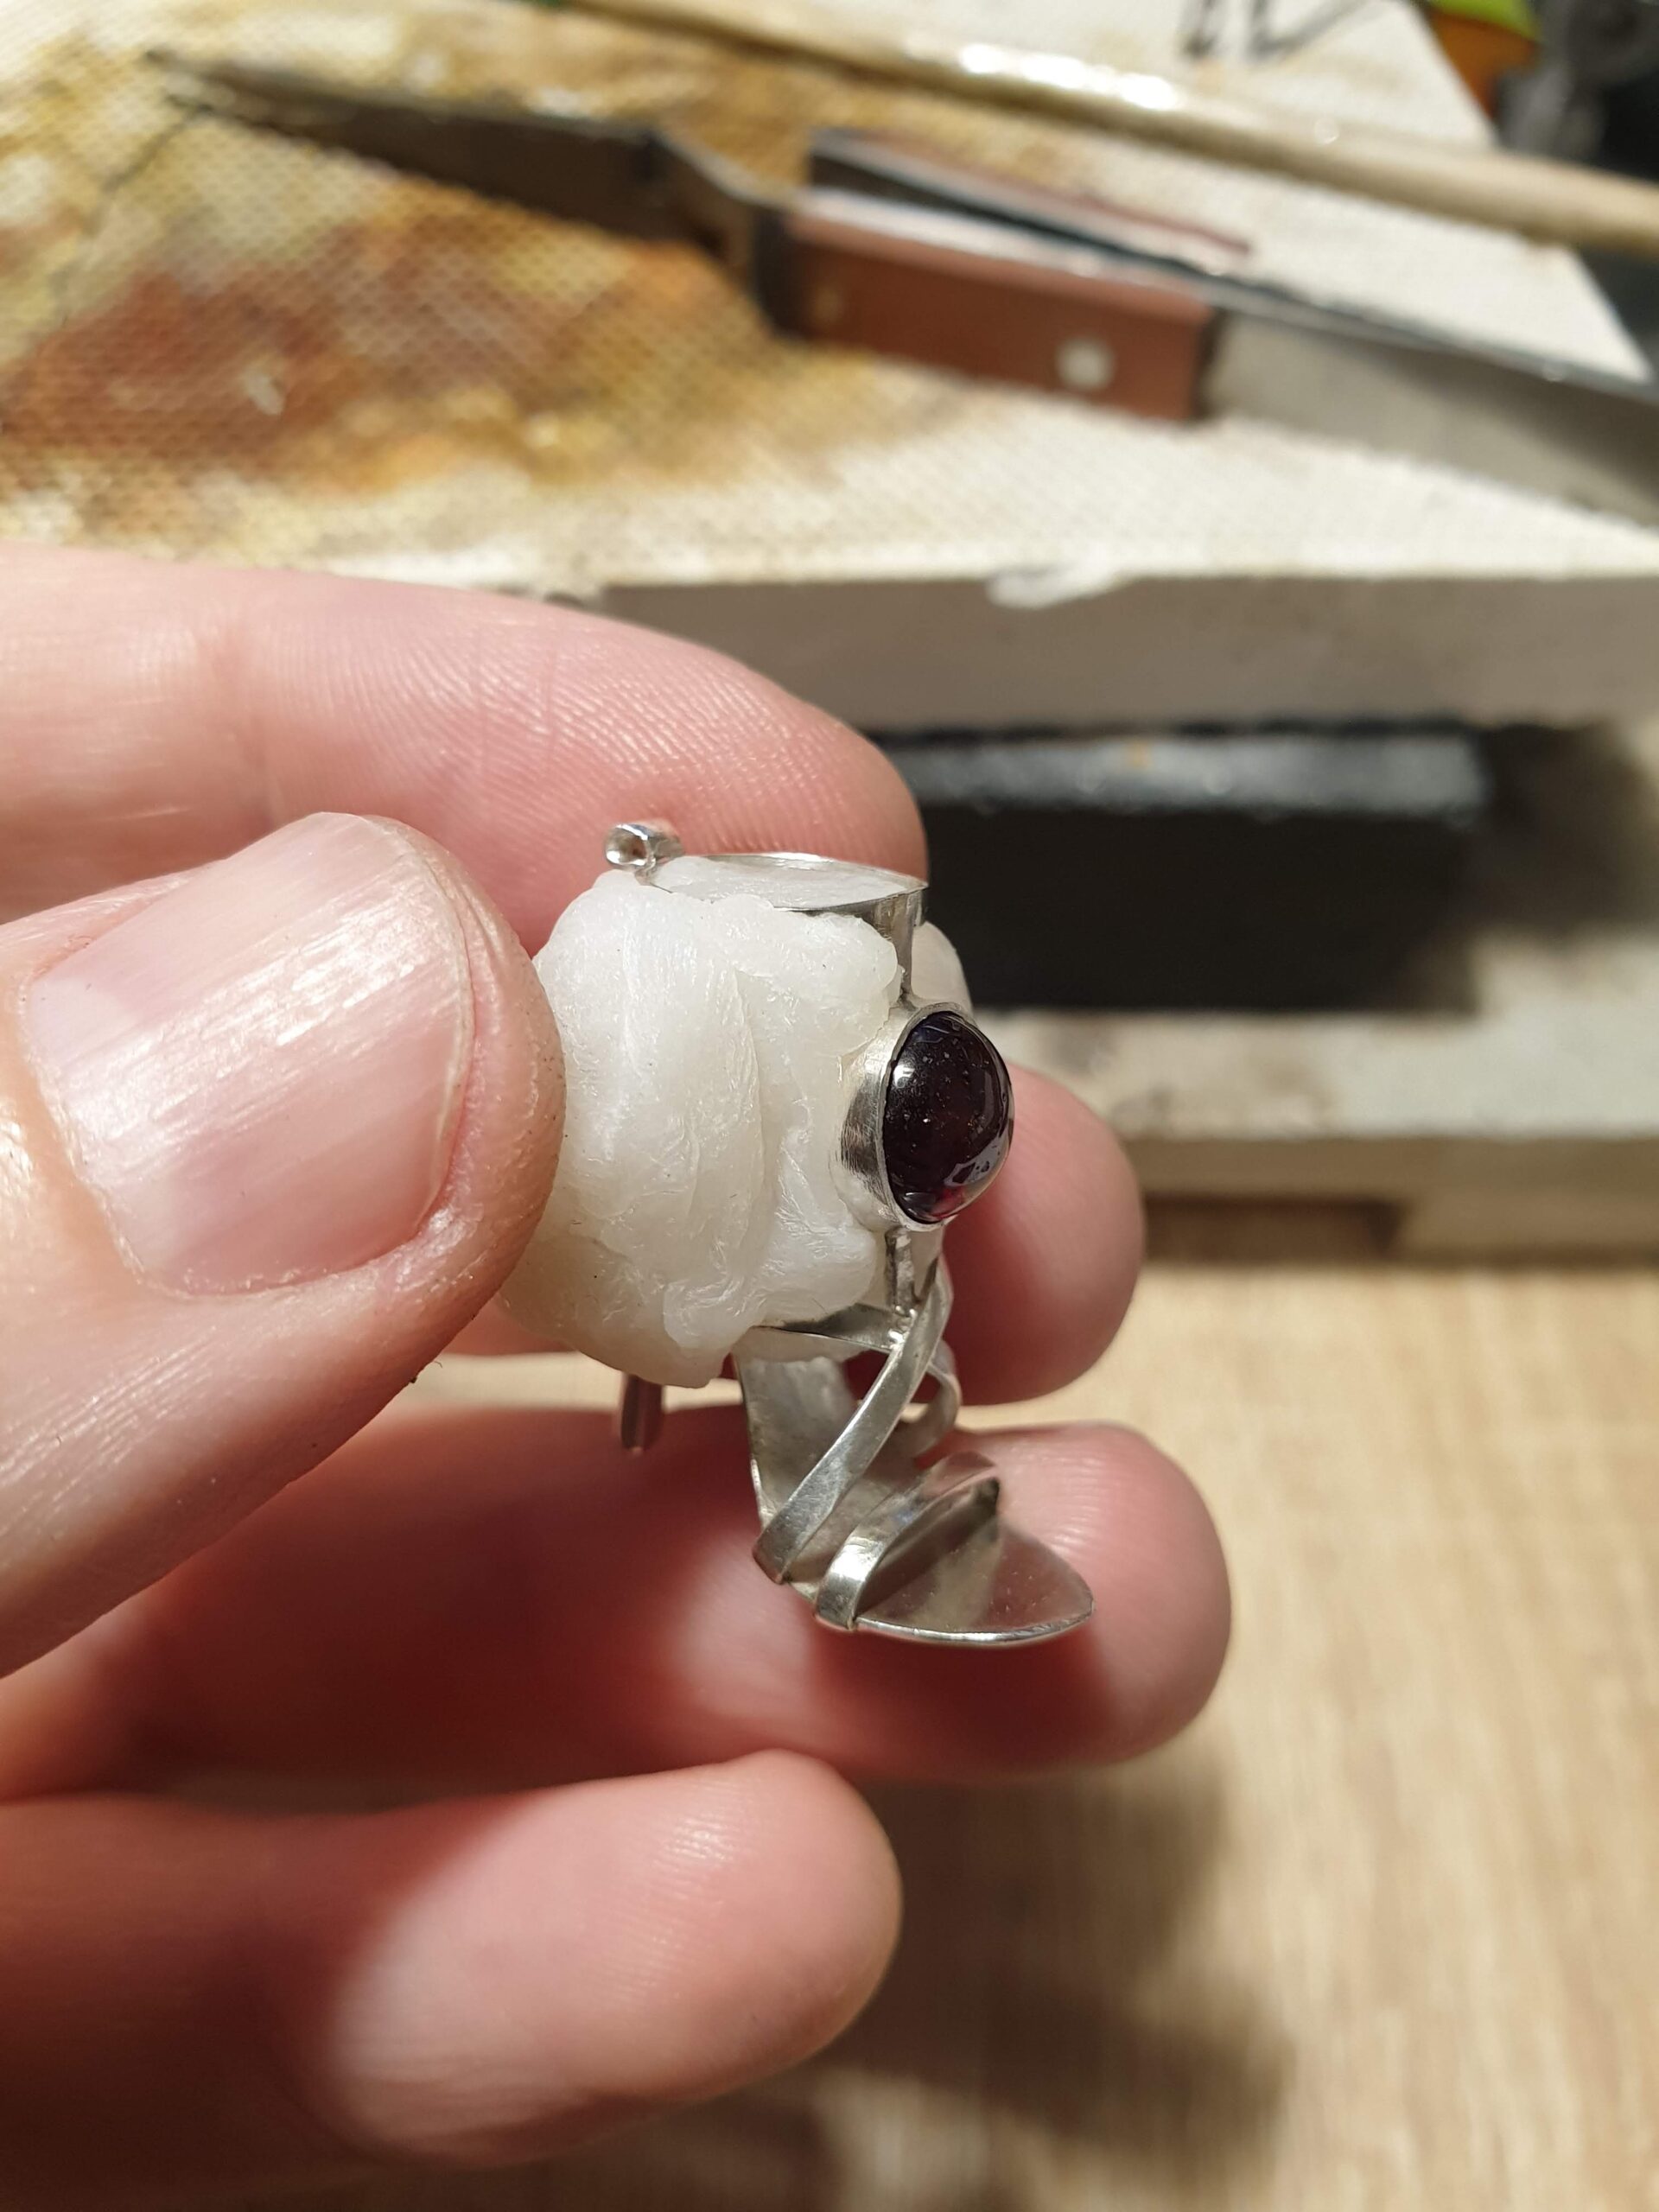
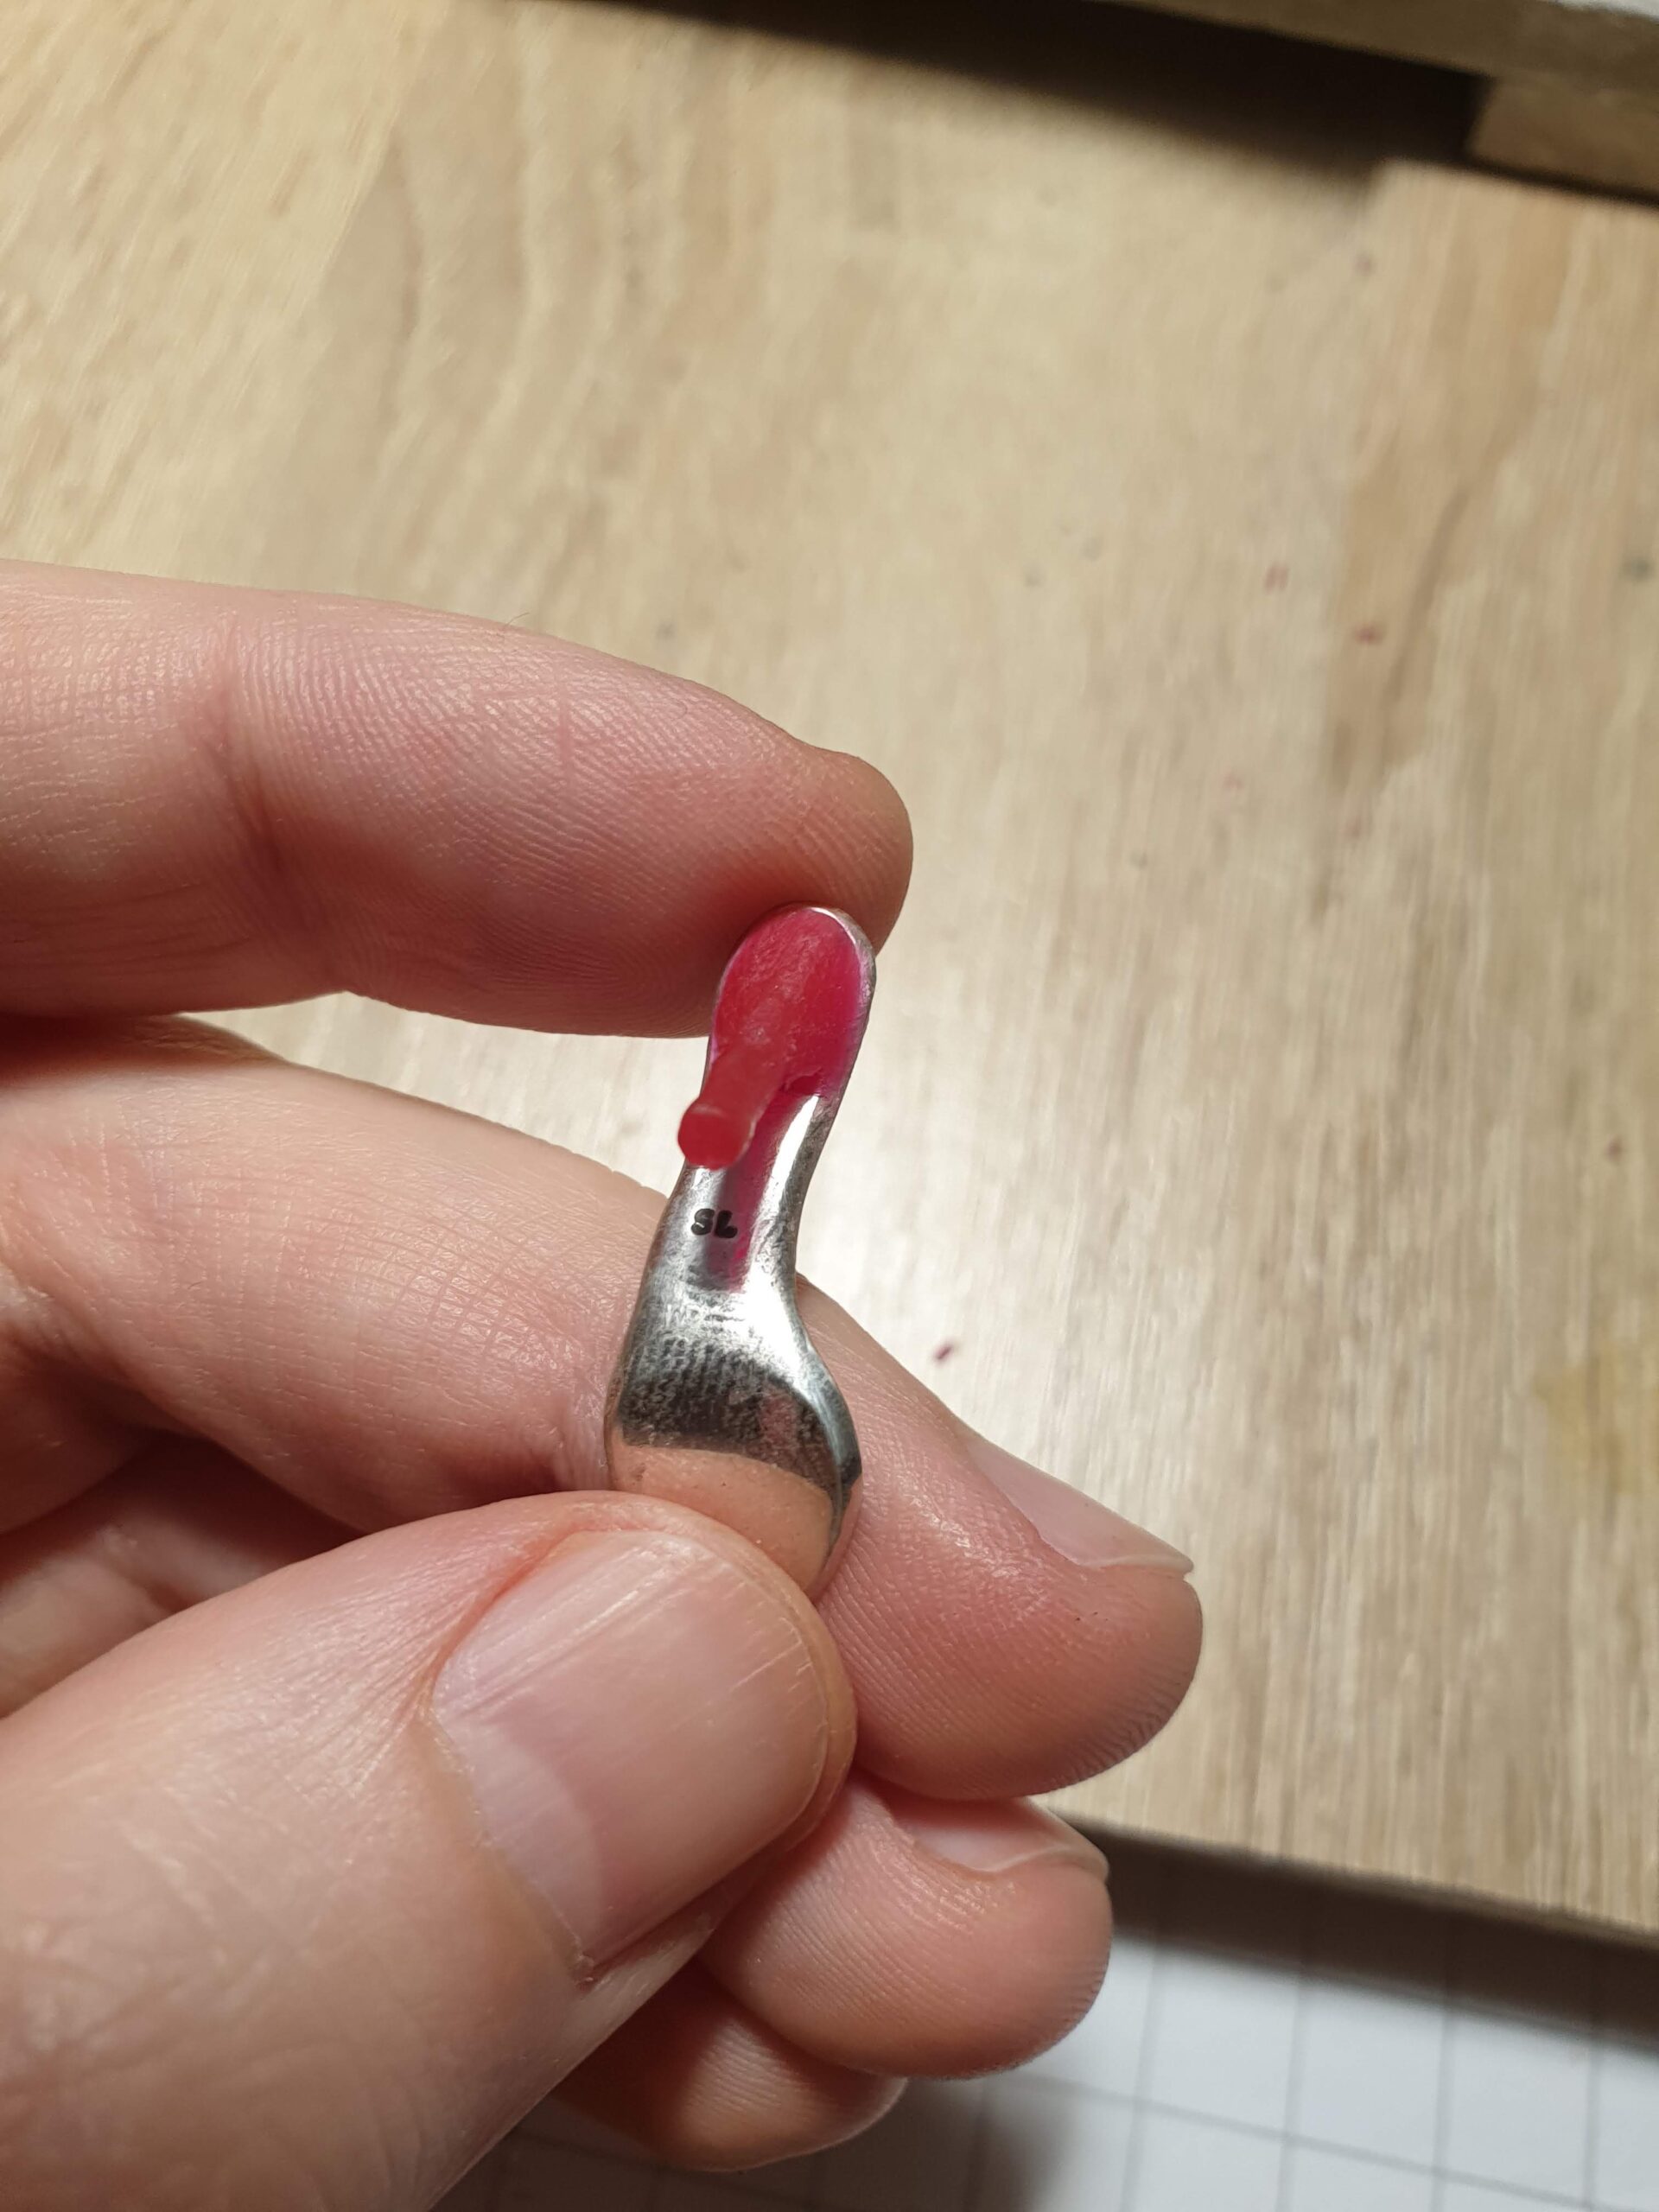
After a hot bath and few hours of filing off all the excessive pieces of straps all over it was a time for a final challenge. Setting stone in a bezel turned out be an extremely difficult process (if you want to get it right of course). My fellow goldsmith (a professional one) advised me to wrap the entire piece in hot sealing wax – the substance once used to seal royal correspondence. With no goof quality wax in hand I decided to improvise and use a thermoplastic polymer. It actually worked quite alright firmly holding all the delicate pieces intact while letting me put it into the vice.
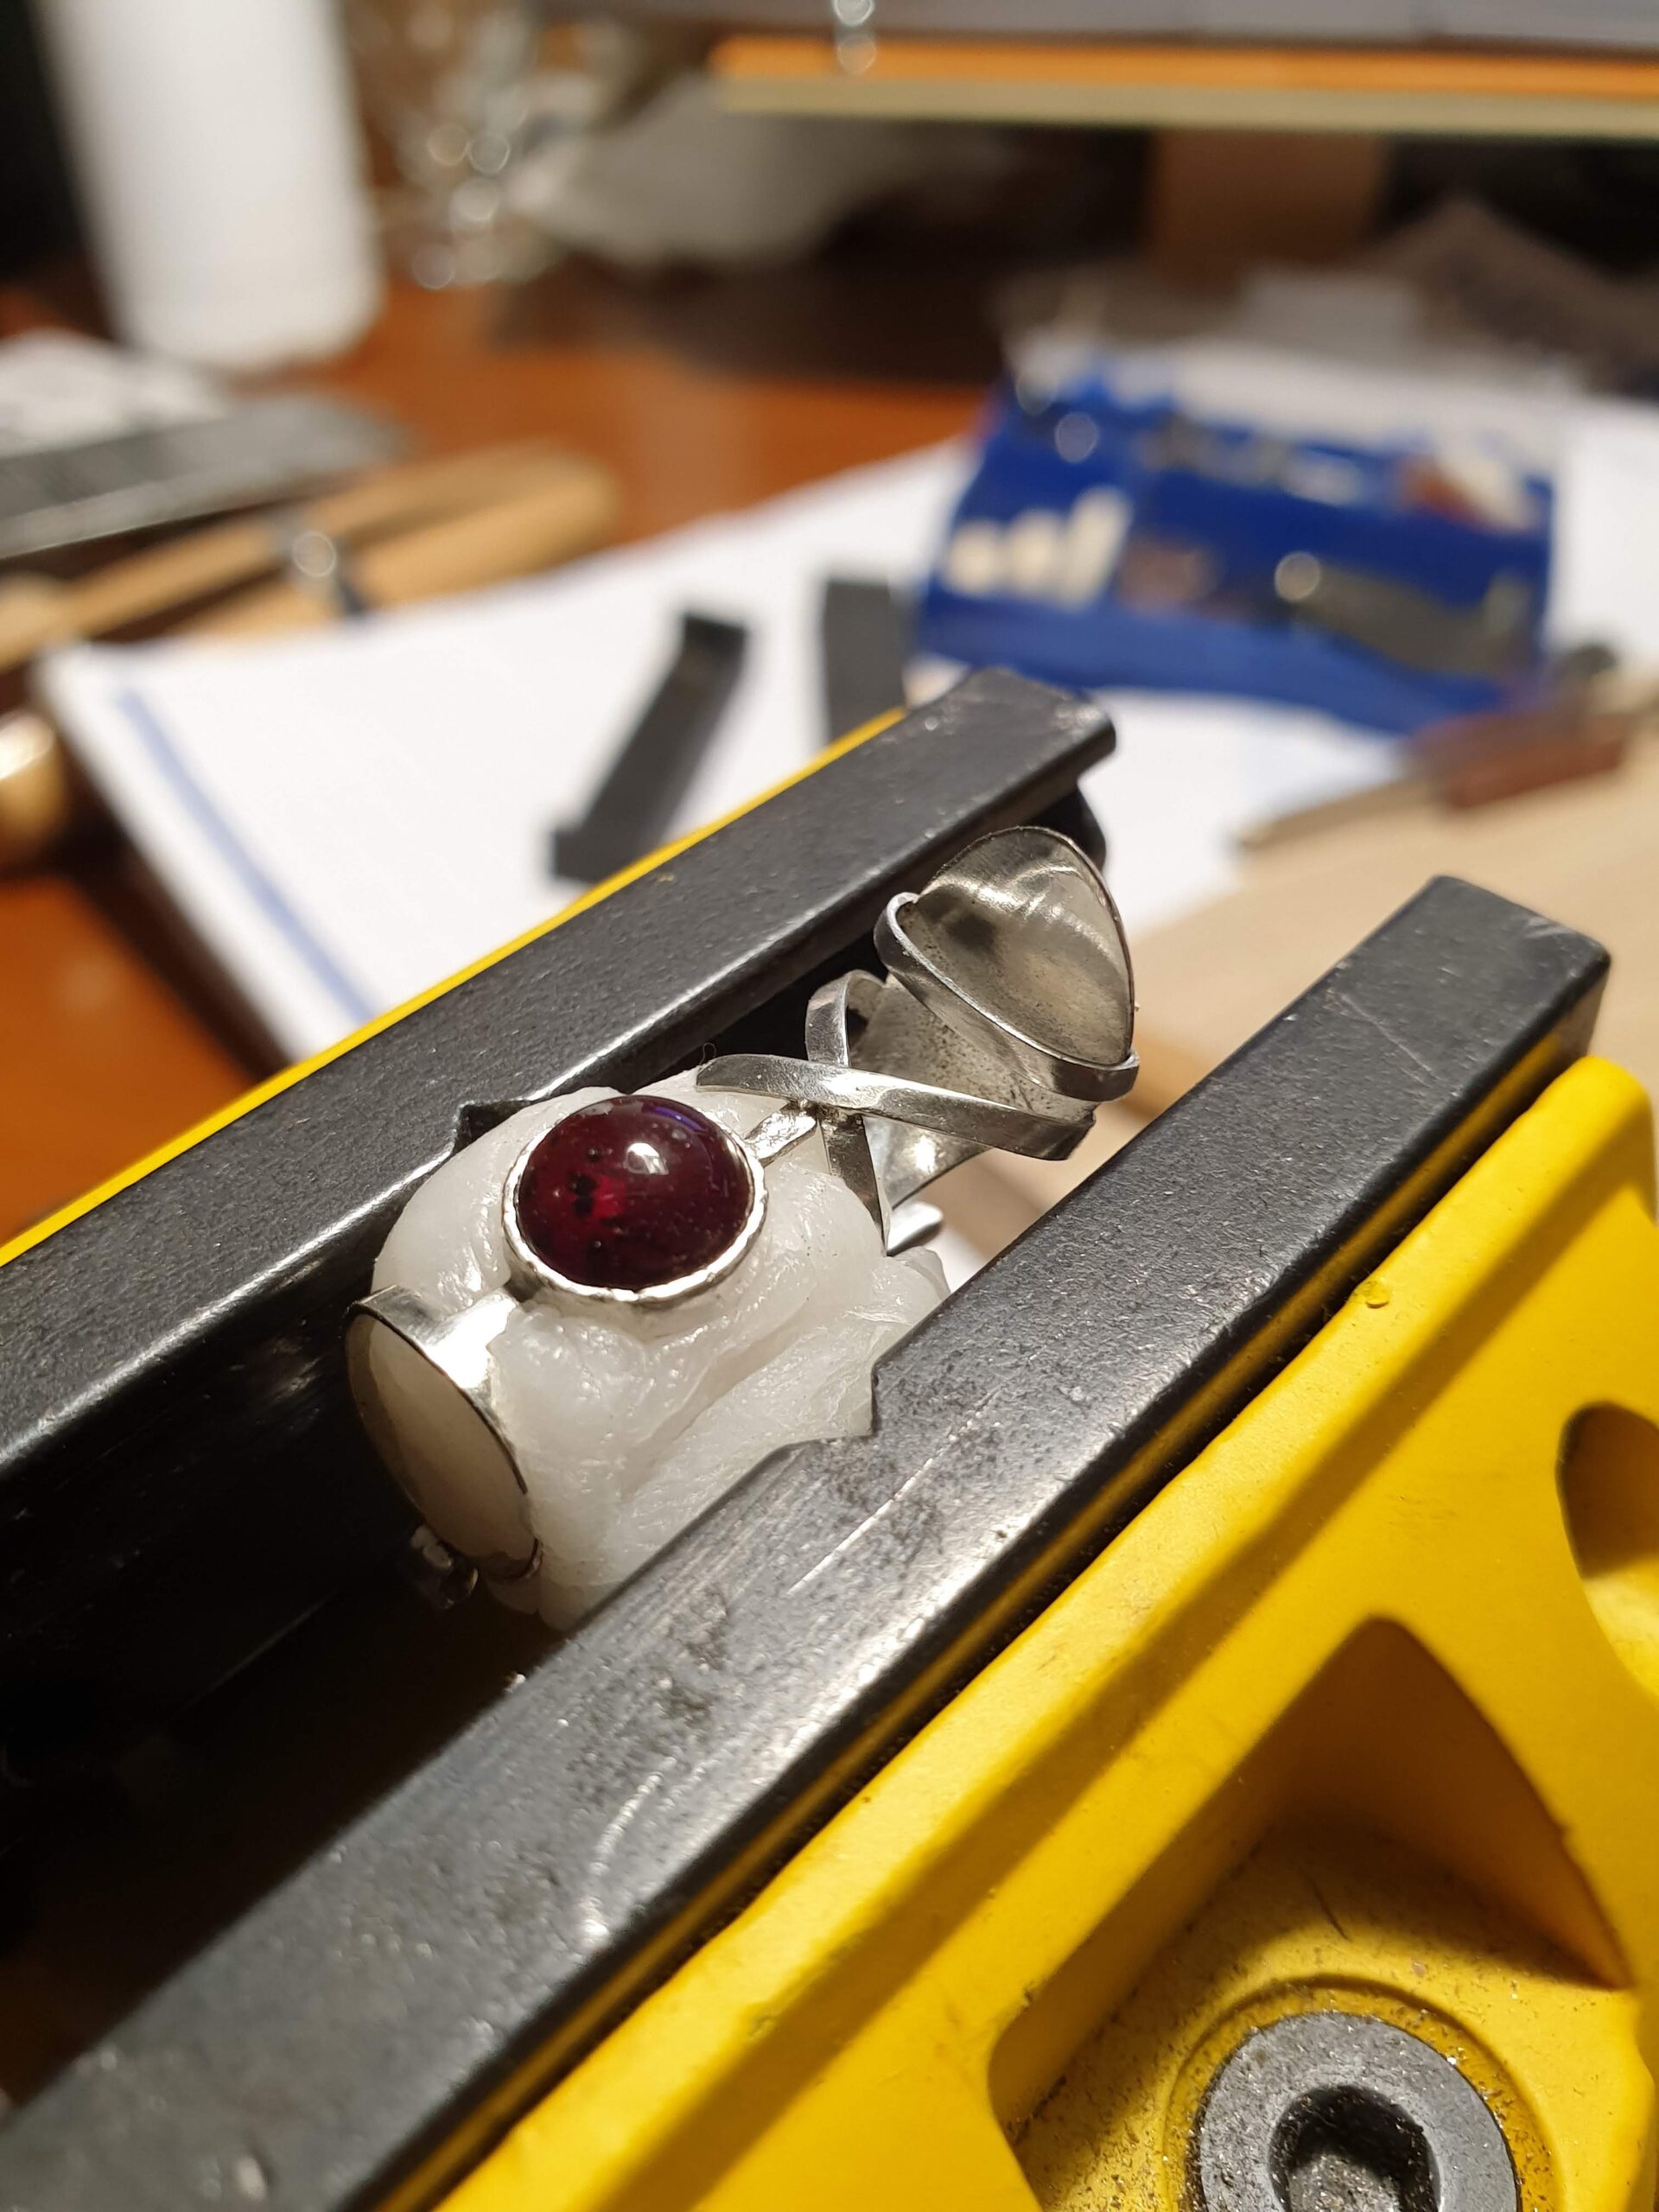
I cannot say it all went smooth, but at the third attempt I managed to fixate the cabochon at its saddle. In the absence of an impact engraver (I hope to have one someday) I managed the whole bezel setting with tiny flat screwdriver and a hammer.
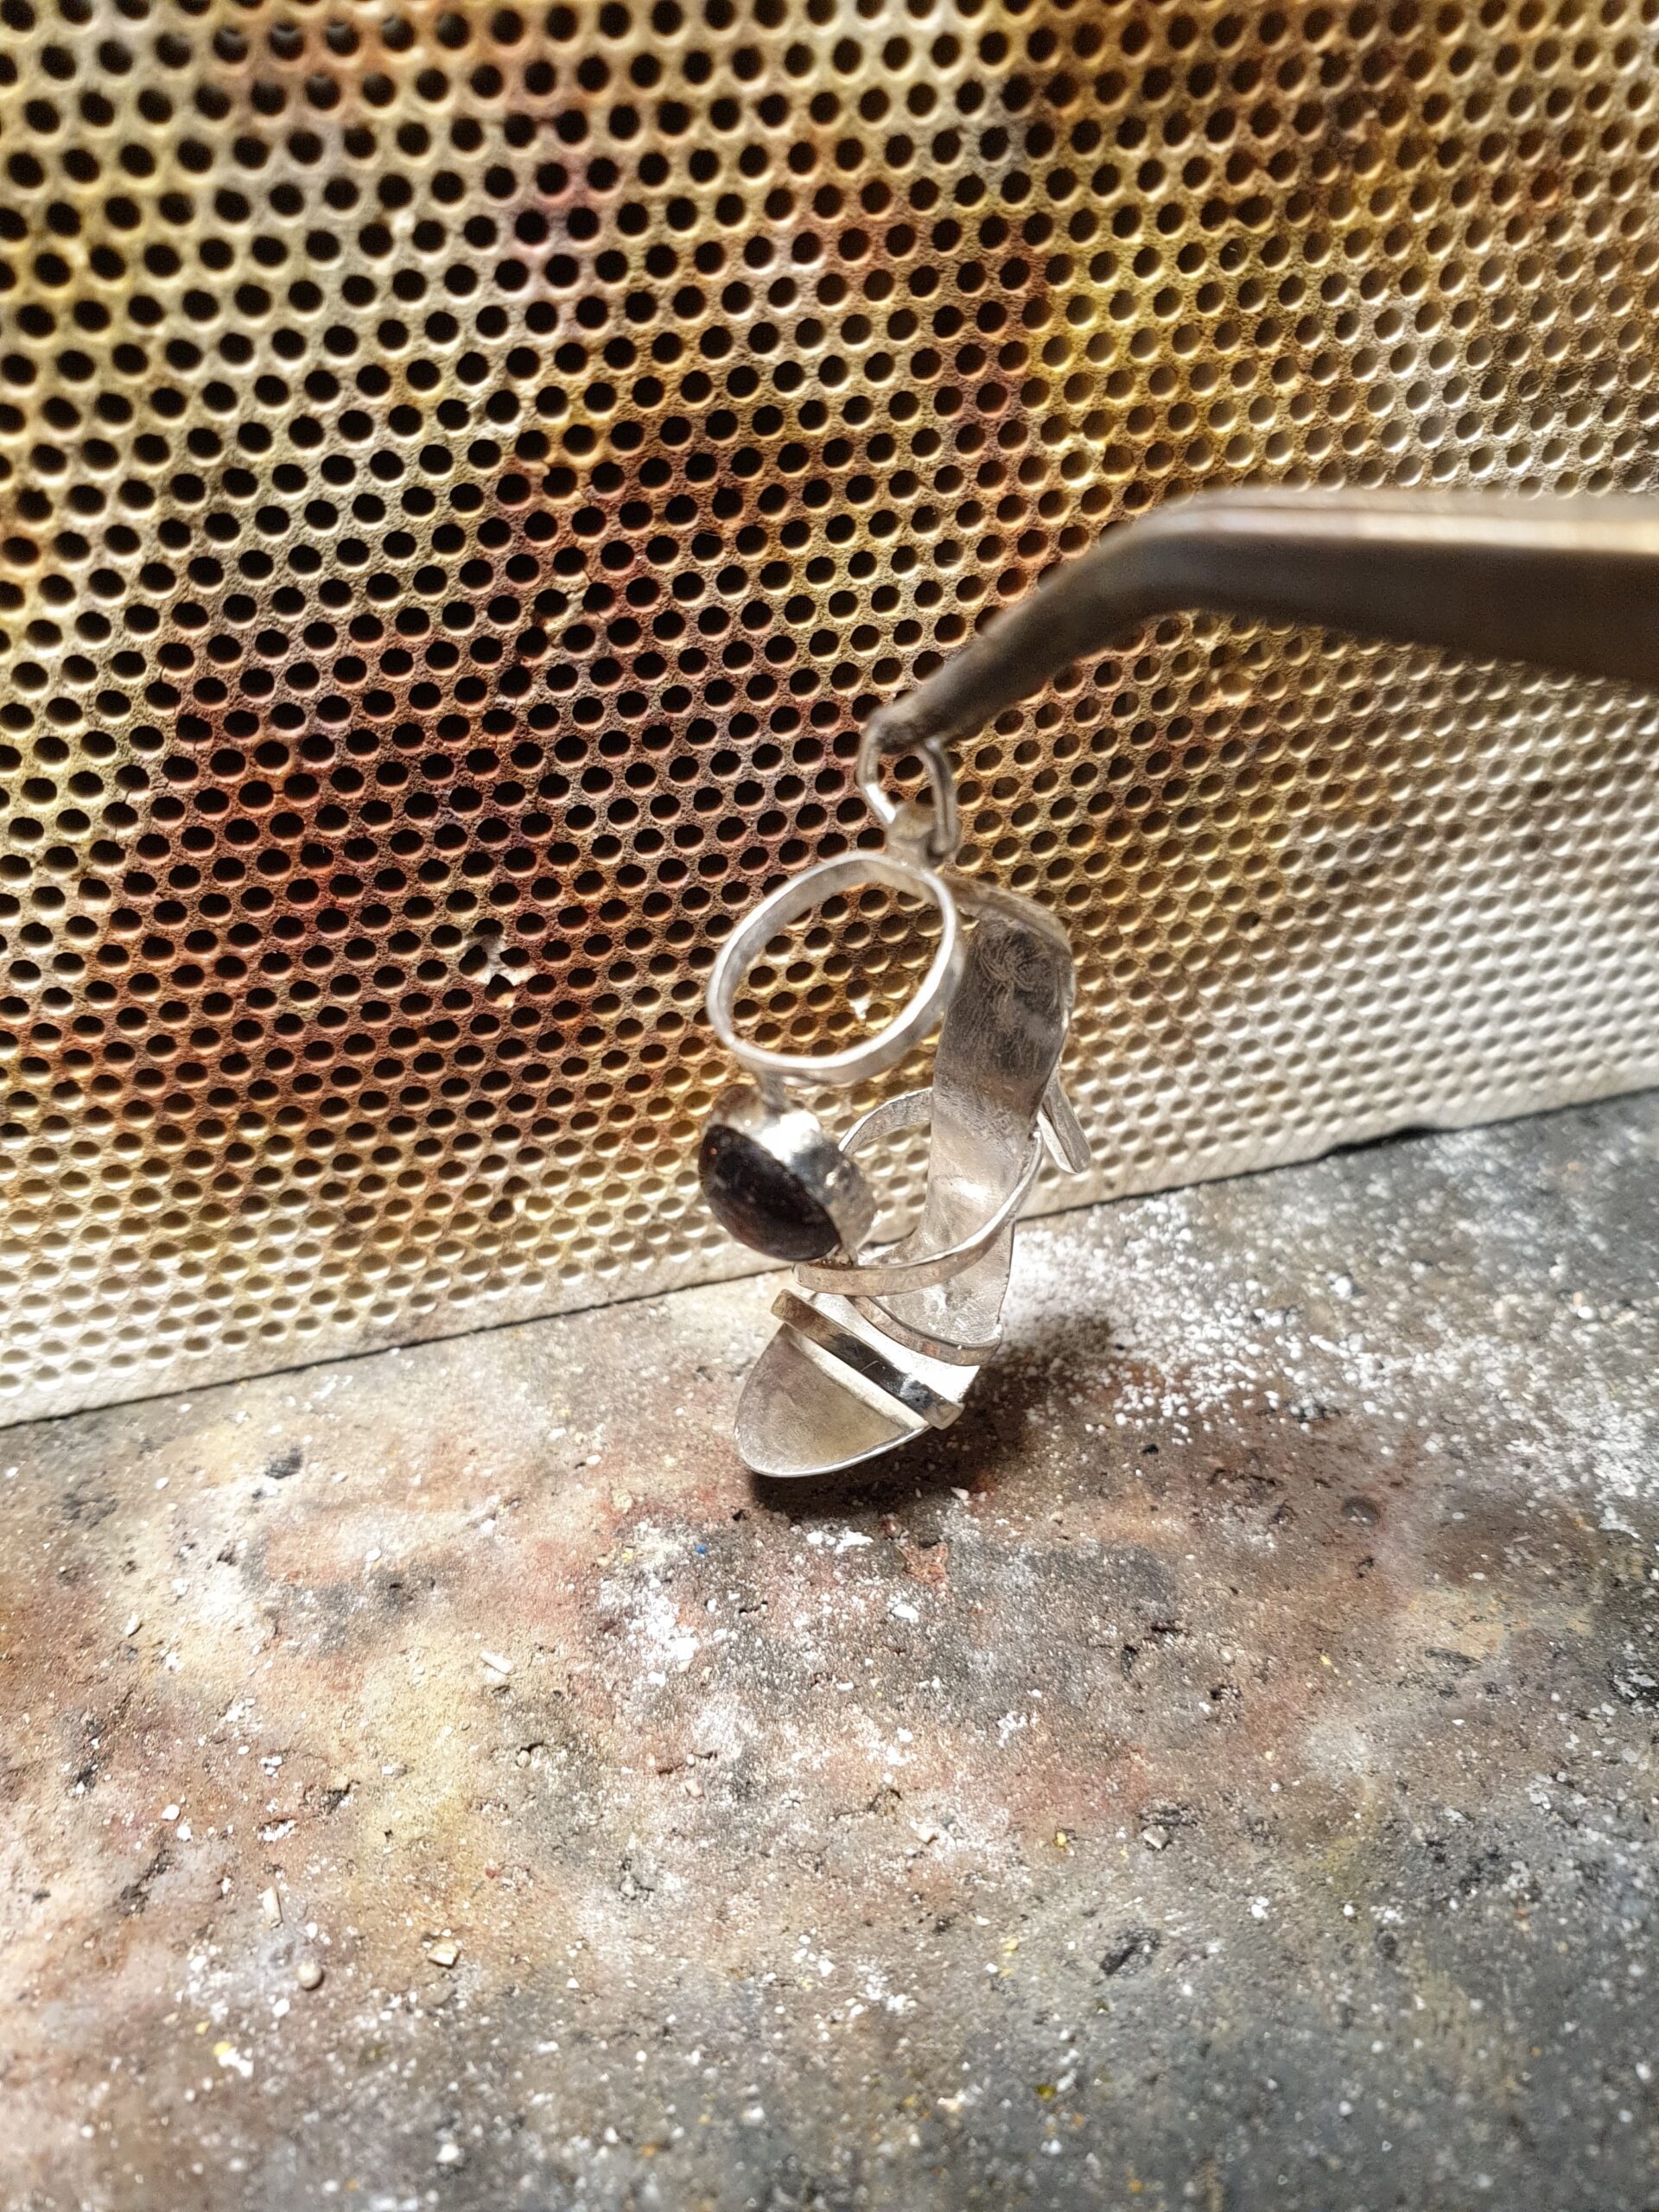
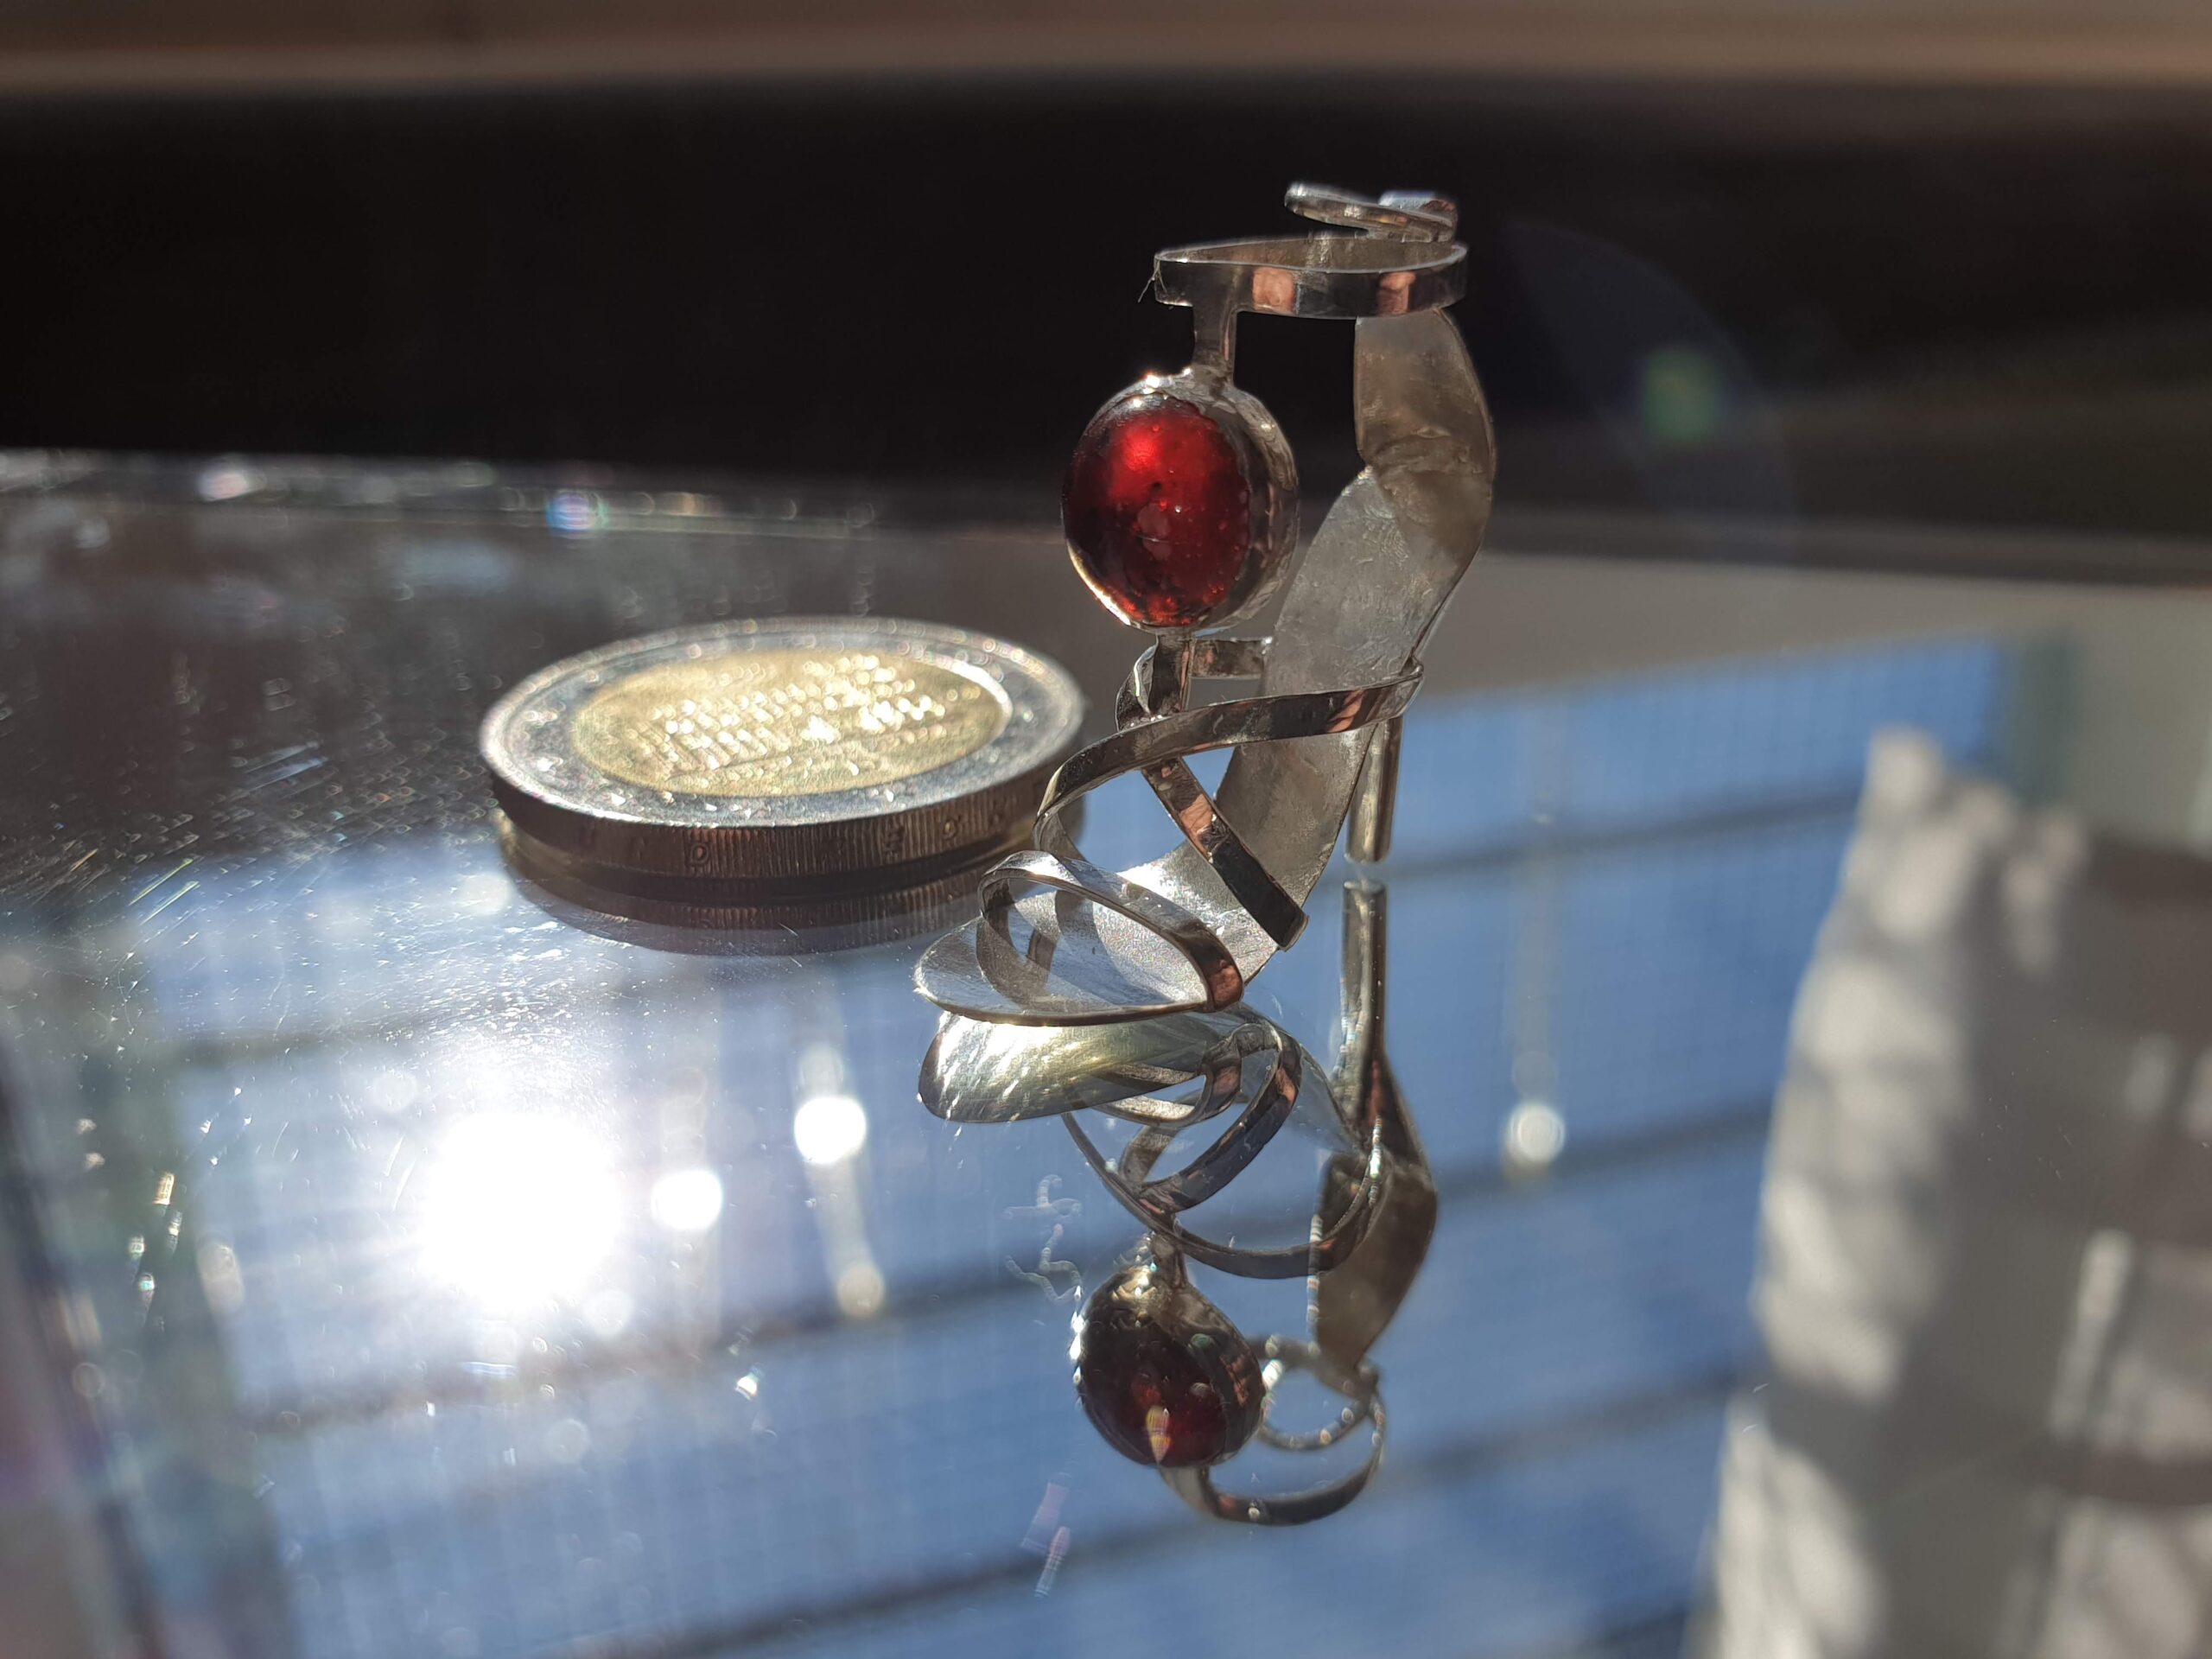
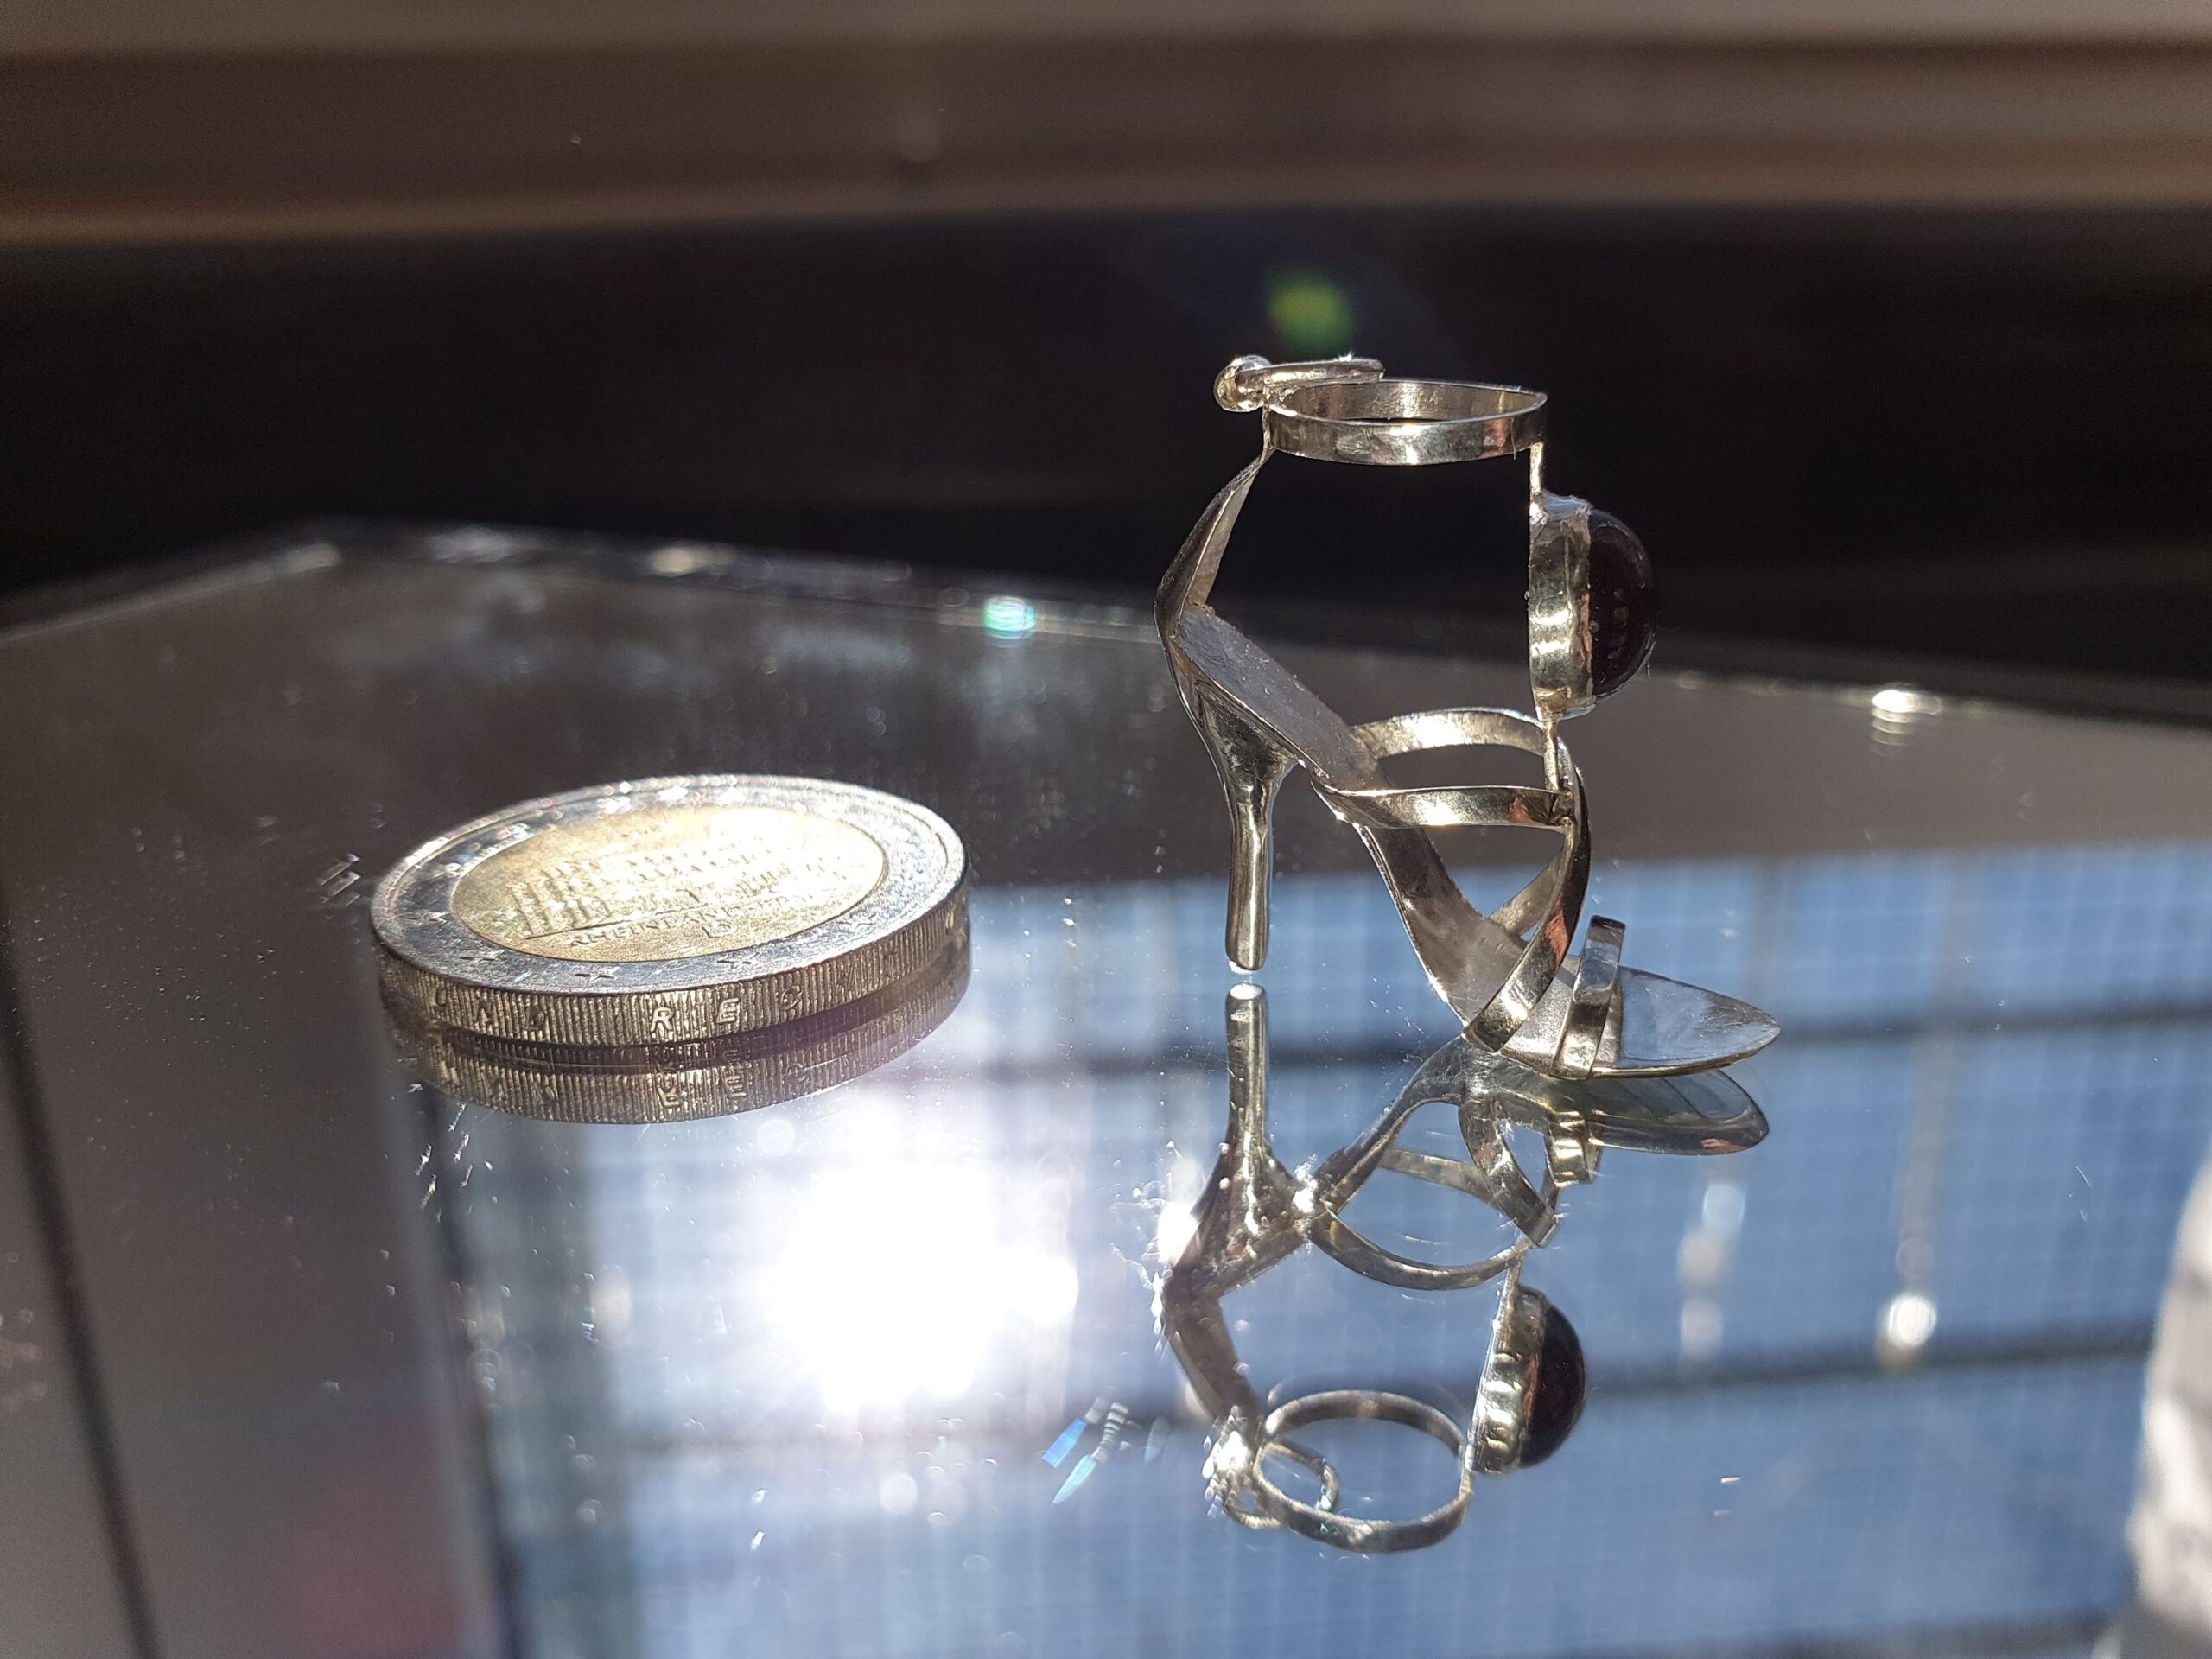
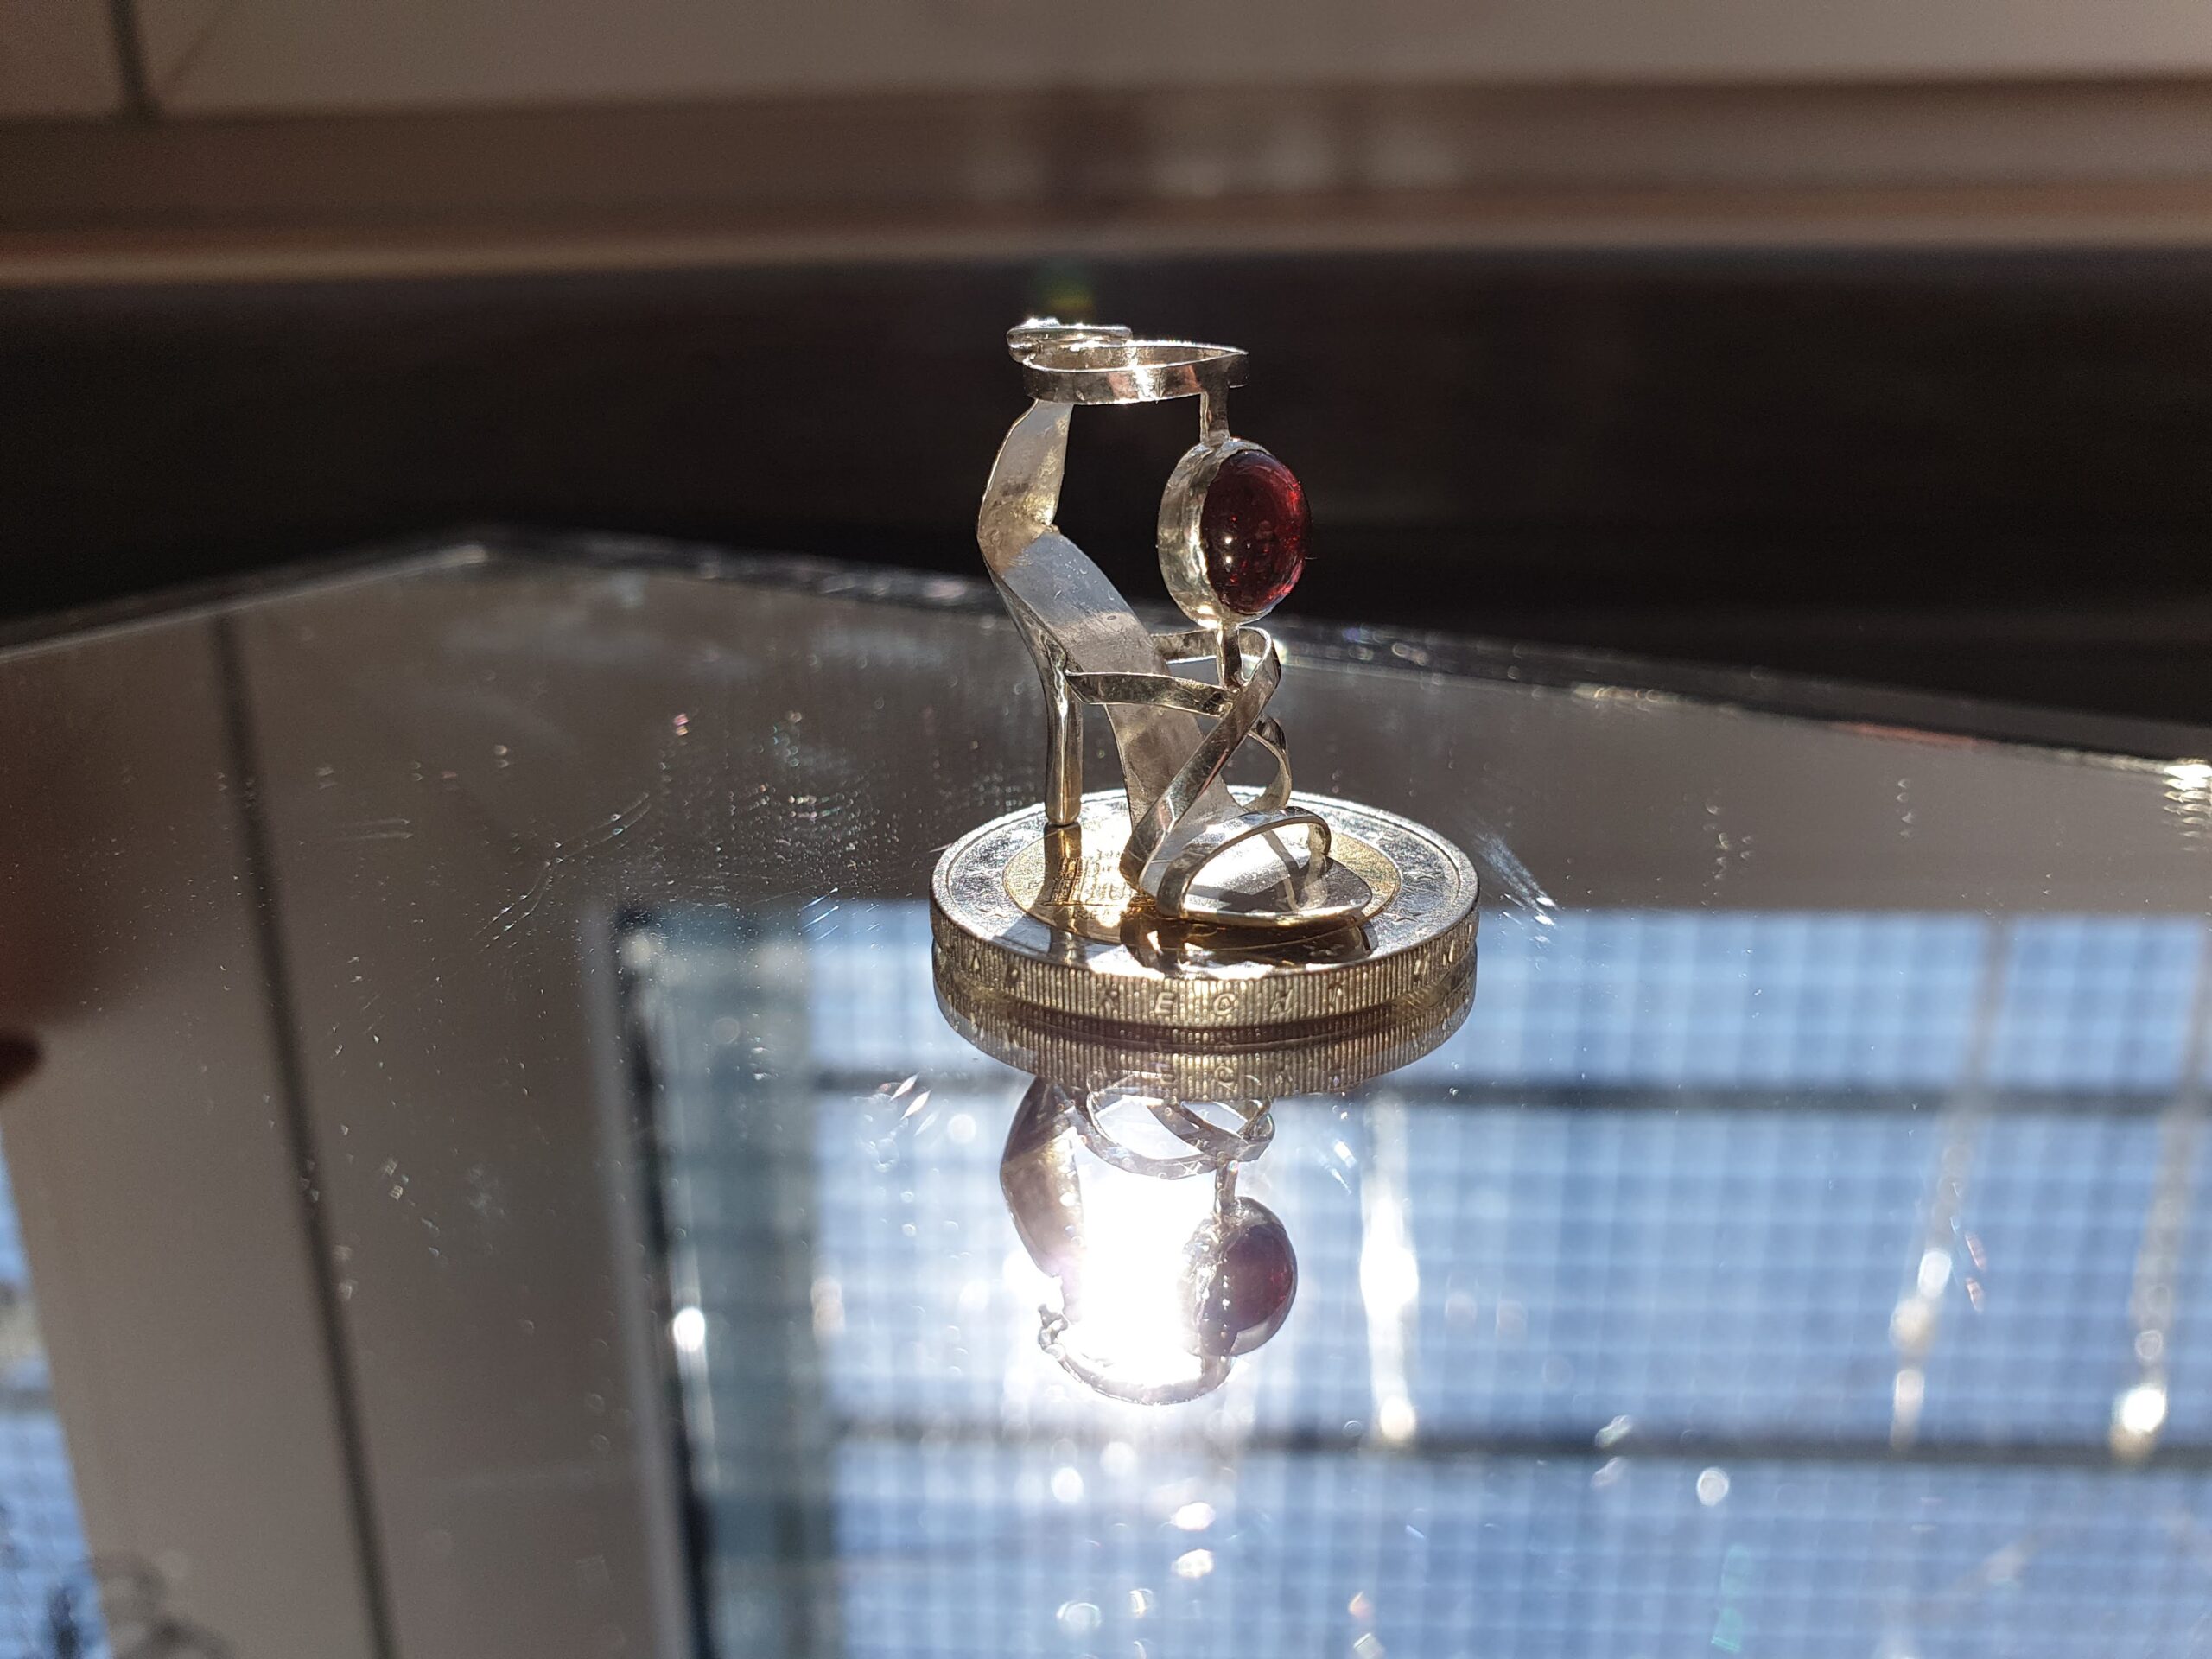
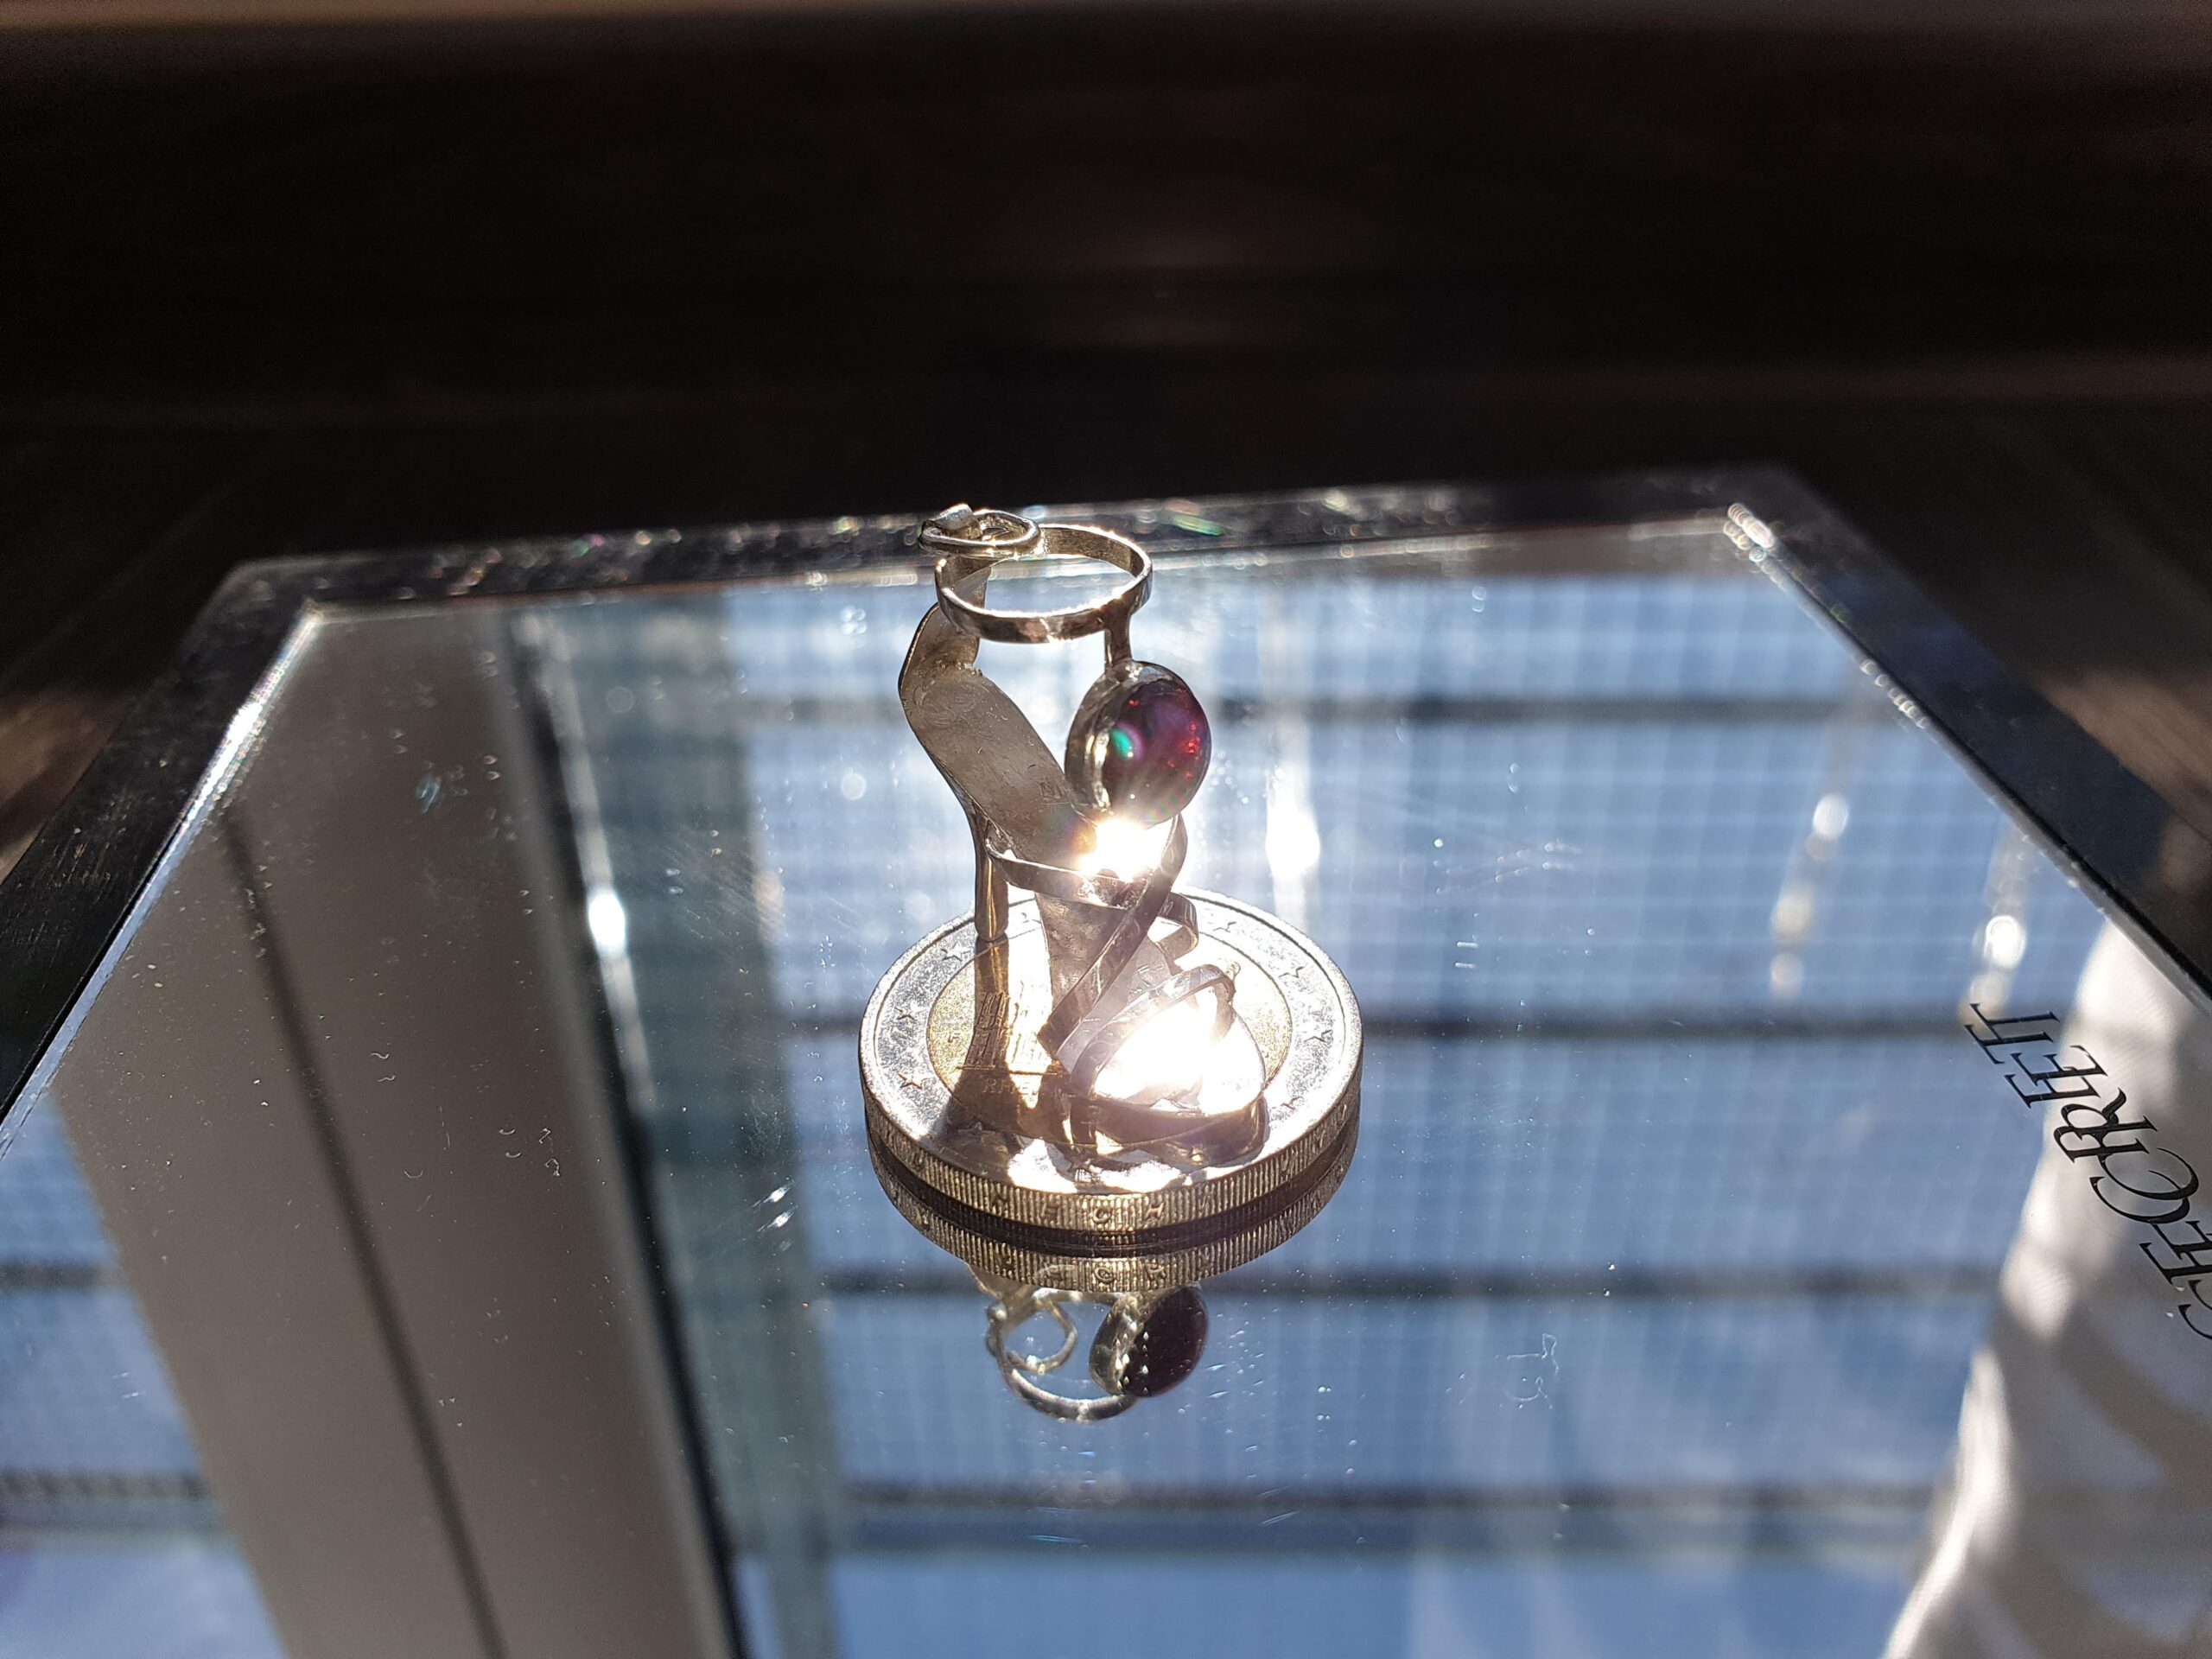
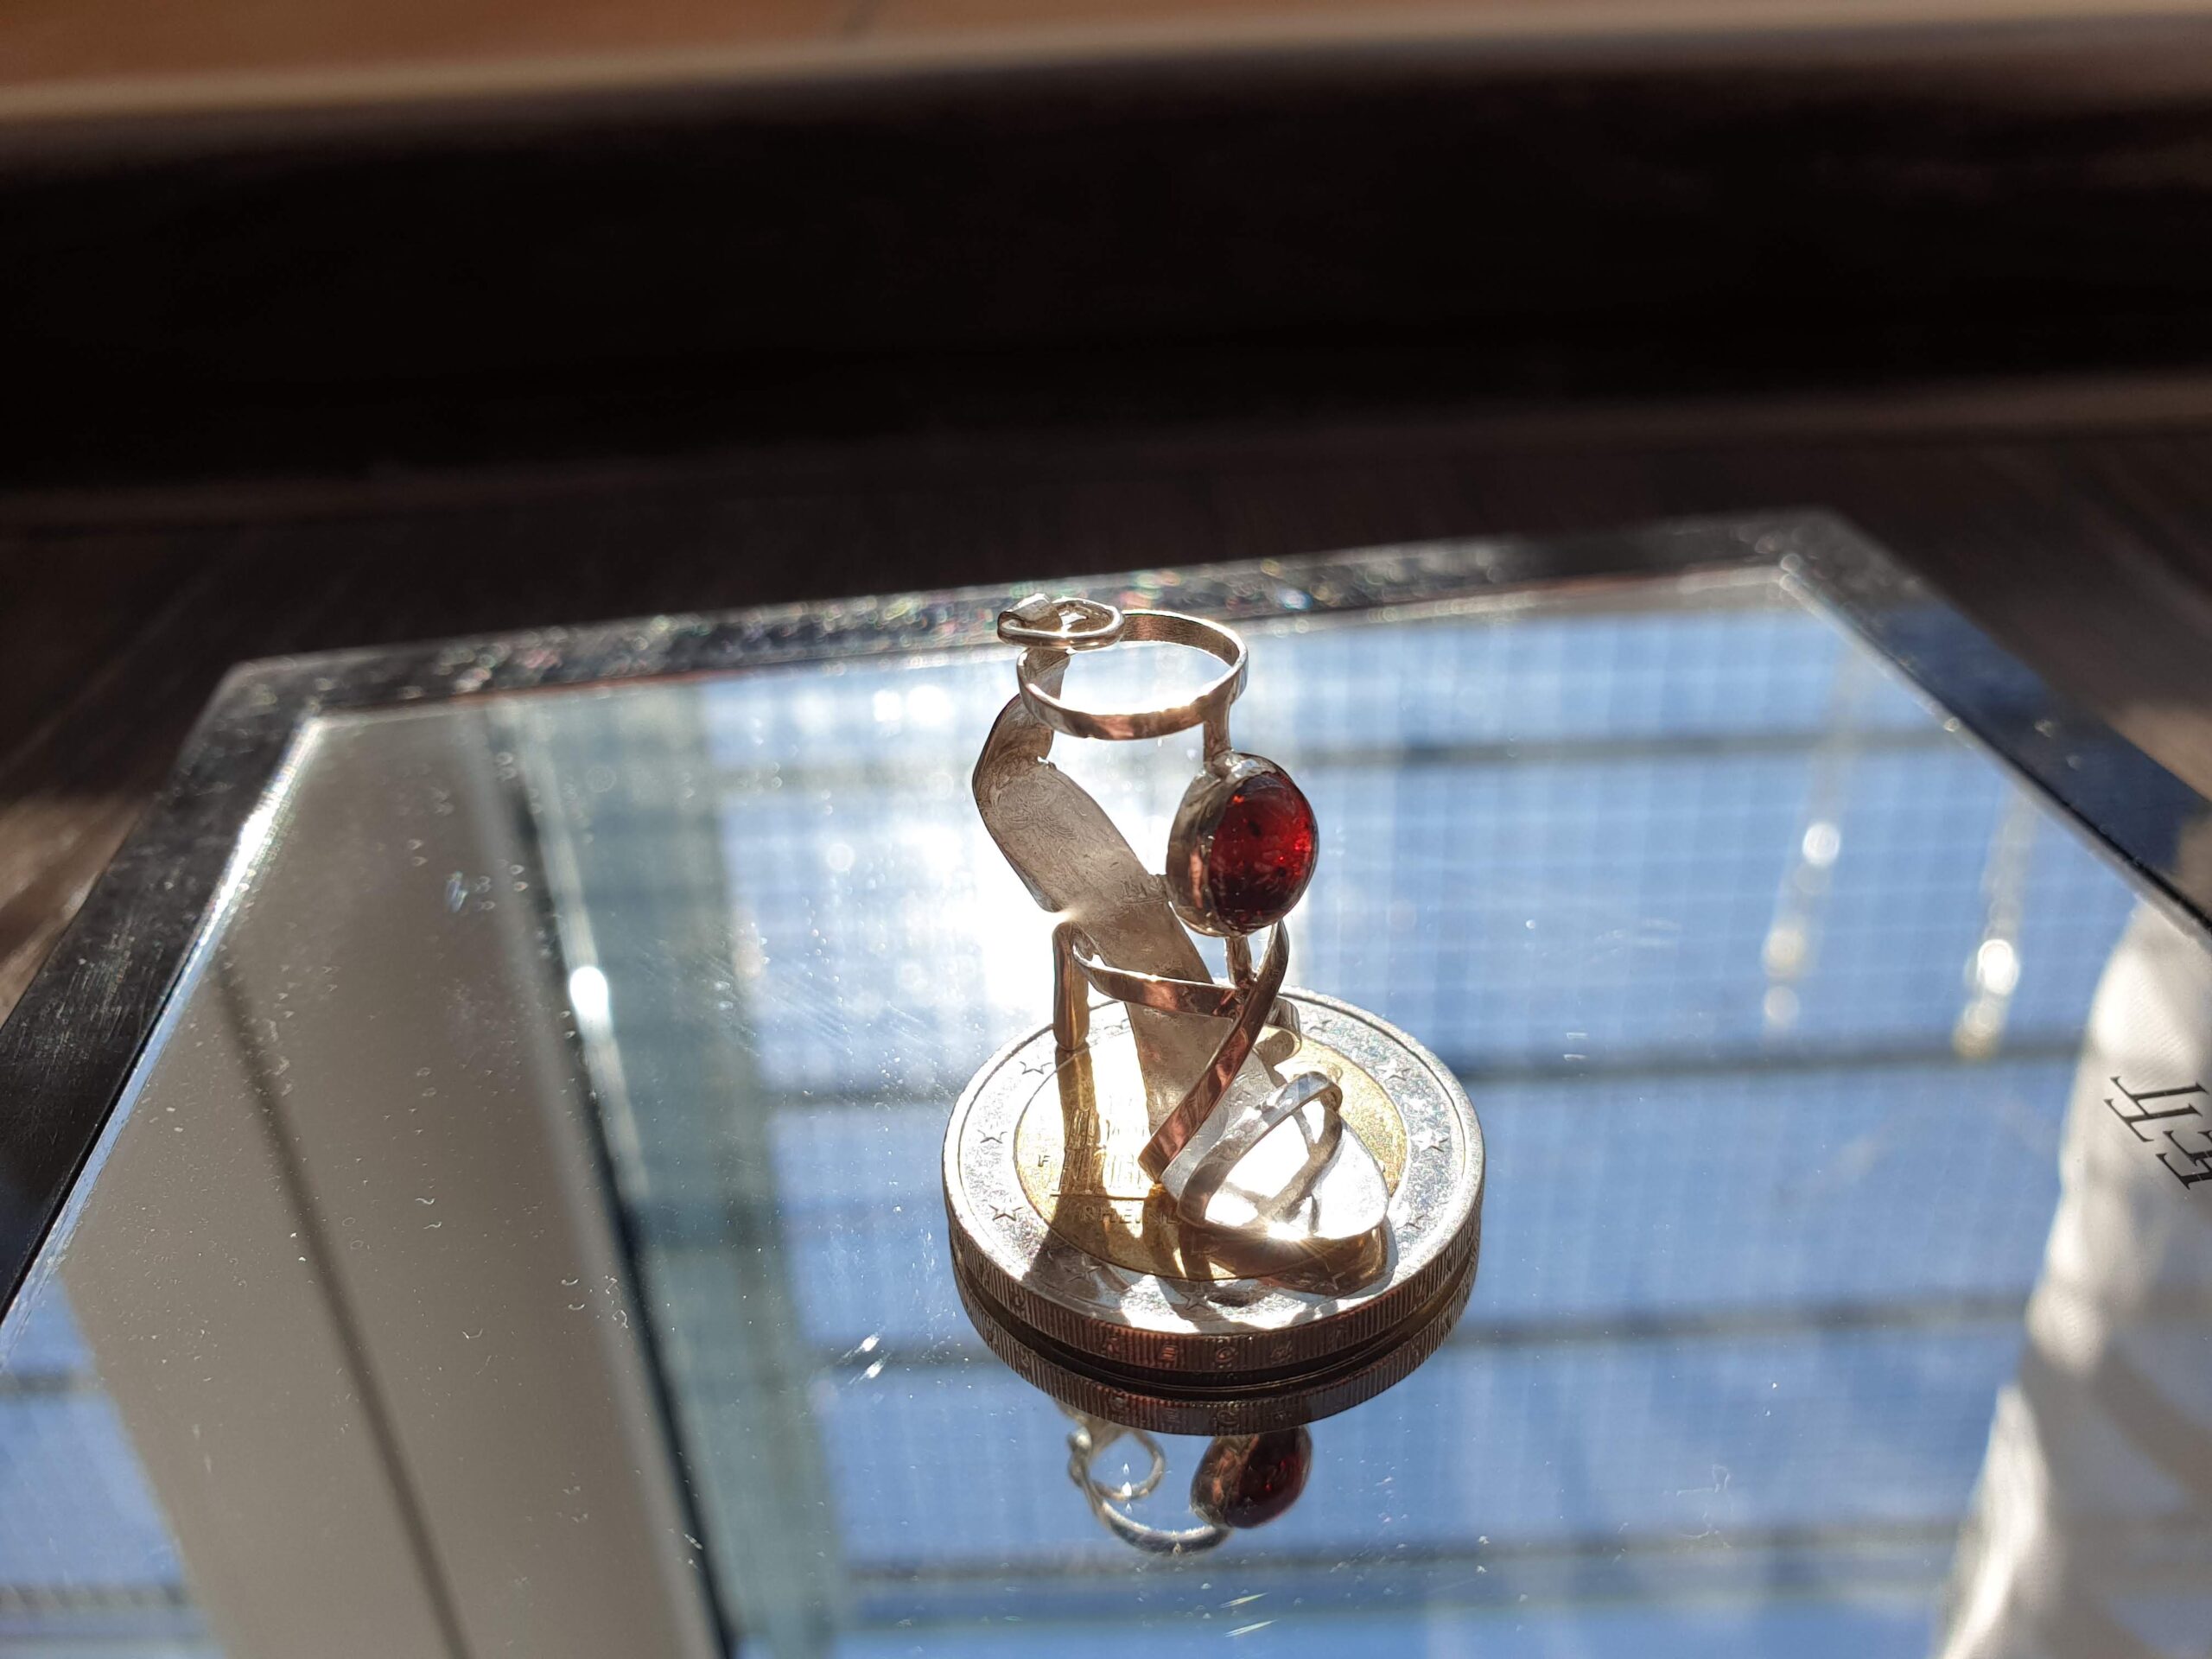
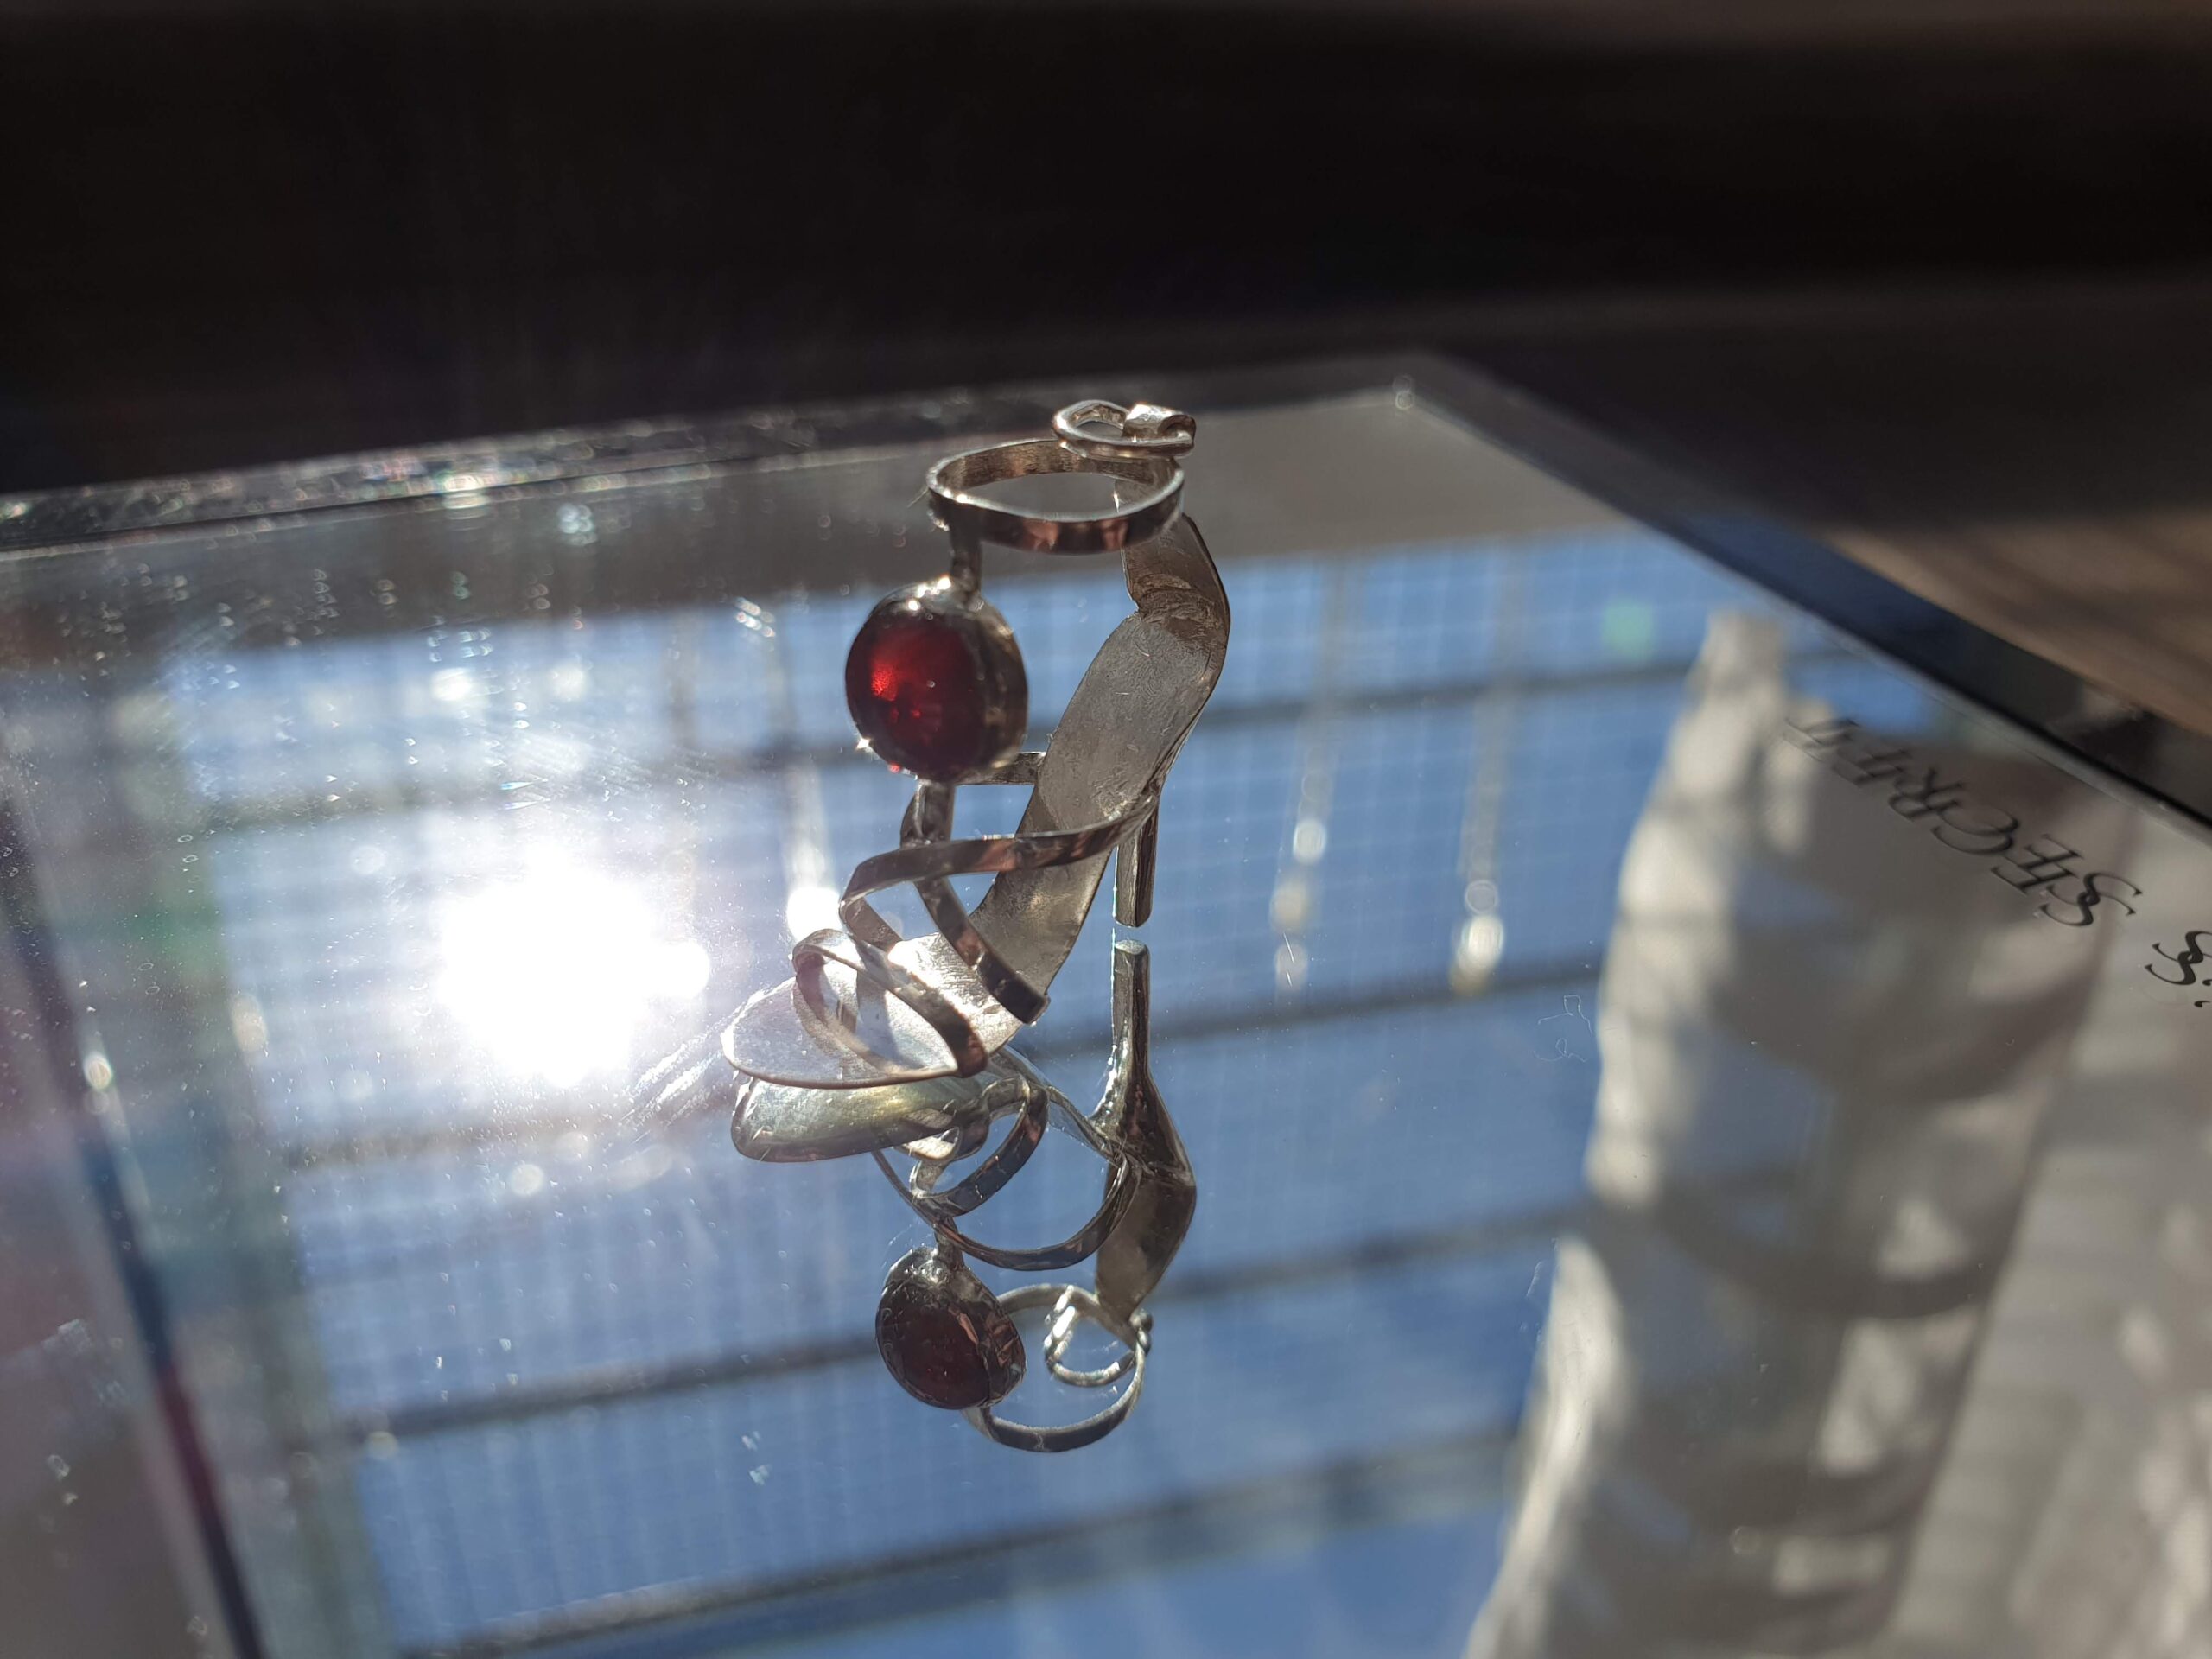
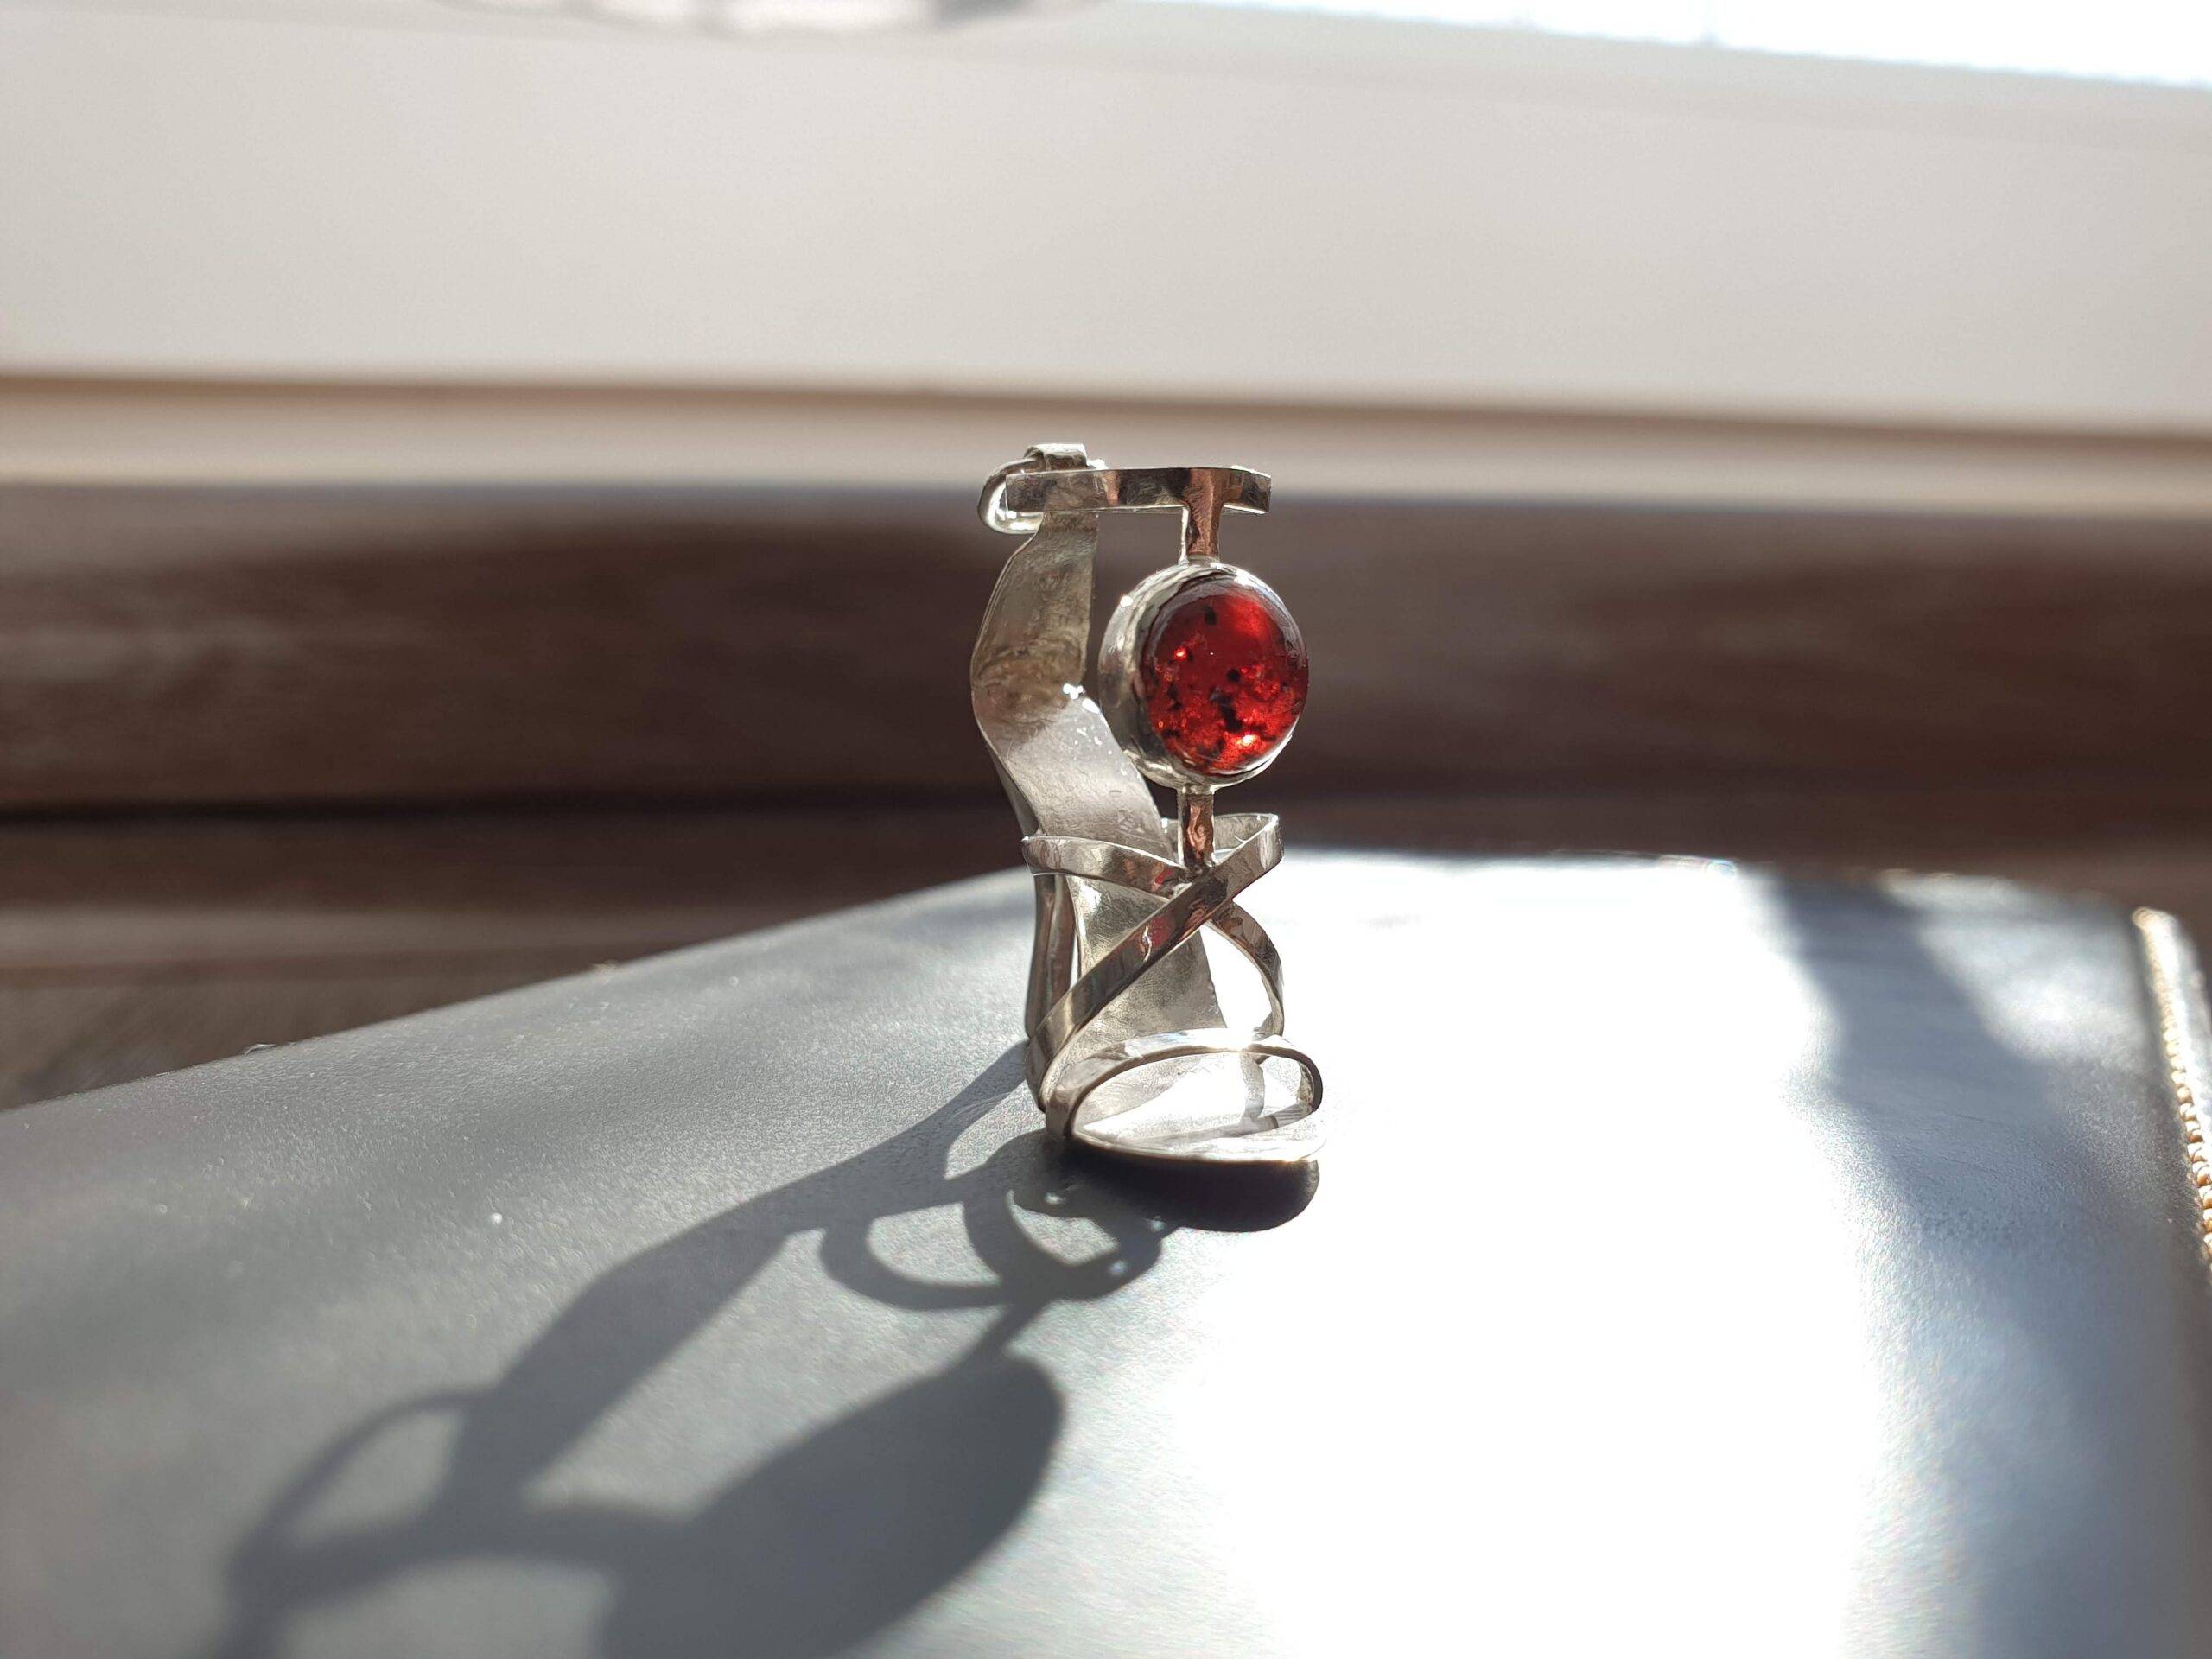
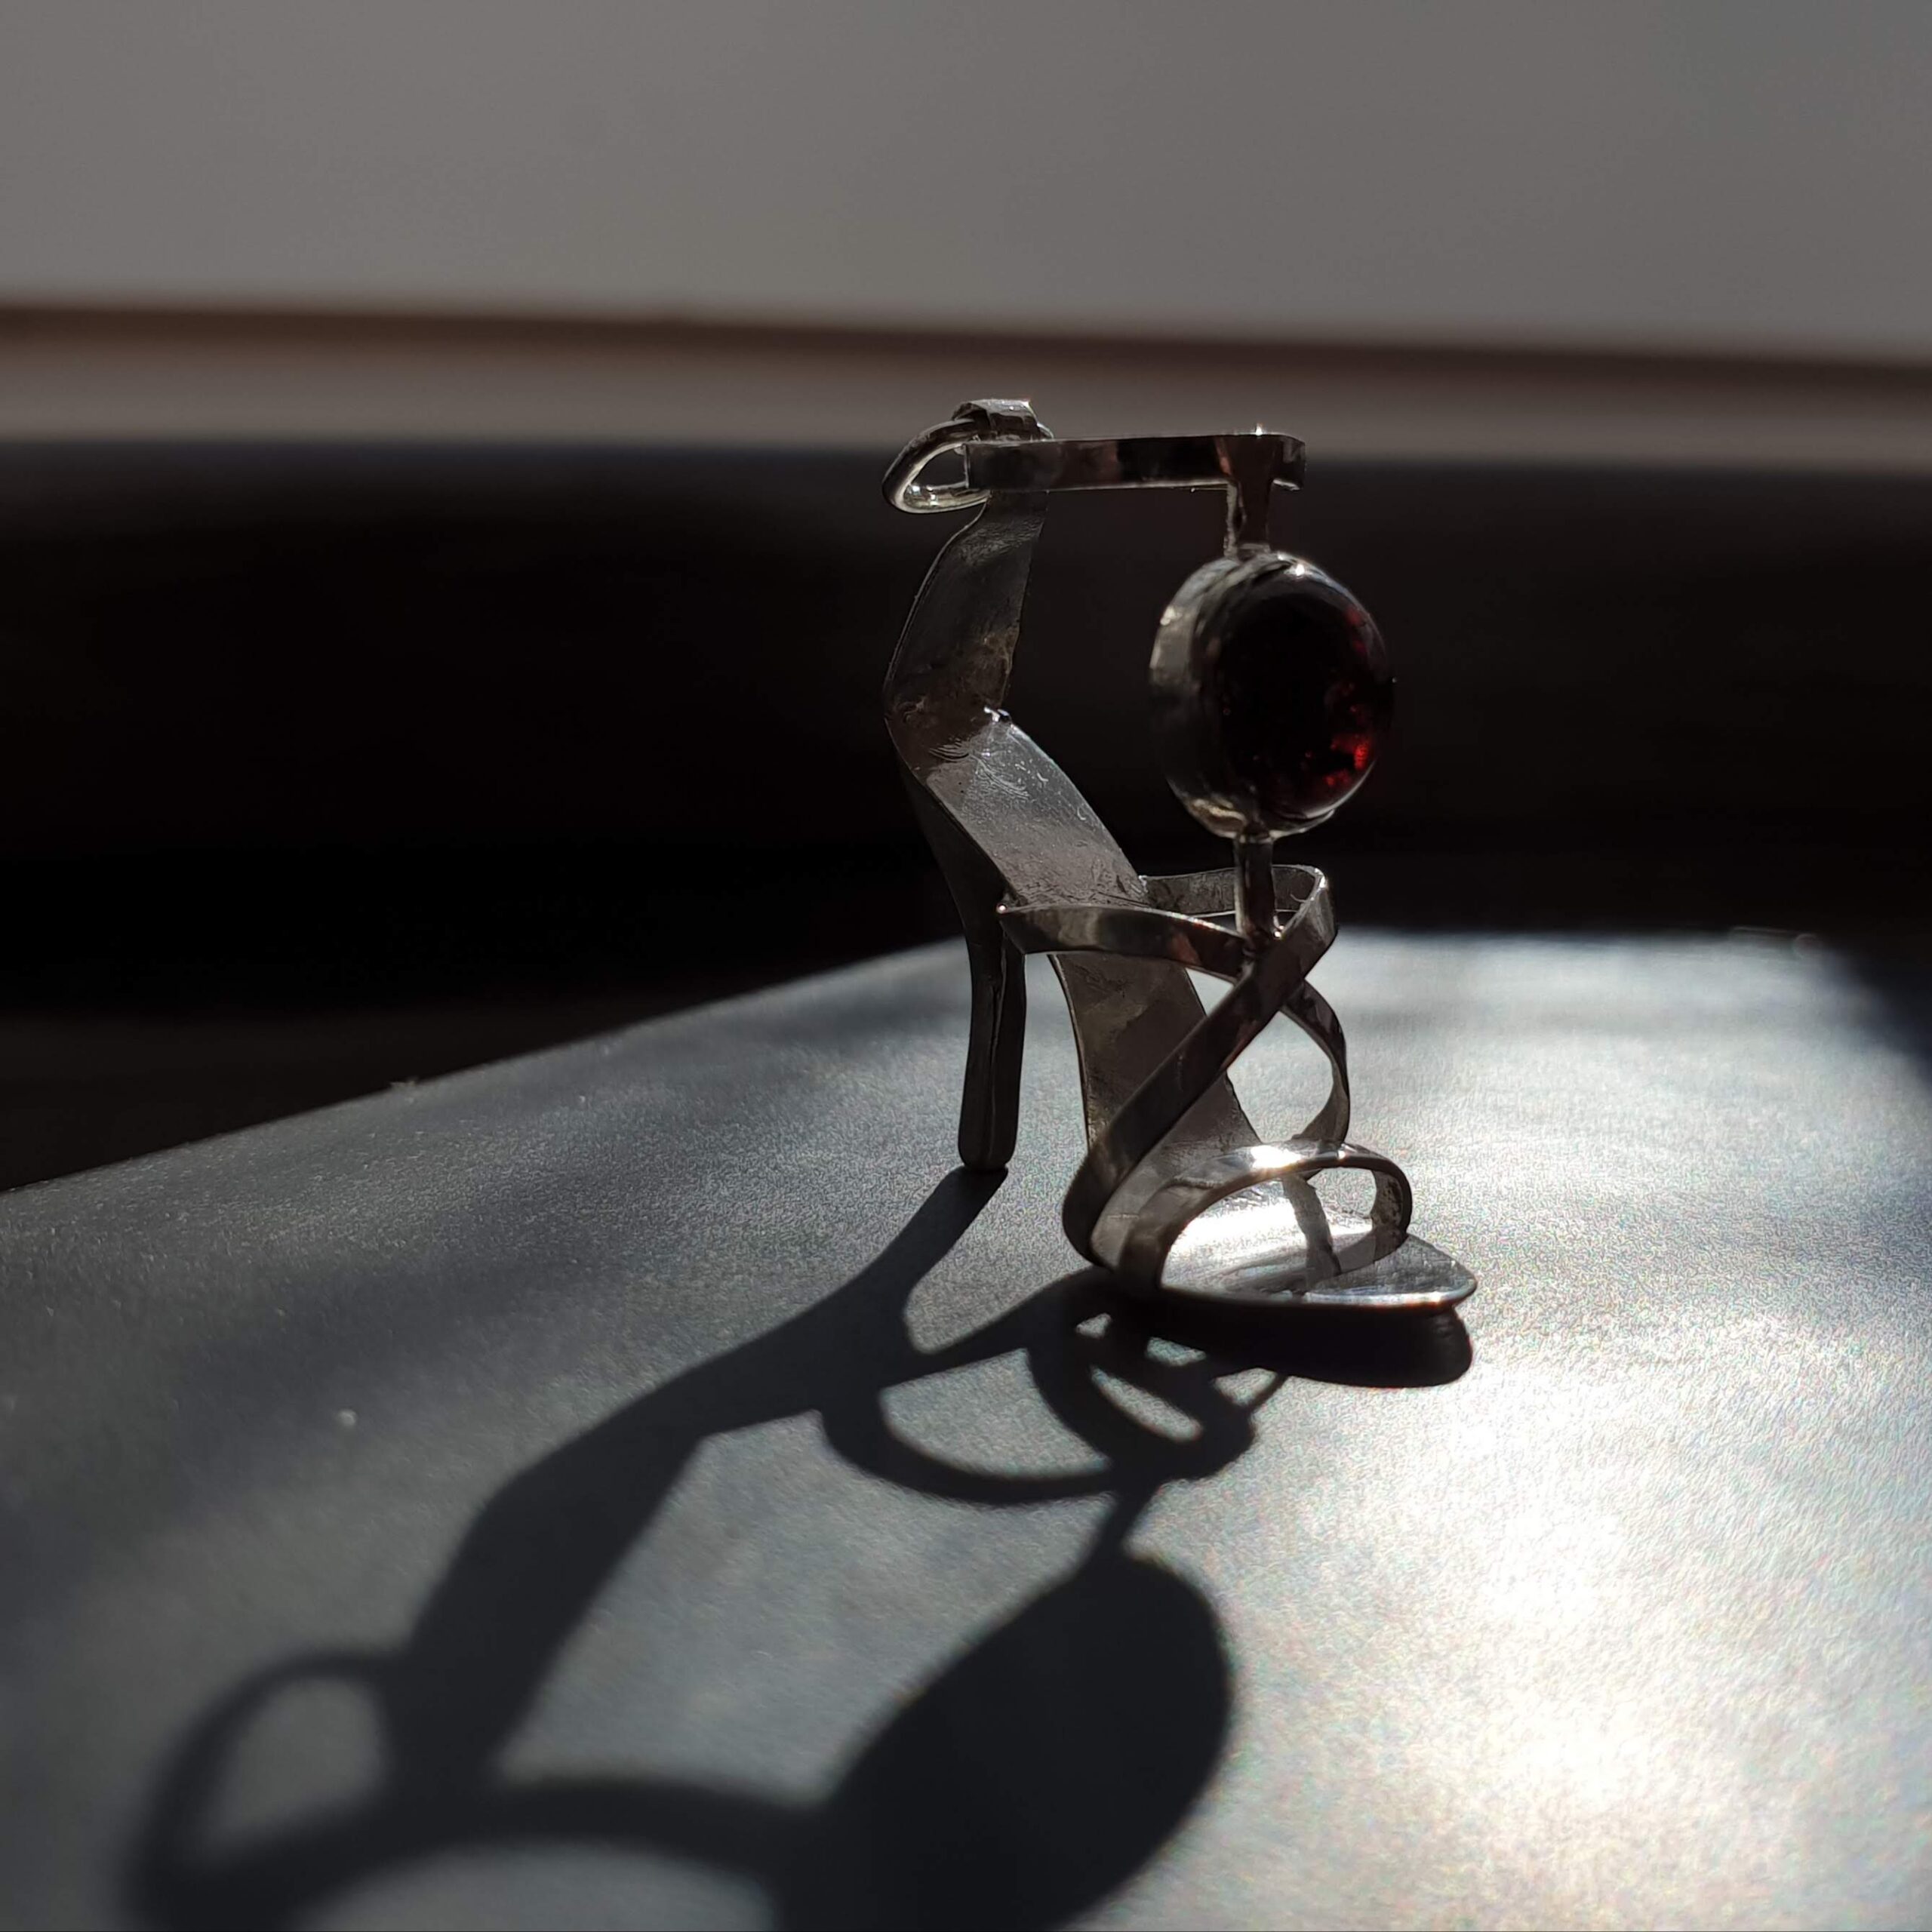
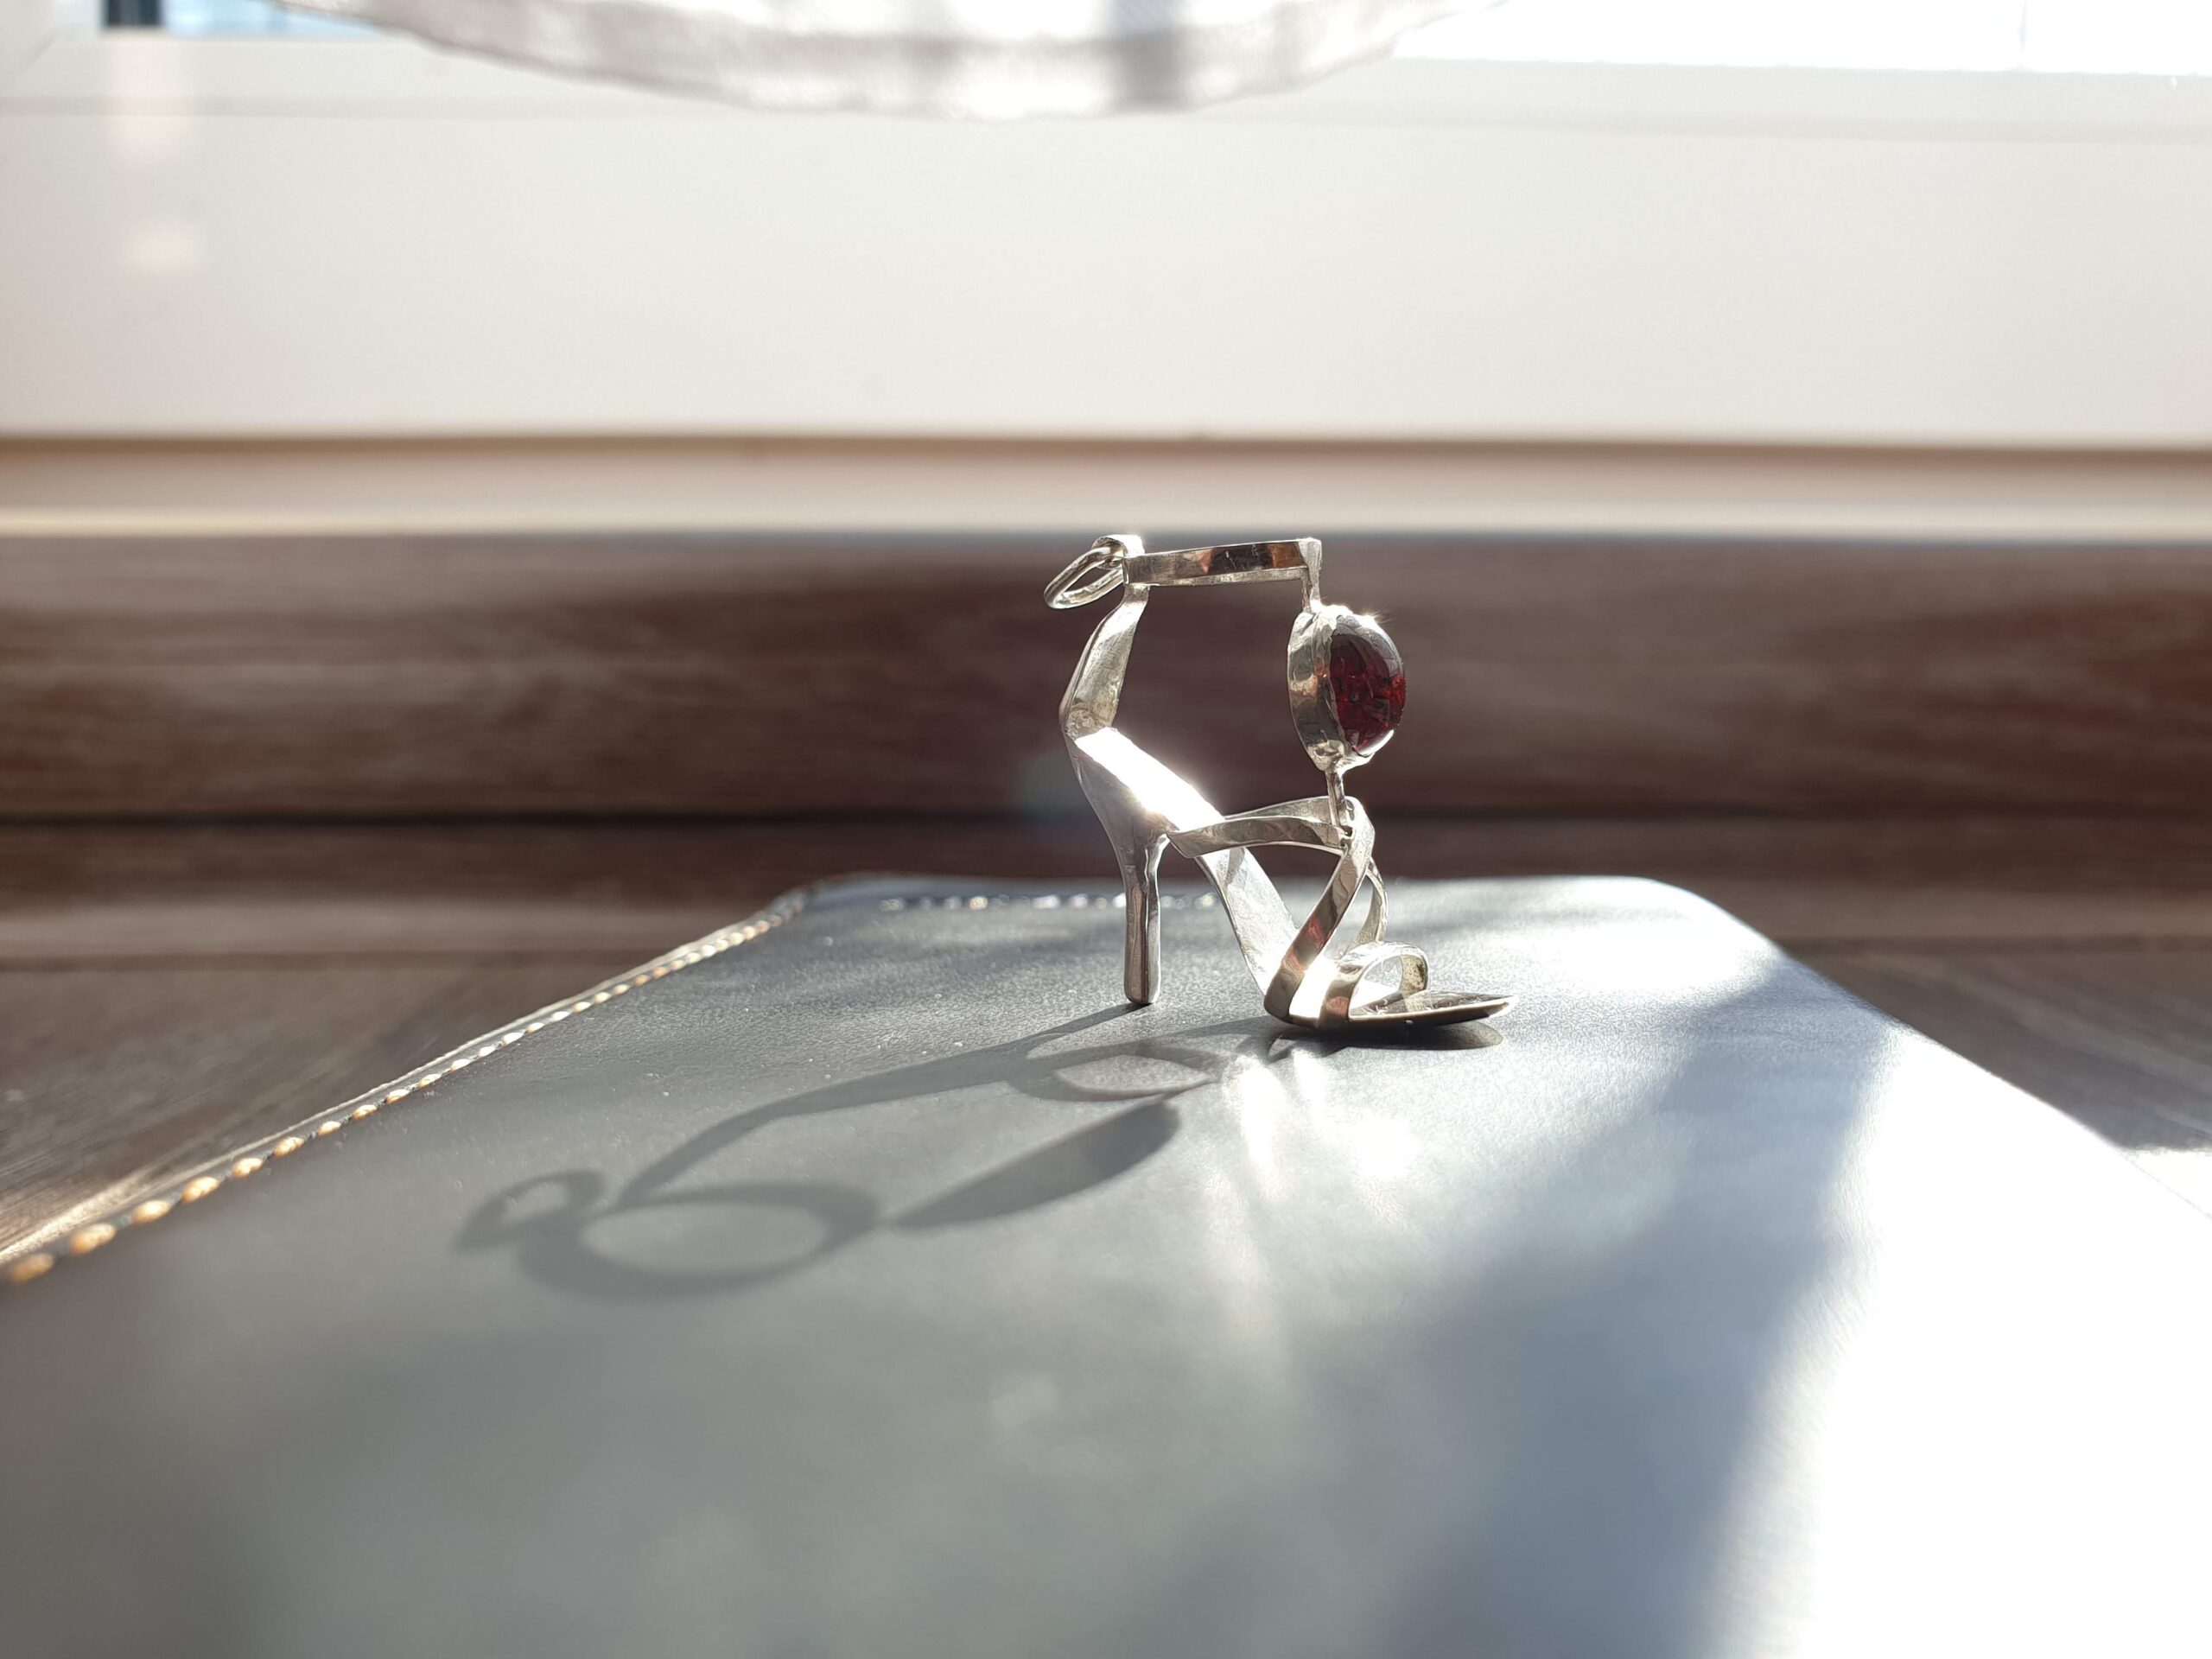
Voila
After the final touch of a fine grain polishing paste and brushing up in soapy water it was the happy ending of my story. Please enjoy the photoshoot and don’t be shy to share this with your friends!
Being so happy about finally have the spring sun I just couldn’t help myself and made a little clip. Enjoy!
This piece is still available for purchase. If you are interested please visit my Etsy Store or send me a DM in my Instagram to talk business 🙂