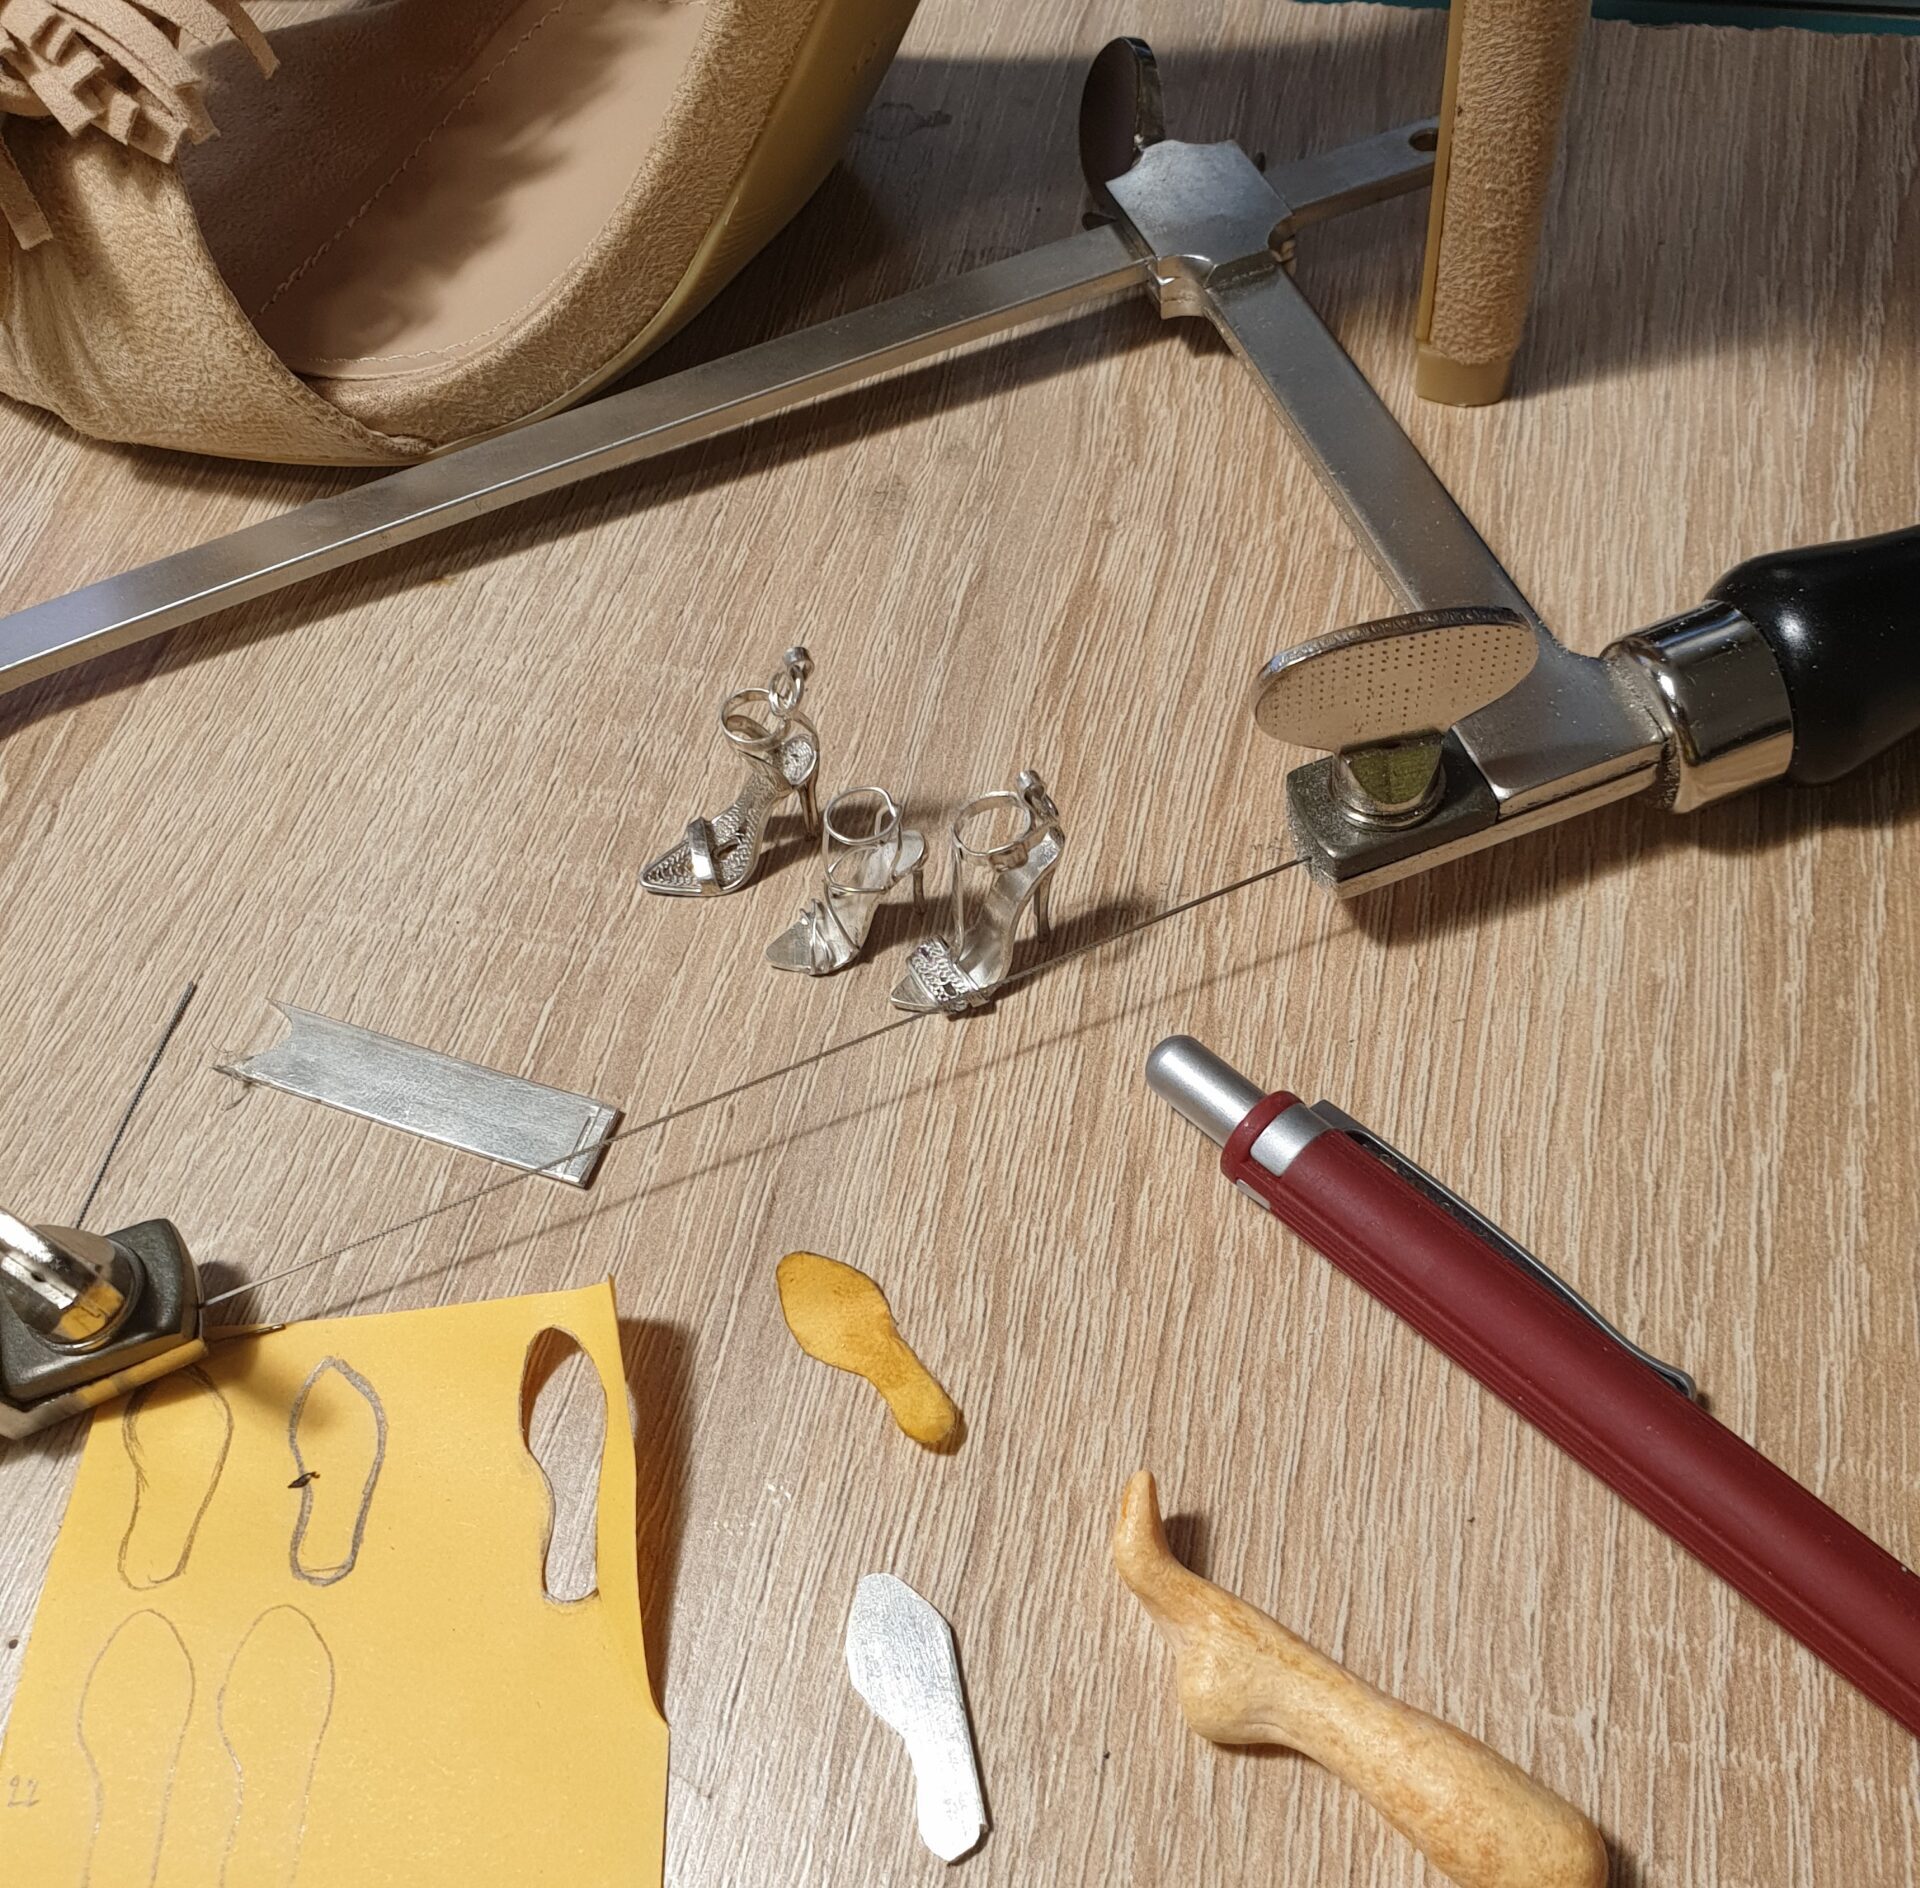
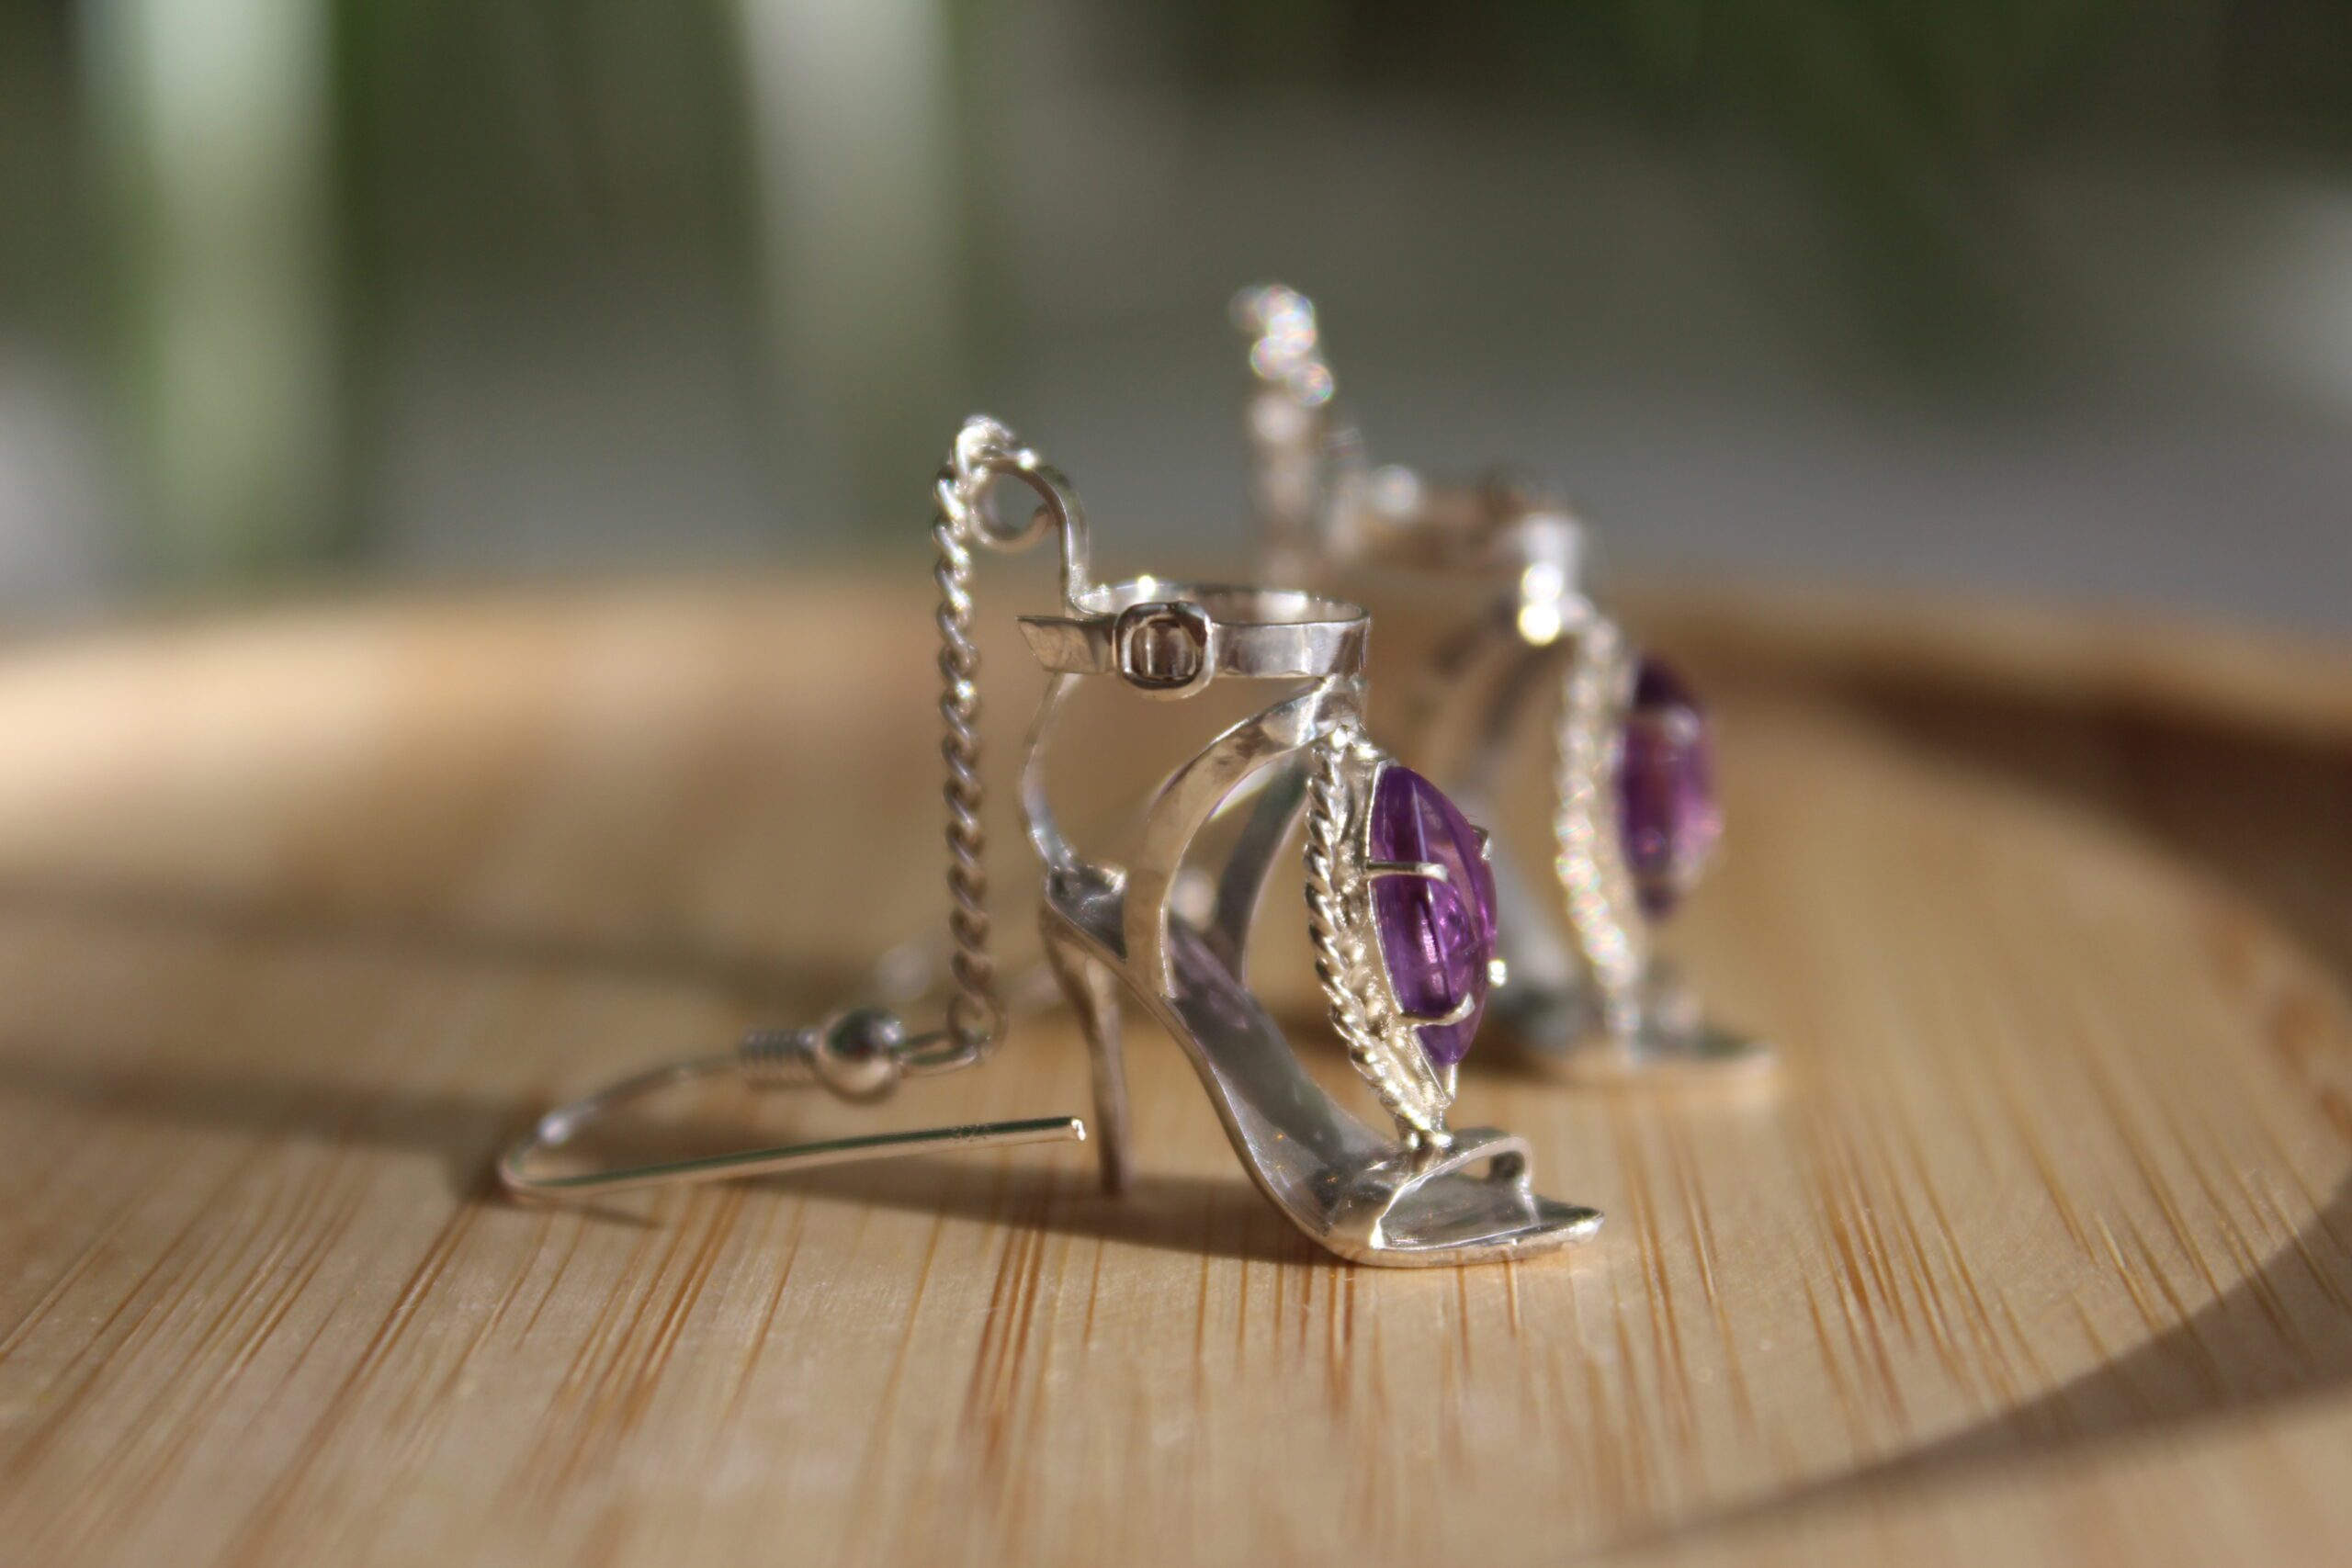
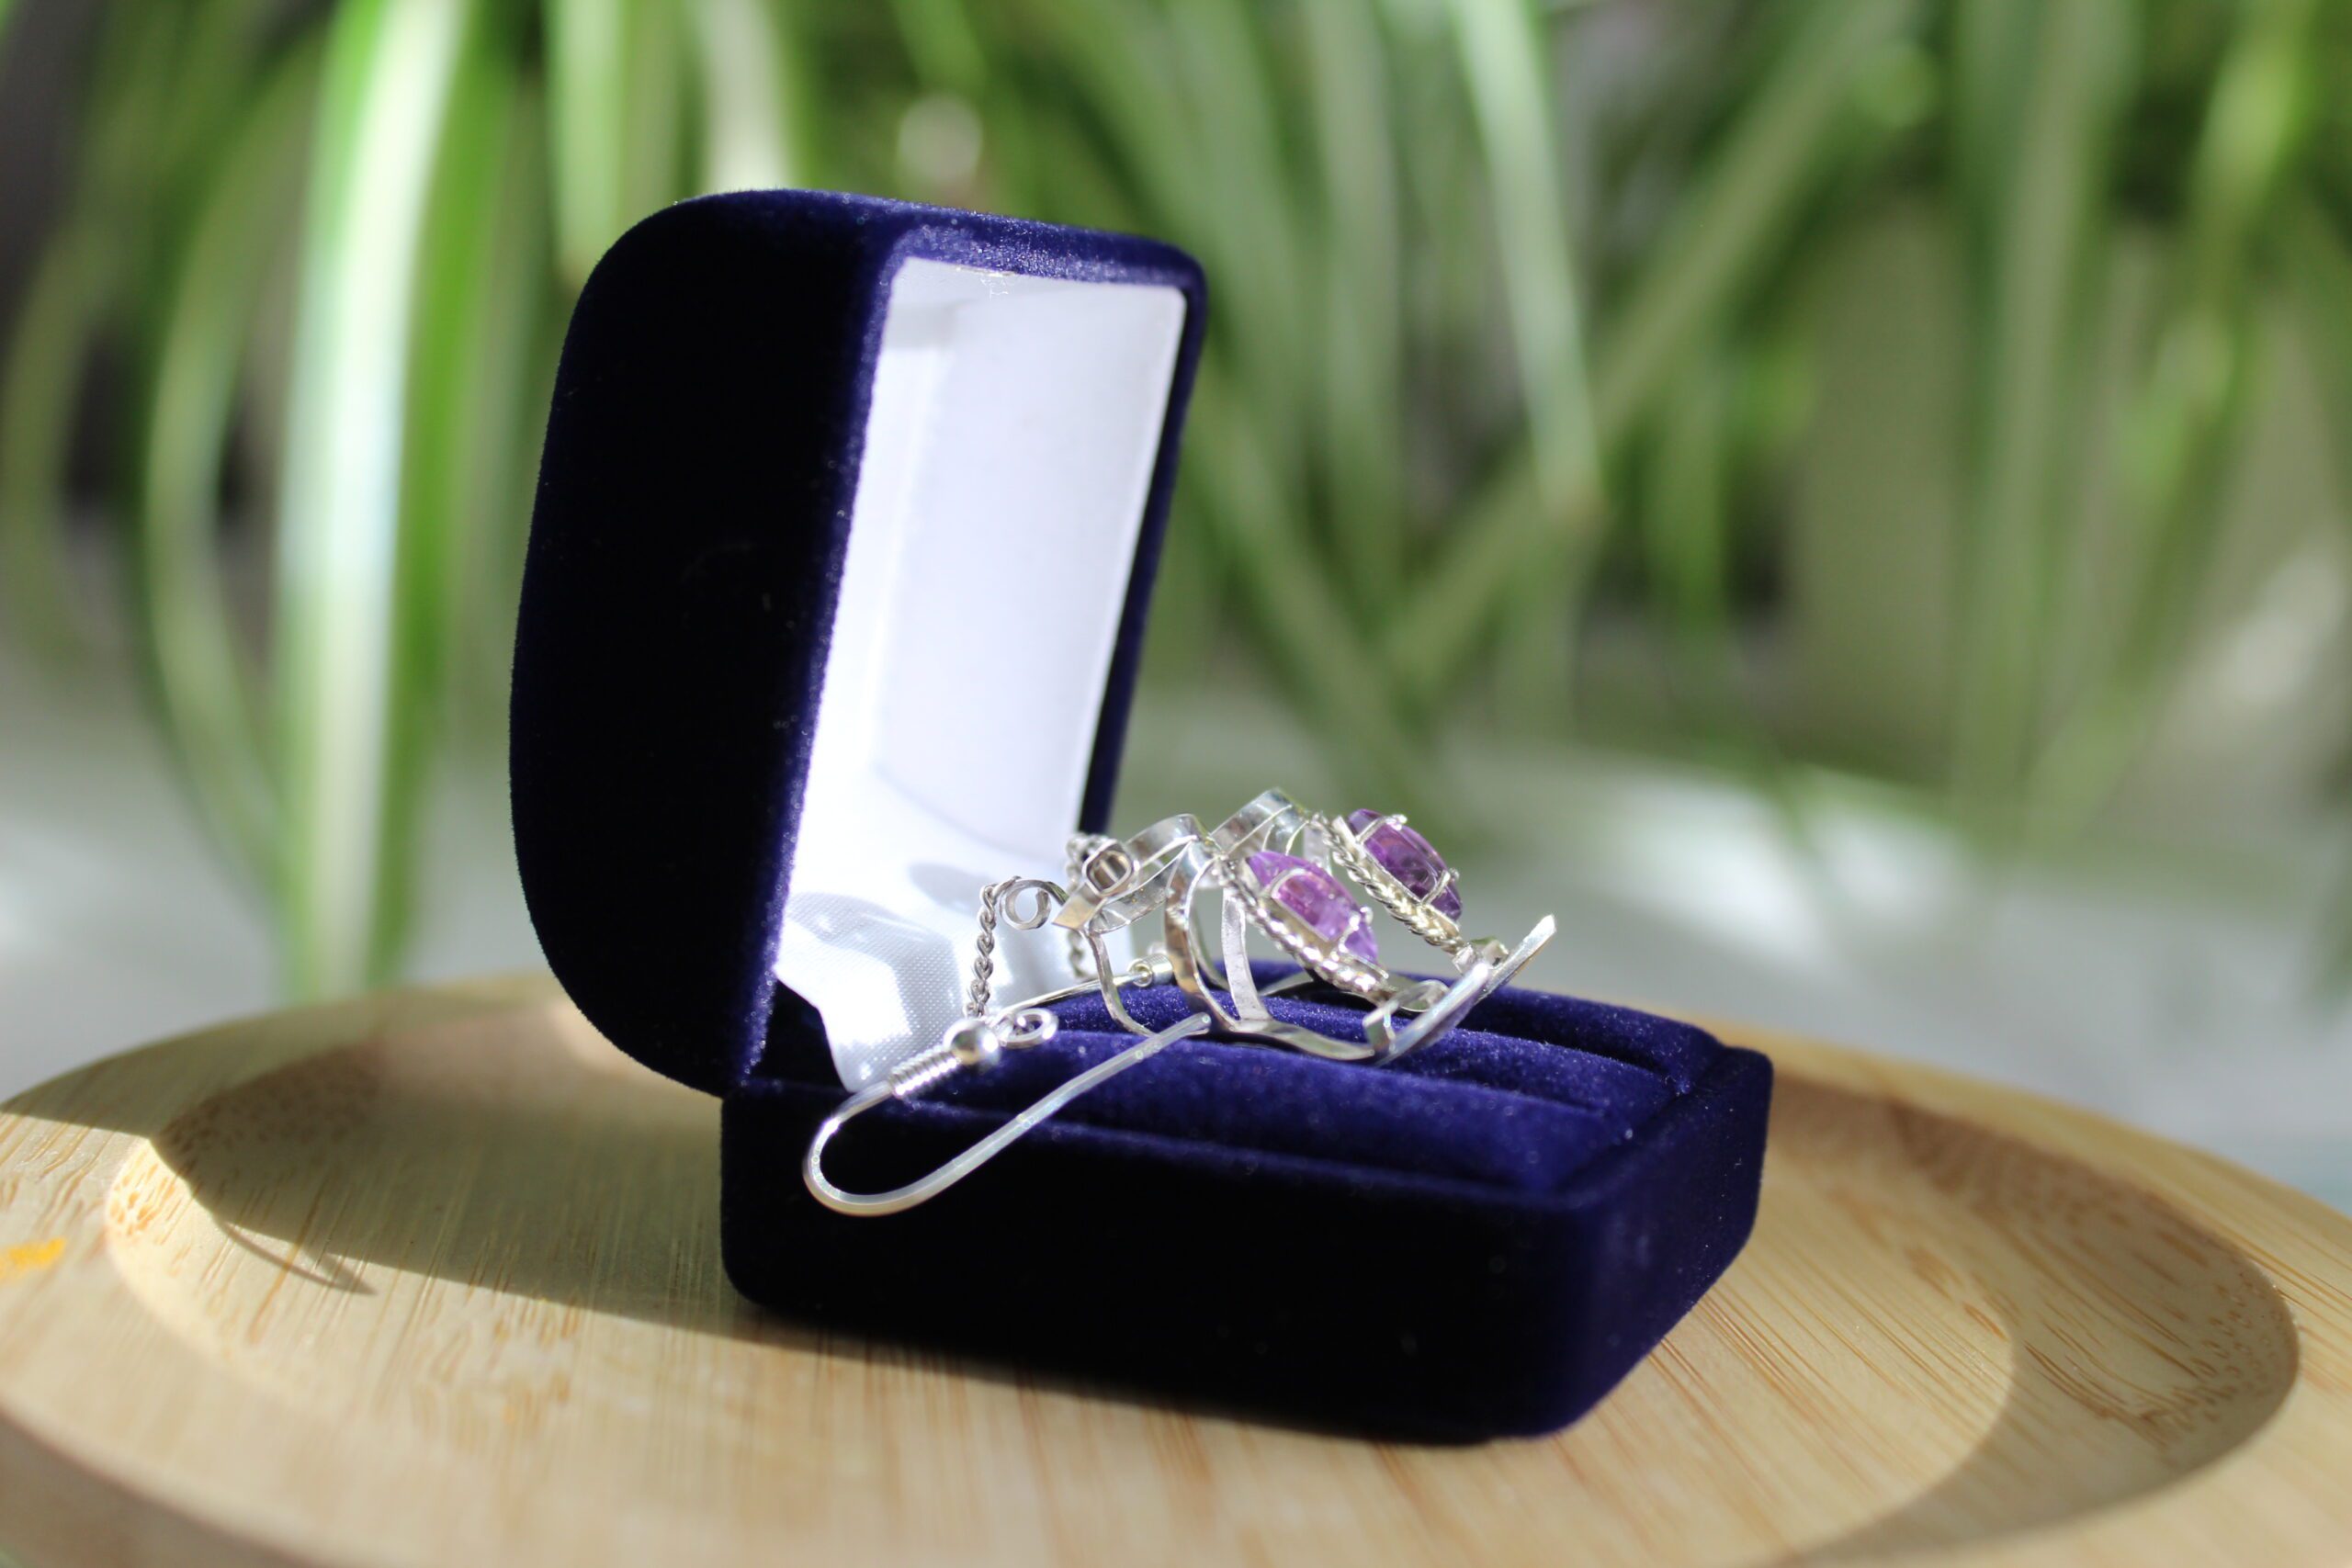
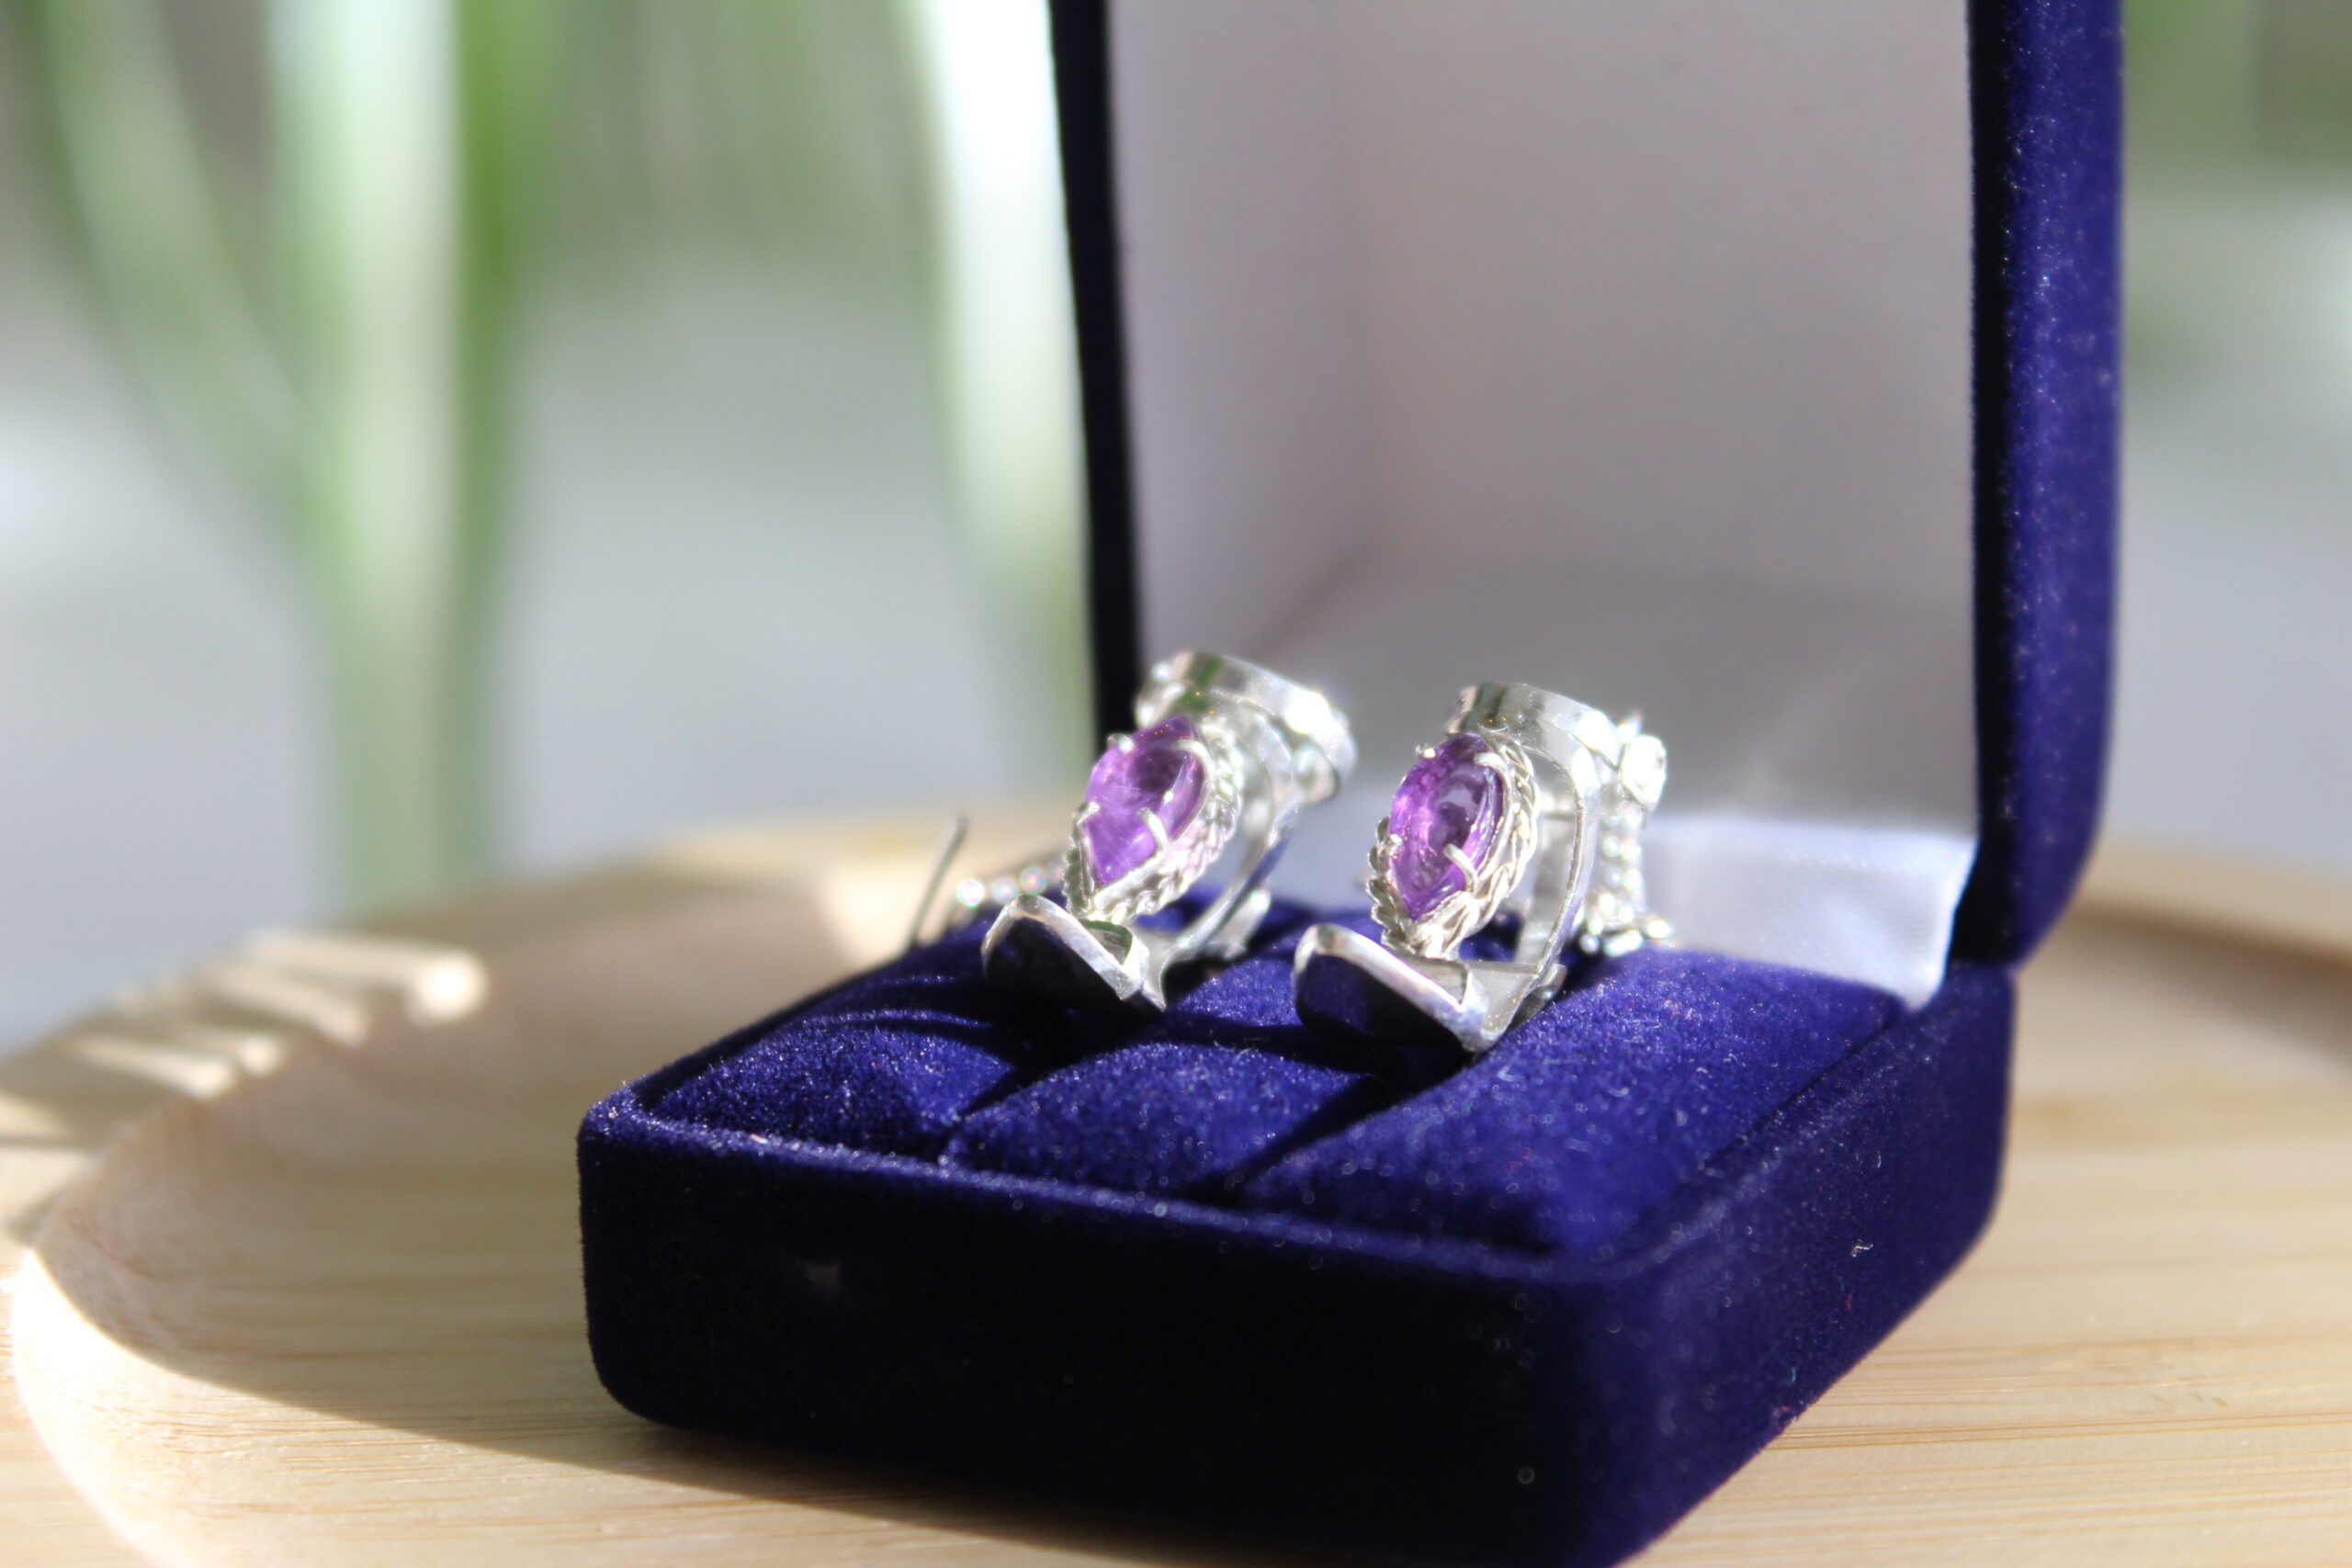
Here comes the story about forging a set of sterling silver earrings shaped as high heel sandals with beautiful amethyst marquise stones. This pair is named Alemans as a tribute to my favourite bachata dancers. My fascination of elegant shoes is getting stronger and I have a lot of ideas how to make them in silver. If you are into this kind of things I’d suggest to check out my previous creations: High-heeled sandal with clasp and filigree strap, Stiletto high heeled sandal pendant and my favourite one High-heeled filigree pendant.
Making soles
Based on the experience I gained so far it seems obvious that any shoe making starts from the sole. So I just borrowed my wife’s real life sandals and outlined approximately the shape of the sole on a post-it note. This convenient as the post-it then sticks well to silver during the next step.
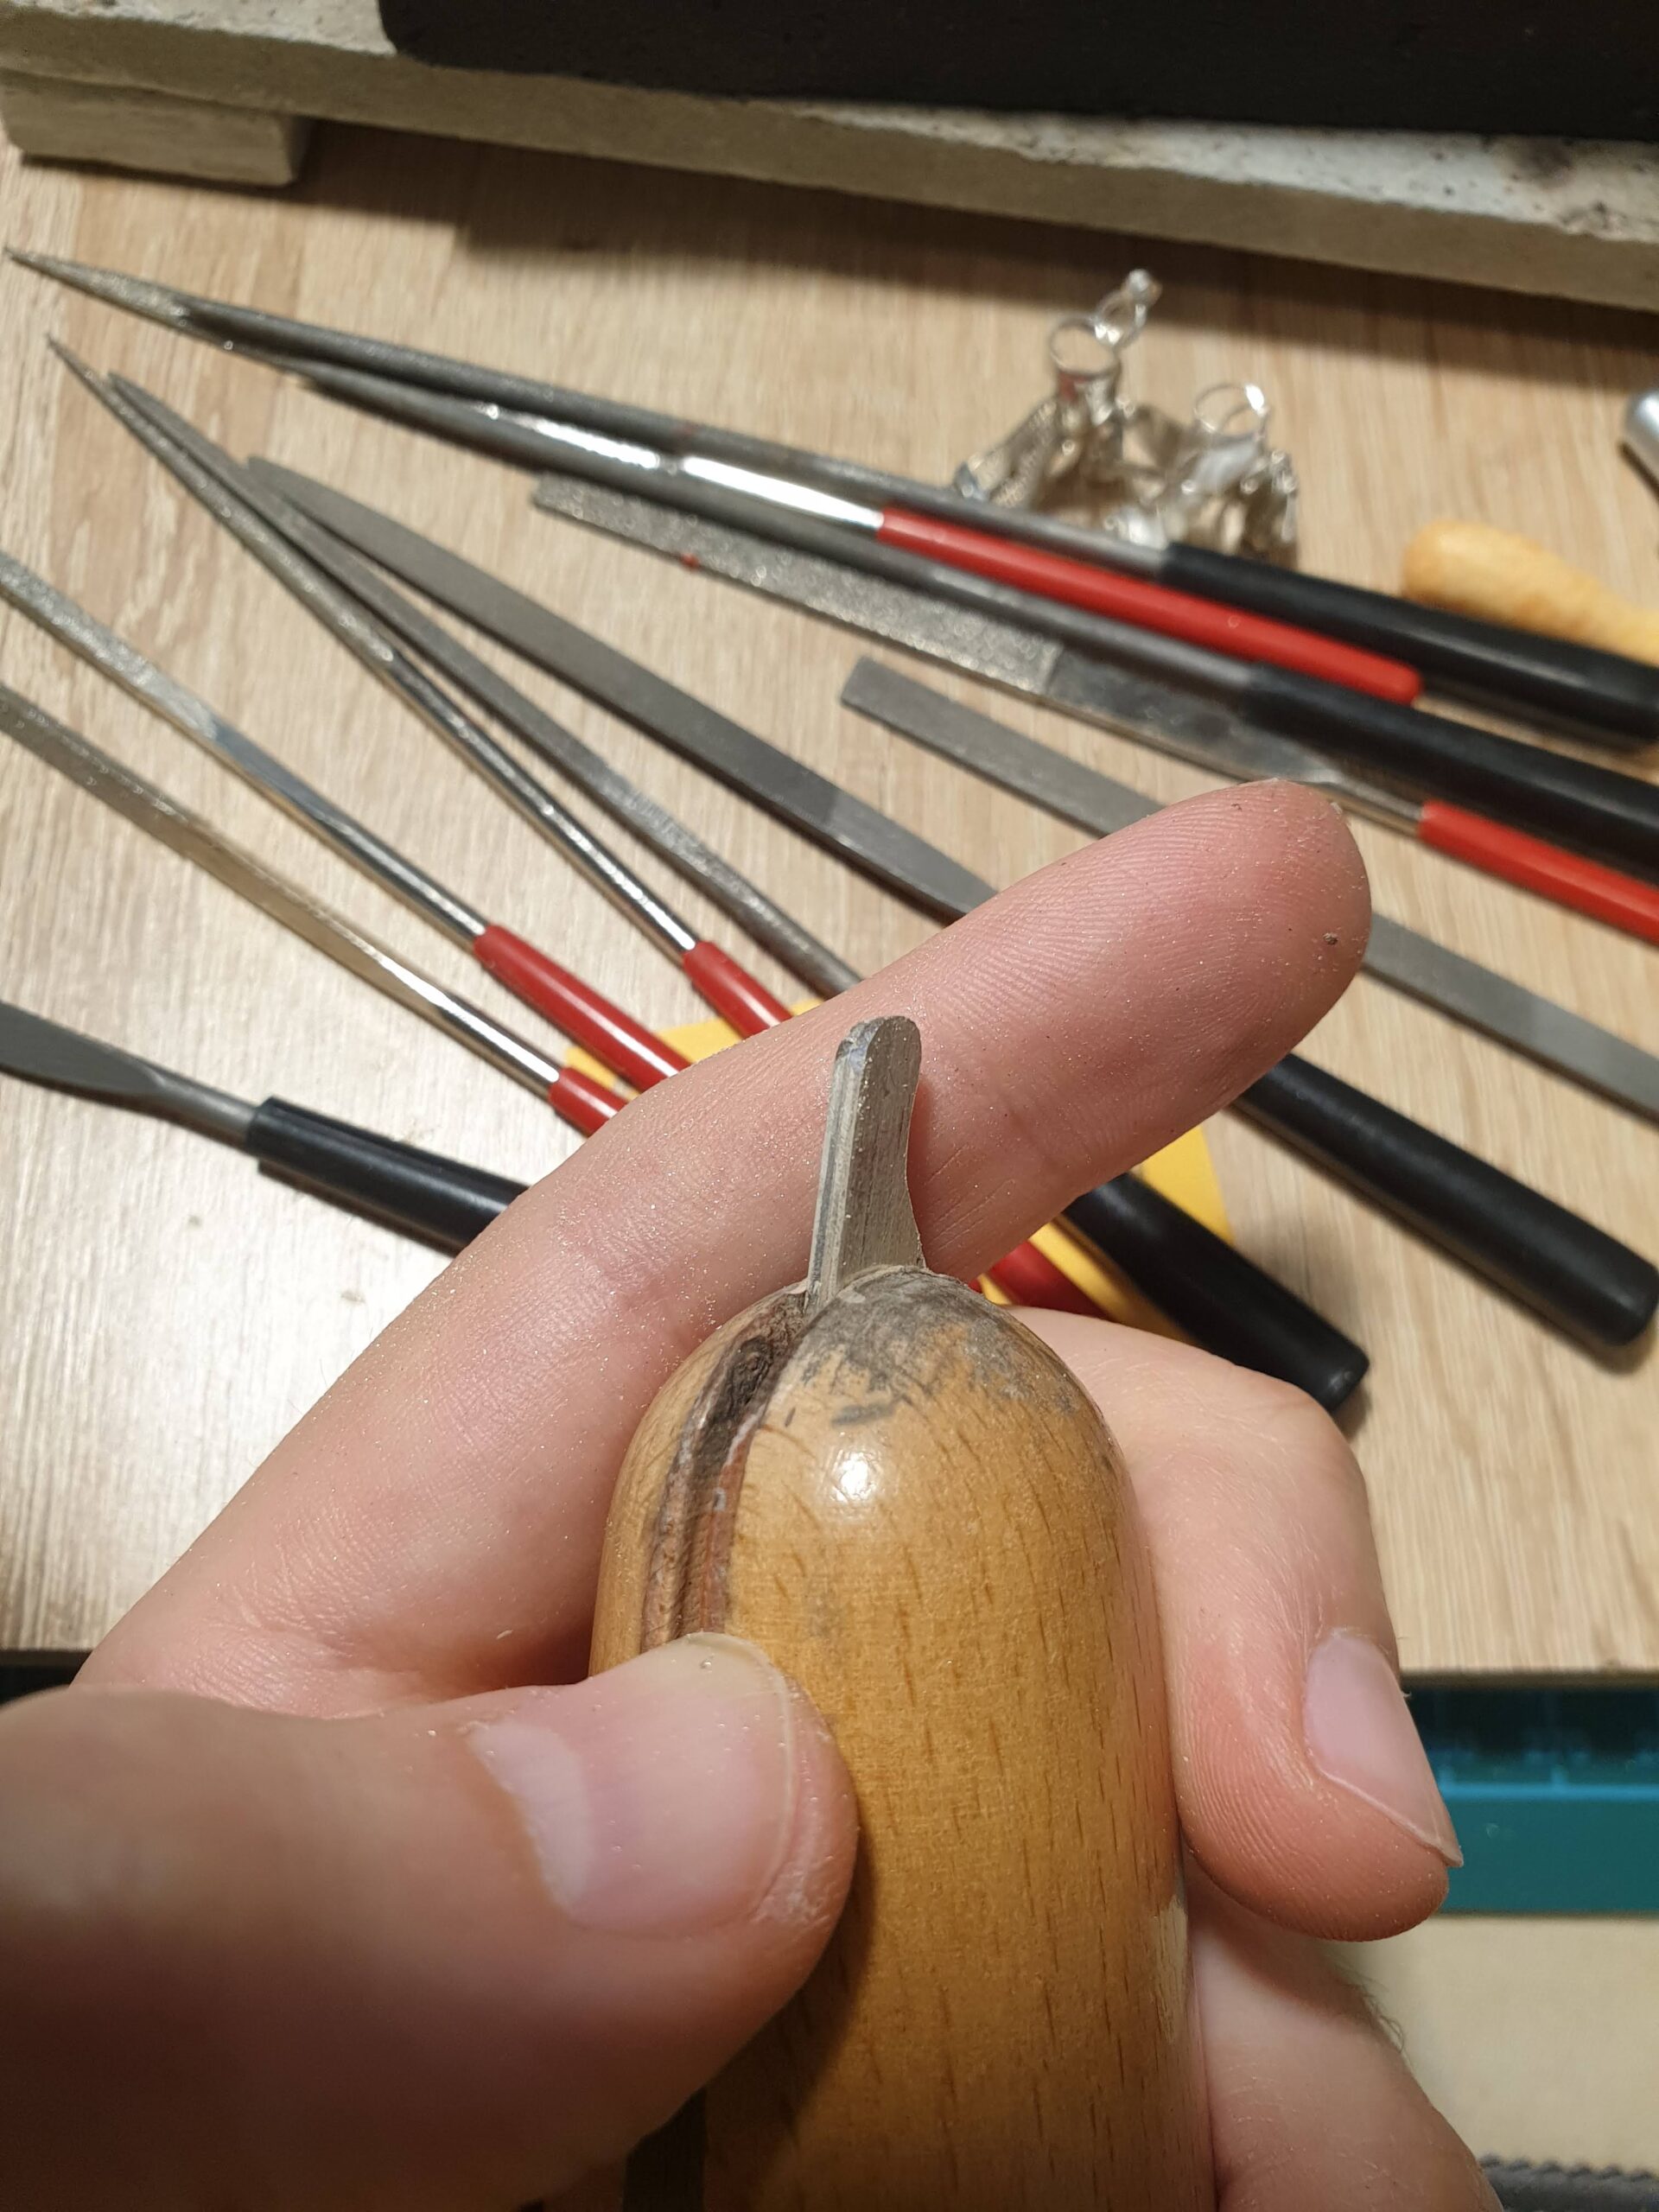
As a sort of an optimisation freak I had an idea of sawing 2 soles simultaneously. Spoiler alert – don’t try this approach and stick to the normal cutting by a jeweller saw. Besides, it is also a lot of fun!

I started to kinda like the sawing process. Once you get your hand on it it is impressive how precise the cut can be. This is nothing like sawing the wood – you can trust my word on that.
Once both blanks are cut to the shape they gotta be filed to fit each other. This is where my optimisation passion pays off – I clamped both soles together and grind them to the final shape.
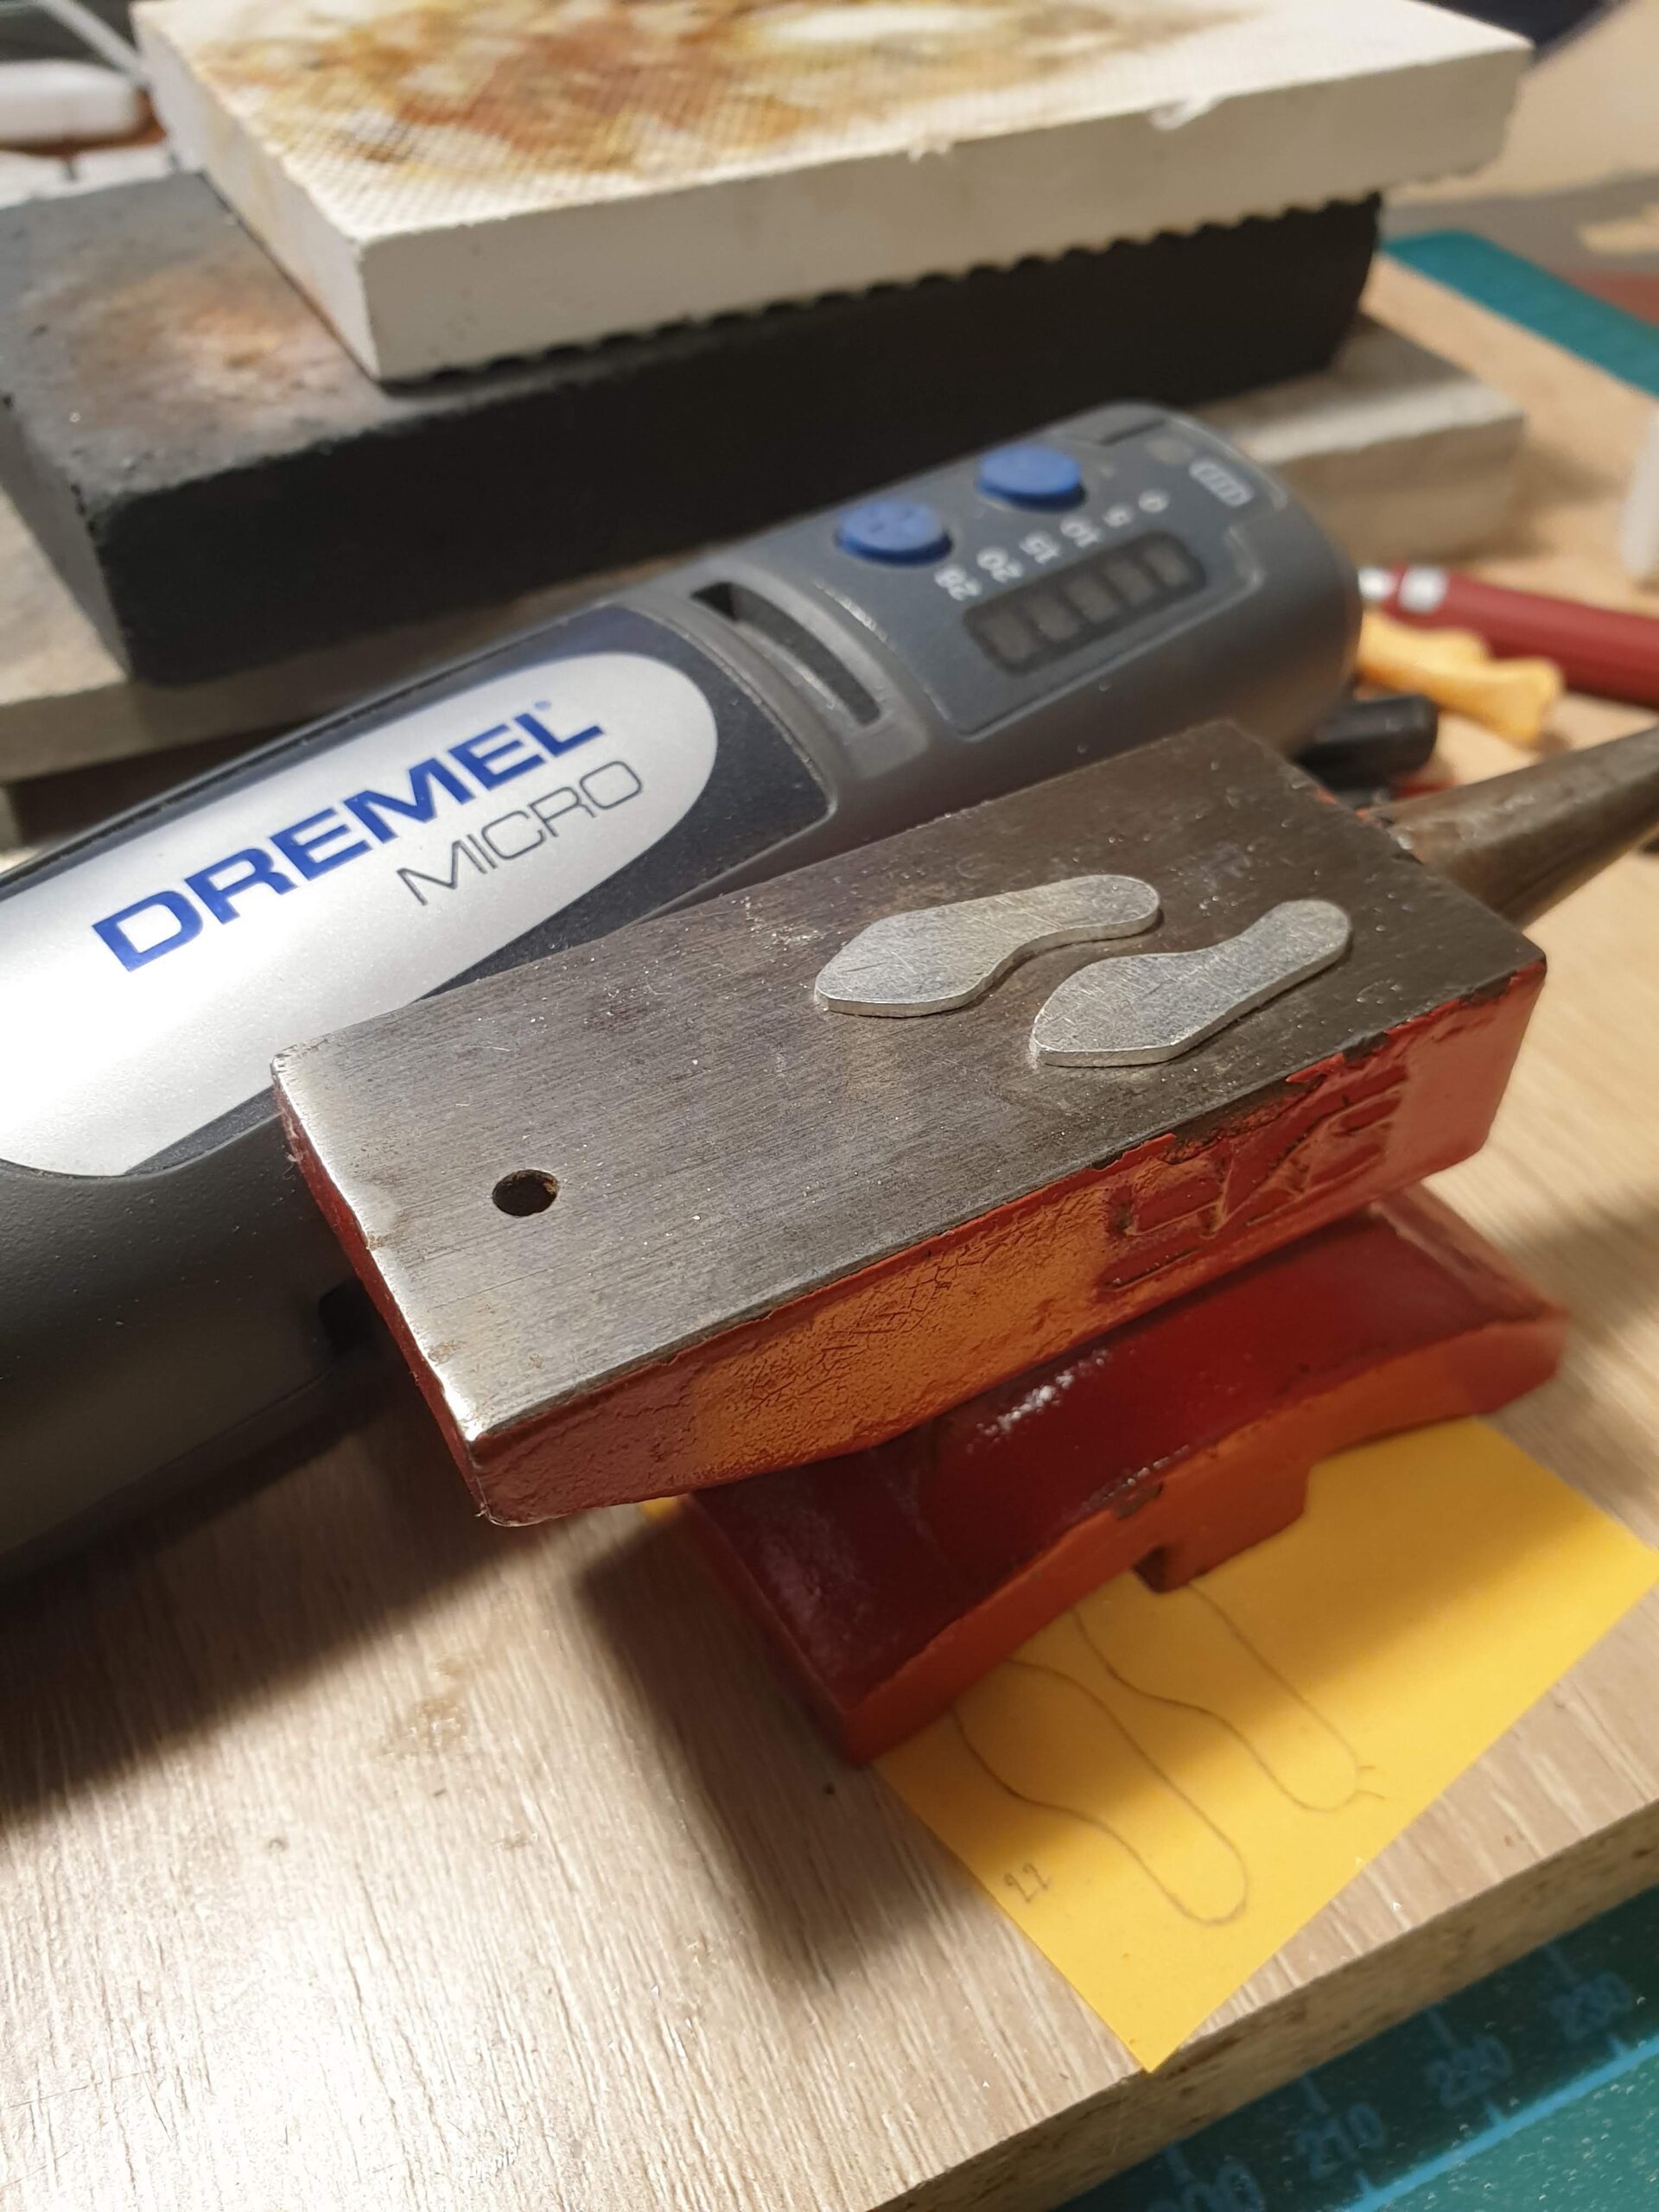
I figured that the process is getting easier when the blanks are equally levelled. A tiny anvil and a bit of hammering do the flattening very well.
Once I was happy with the shape of my soles I filed down all the edge on one side. This trick gave a nice nifty touch to the soles, which made a huge difference to the overall sandals design.
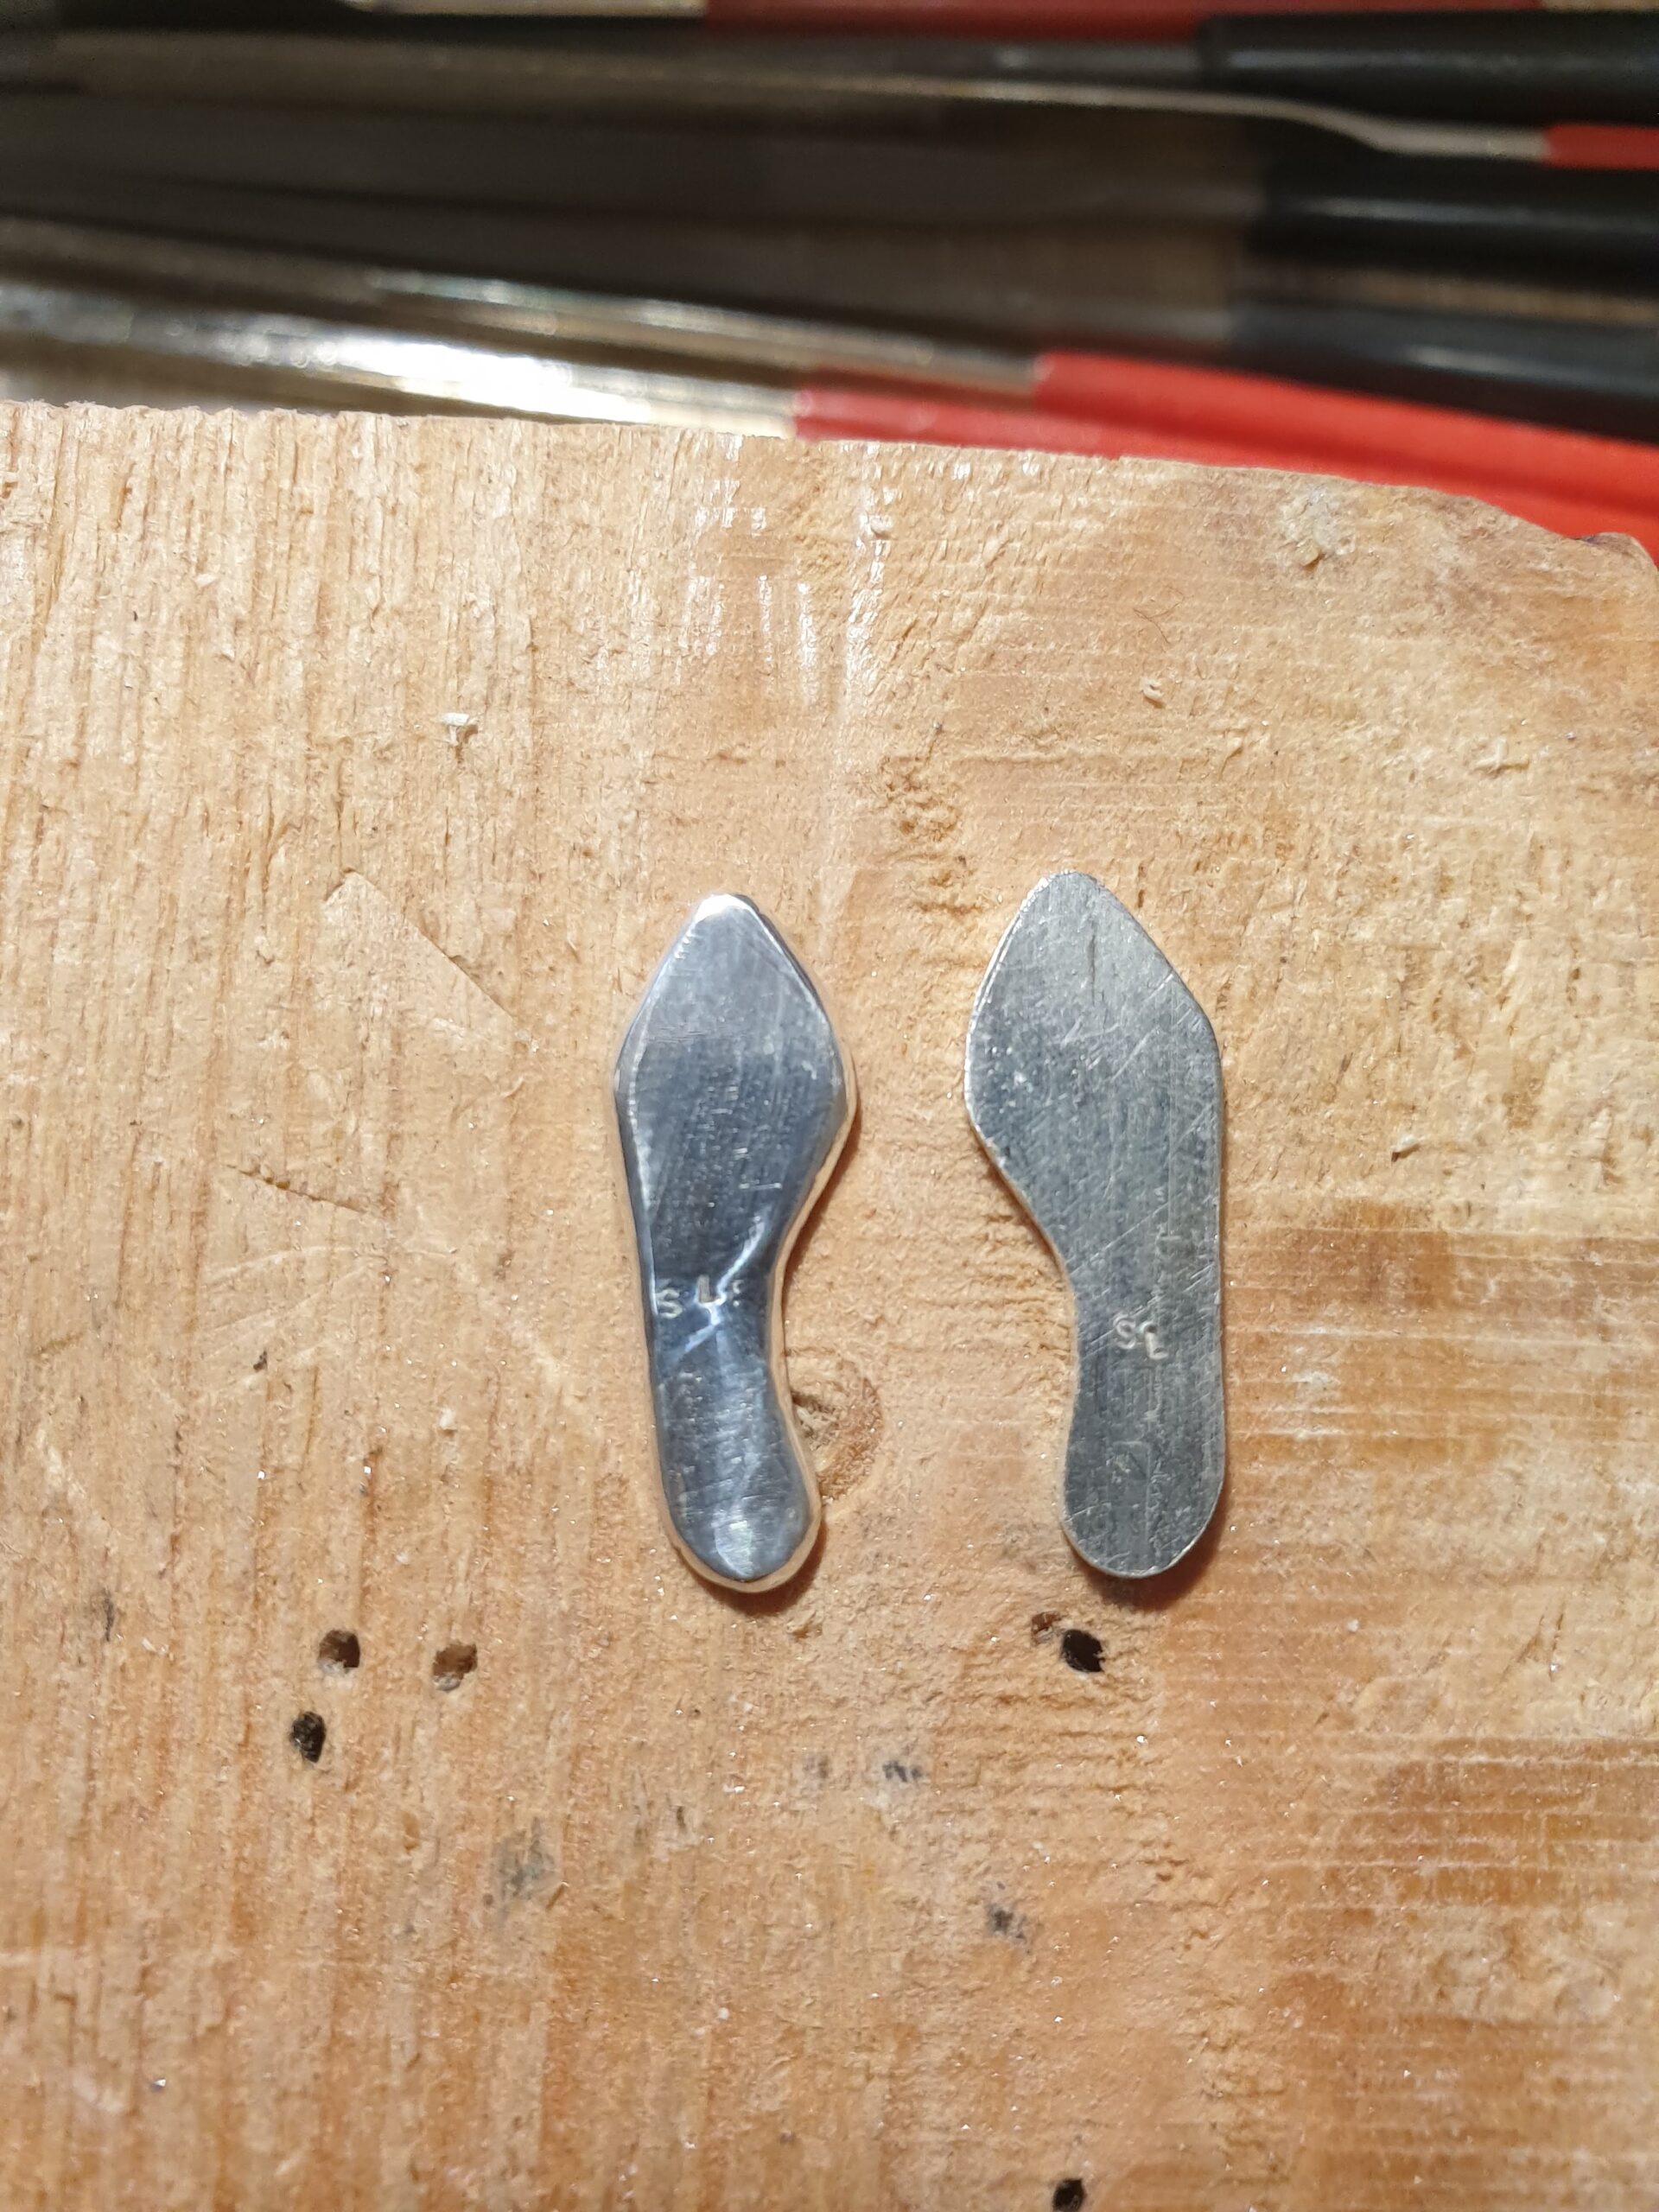
It was definitely a good idea to flatten the soles once again and polish them from both sides. Because the next step was the bending. Once bent it would take hell lot more time to get the same shiny effect on the soles surface.
Mounting heels
The hardest part of the tiny shoe making is to produce a good looking and fine fitting heel. It took me several attempts and lot of hours trying to get it right without metal casting experience as well as equipment.
In my first iteration I tried a technique used for making pins. A piece of wire hangs a bit above the heating brick and flame heat up its lower end. Wire melts on one side forming a droplet which should be easy to file down to a heel shape. The problem I discovered was that it makes a weak spot where wire and a droplet are joined. Even though I was being careful it broke both times I tried to shape it with a file.
Until I am ready for real silver casting, there is another way to make a spike heel. I used it before and it seemed to work fine, even though it is far from perfect. The idea is extremely simple – I carved out a rough heel shaped hole in my coal heating brick and melt silver scraps right on top of it. As a result I got a strong solid piece, but it required a lot of afterwork to make it look nice.
A friend of mine, an experienced dental specialist, offered to help me out with metal casting. It seems like a great next challenge in my jewellery adventure, but I decided to complete this project in the old school fully manual way. And to be honest I think it went quite well – I was even offered to sell one of those blank slippers as a pendant.
Decorating the slippers
The offer turned out to be not too serious after all, so I started to prepare myself for the next phase. Even though the high heeled slippers look surprisingly good I did have in mind to decorate them. And this time I was determined to set some stones.
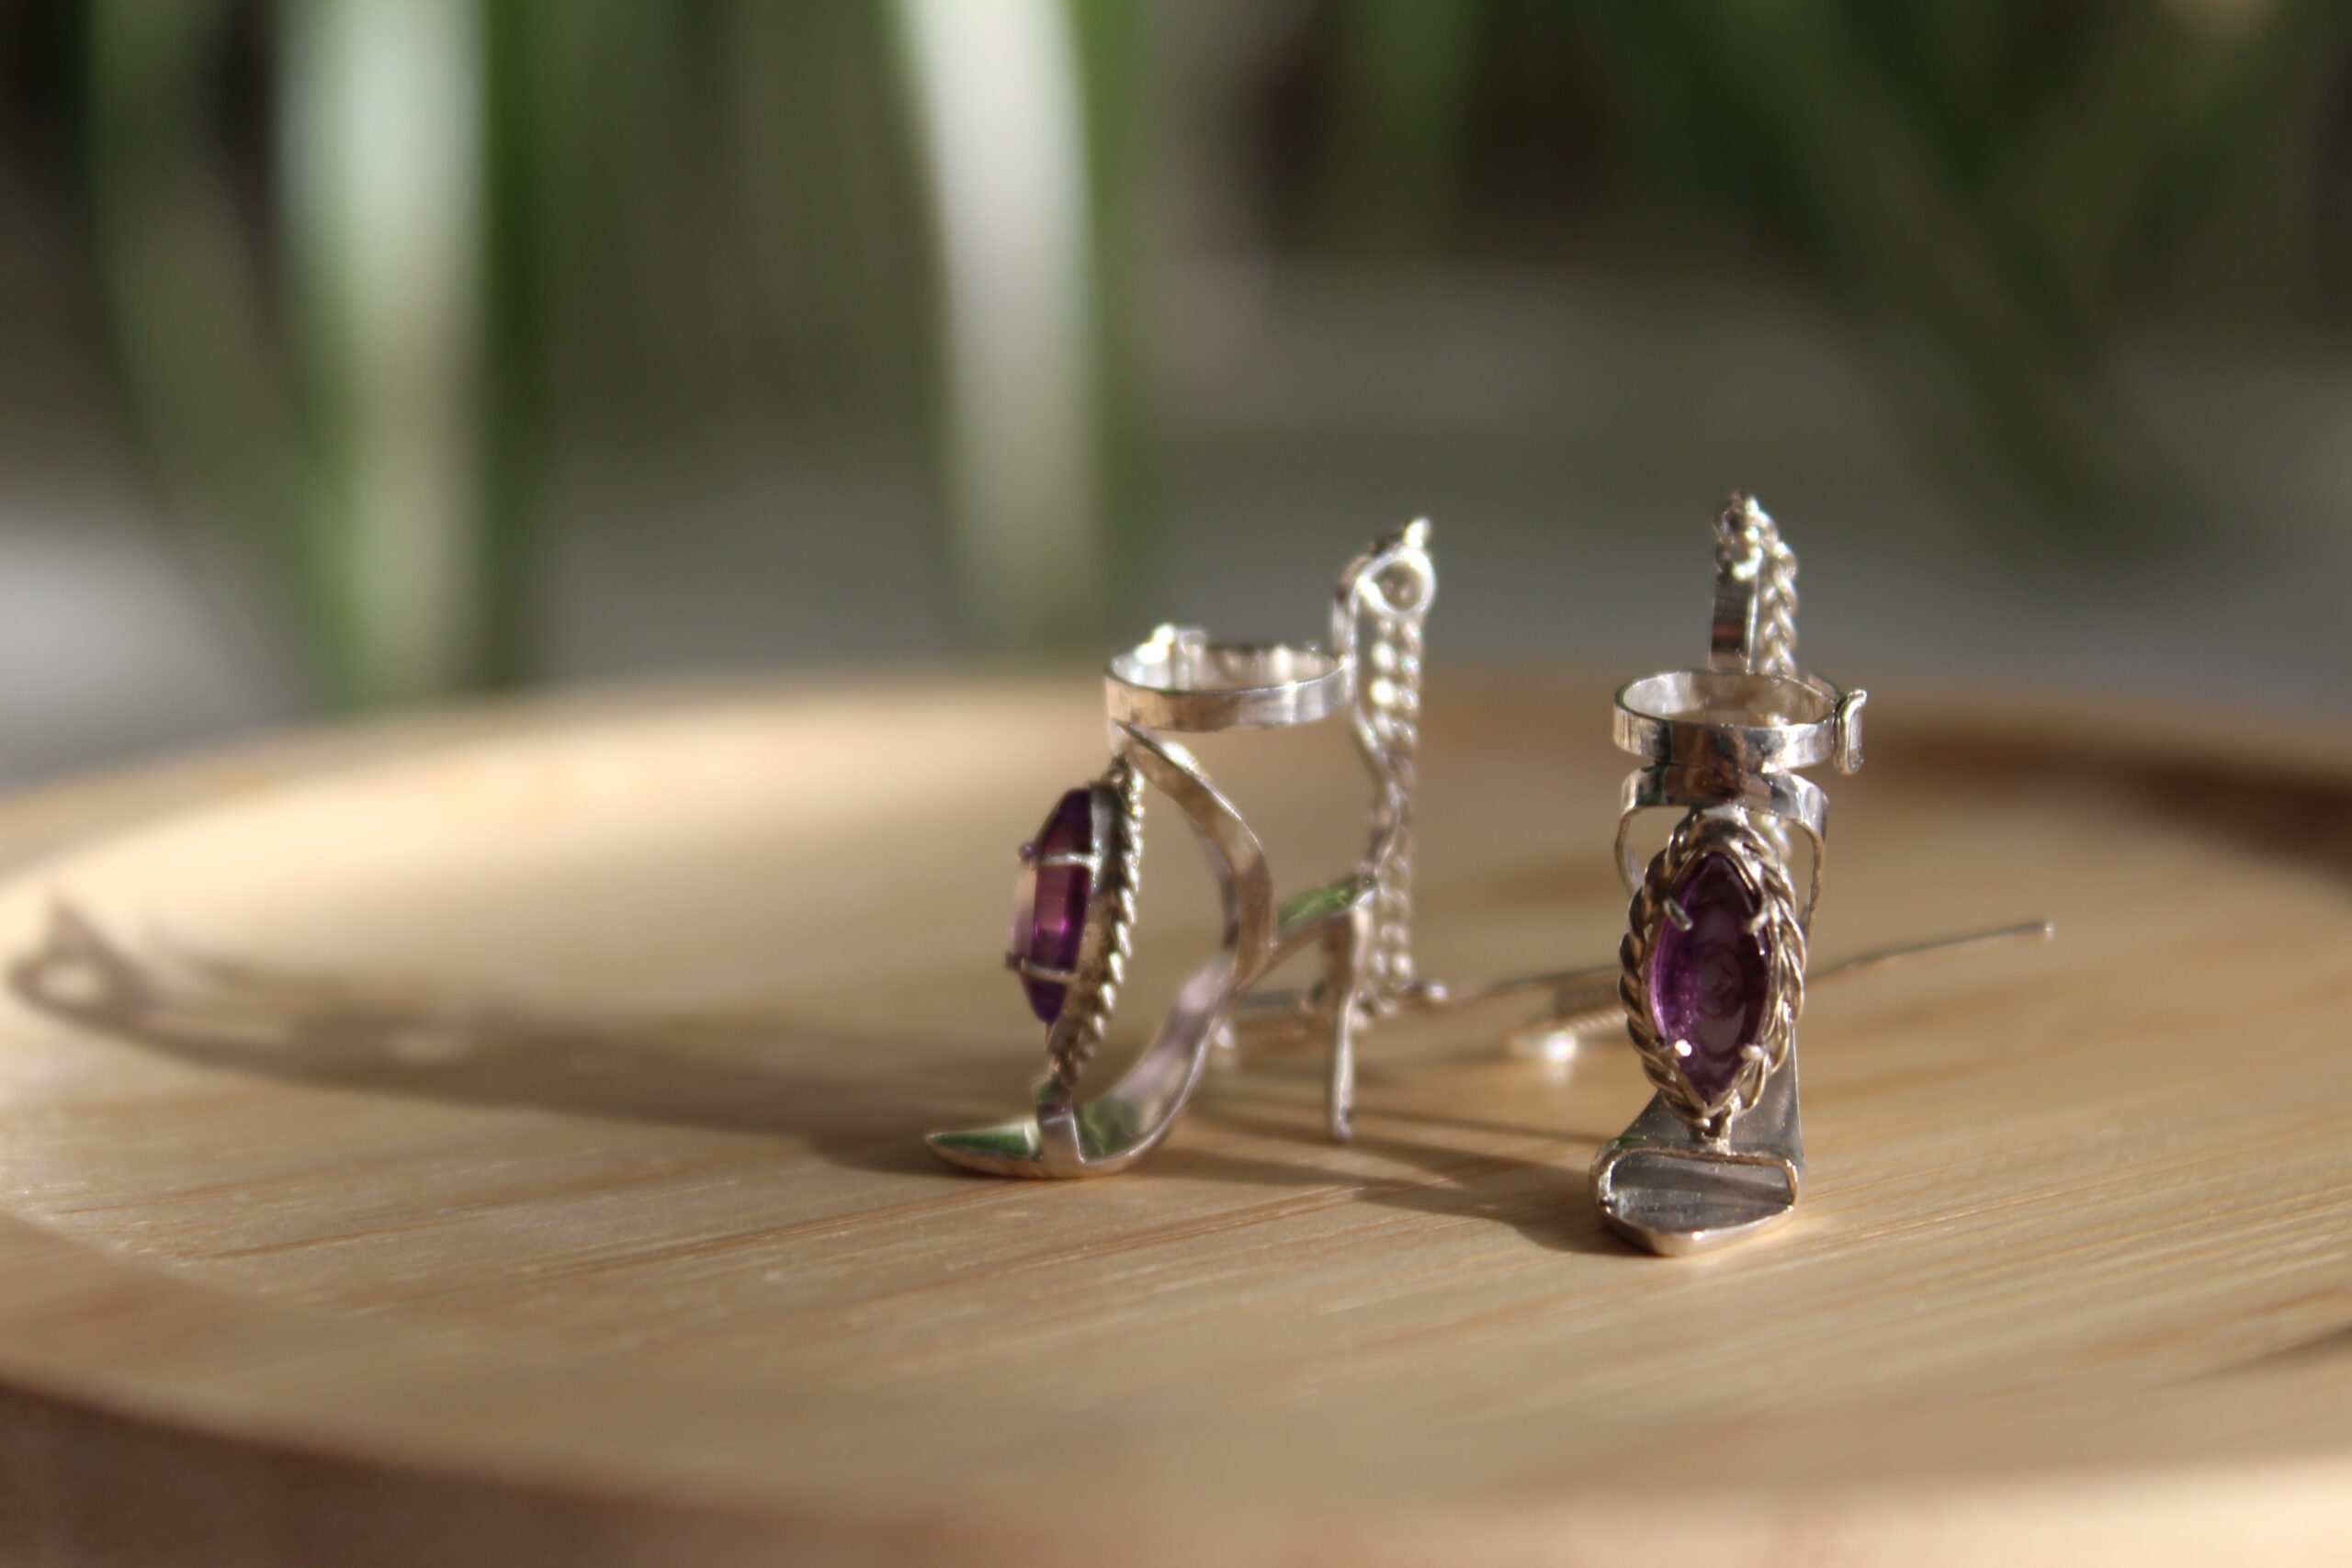
I’ve got a couple of tiny cute amethyst marquises in my mineral collection, which are perfect for the occasion. Small and semi transparent they would look lovely on the silver sandals. Having a hard time trying to sketch out a design I decided to go with a flow and try ideas along the way.
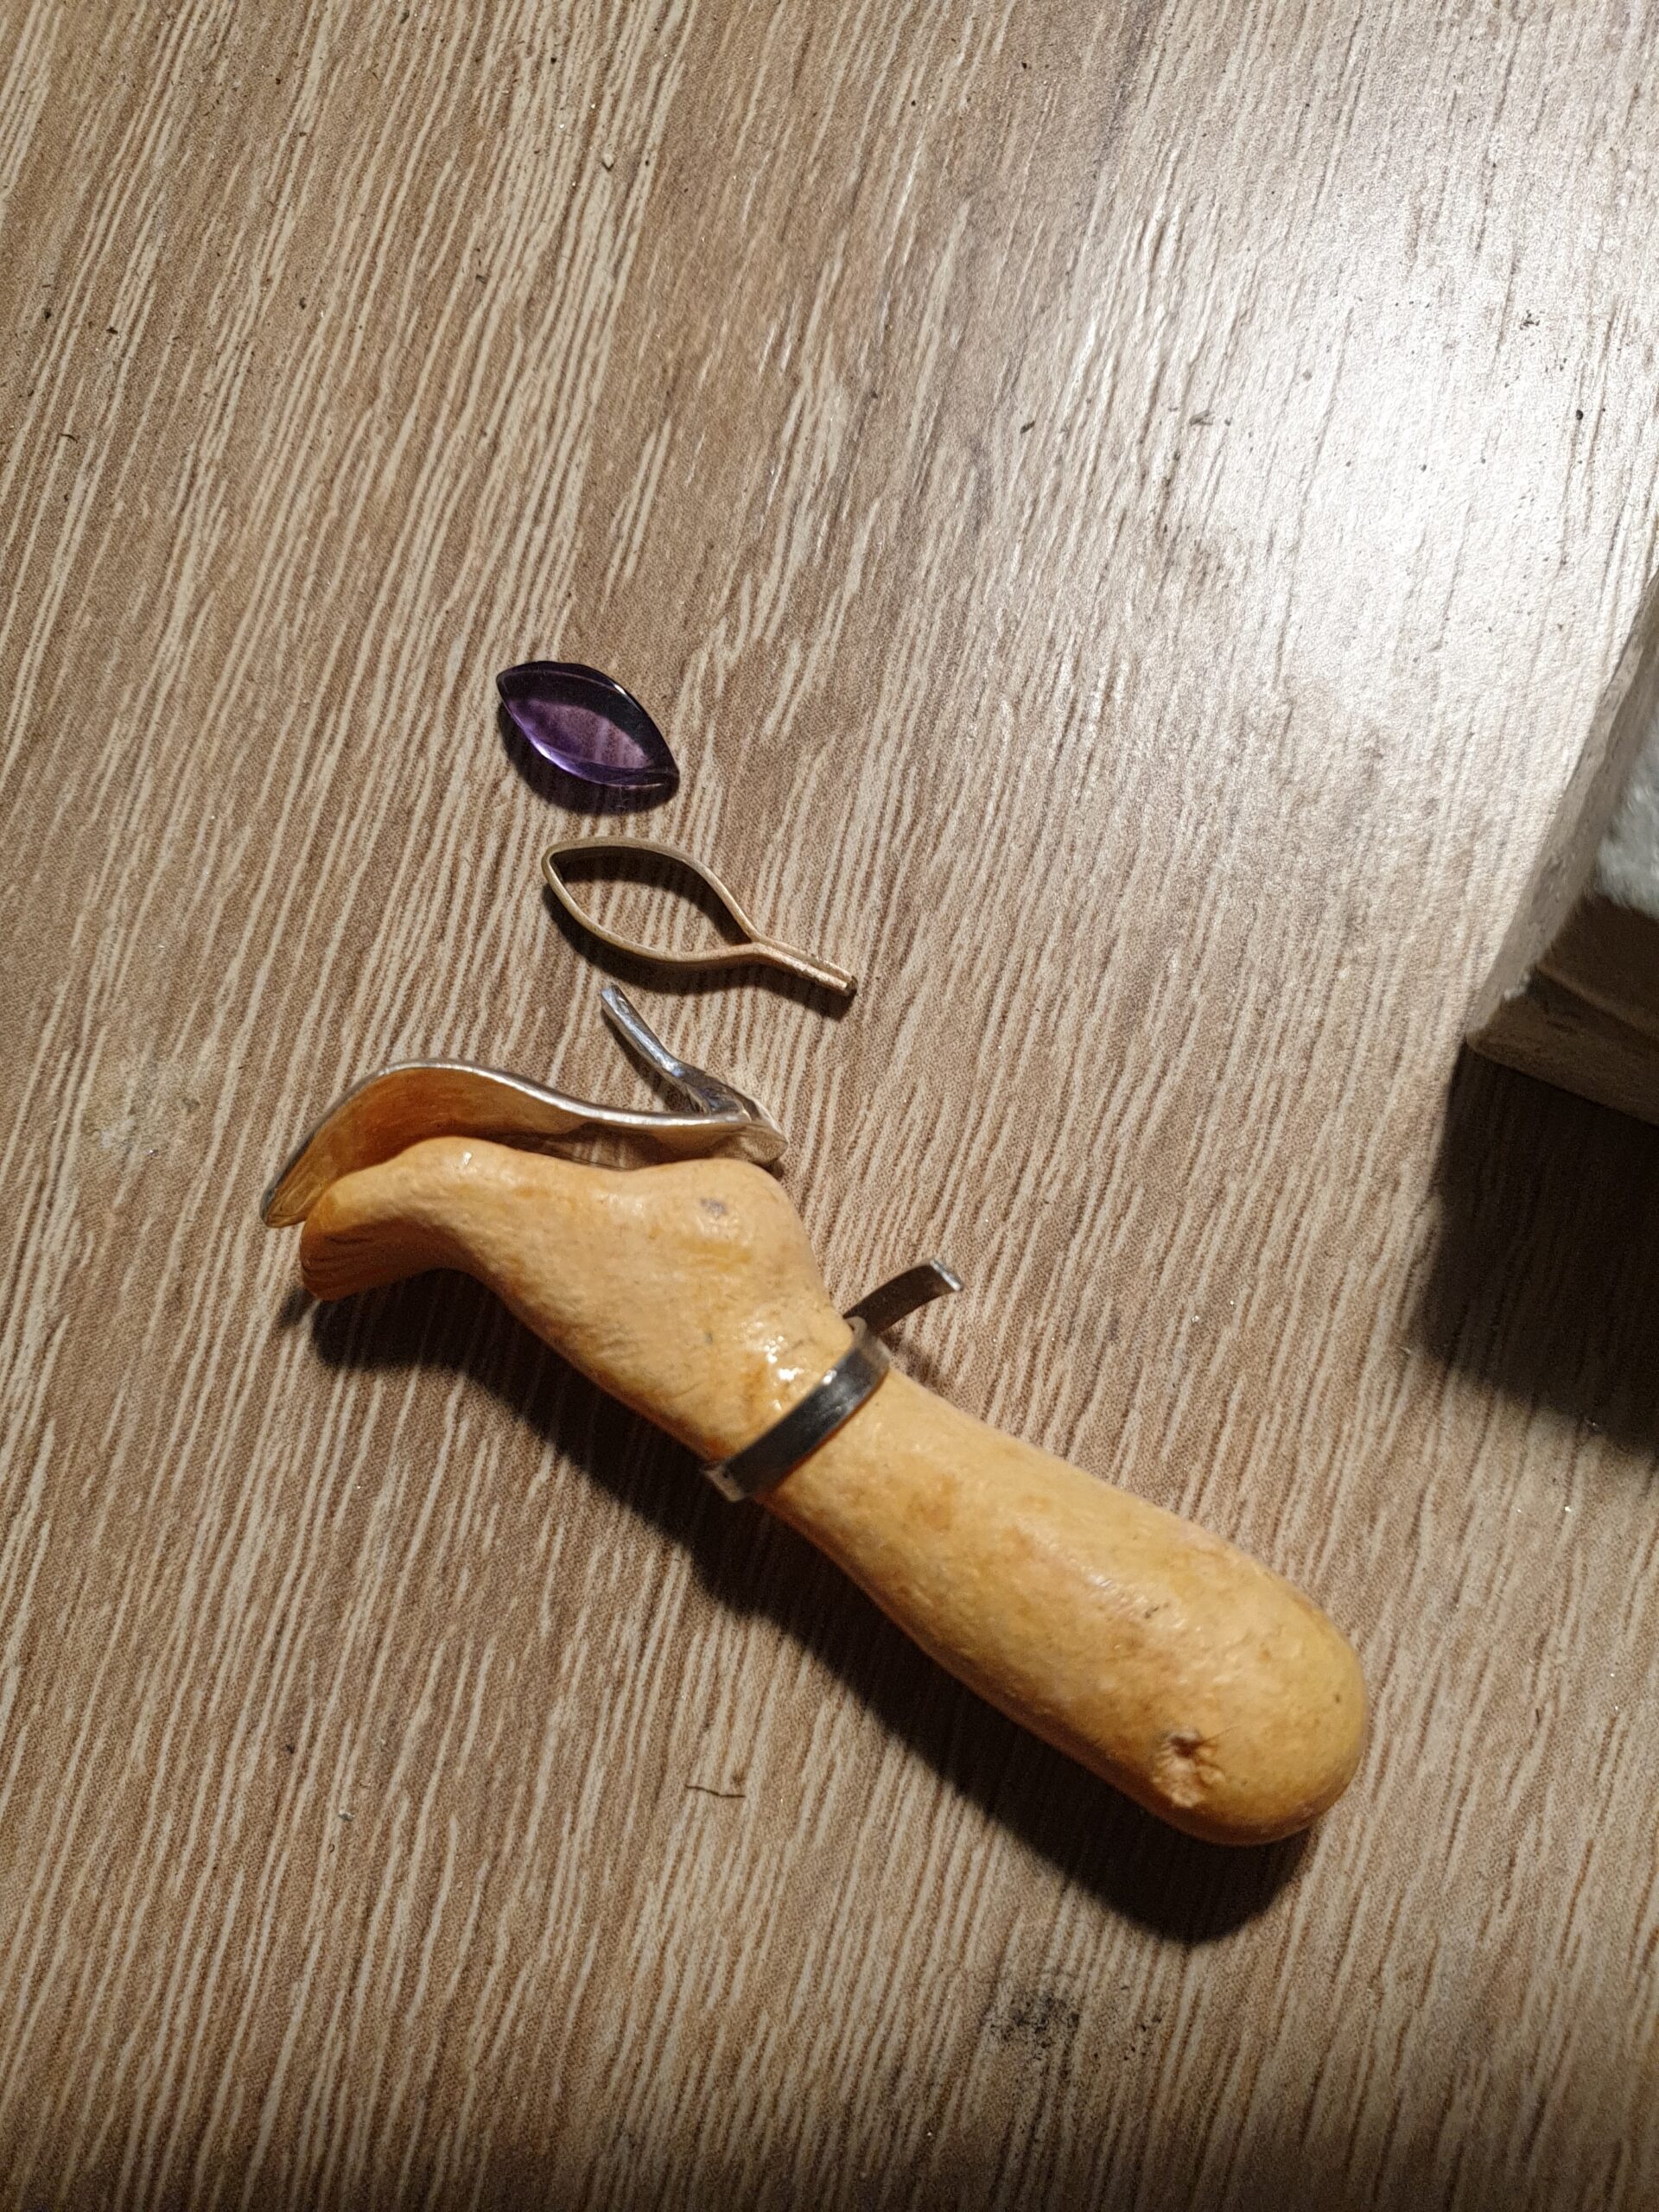
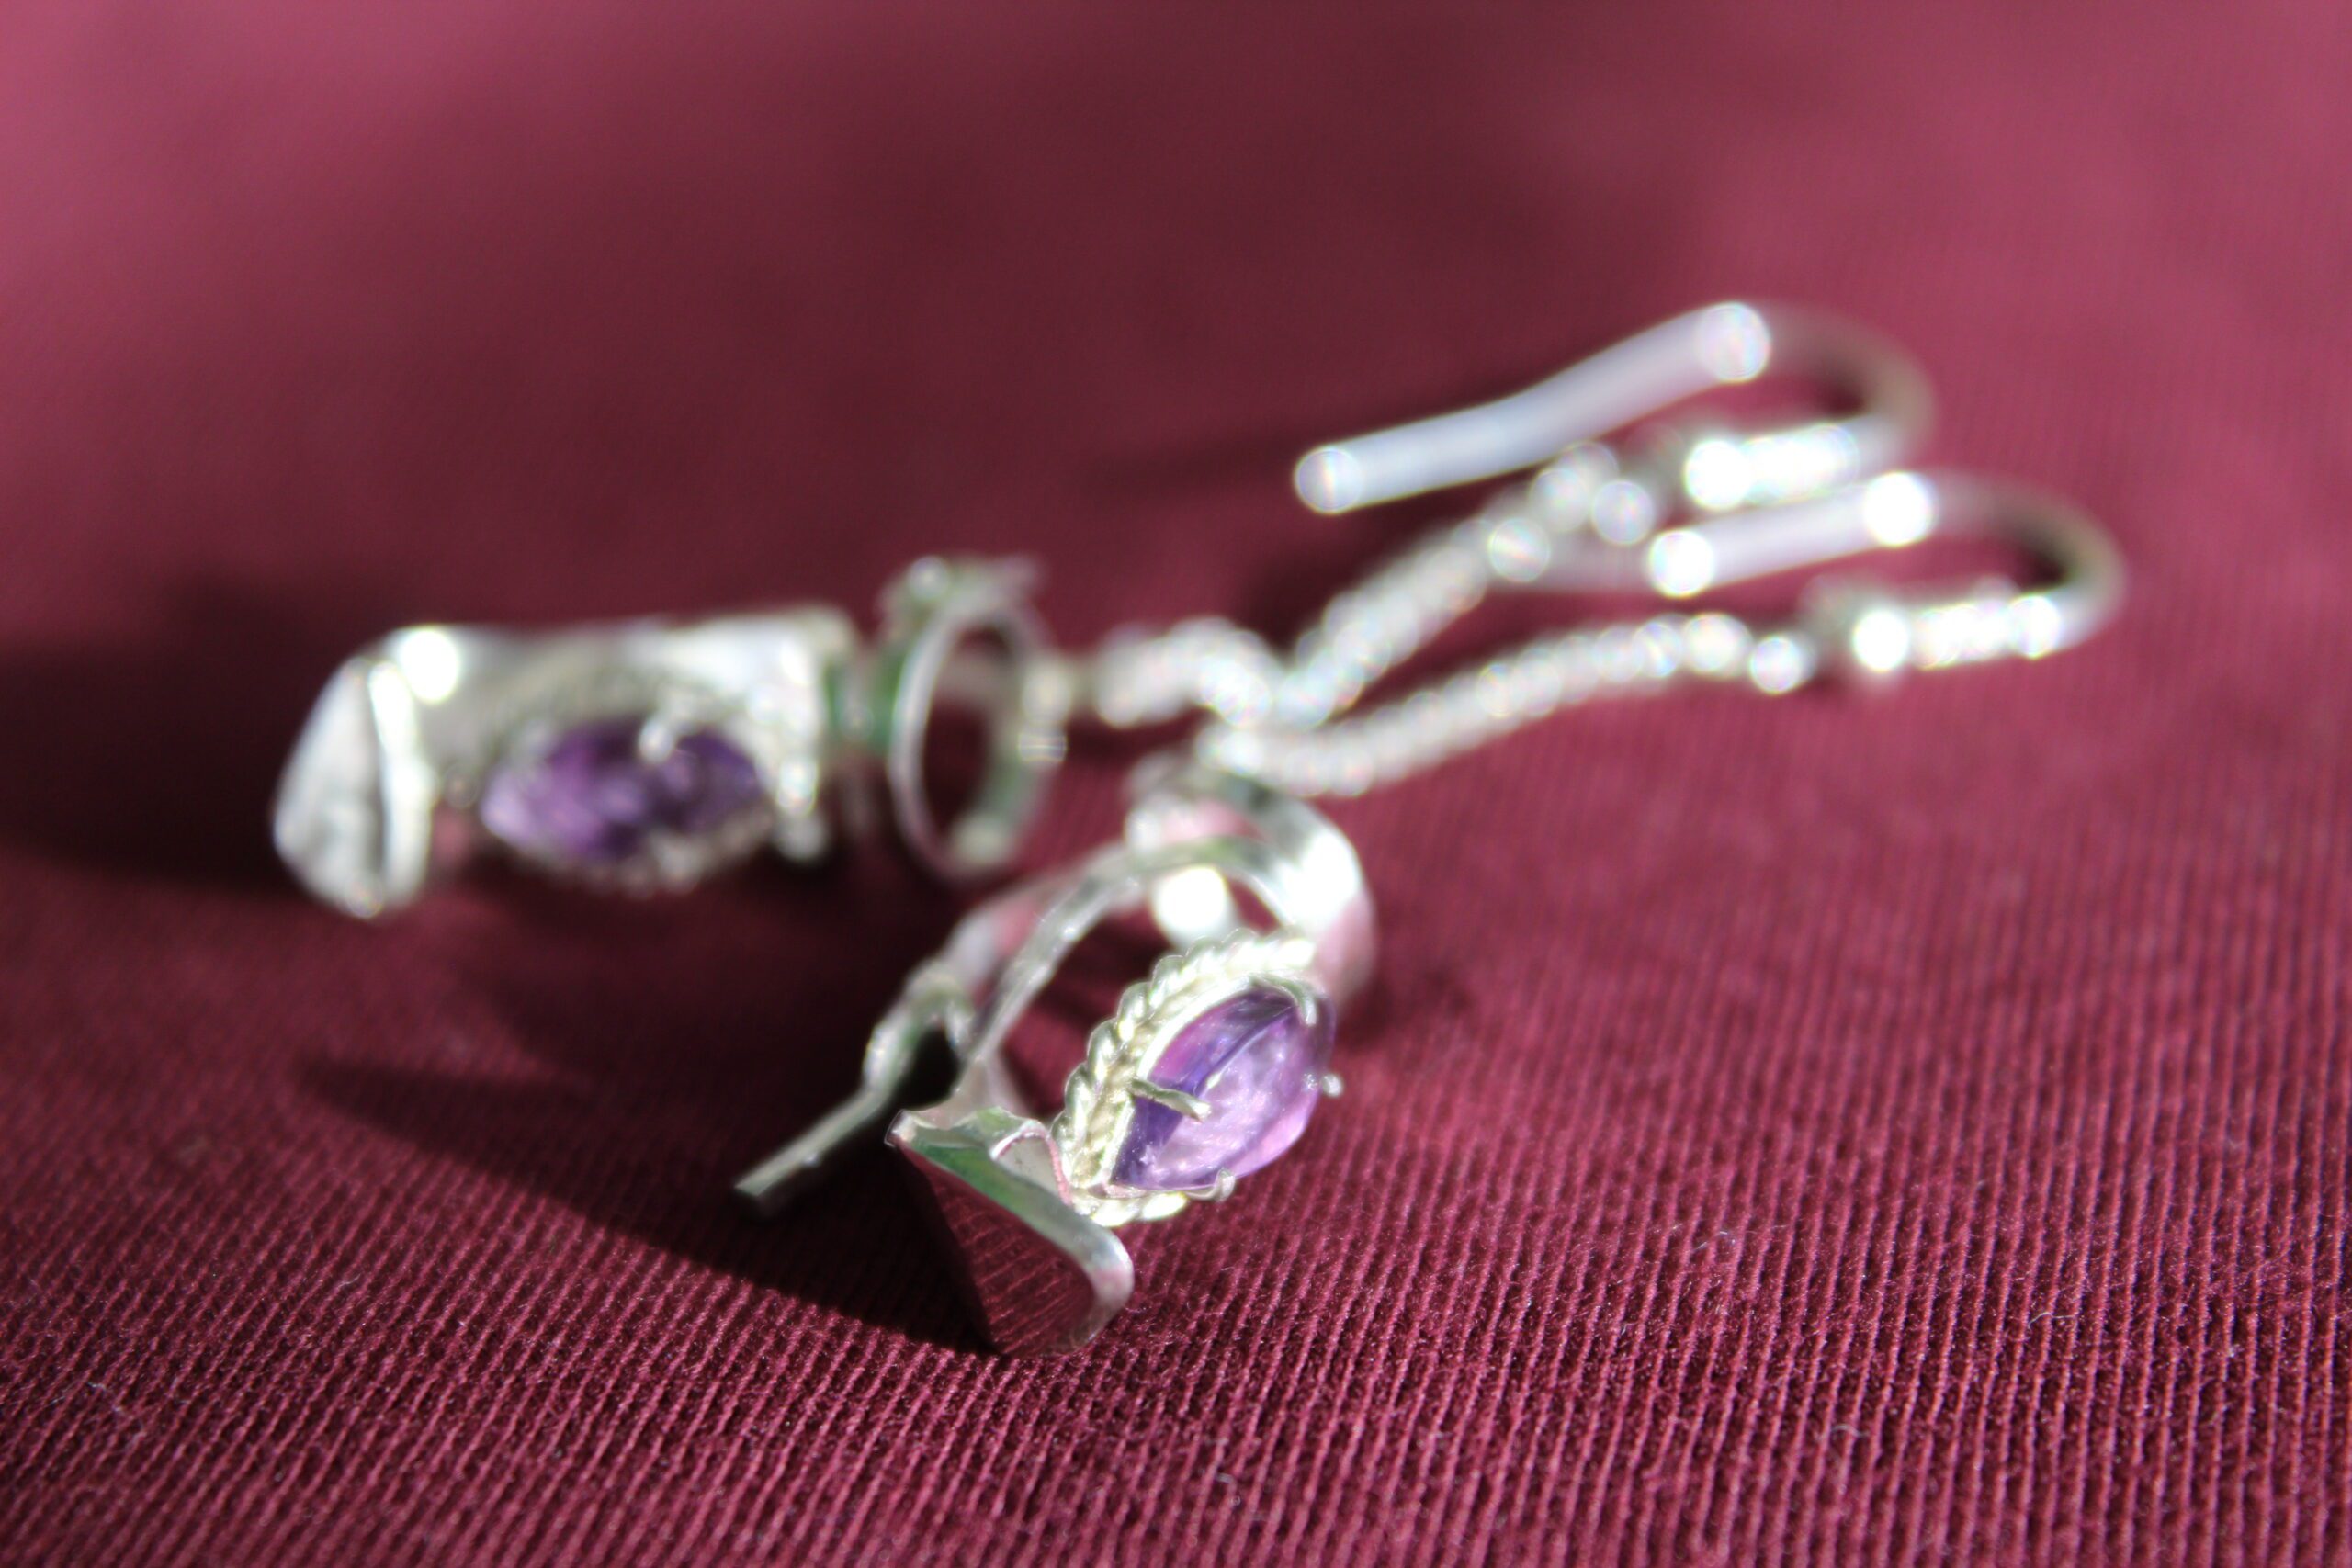
To boost my imagination I even carved a tiny leg out of a polymer clay (first time I ever tried it). Although it looked a little creepy it did help me to figure out the overall pattern I was after. I imagined that the shoe will have a toe strap, an ankle strap and an amethyst set between them. To make sure it will all work I needed a reference point, hence I started with a setting frame for the stone.
There was nothing supernatural – just a loop made out of a 1.2mm strip and some filigree to keep the stone from the bottom. During the fitting it al on the tiny fake leg I figured that the setting frame is a tad short and it will skew all the straps. Naturally I needed to add something around as an extension. My eye got caught by a piece of twisted silver wire scrapped from a previous project. Mental note to myself: spirals can consume a lot of solder unless you fit them properly to the frame.
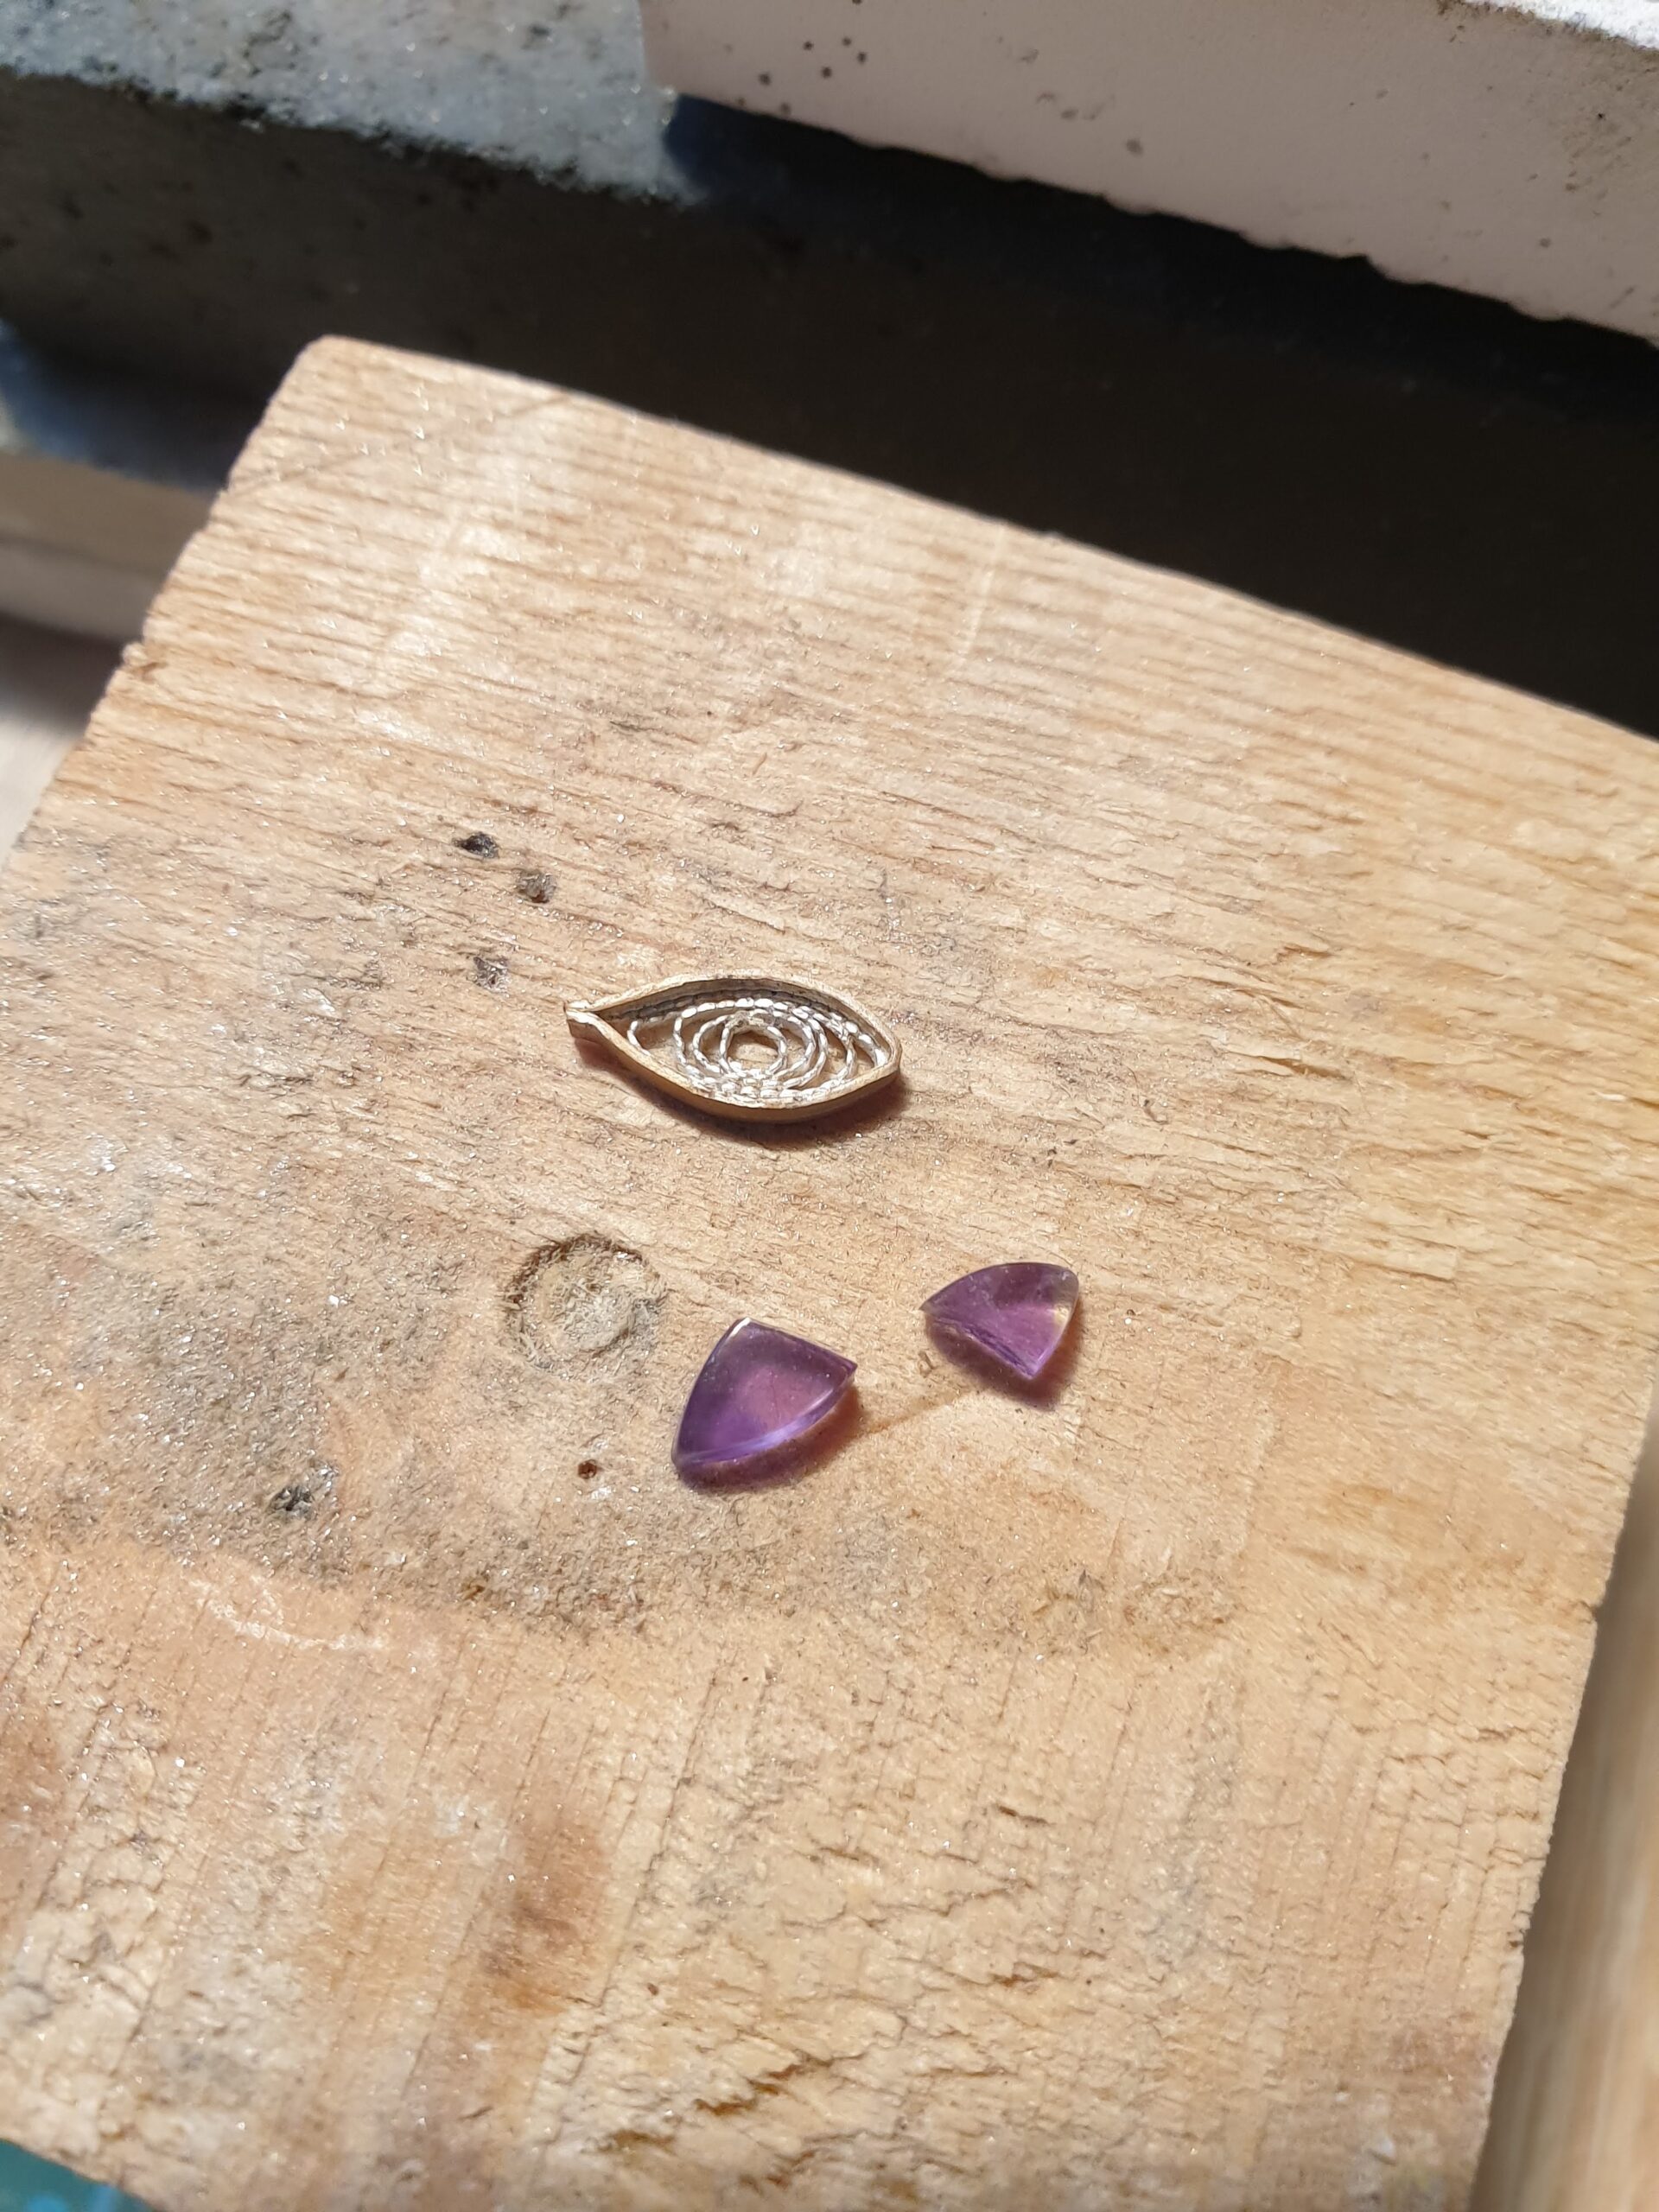
It is interesting that when my excitement goes a tiny bit over the top something happens. I was grinding the inside of the setting frame to make sure the amethyst will sit there comfortably and put it in its saddle on and off like hundred times. And all of a sudden there was a sound no jeweller ever wants to hear – crack. Damn. Snap, back to reality (cheers, Eminem). This was pure luck that I had another amethyst just like the broken one. However, the setting frame was no good for it and I had to start over.
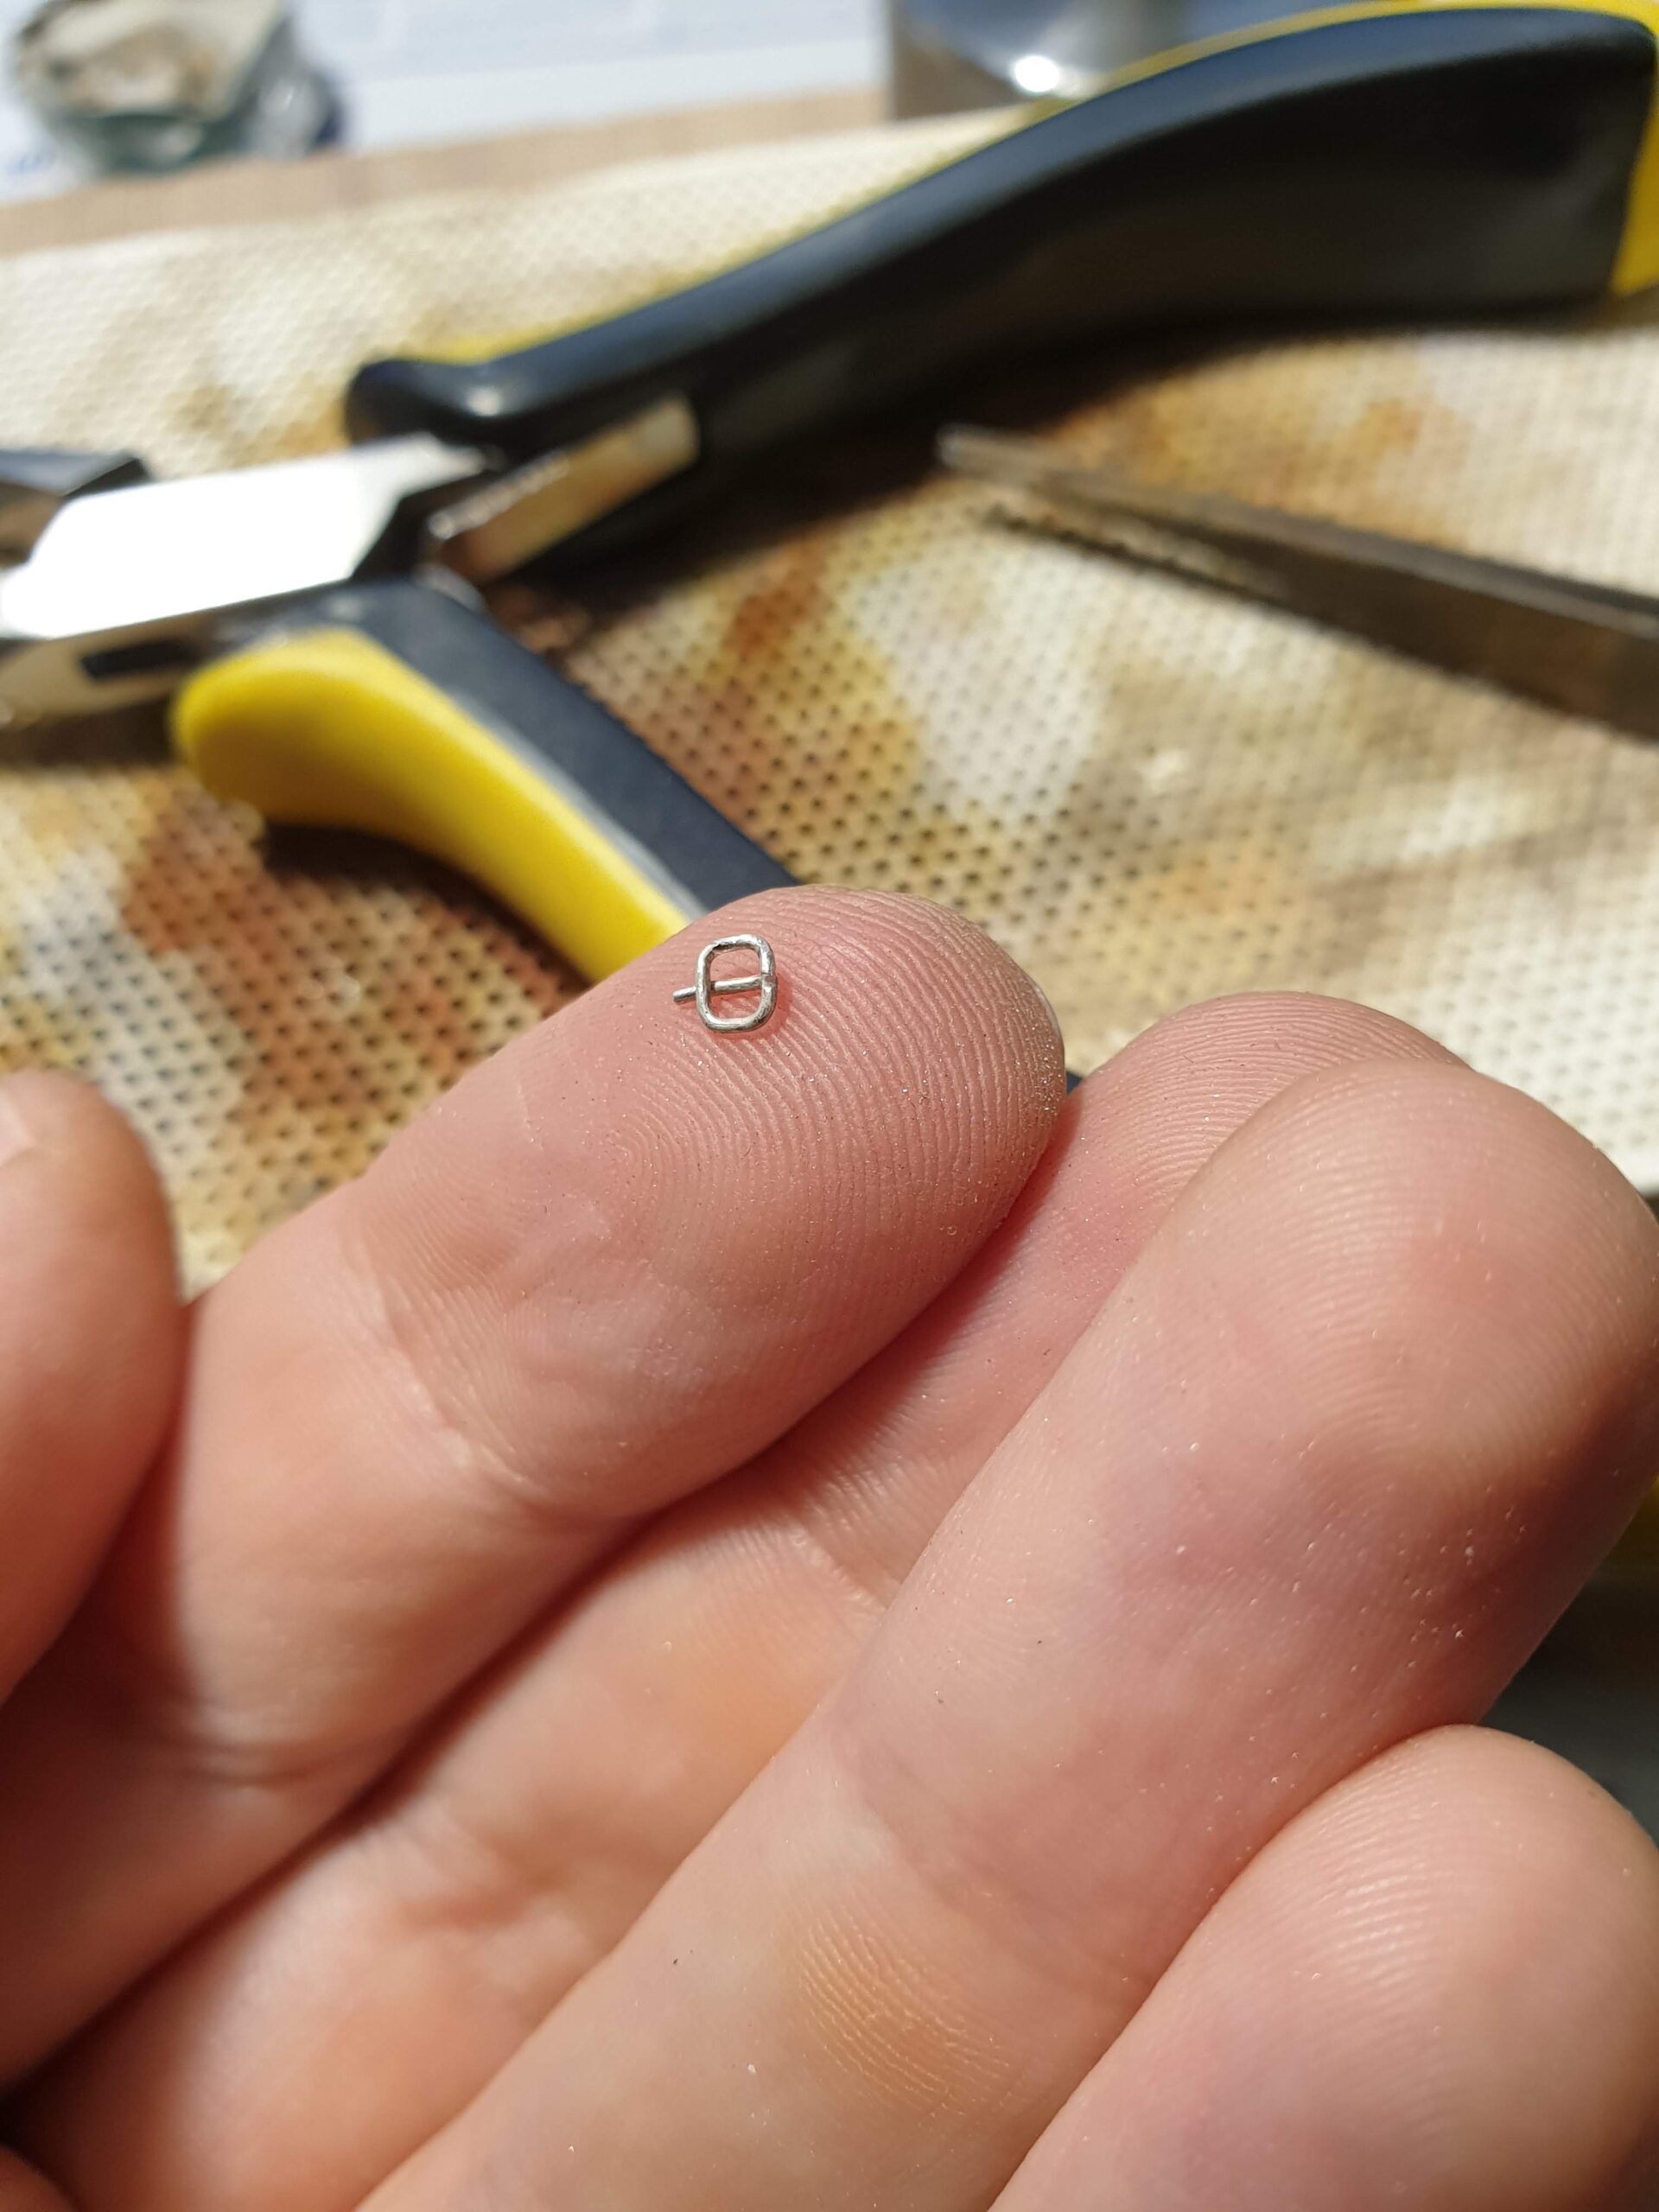
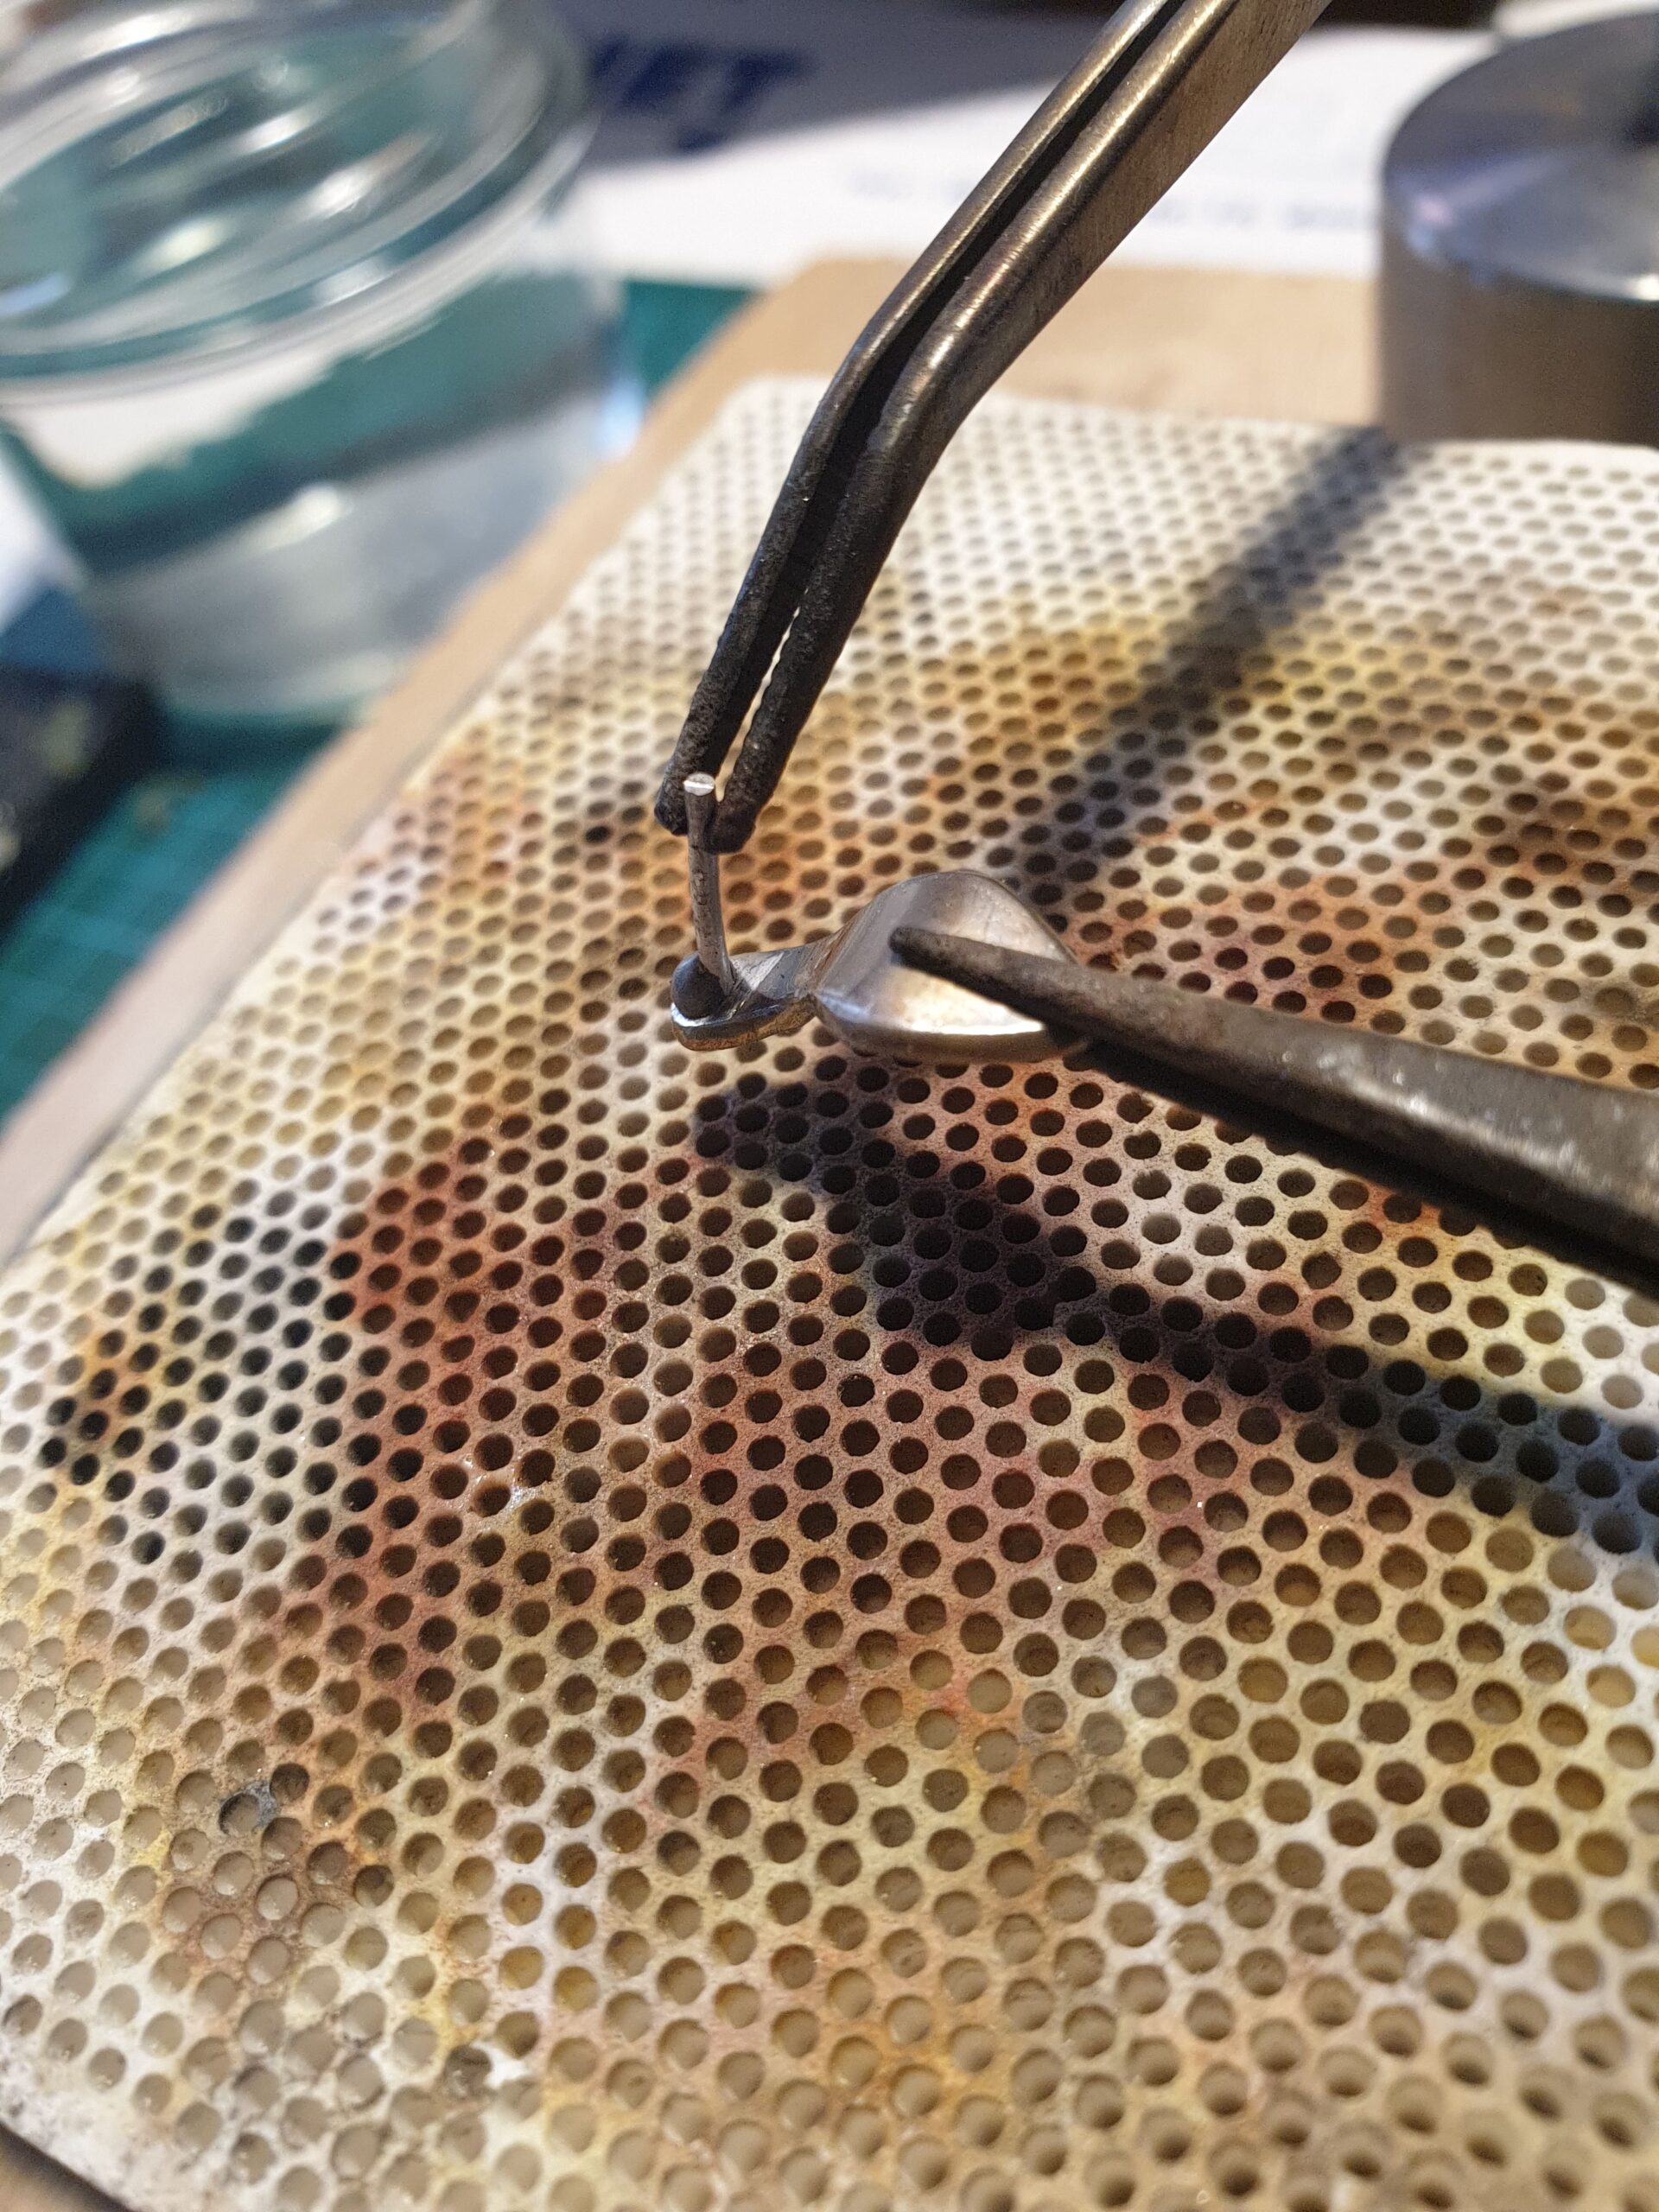
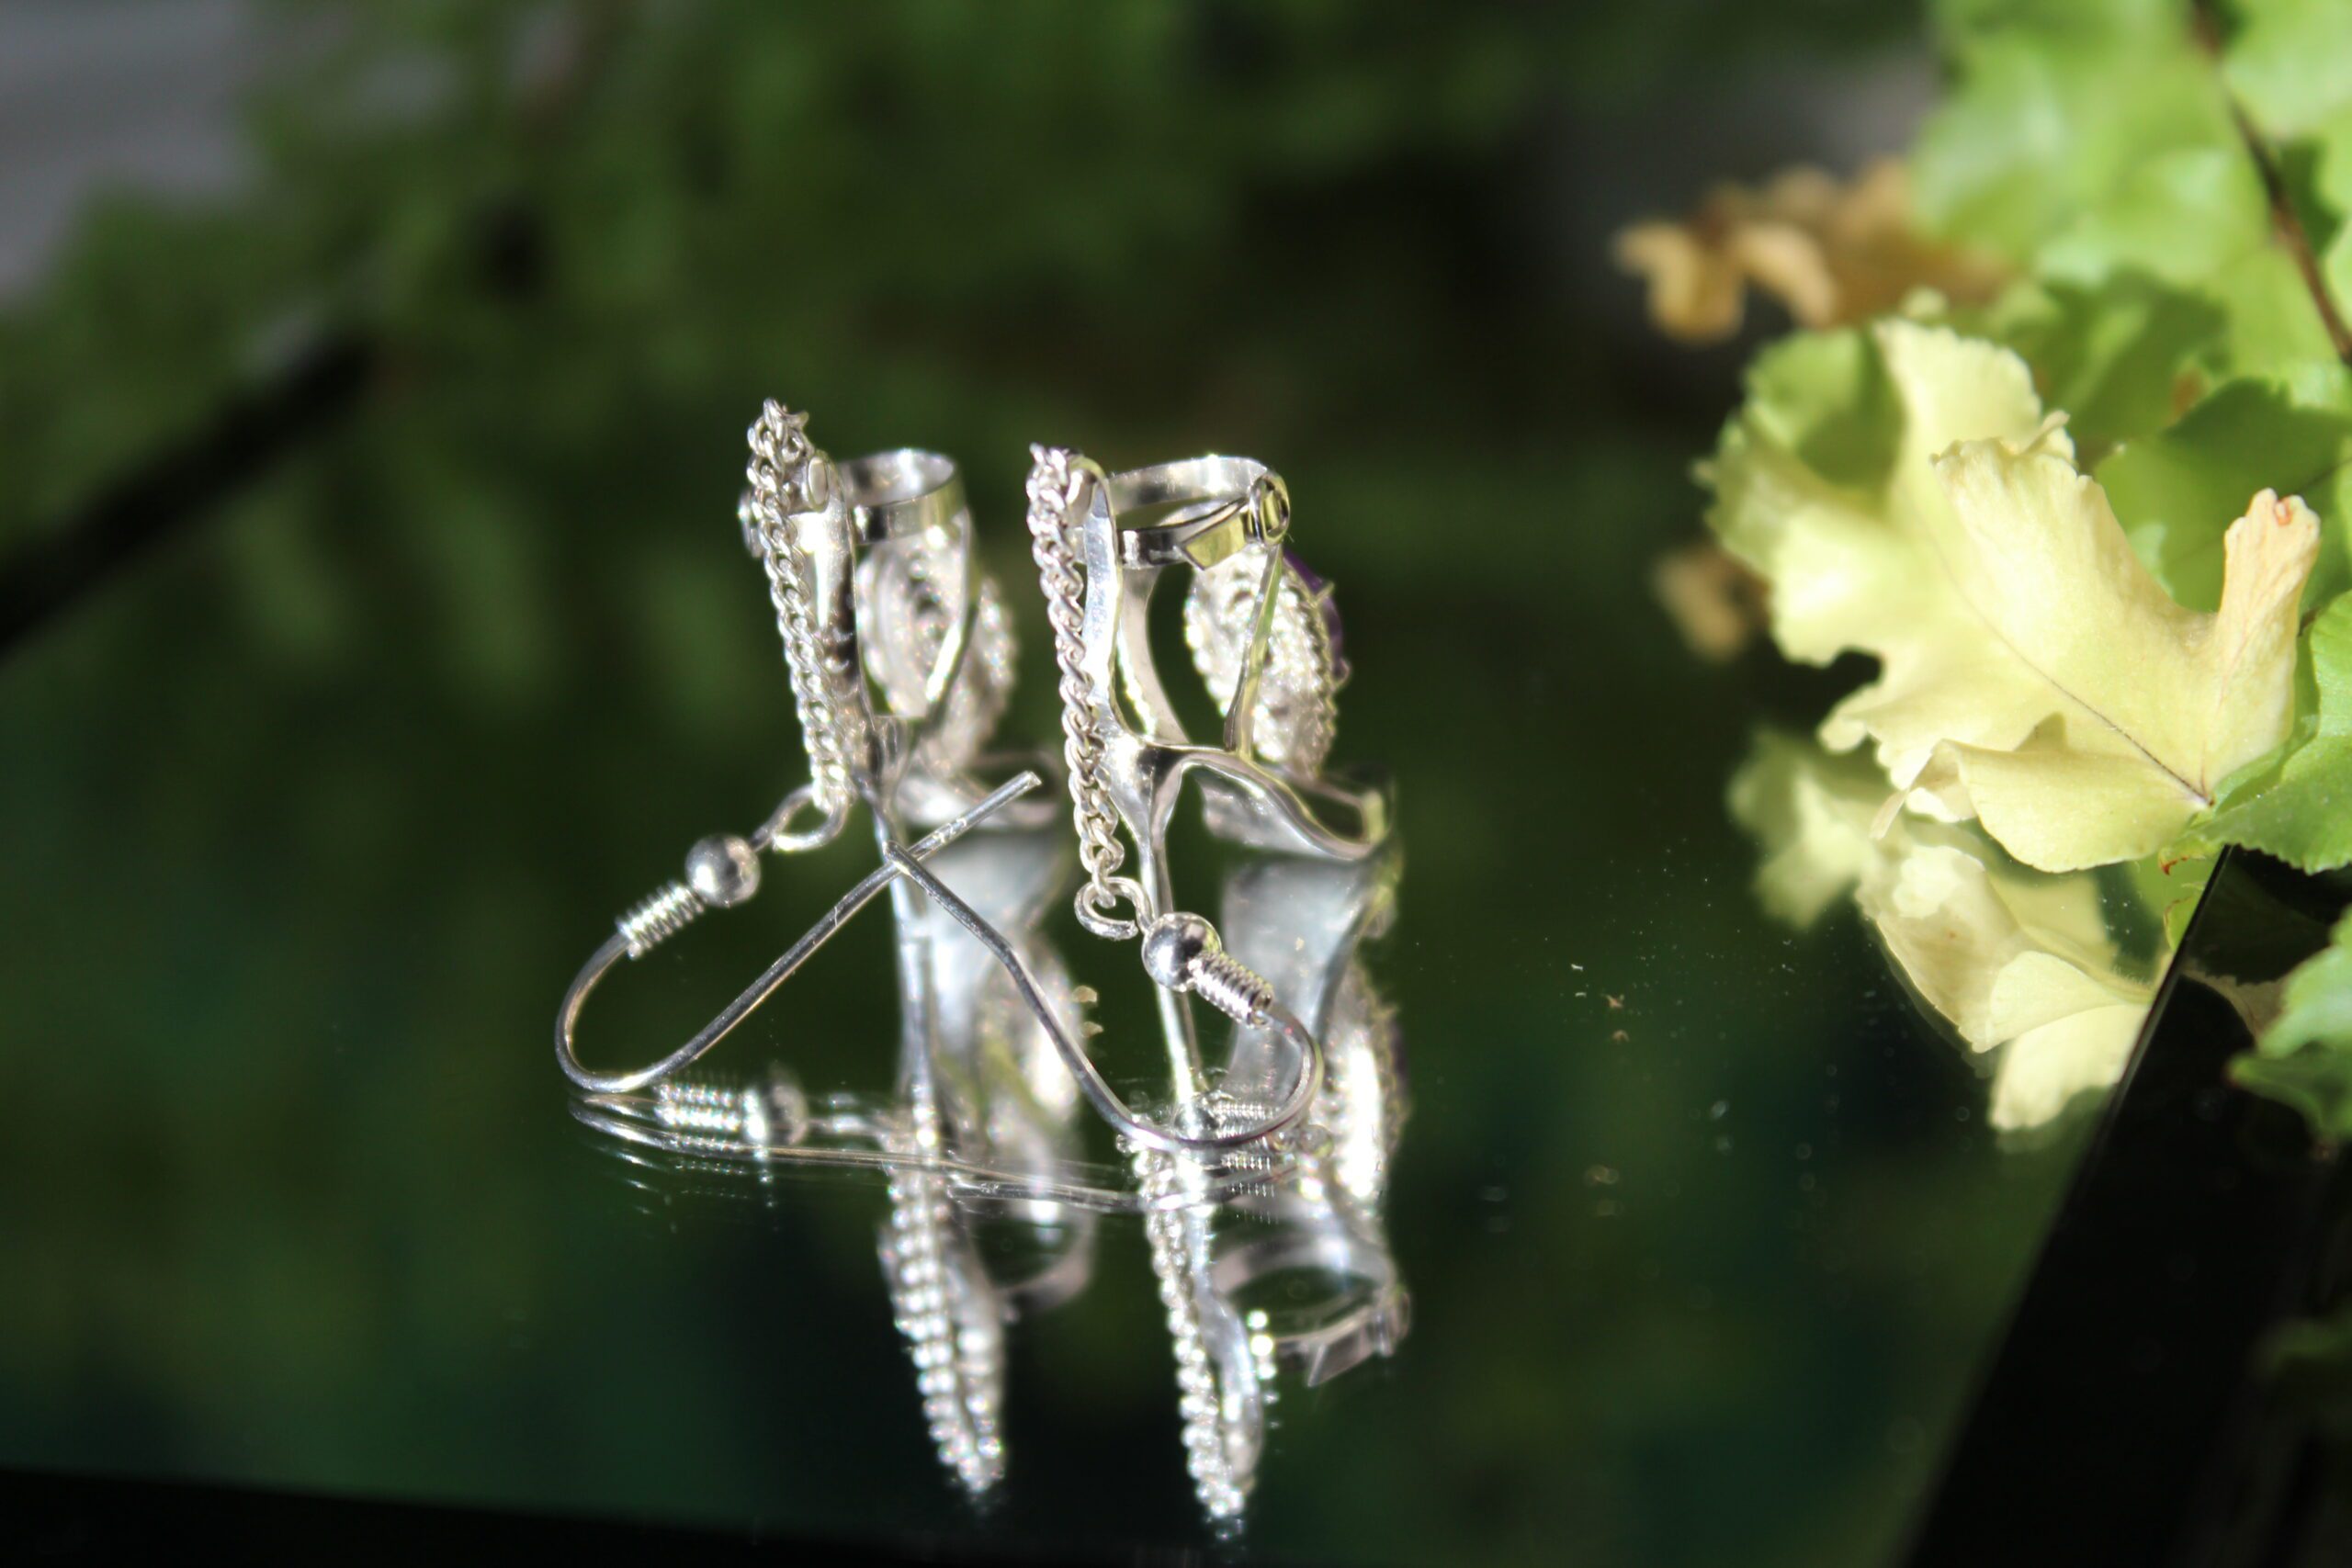
For those who know me close enough it won’t be a surprise that I adore tiny micro things. So here was my chance to produce one of those – a tiny clasp for the ankle strap. I have done it once in a previous project and I must proudly confess that I’m getting better at this. Oh, come on you gotta admit – this is cool! And freaking cute!
Another little trick I figured during the final assembly of all elements. The setting frame for my amethyst marquise needed to be equipped with prong to hold the stone tight. Since the whole idea of these earrings is to be fragile and delicate I made the prongs out of the thinest wire I had in stock. If I’d cut the prongs prior to soldering it would have been quite tricky to get them attached properly. Hence, the hack is to bend a longer chunk of wire in a shaсkle and solder it as a whole. This way heat from the torch dissipates evenly and solder doesn’t flow all over the place.

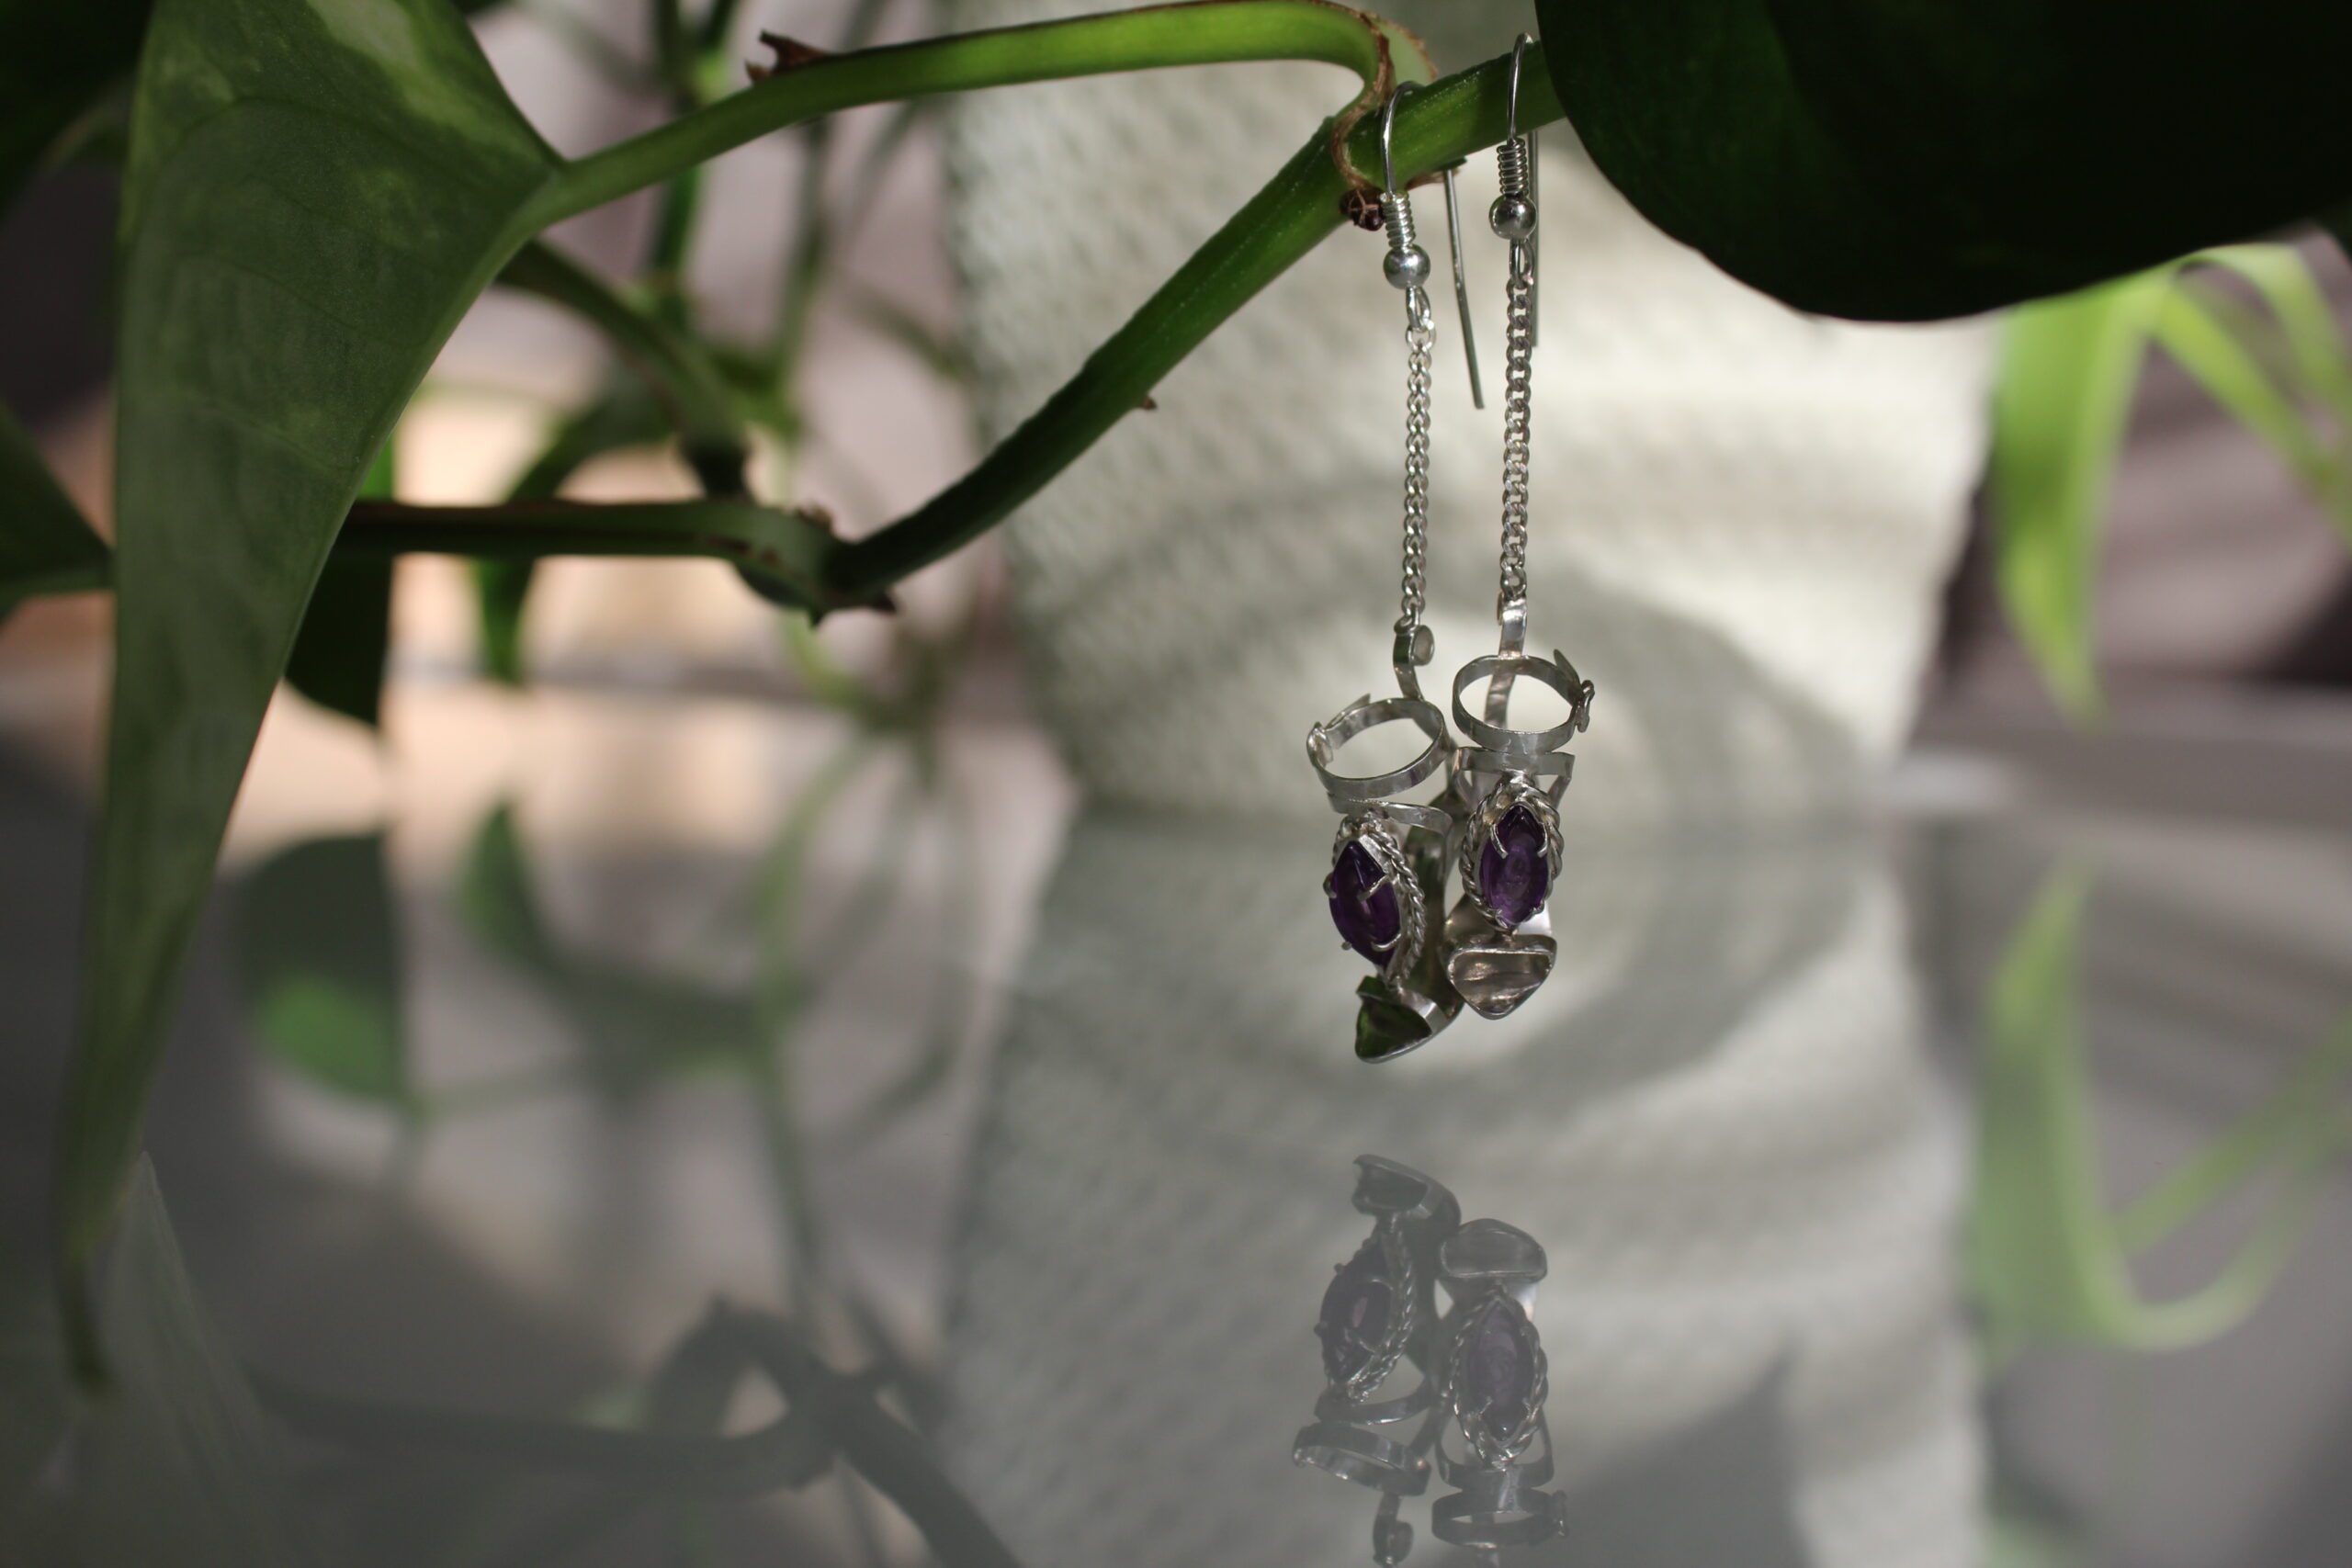
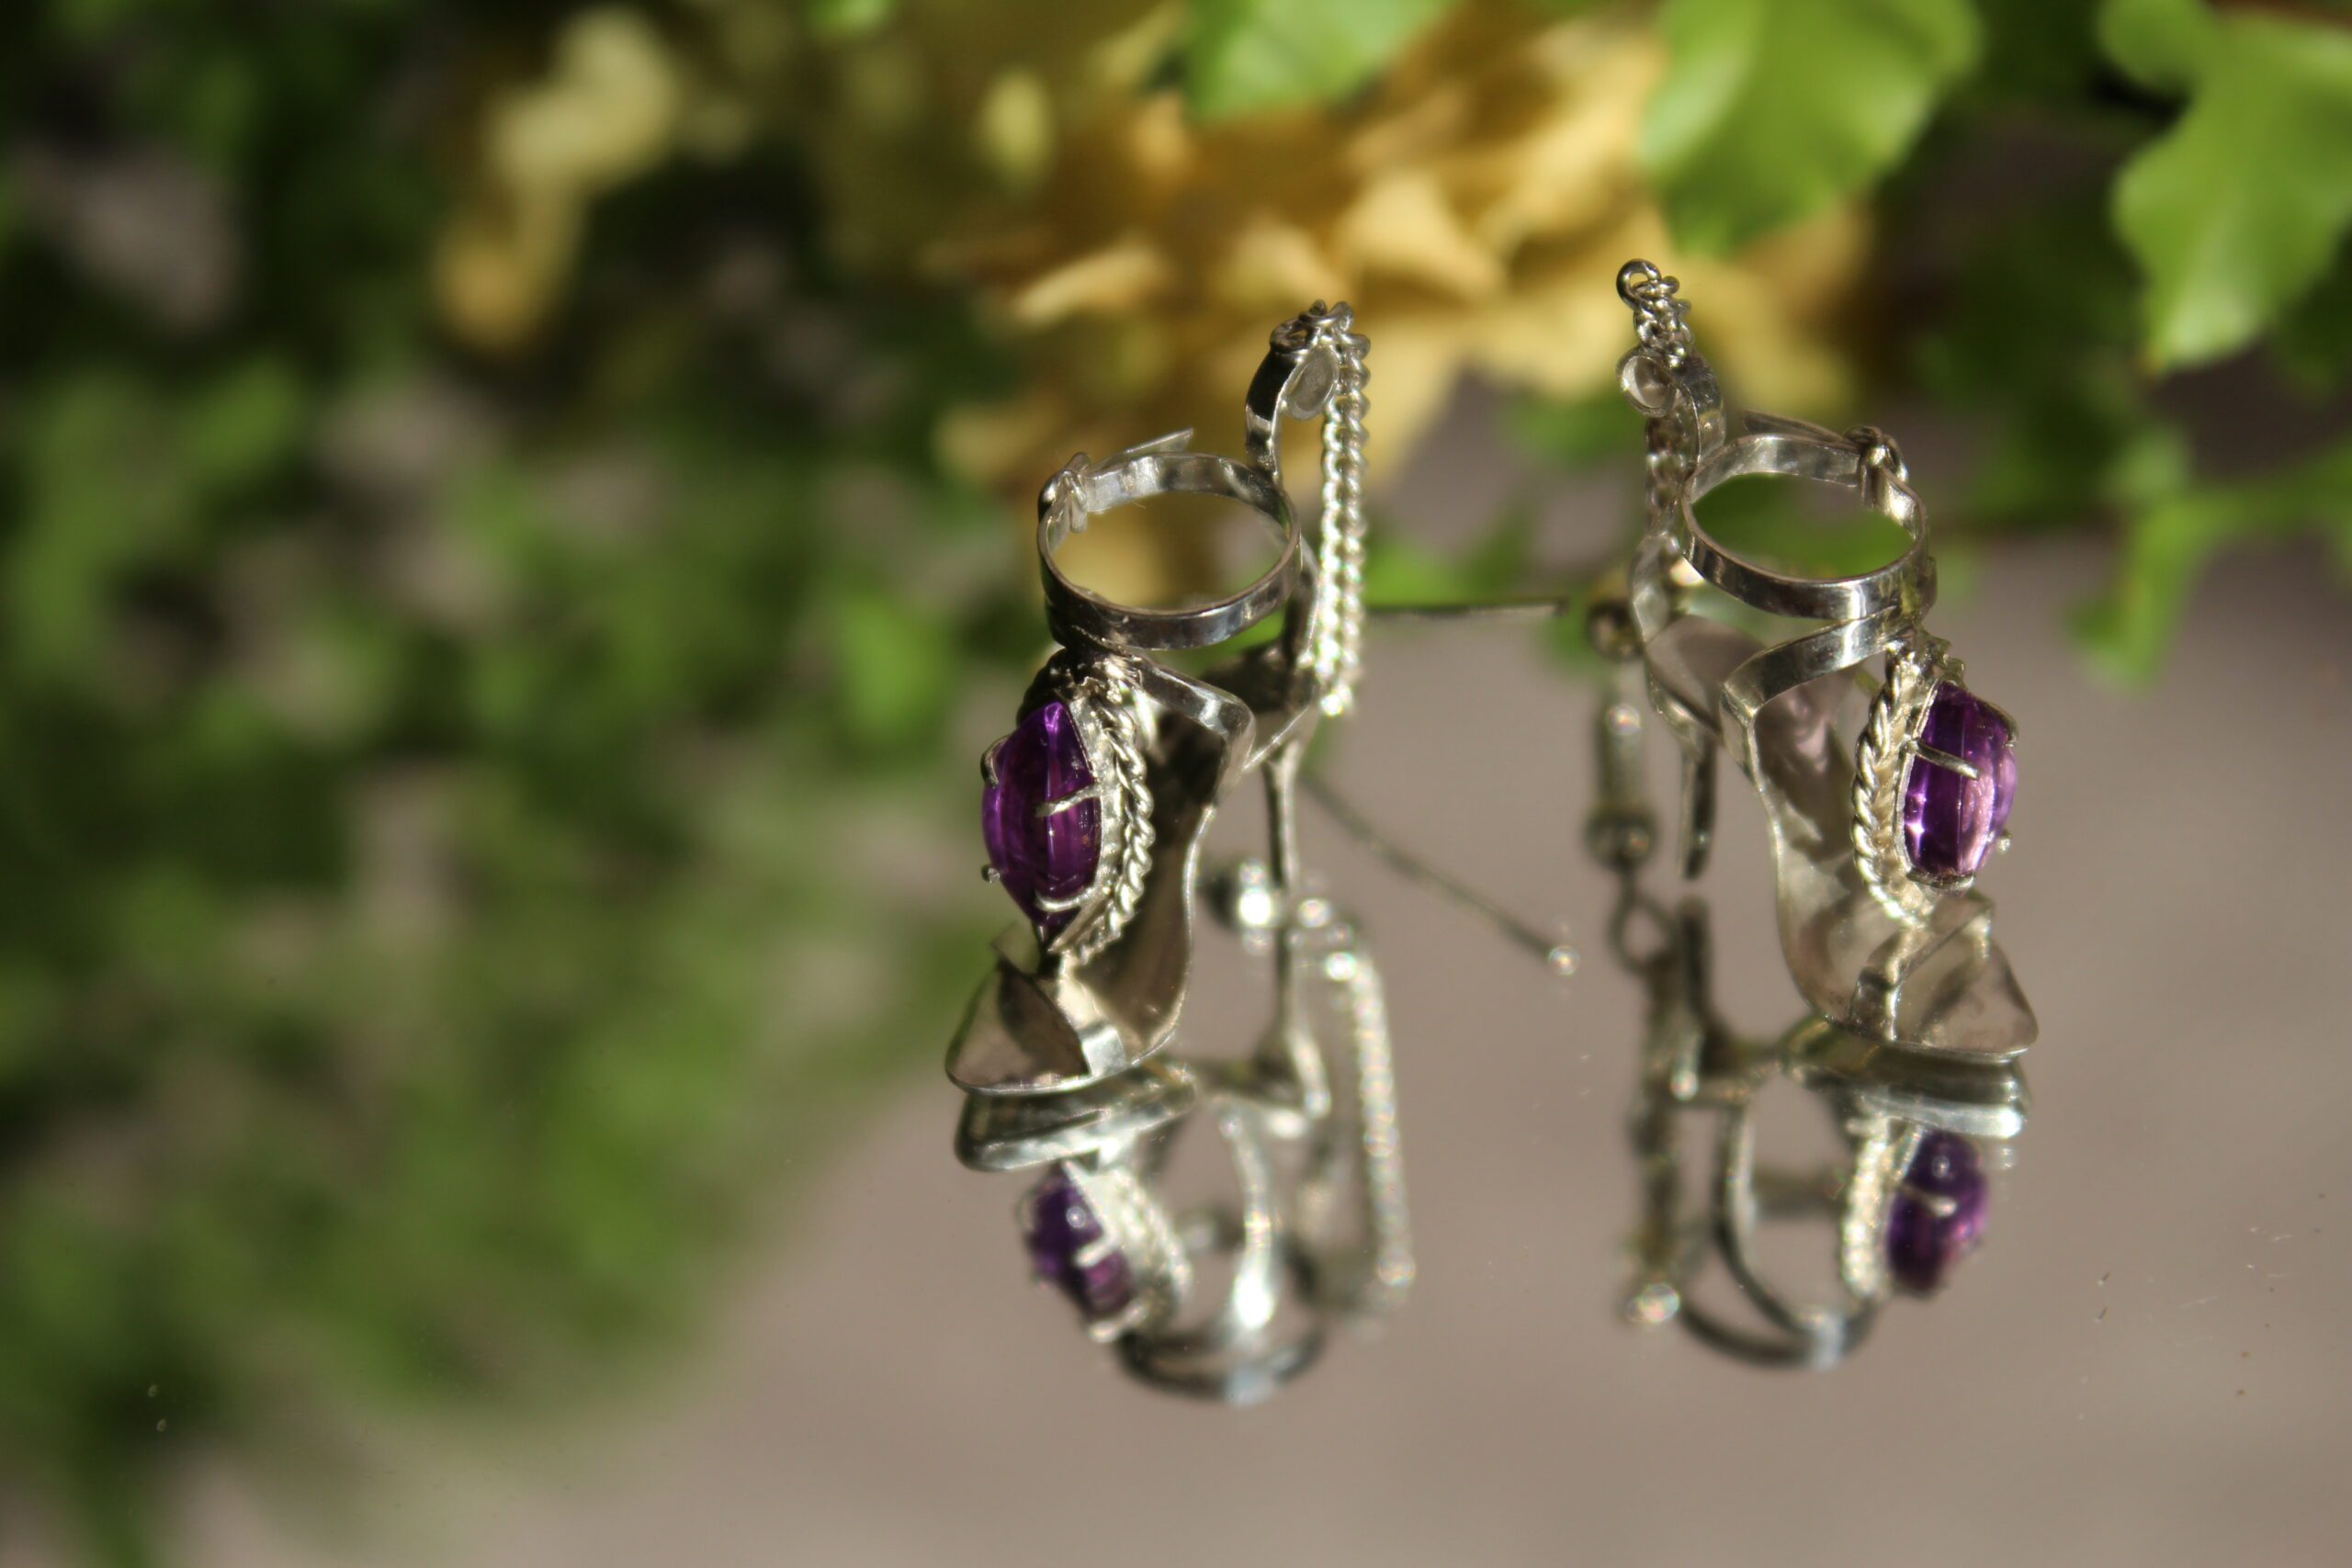
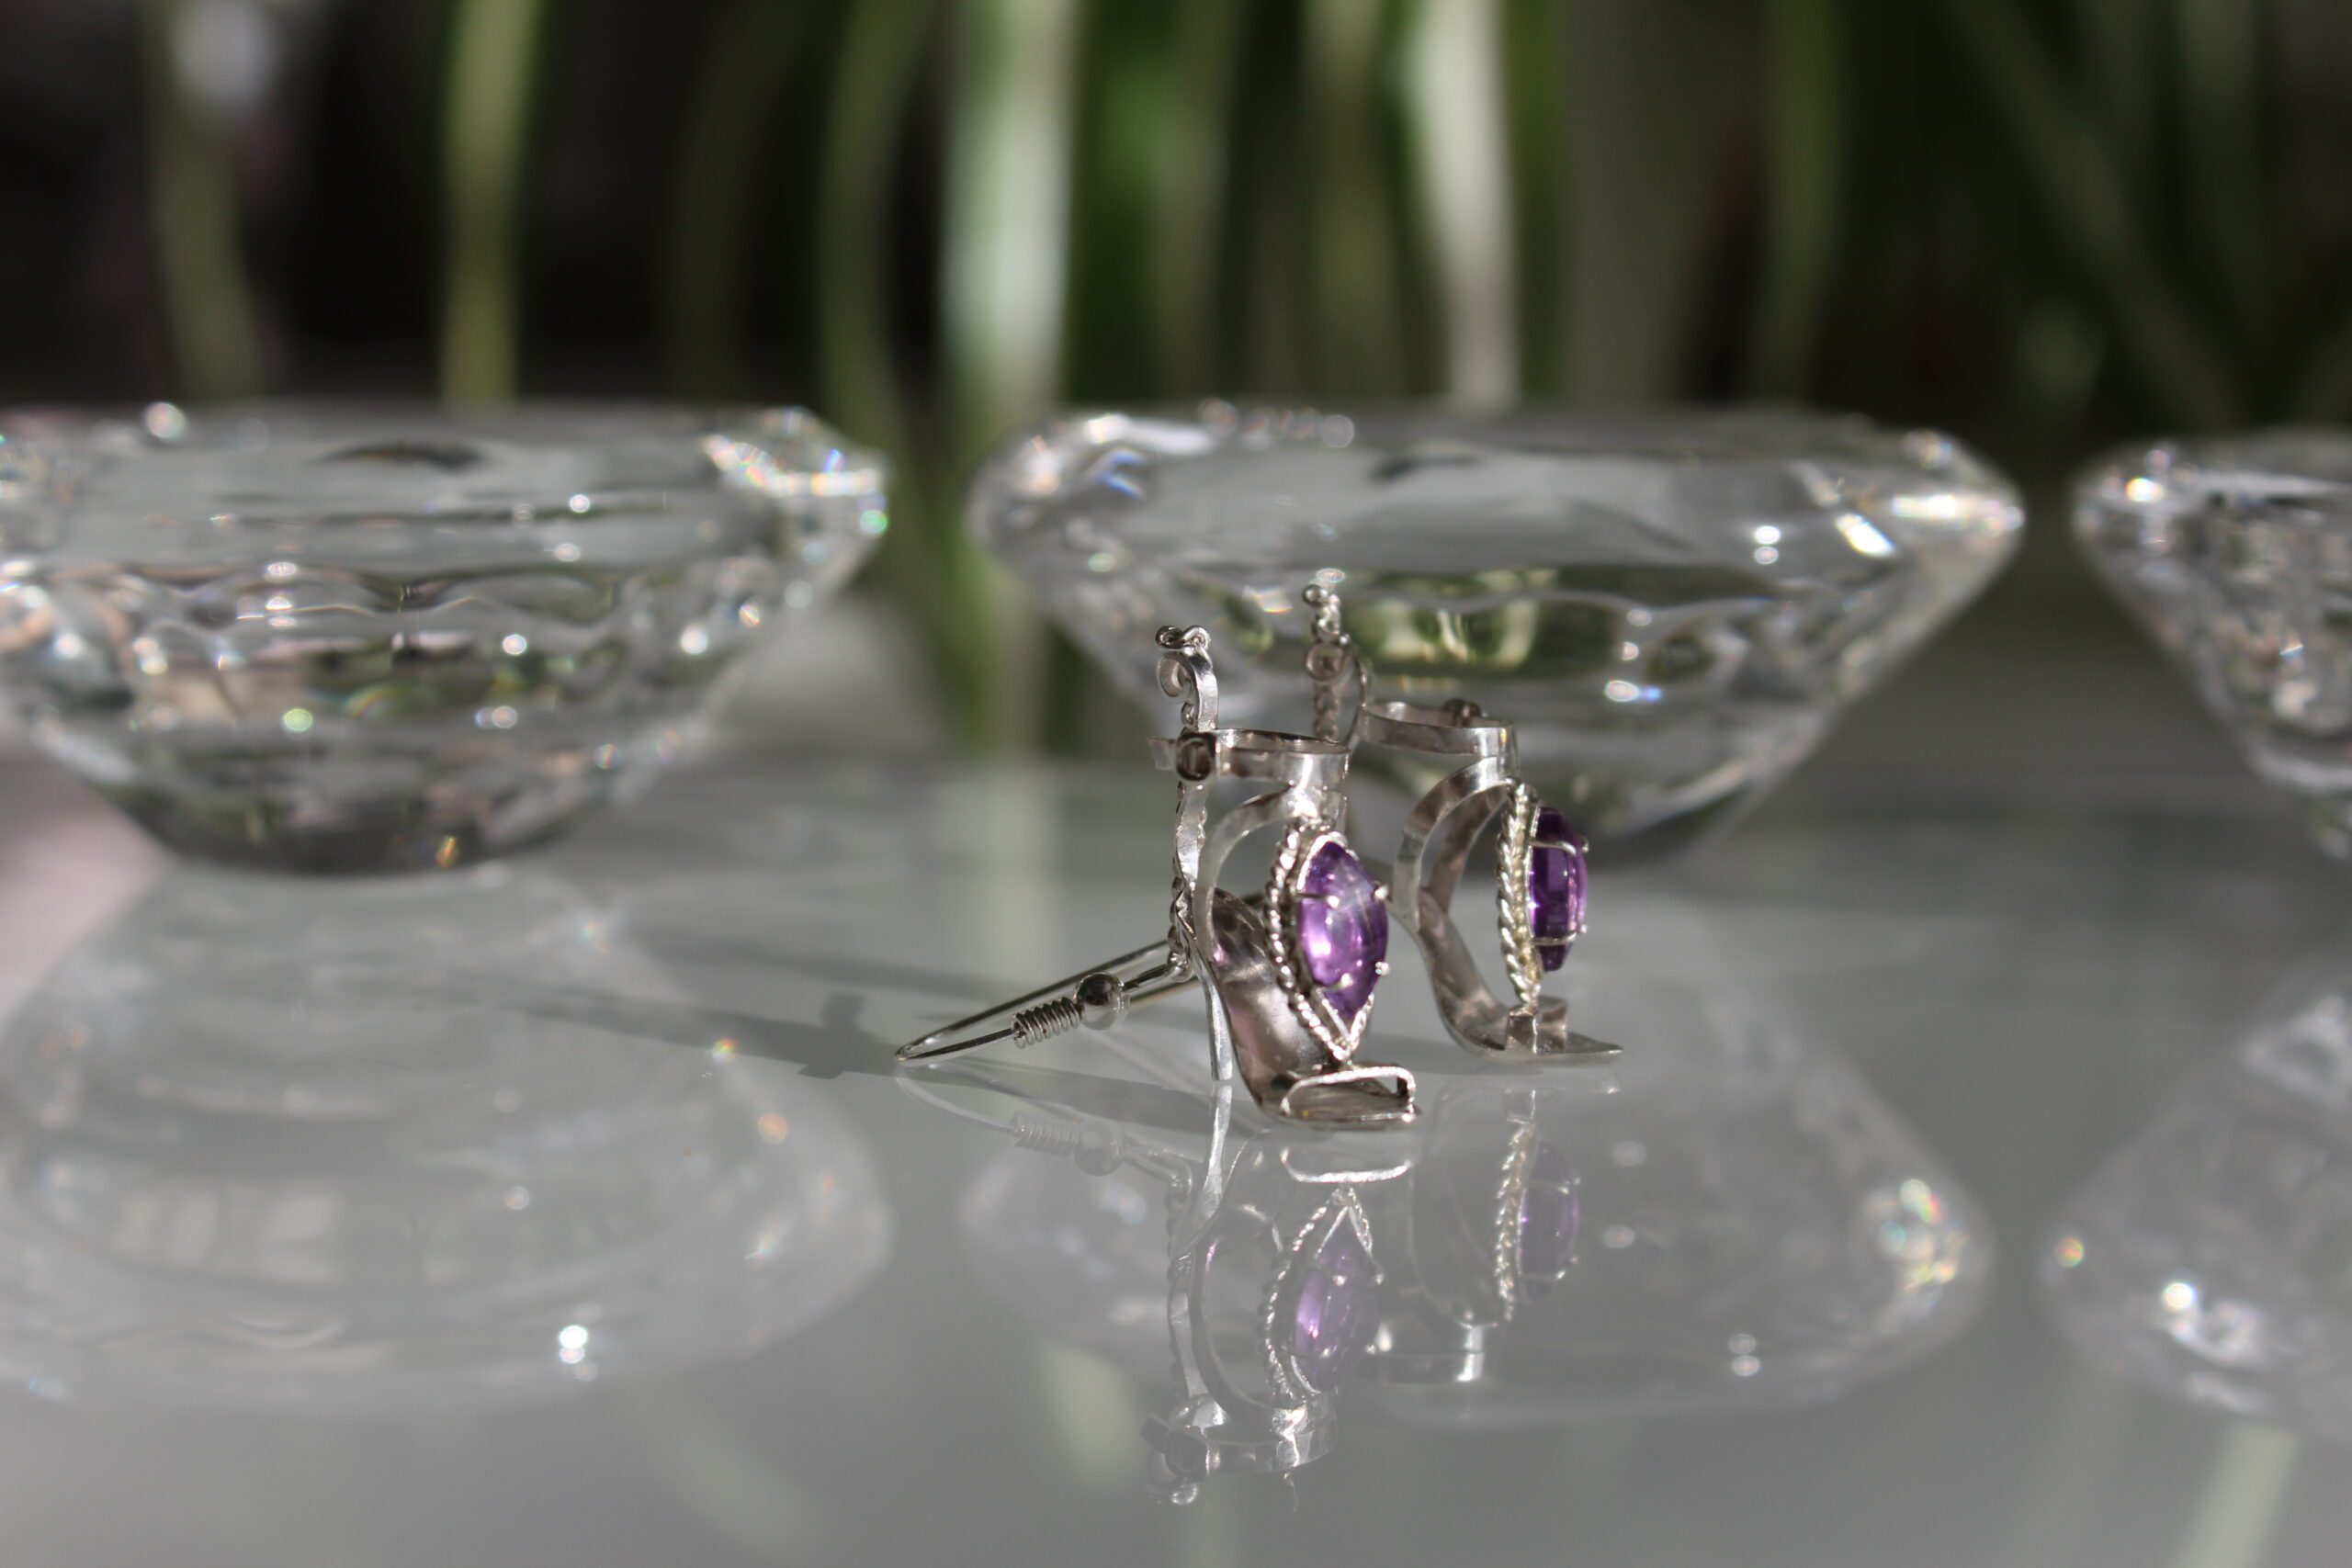
Enjoy the show
I was kinda worried that it would be a challenge to make a second earring looking similar to the first one. It turned out to be somewhat true as I fully completed one earring first. Only after I was happy with the result I started the second shoe. But the fact that I didn’t have an initial design sketch came in handy as I just used the first earring as a guide for another one.
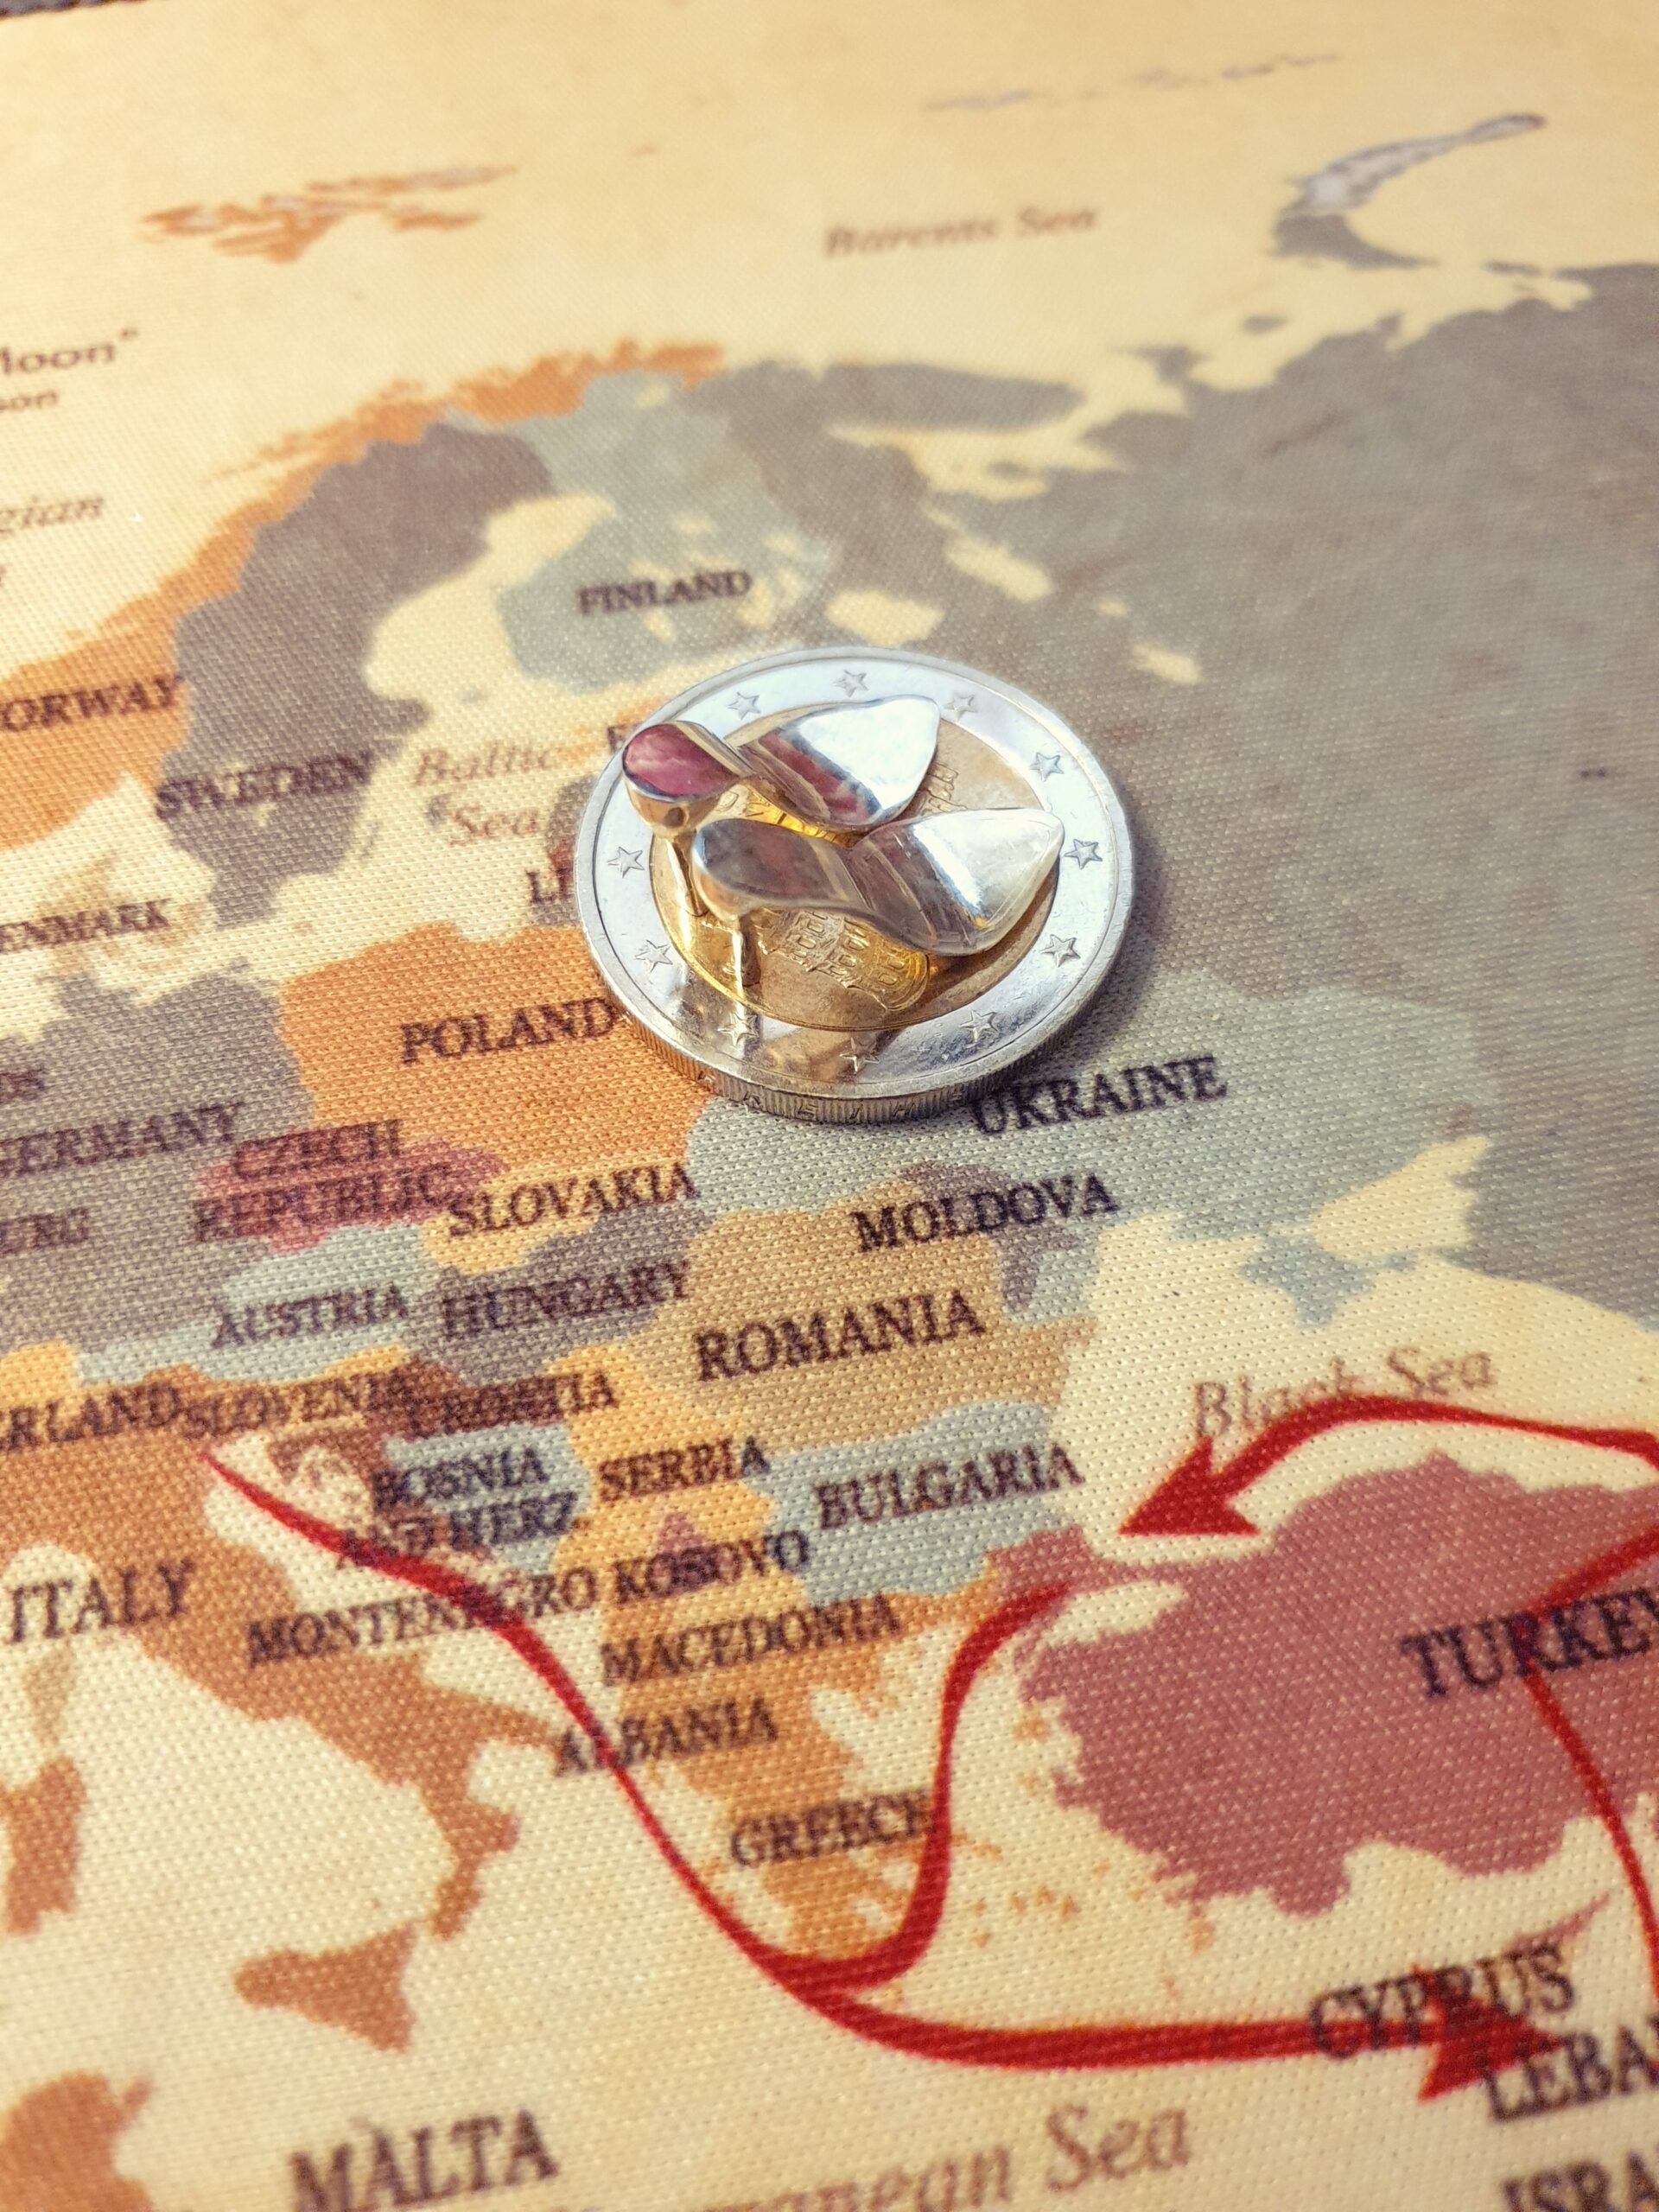
In any case I wish you to enjoy the photoshoot below and I hope it’ll give you an inspiration to pursue your own passion. Have fun!


This piece is still available for purchase. If you are interested please visit my Etsy Store or send me a DM in my Instagram to talk business 🙂
Check my Instagram or DM me through Etsy if you want to keep in touch.