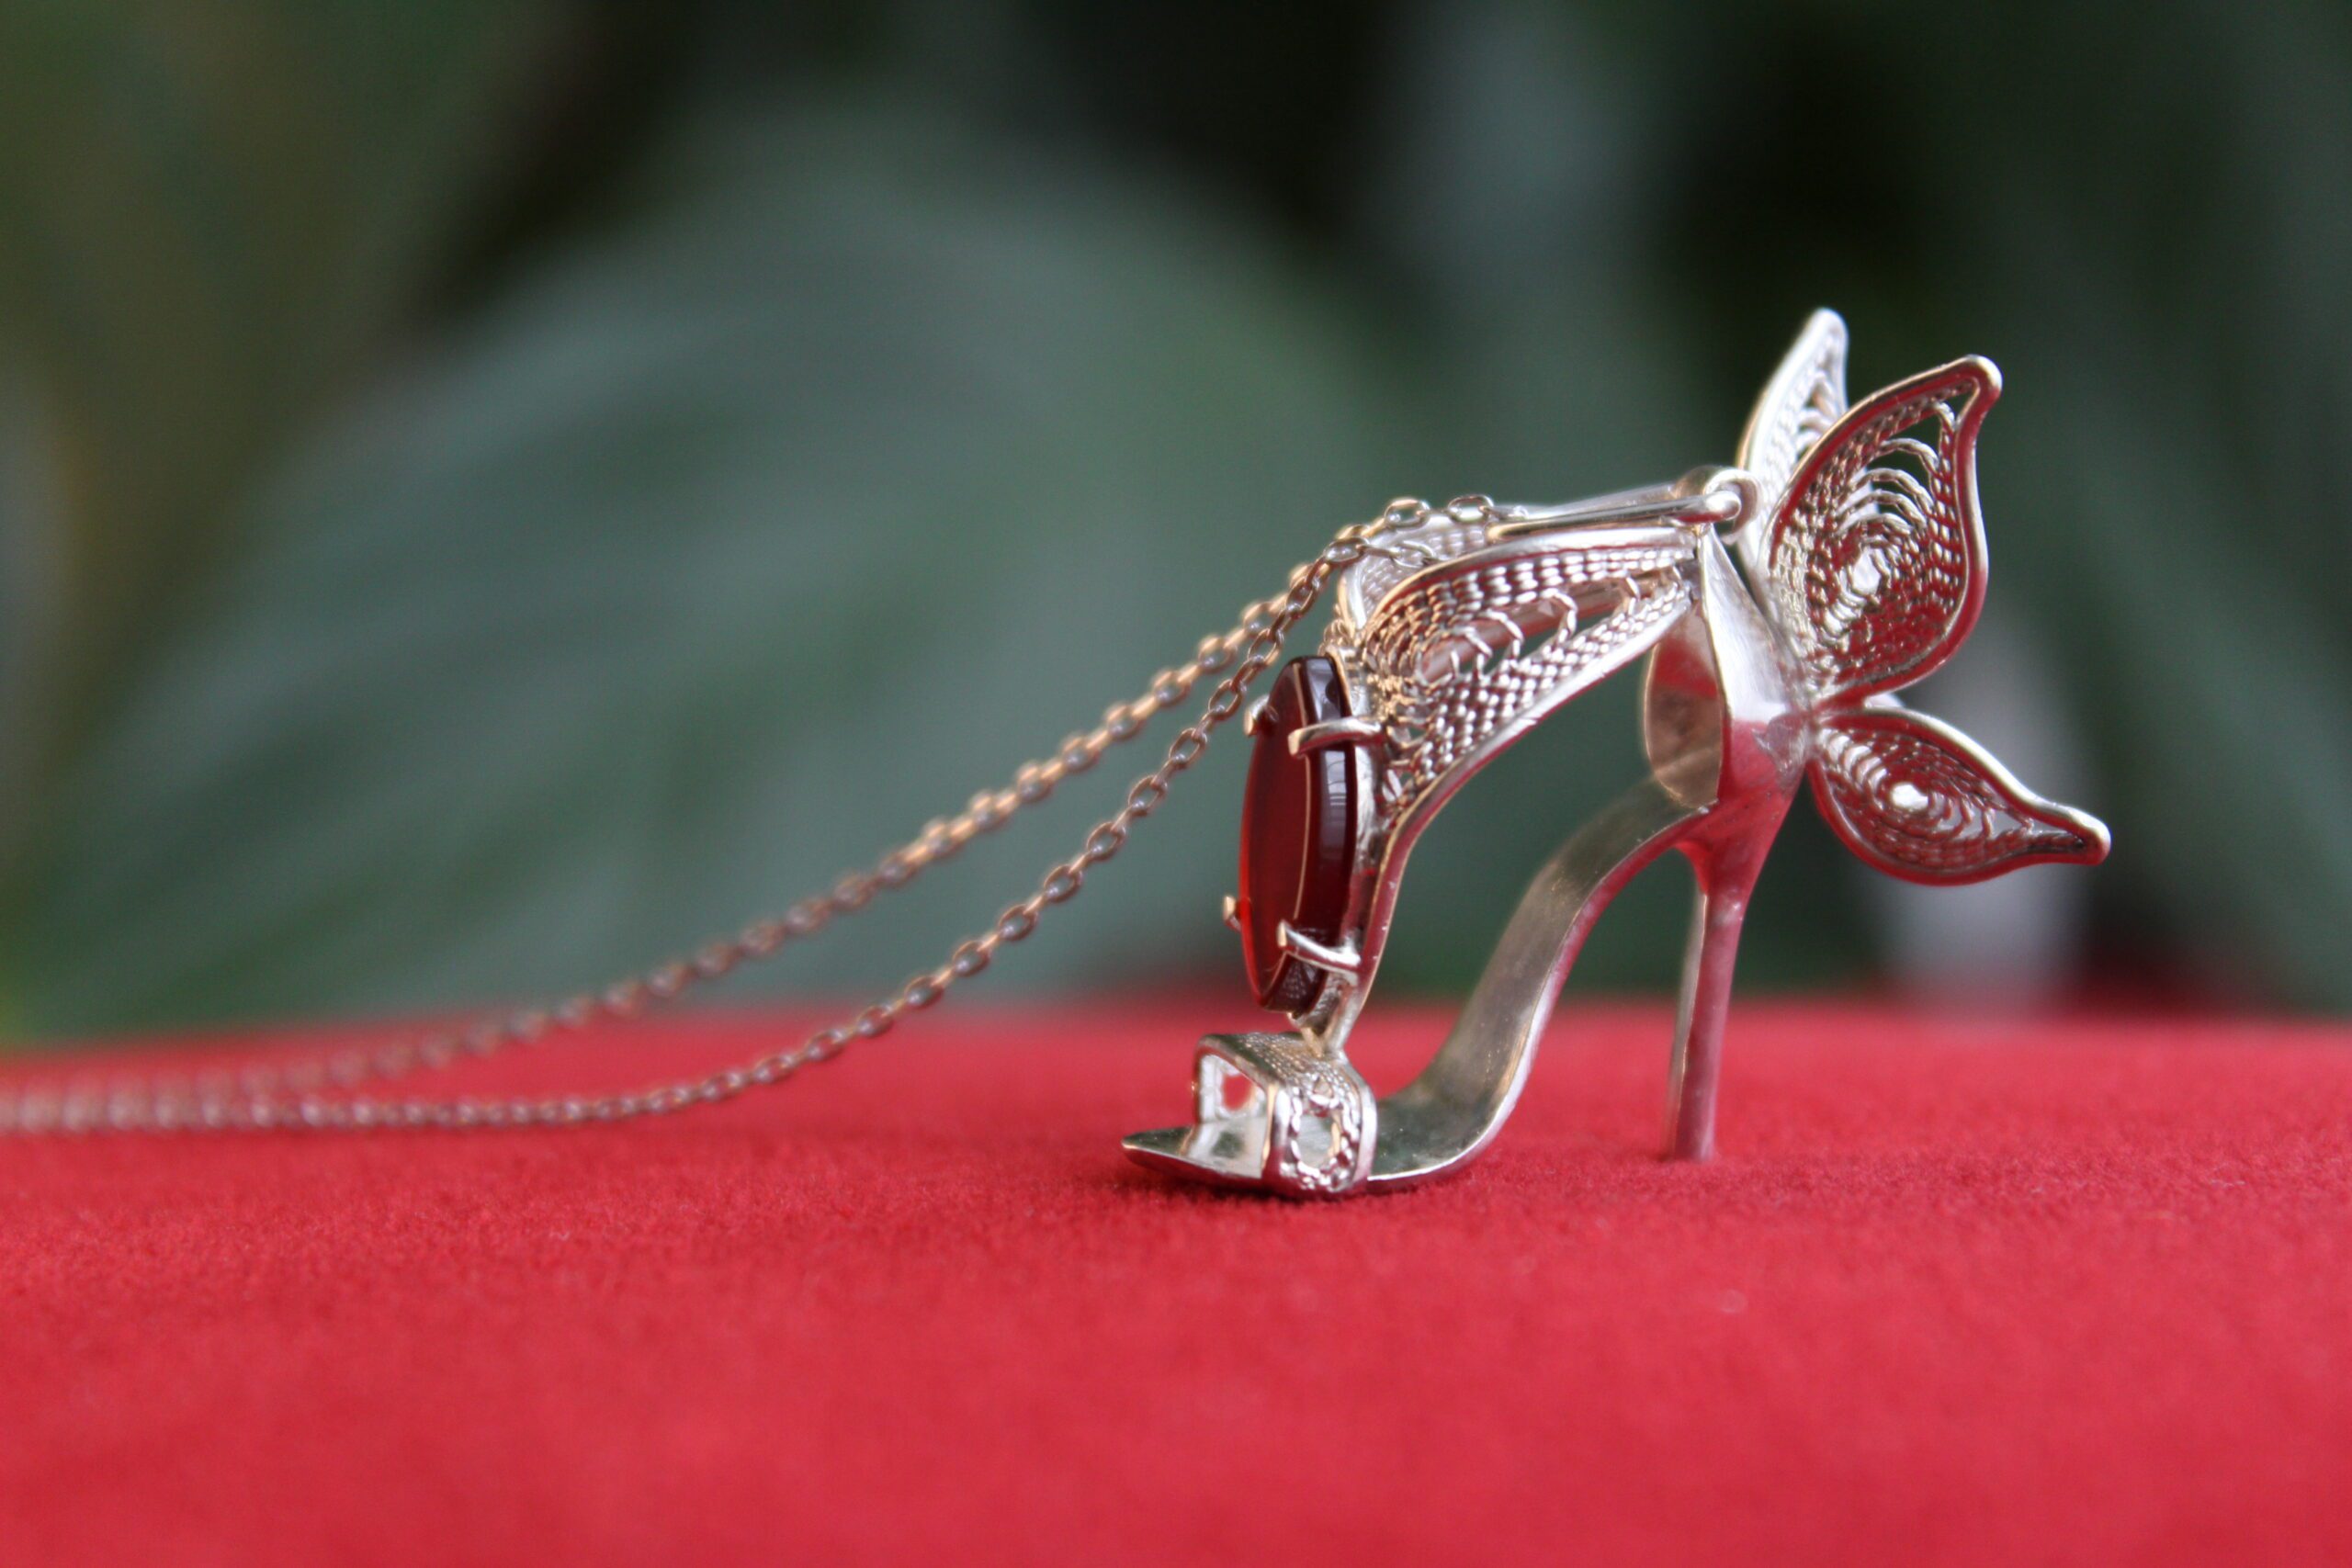
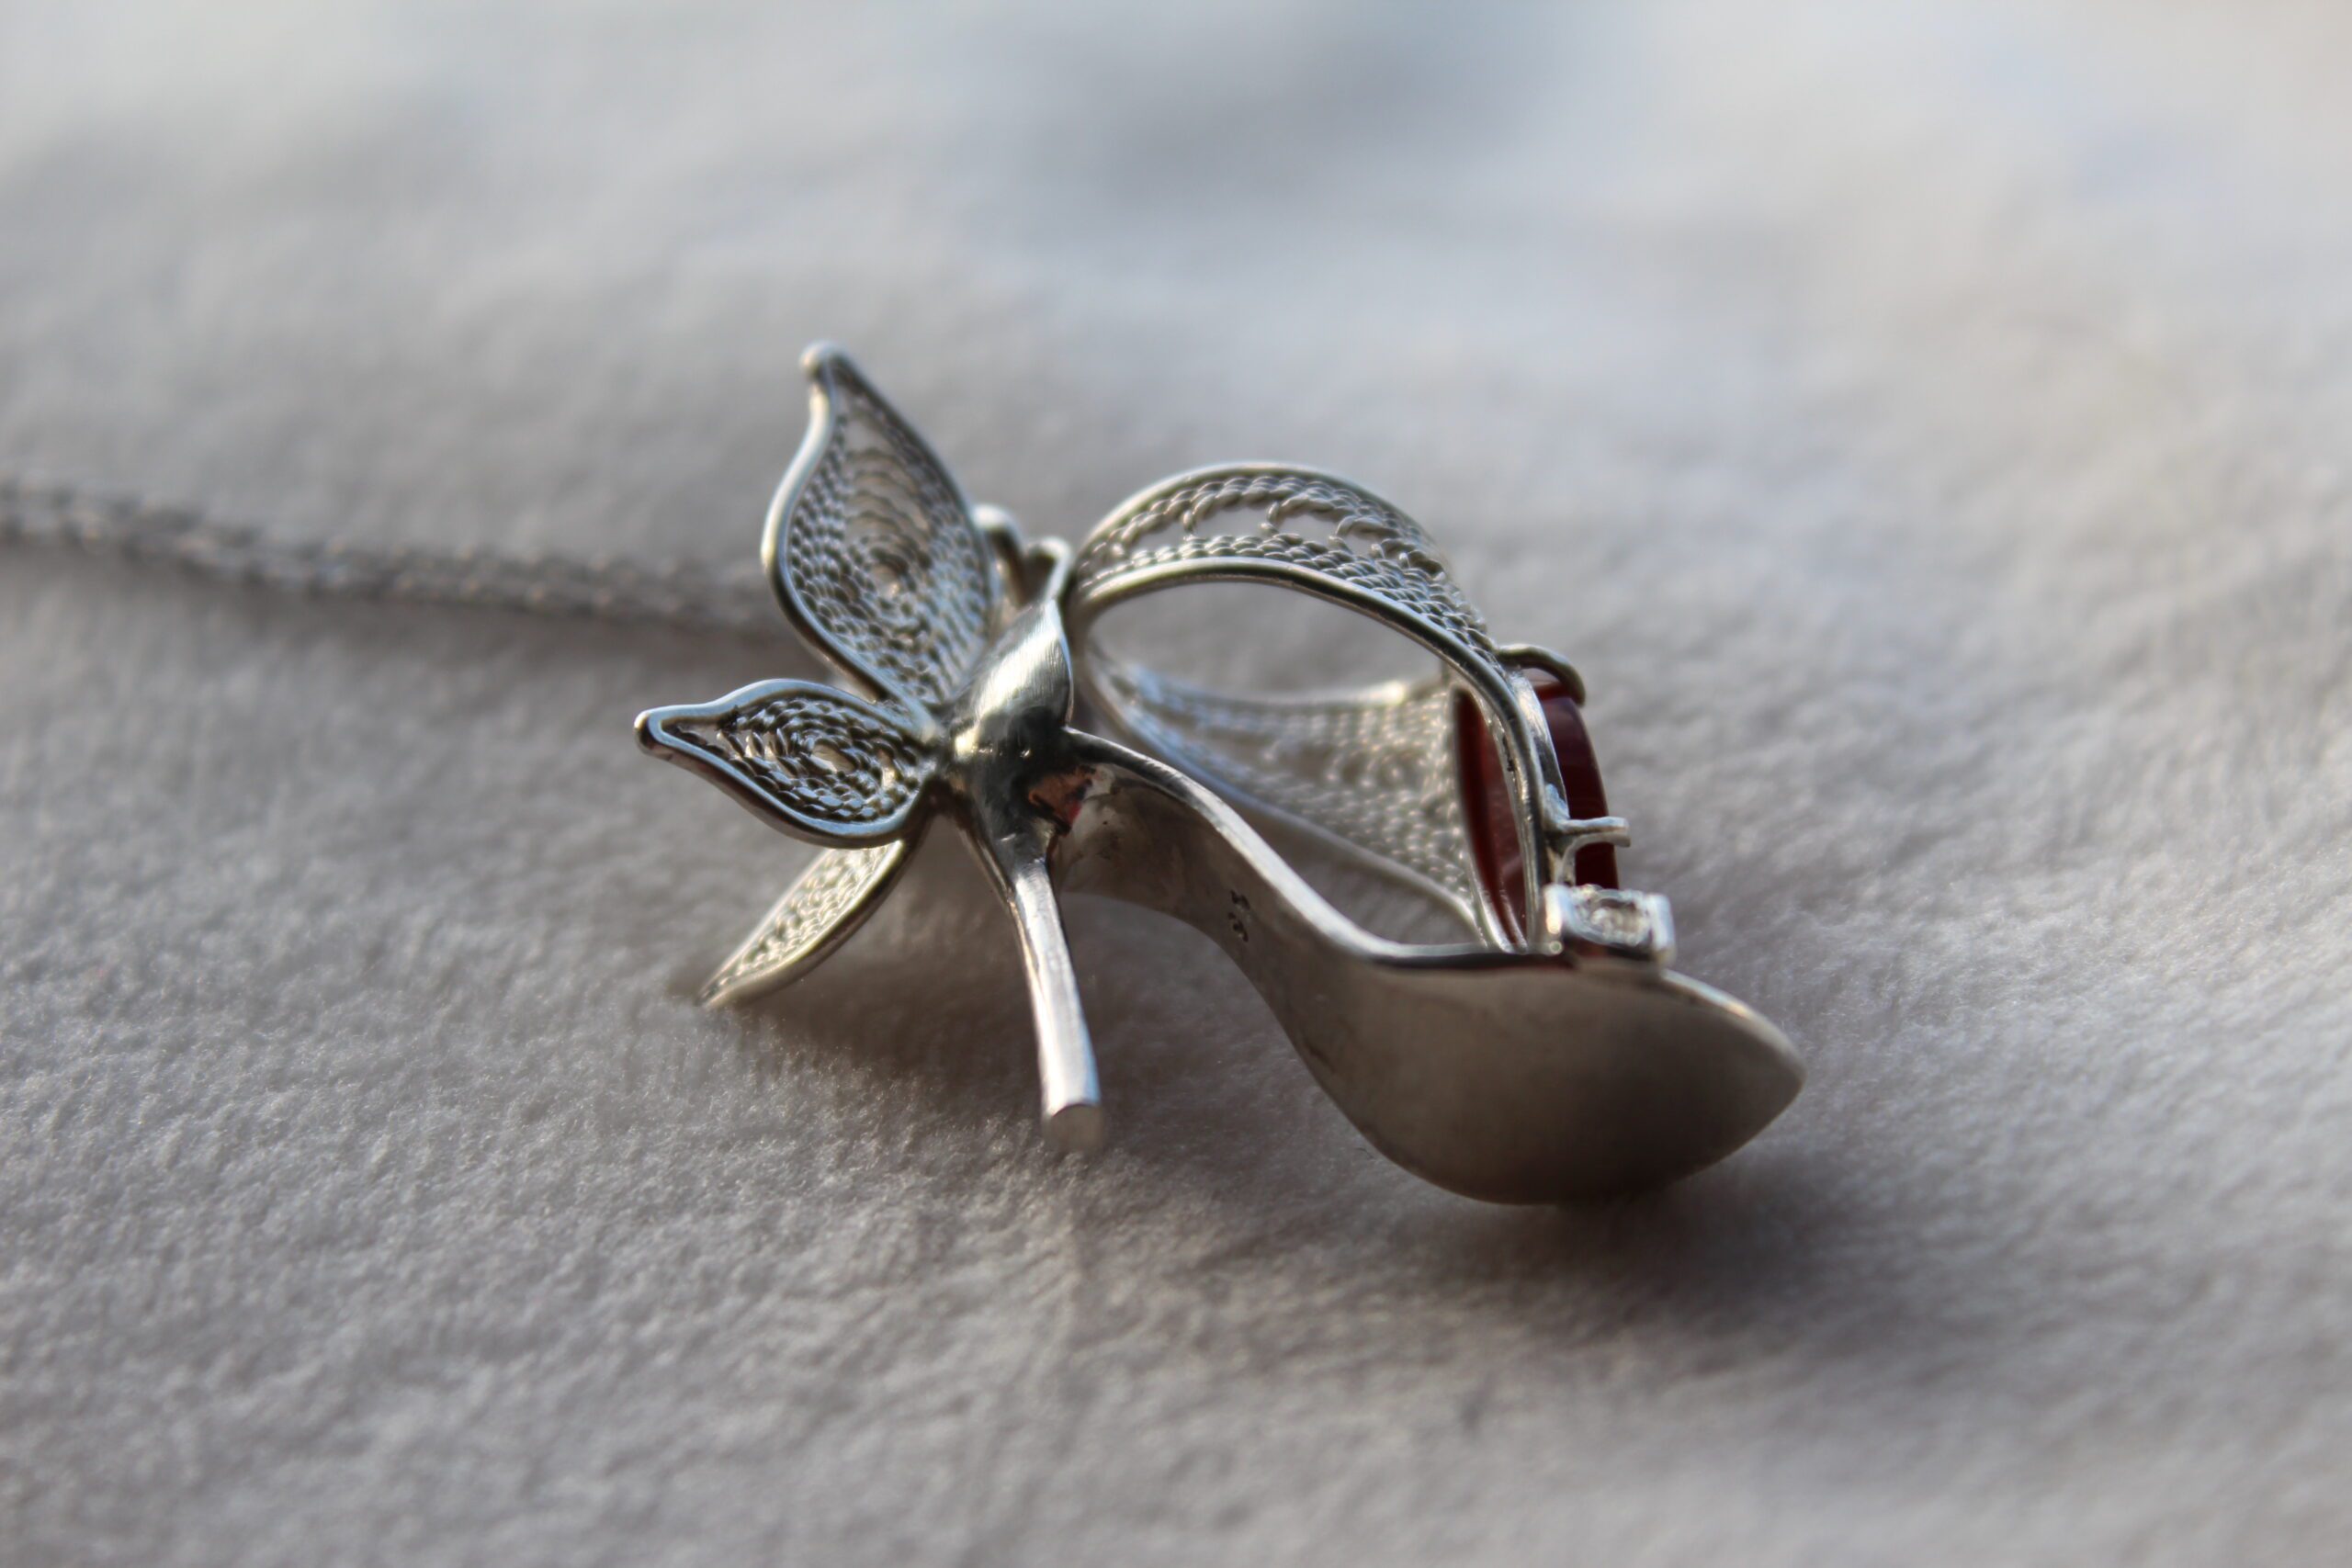
Let me take you on a 40-ish hours journey of handcrafting a gorgeous pendant in a shape of a high heel sandal with carnelian stone and butterfly wings heavily decorated with filigree.
Intro
It is very satisfying that there are people out there who share the same passion. In my case this passion is elegant shoes and I found a way to express it in a form of jewellery. A friend of mine noticed my post in social media and contacted me right away to make an order. Motivated by the demand I set off to materialise a challenging idea I had in mind for quite a while – a high heel sandal with a butterfly wings inspired by Sophia Webster‘s incredible shoes.
High heel slipper
As any other silver shoe project (like this one or that one) I start with sawing a sole. I used a template from a previous high heel project that I am particularly happy about. Some say that the size of these pendants is too large to be delicate enough. Well, this is how I do my art and if you don’t like it – you’ve got the entire rest of the world to explore.
Although the sole is relatively easy to saw, making a good heel is far from trivial. Surely the silver casting would make it a lot easier but what’s the fun in that? The entire piece could have been casted in a mold and therefore loose its uniqueness.
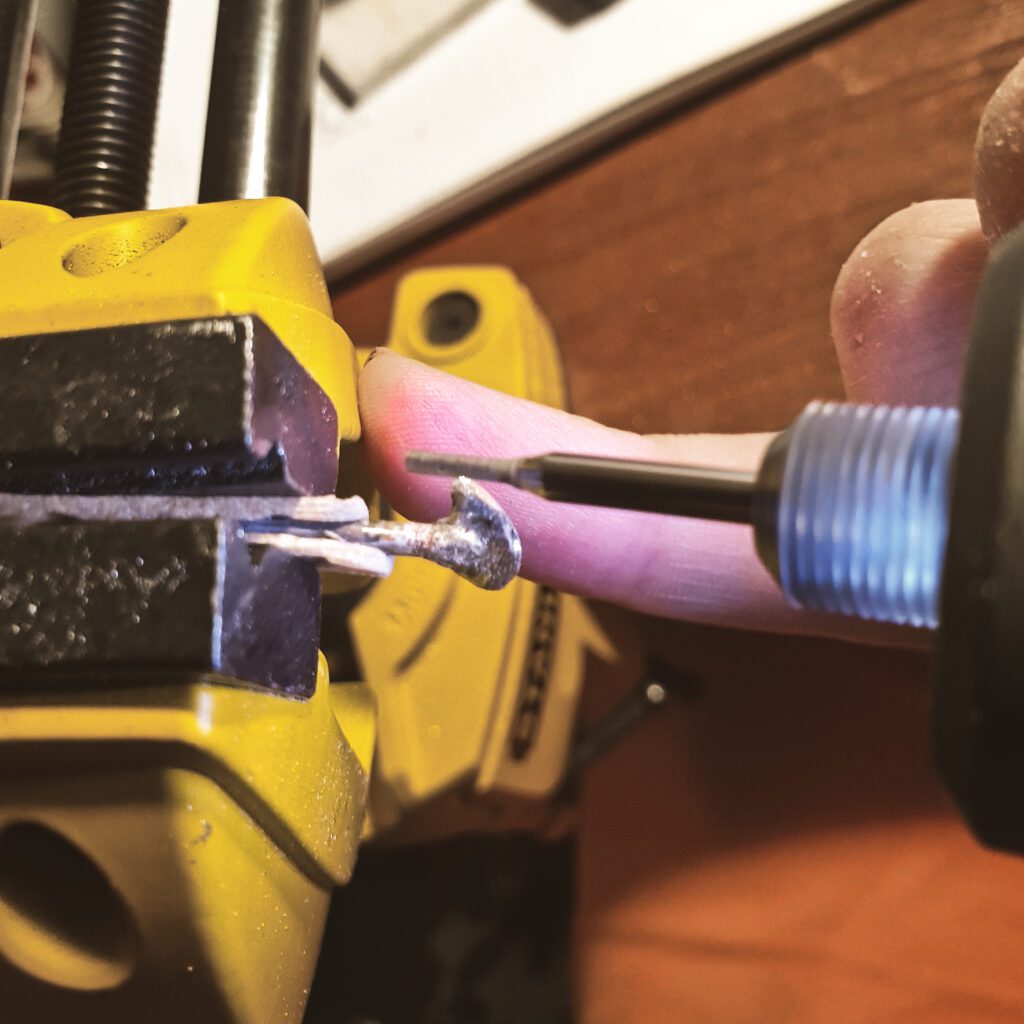
So this time I started with melting one end of a piece of 2mm silver wire into a drop. Then I filed it down a bit and soldered on a piece of 1mm thick plate on top of it. First it looked rough but after some heavy grinding the result was actually better than I anticipated.
Once the heel is grinded to its rough shape I decided to attach it to the sole and do the fitting of the entire slipper. The trick I learned from mistakes is to make sure that the sole is polished as good as possible on this stage. Every new element on the shoe will not make polishing any easier. On the pic above you might notice the “S L” punched on the sole – it stands for SlavikLTD (in case you were wondering).
It is also important to use a hard solder on this stage. Otherwise if you use the same solder at all steps of building a piece you might find yourself getting angry about elements randomly detaching or misplacing during the heating operations. Once the heel is in its place there is usually a lot of redundant solder to remove and defects to file off.
Back heel holder
I was meaning to reproduce this element for a while. Some real sandals have this piece in the back of the shoe to hold a foot firmly. It seems to be easy to make in fabric but in my case it has to be a metal sheet.
I happened to have a small piece of fine silver sheet about 0.8mm thick and I saw it as a perfect fit for a job. After a few failed attempts to make a sort of a template out of paper I got annoyed and just cut out a triangular piece to start with. The difficulty here is that this element has a complex semi-spherical shape stretched to the top. It’s a shame I don’t posses any dapping punches as it would probably make this step a lot easier. This time I had to go old school and hammer the back piece on a round end of my little anvil. Although time consuming the process was satisfying and the result turned out to be more than all right.
Stone saddle
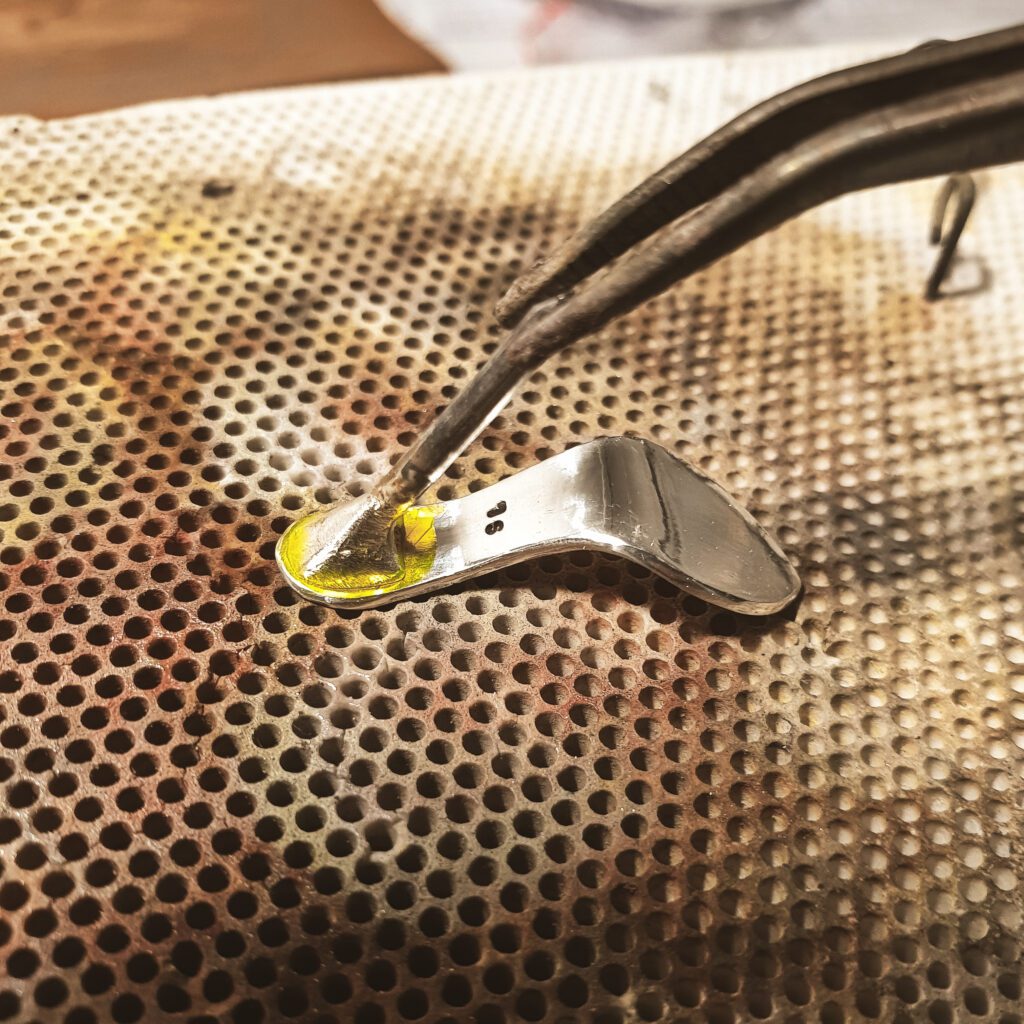
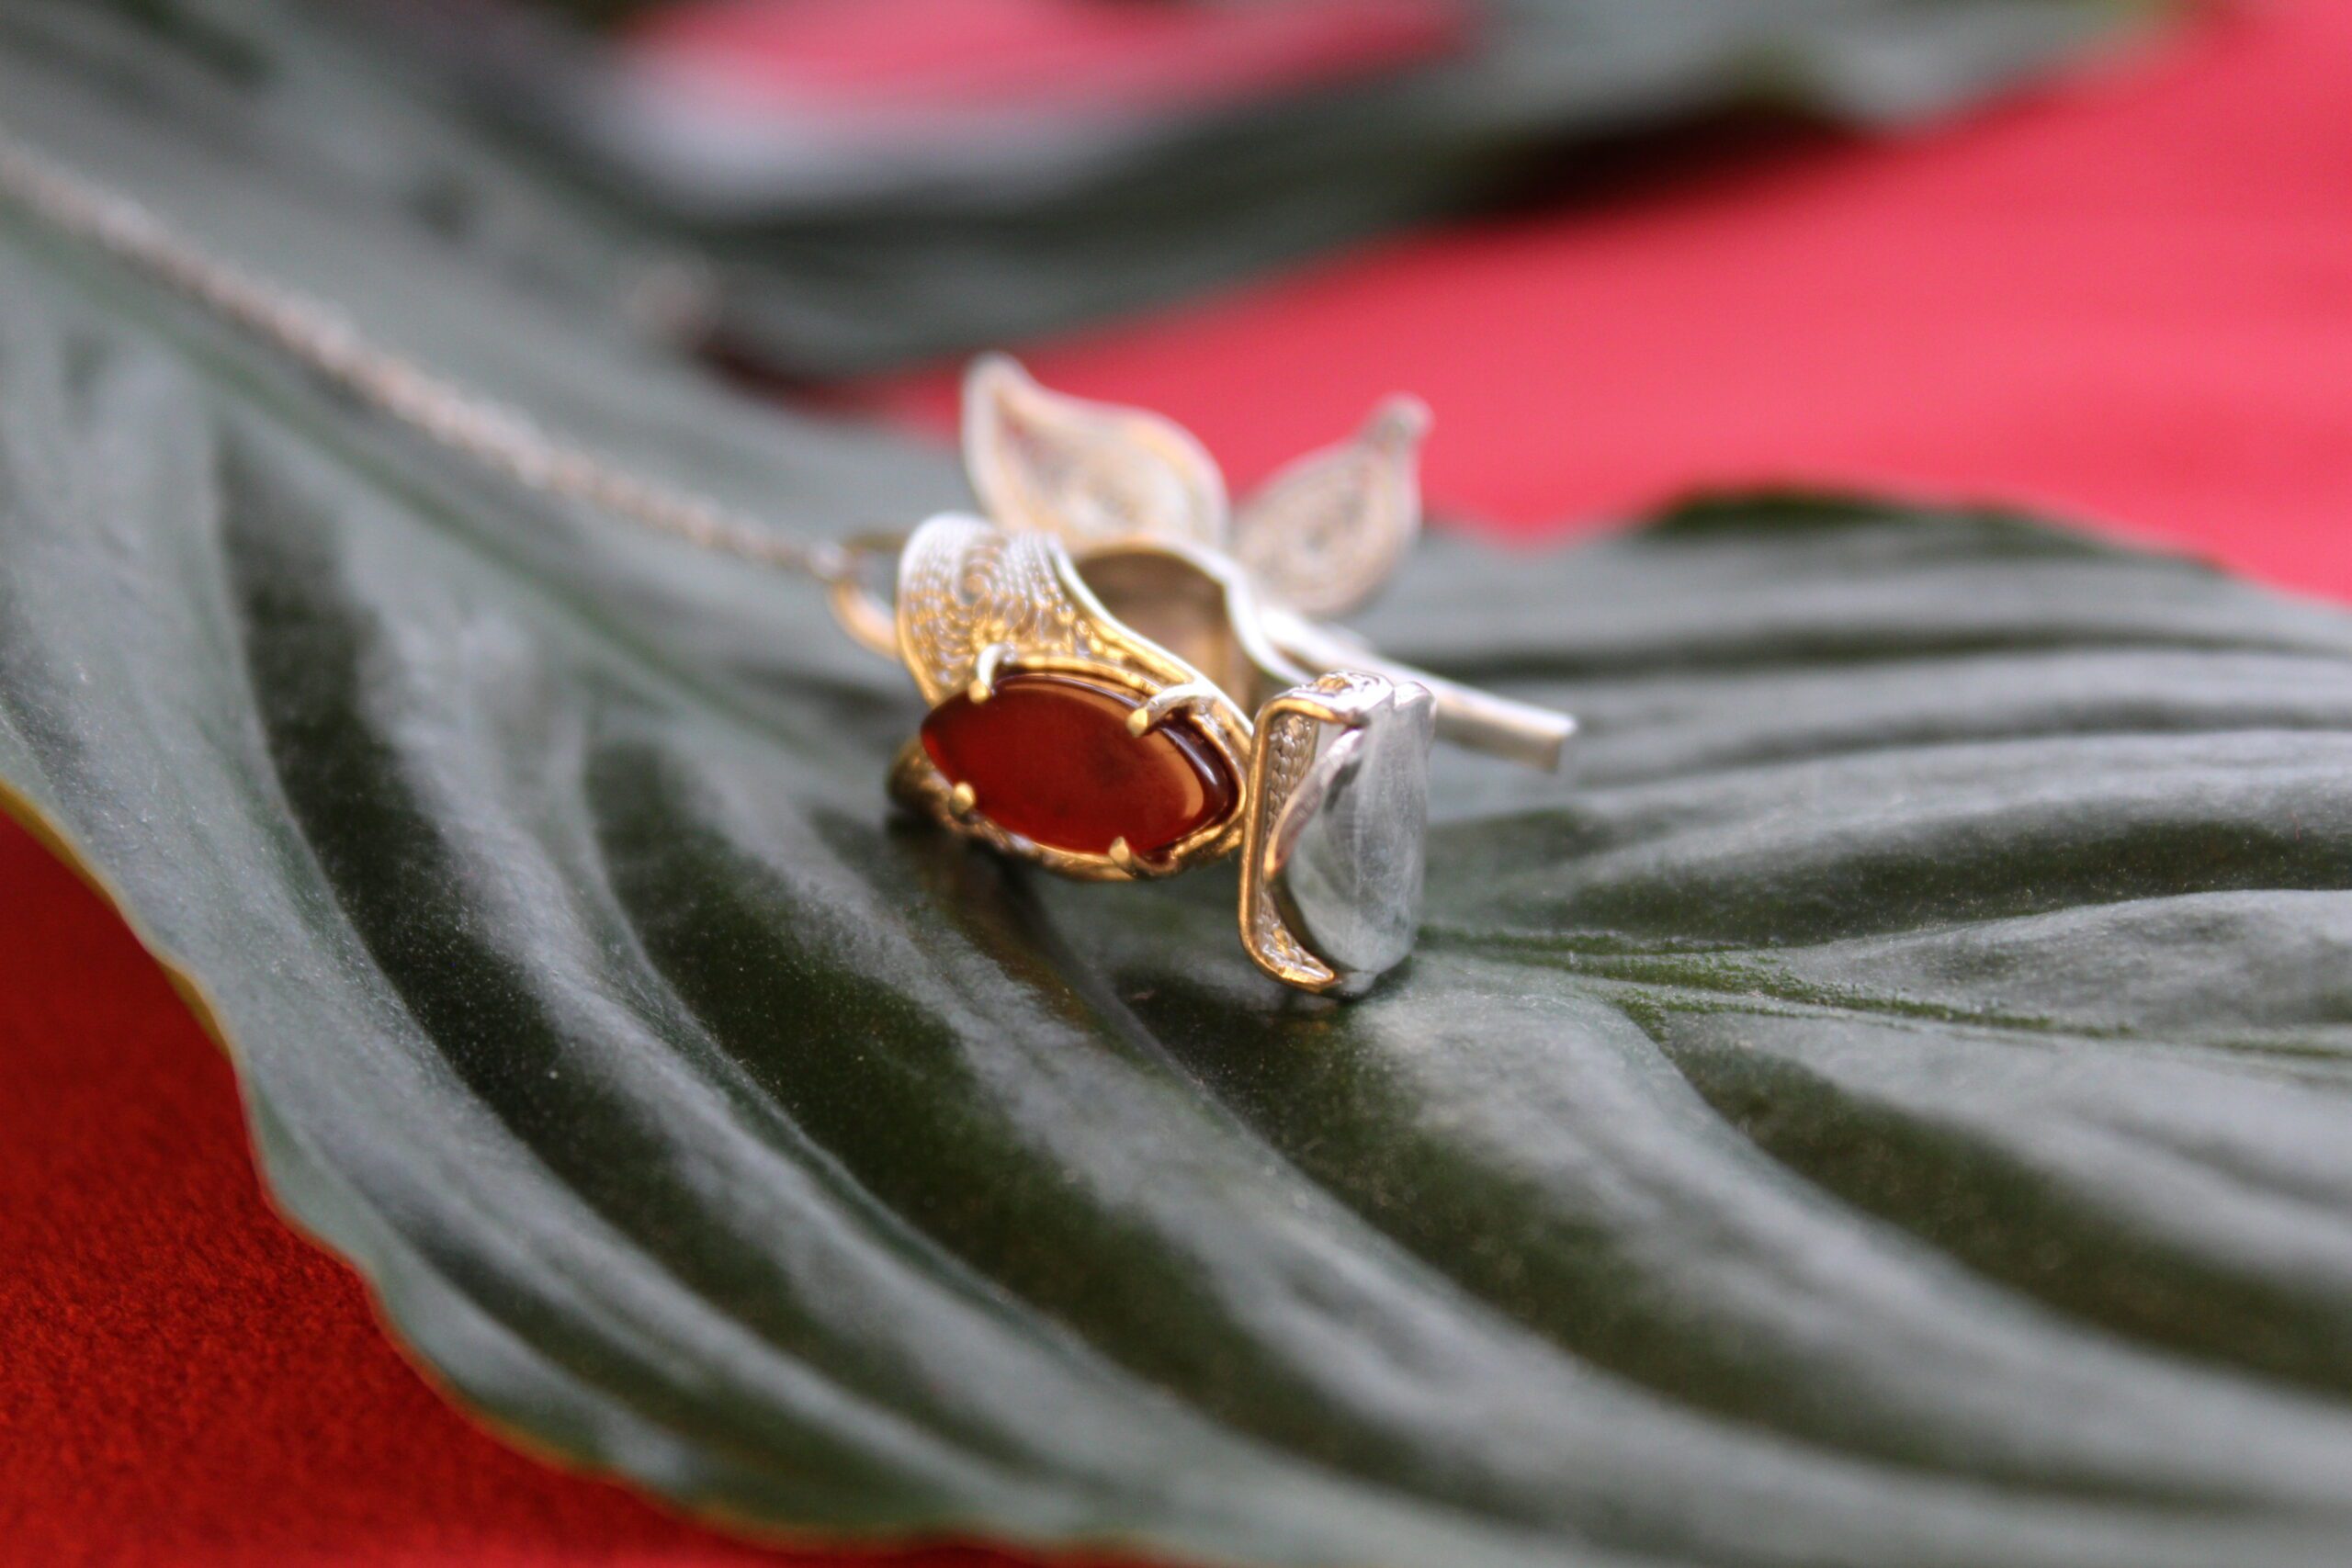
The slipper is ready even with a curvy back piece that makes me clap my hands when I see it. What’s next? Now it is time to think about a saddle for my mesmerising carnelian smooth marquise. I bought this stone in a local mineral shop for a few bucks only because it had an imperfection embedded in it. In my mind this inclusion makes it even more perfect.
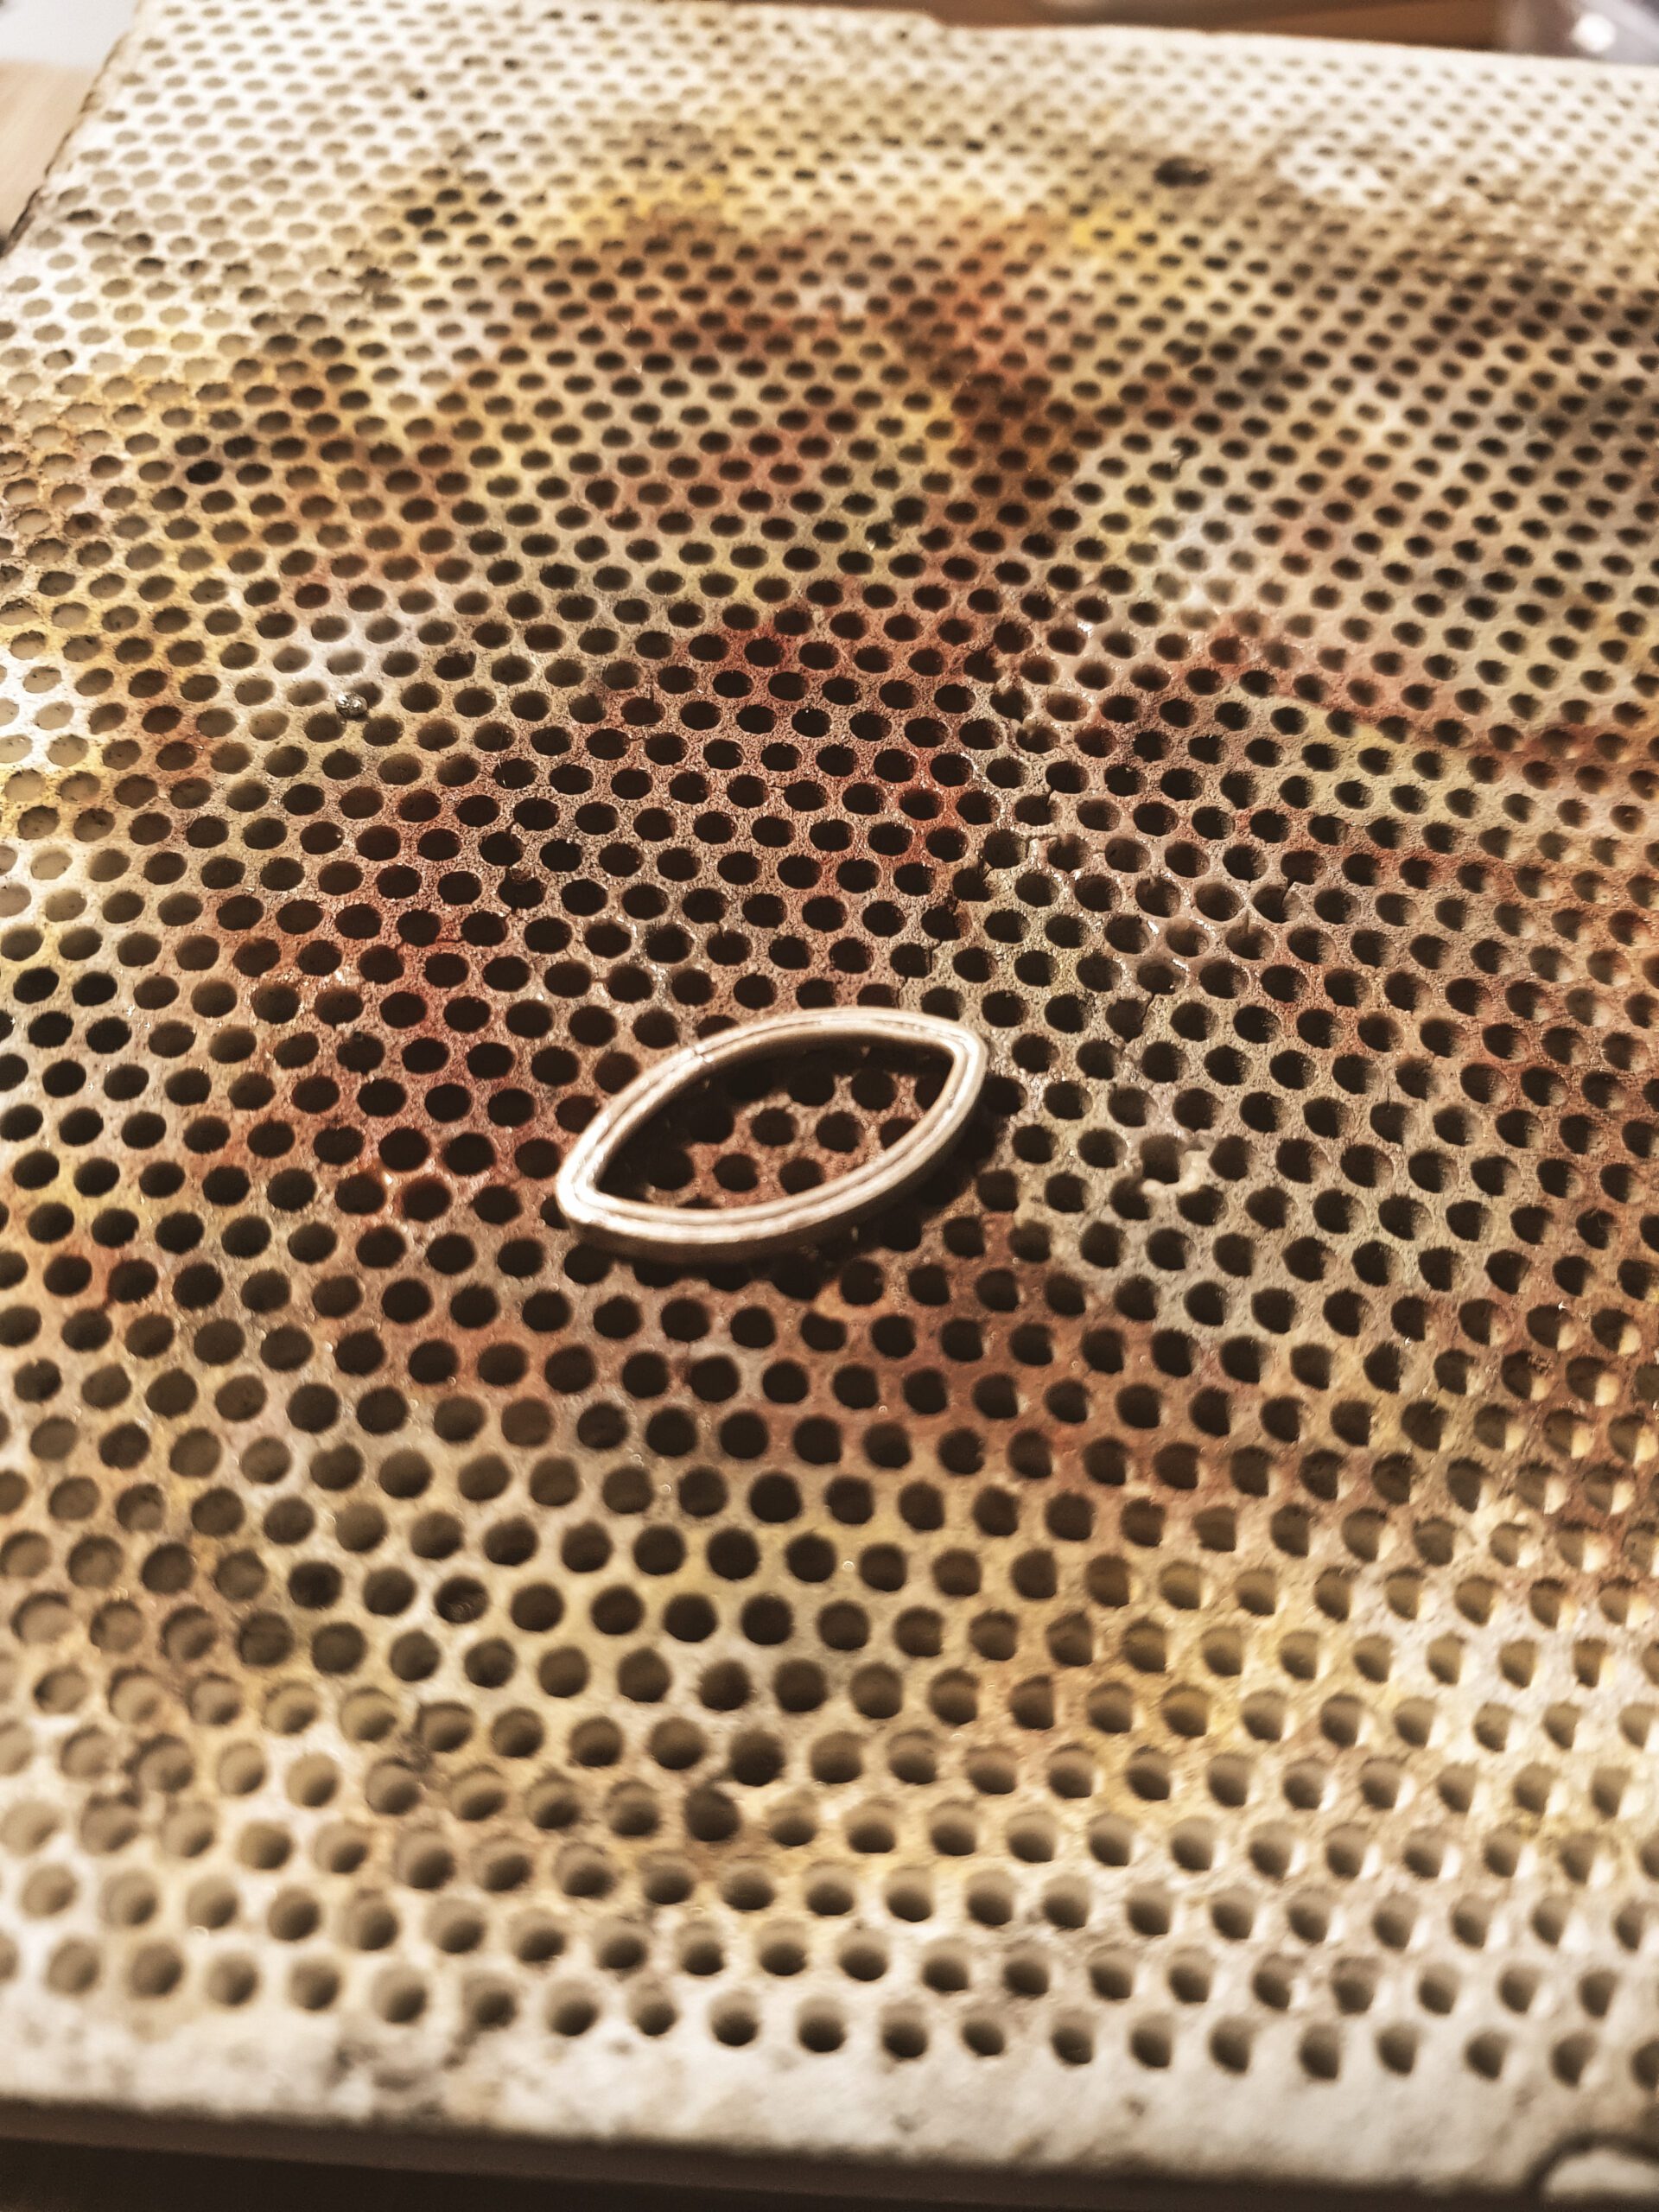
A stone setting rule of thumb is to begin with a good saddle. I used a 0.6mm thick silver stripe to make an oval which tightly fits the stone. Then file the ends just a bit and solder the oval and add the support ting on one side. You will always be able to grind the saddle insides to fit your stone, but if you make it too big – you might as well start from scratch.
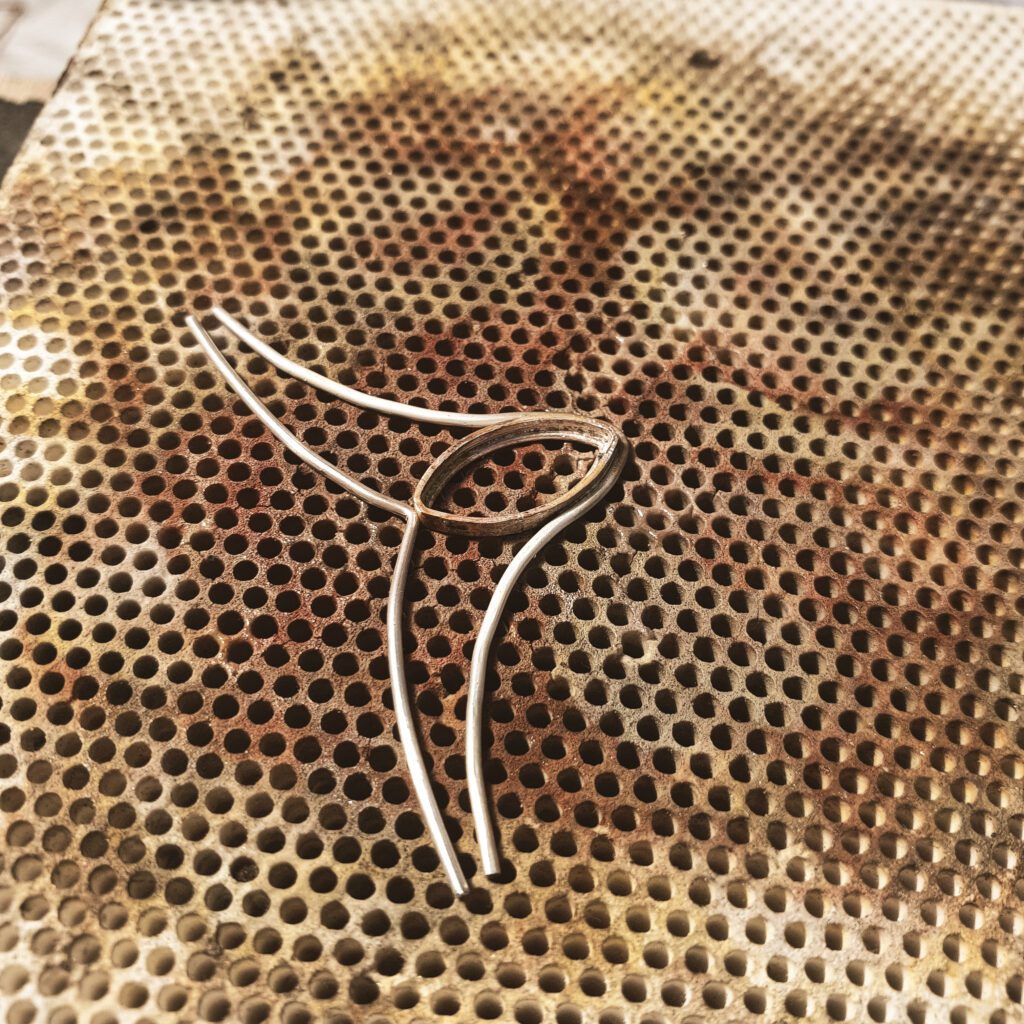
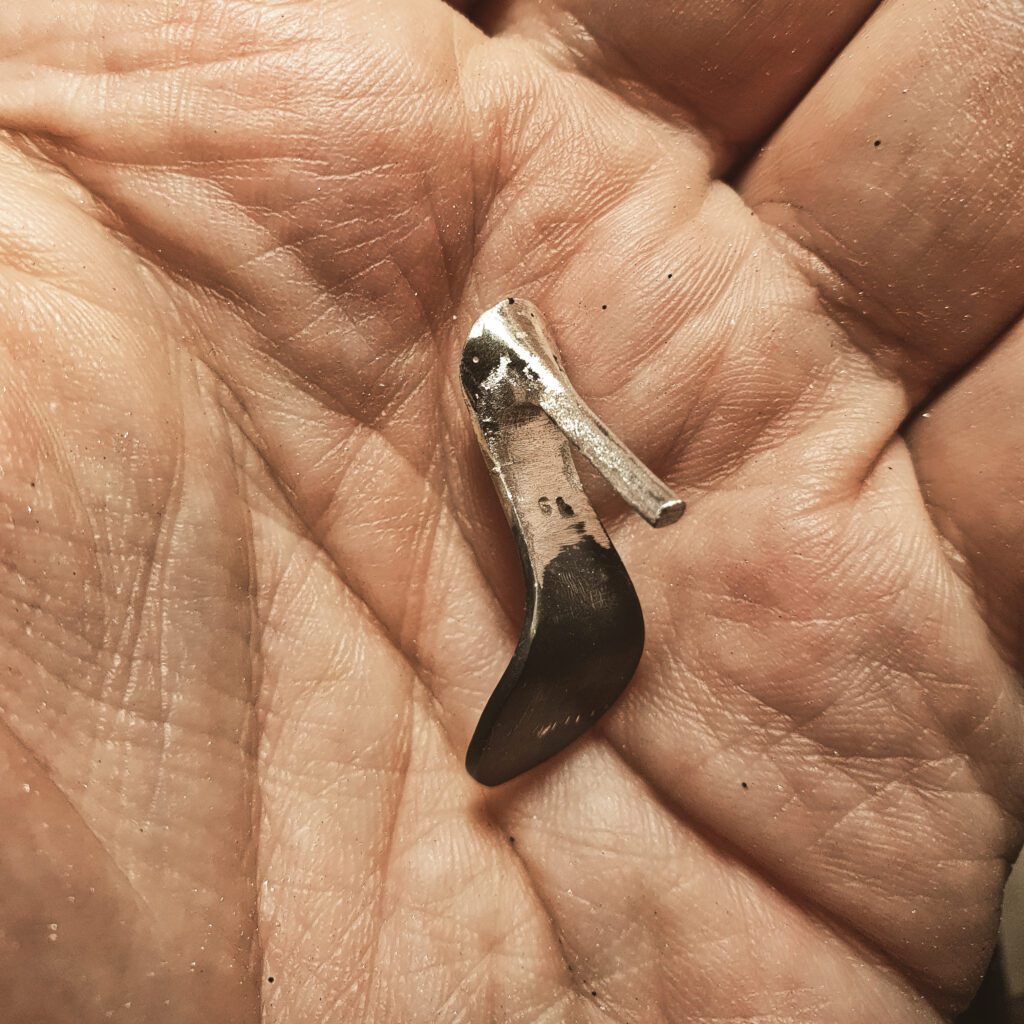
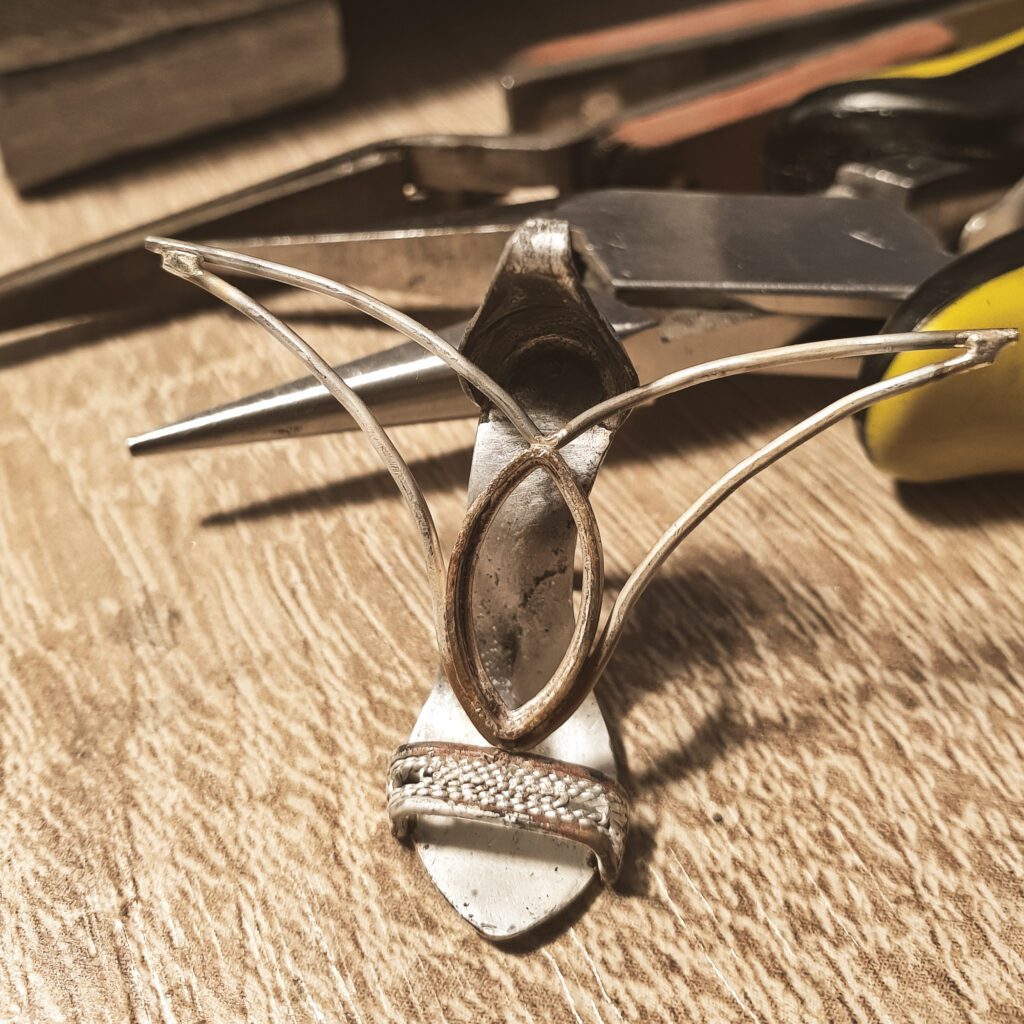
The stone saddle must be firmly connected to the shoe. I decided that three attachment points should be enough to hold it in place. The support frame is a sort of a v-shape which will be bent and have its ends soldered to the back heel holder.
Because there was no sketch (not on paper at least) I had to do a lot of fitting tries. This time luck was on my side as it appeared that the size was just right and there is no need to start over.
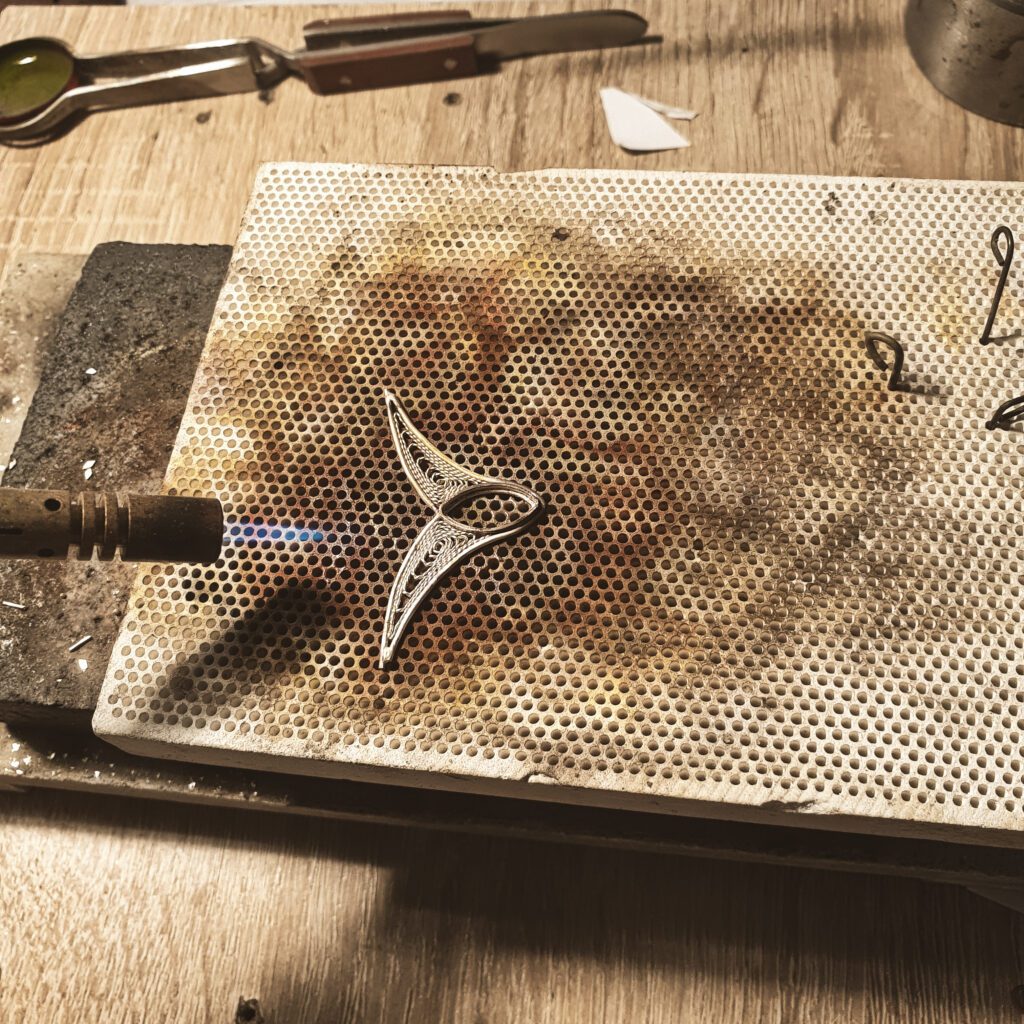
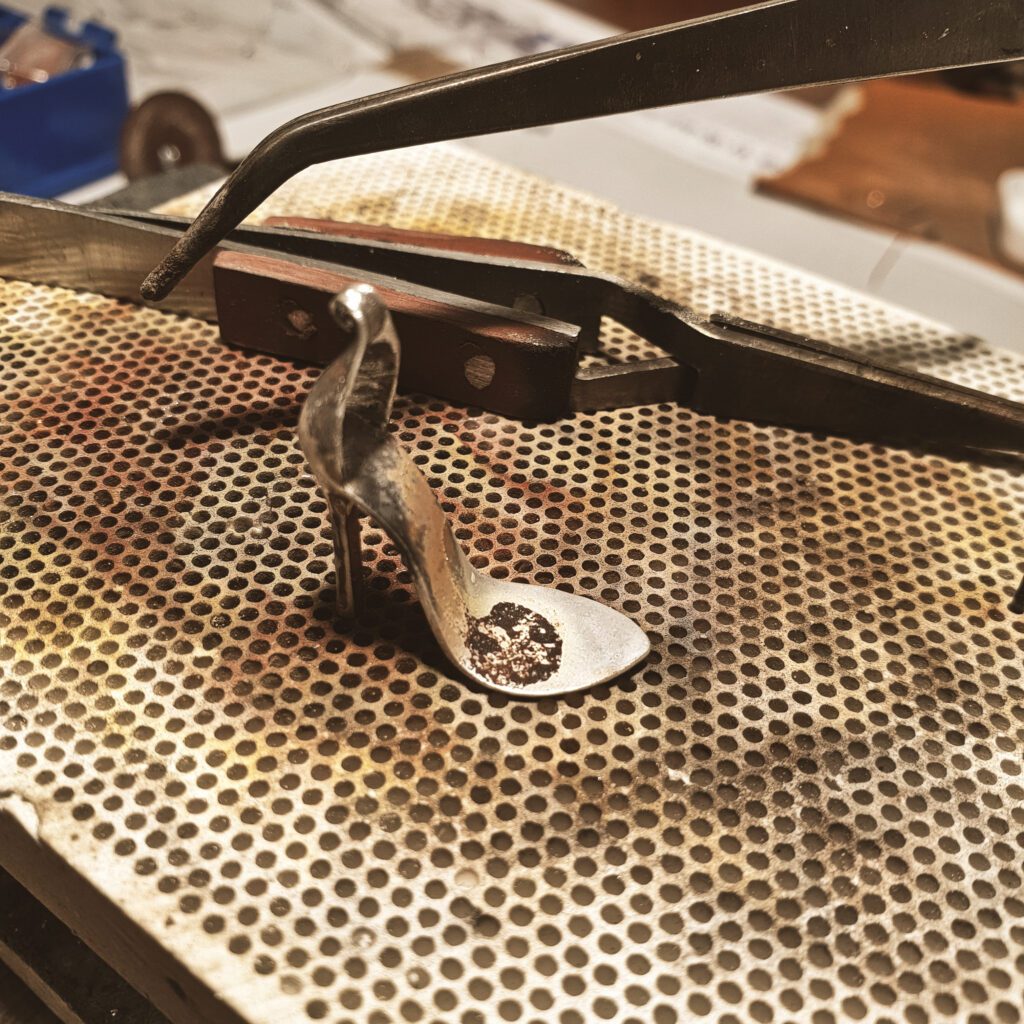
Before the final bending the saddle support frame I wanted to decorate it with filigree. It is way more convenient to do while the frame is still flat. Once you make your frame curved it becomes a nightmare to fit the filigree wire in it.
Once the filigree is in place it was time to add another important structural element – prongs. These are pieces of wire to hold the stone in its saddle. Learned my lesson in the High Heeled Amethyst Earrings this time I used thicker wire for prongs and attached them as two U-shape frames instead of four separate pieces of wire. then I bent the ends in the hoop and soldered the entire decoration component onto the shoe. So far it looks promising.
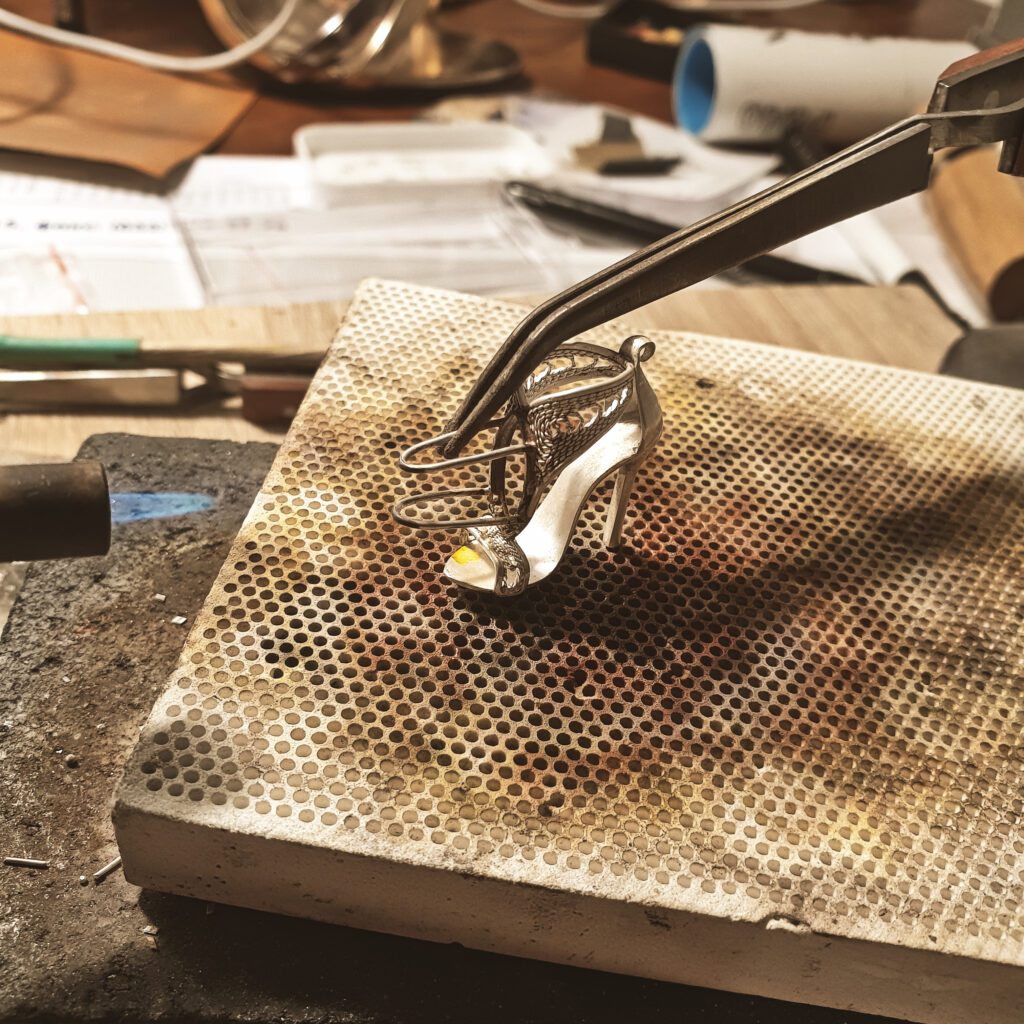
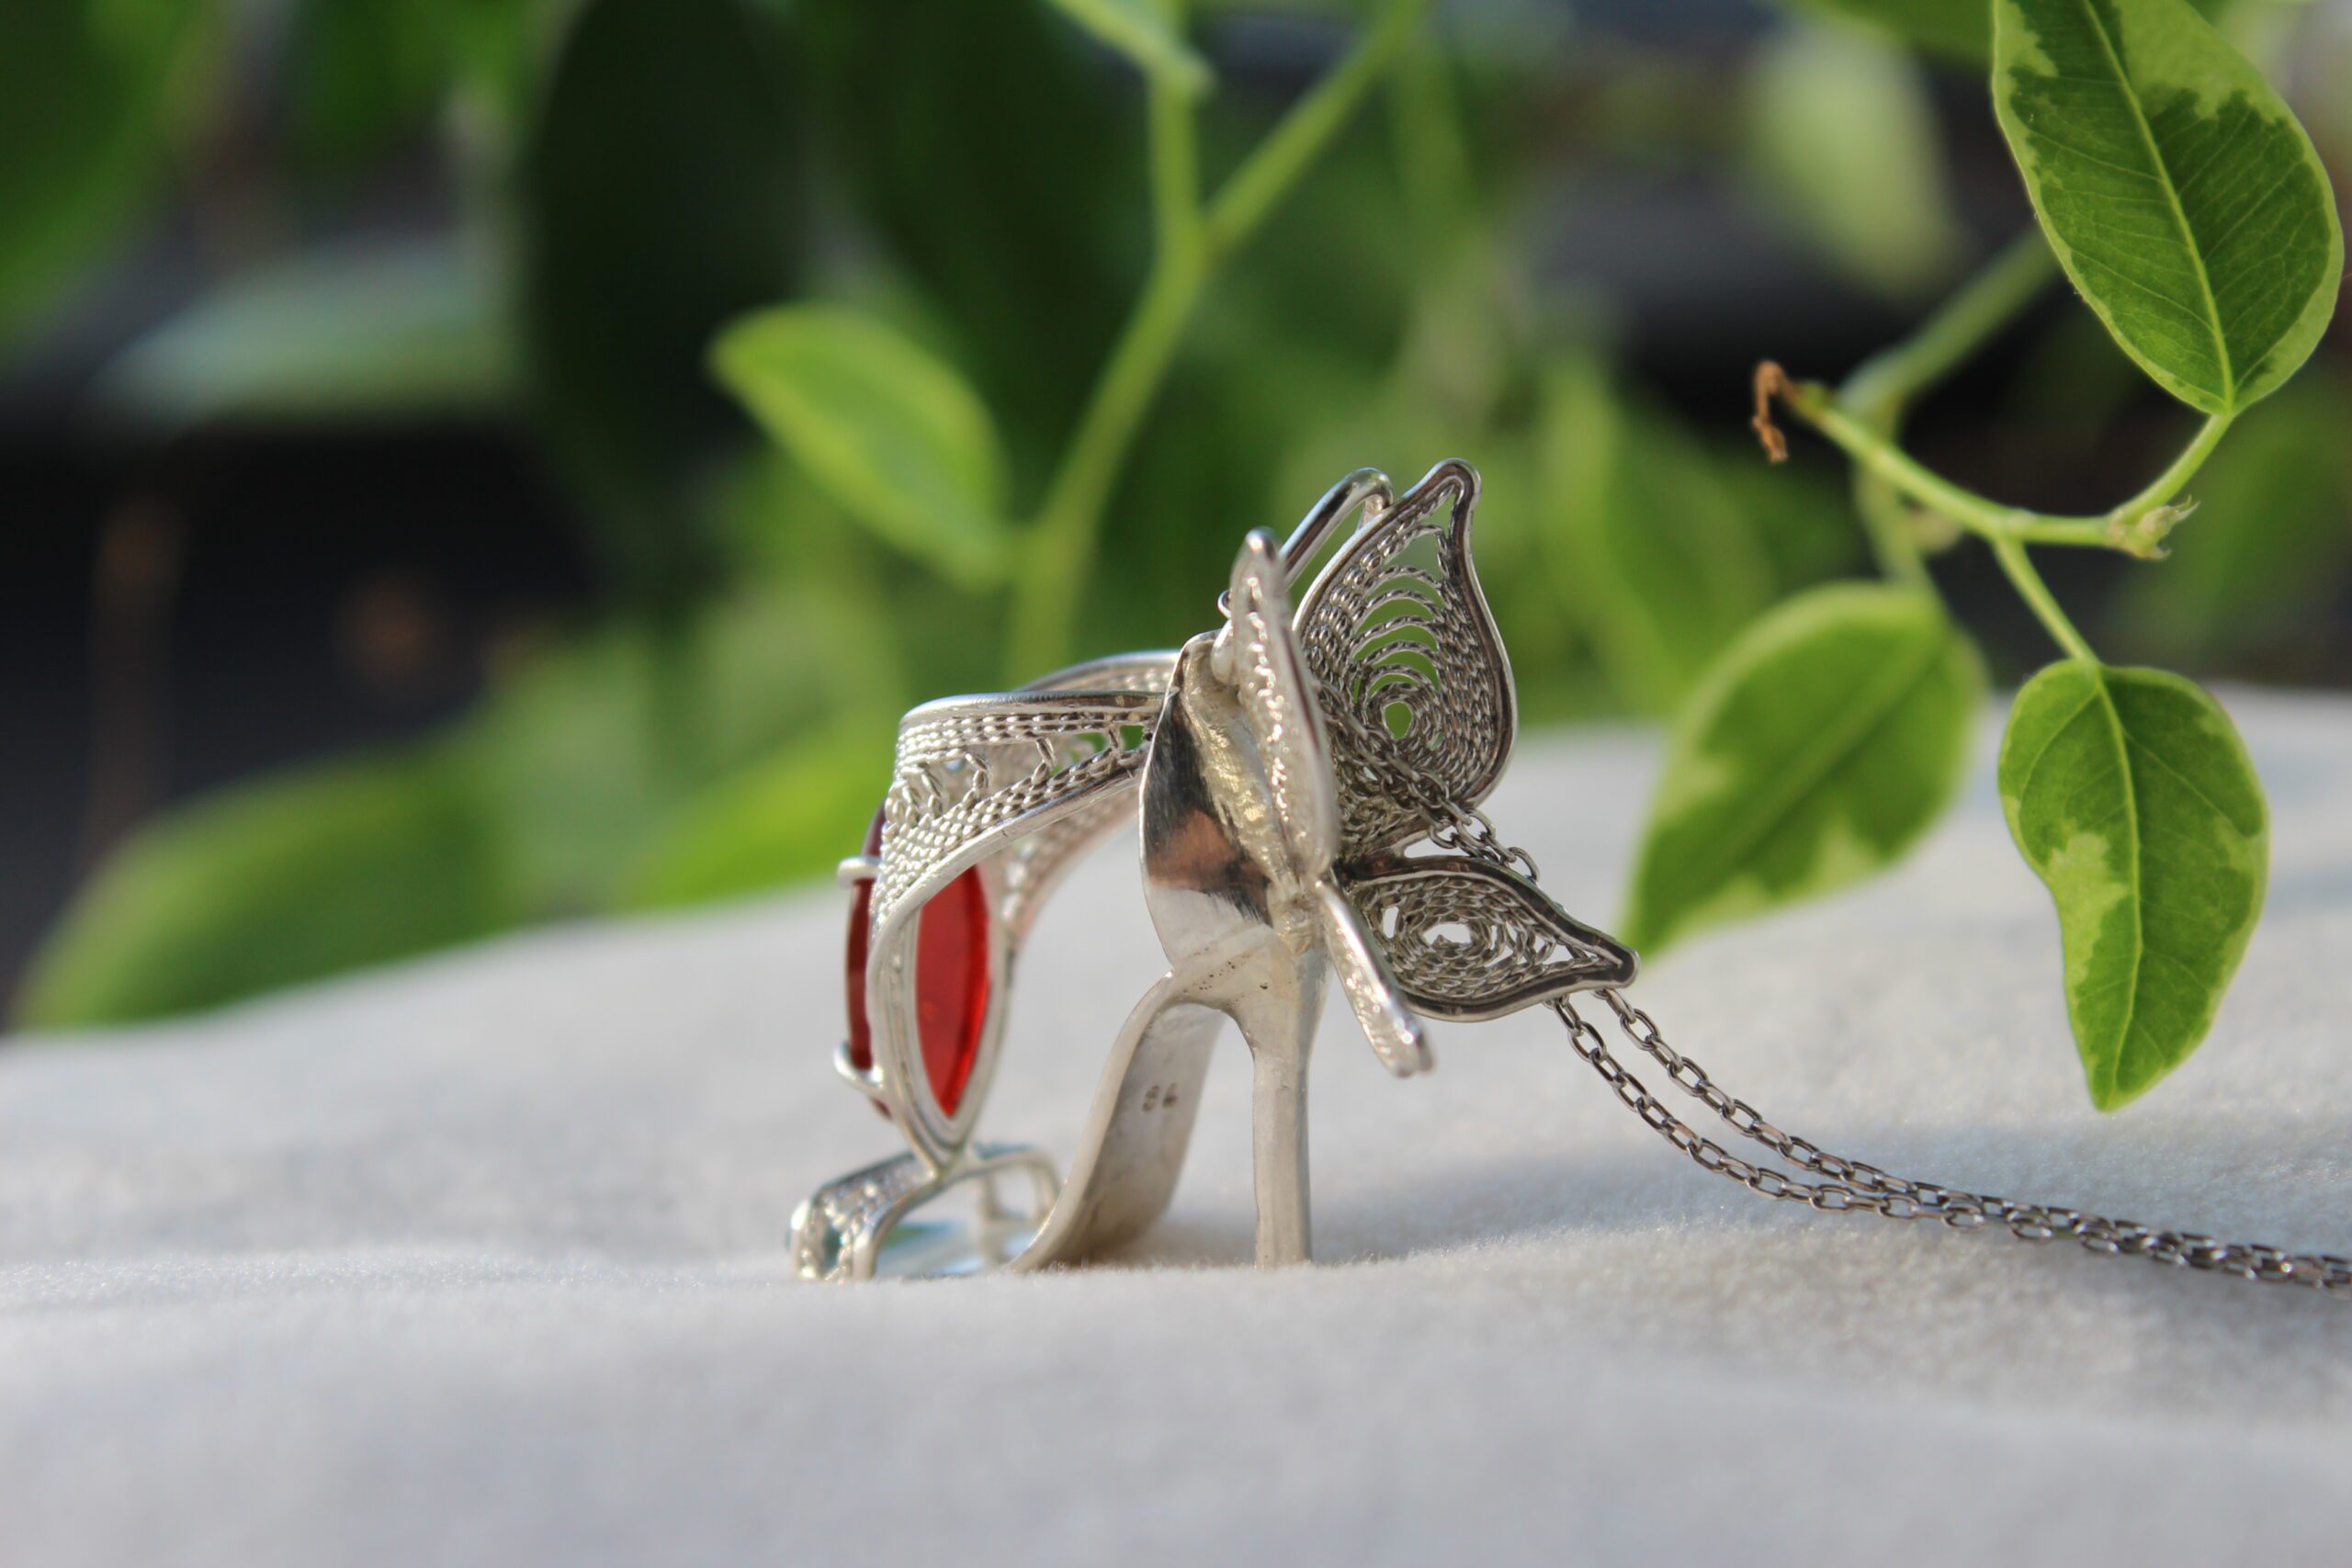
The butterfly
Inspired by a Sophia Webster winged shoes I was sure the butterfly wings will look awesome in a silver shoe as well. I did, however, had some doubts whether go forward with this idea because the shoe was already looking great after the rough polishing. In the end the curiosity took over the risk of screwing up a perfectly good pendant.

This time a sketch was rather necessary at least a rough one. I have come to realise that I have never sketched a butterfly before and it appeared to be nothing like straightforward. I ended up doing a research on butterflies and you would be surprised how many of them are out there. After a couple of hours and few sketch pages spent on butterflies I had a winner fitting perfectly to be sitting on a silver shoe.
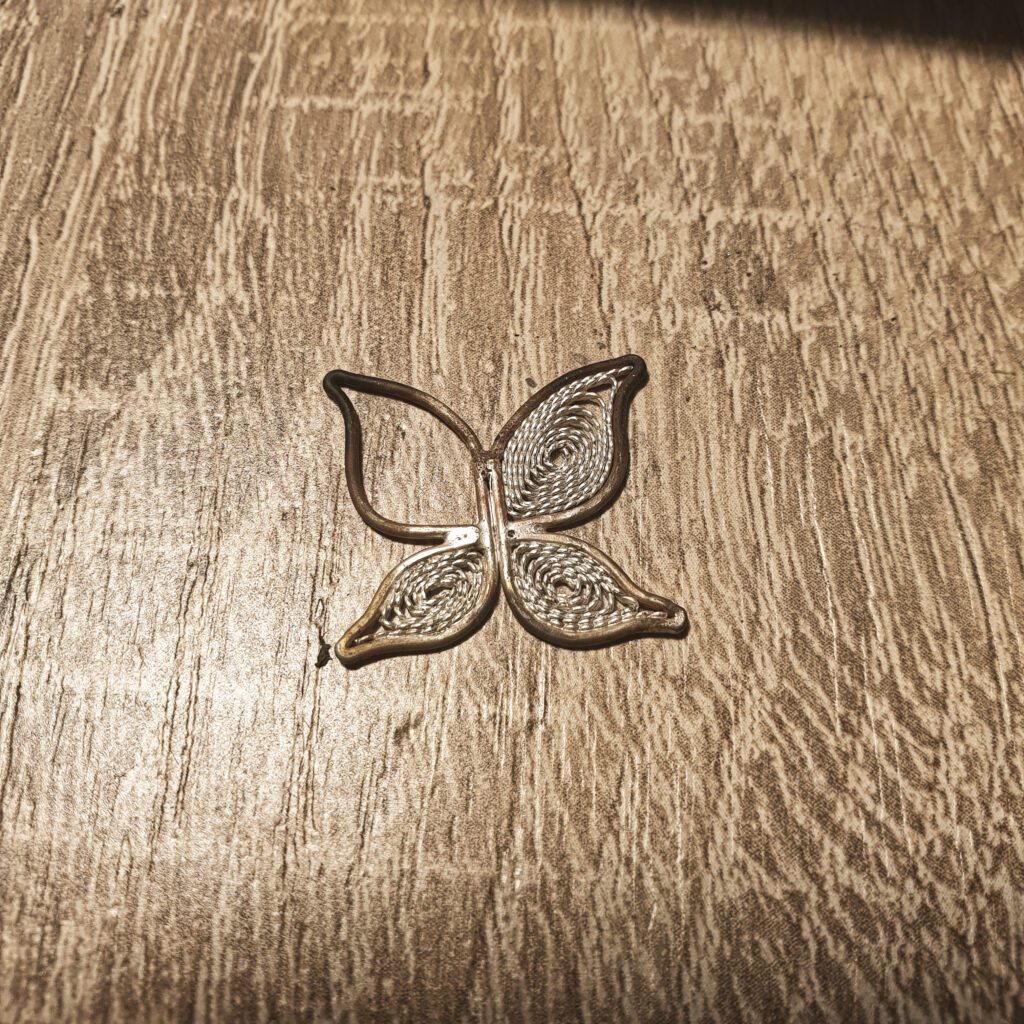
Thanks to my engineering intuition I did spent a bit more time thinking through the whole assembly process. Otherwise I would most definitely ended up starting this element over and over. The trick is that the butterfly outline is initially made flat so that I can fill it in with filigree. After that it will be bent in half to spread its wings. That’s why I made the frame with a single piece of wire with both ends running parallel in the middle. I assume that with a single wire in the middle it would not be stiff enough and there might have been difficulties soldering it to the shoe.
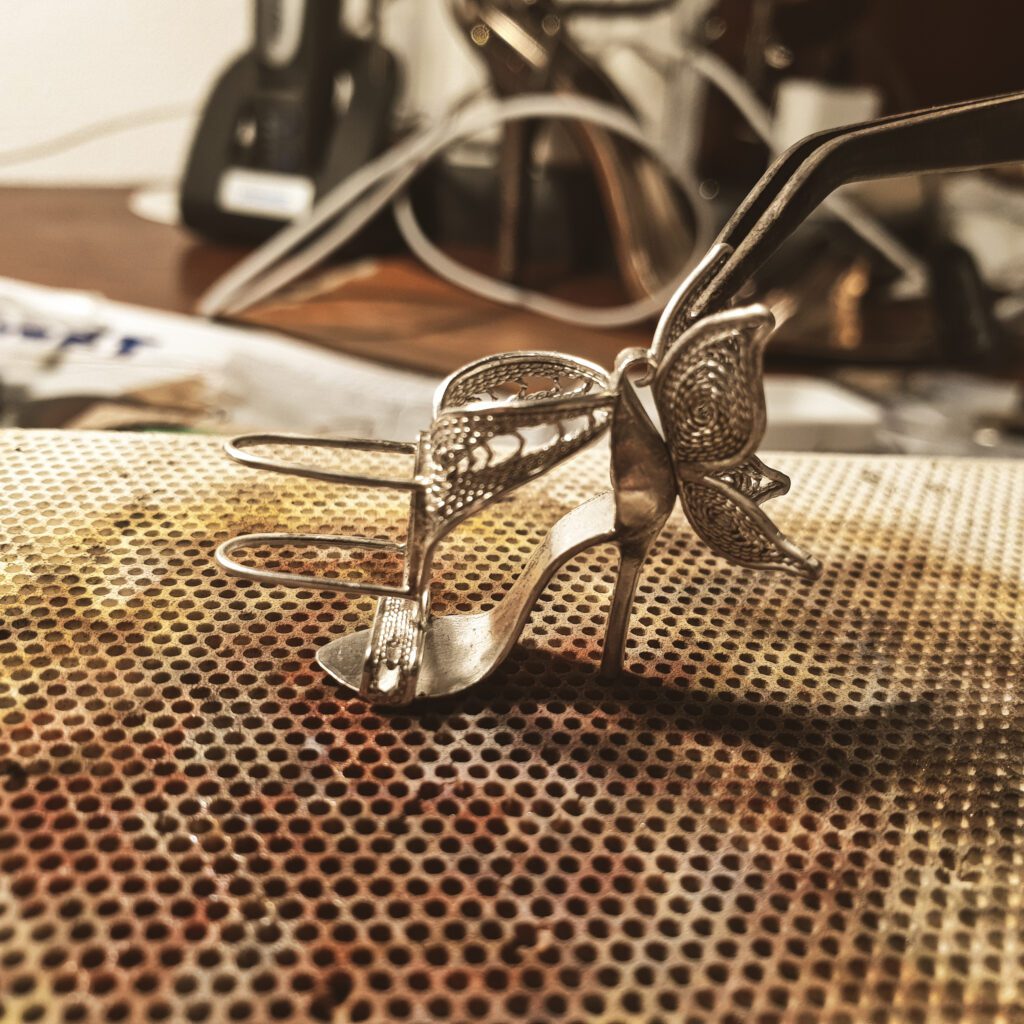
The final assemble is always breathtaking as this is when all previous flaws usually appear. I was worried that during this operation I might overheat it and the heel or back heel holder will get misplaced. Luckily this time no major disaster happened, nothing that cannot be gently grinned away anyway.
Stone setting
Once all soldering operations are completed and rough polishing applied – that’s like almost the finish line. One of my bosses used to say that “if it 90% done – it’s done”. But in my case I thought it would be weird and irresponsible to spend so much effort crafting the saddle for a stone and leave it empty. The biggest difficulty here is that the shoe has a complex shape especially with a butterfly wings on its back which is not perfect to be clamped in a vice.
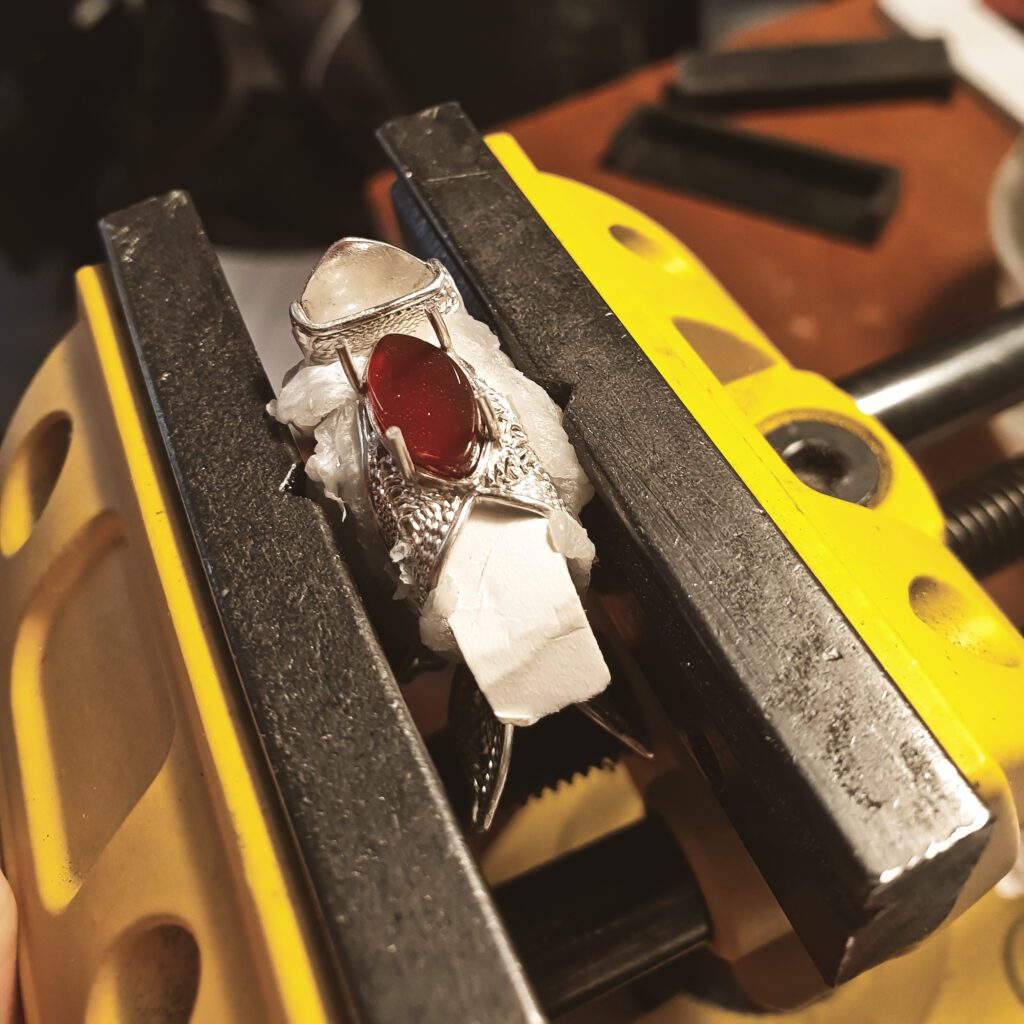
In order to preserve all the delicate parts of this pendant I decided to use a thermoplastic putty for stone setting. I put the beads into the boiling water where they melt into a single slime. This slime goes inside and around the pendant making sure the saddle is accessible. Once it cools off it gets impressively hard so that it can be safely clamped in a vice. It is now time to insert a stone in its place, maybe grind off a bit to get a perfect fit and bend the prongs to hold the stone firmly. Voila!
Final note to myself: even though the thermoplastic putty works great for the stone setting activities, removing its residue from tiny cavities of a complex shape pendant is a nightmare. Next time I do need to remember to think this step through more thorough.
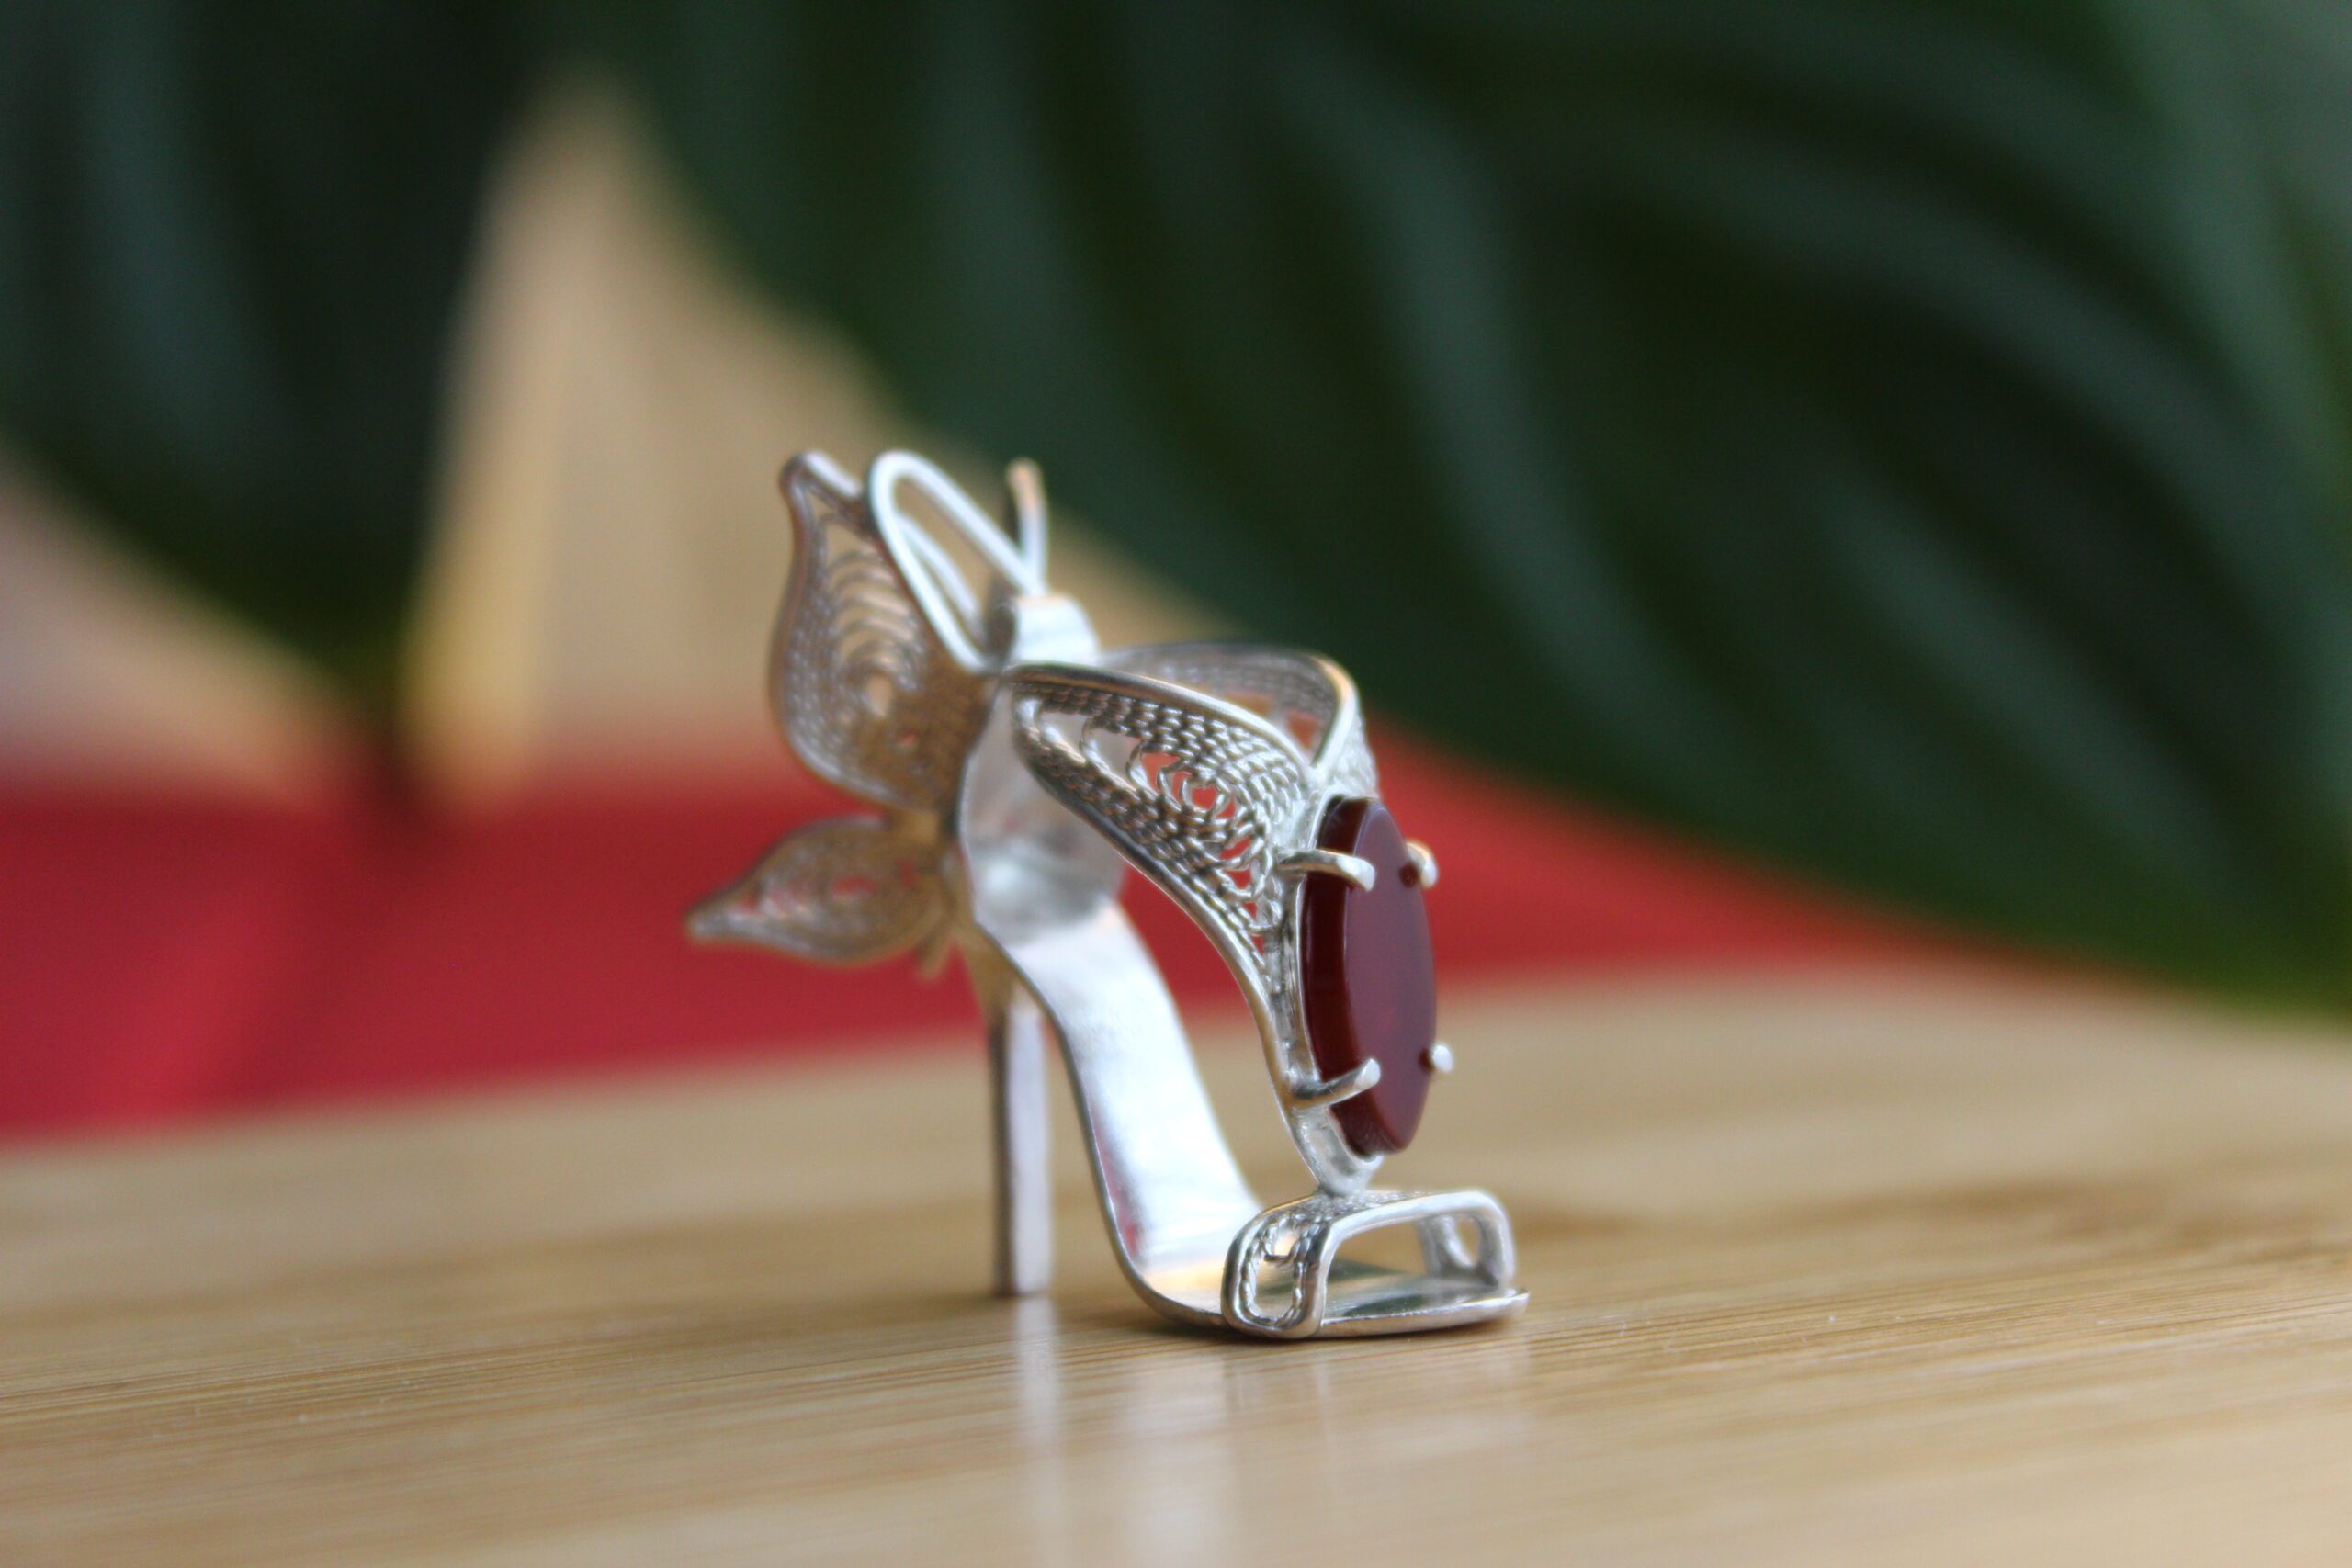
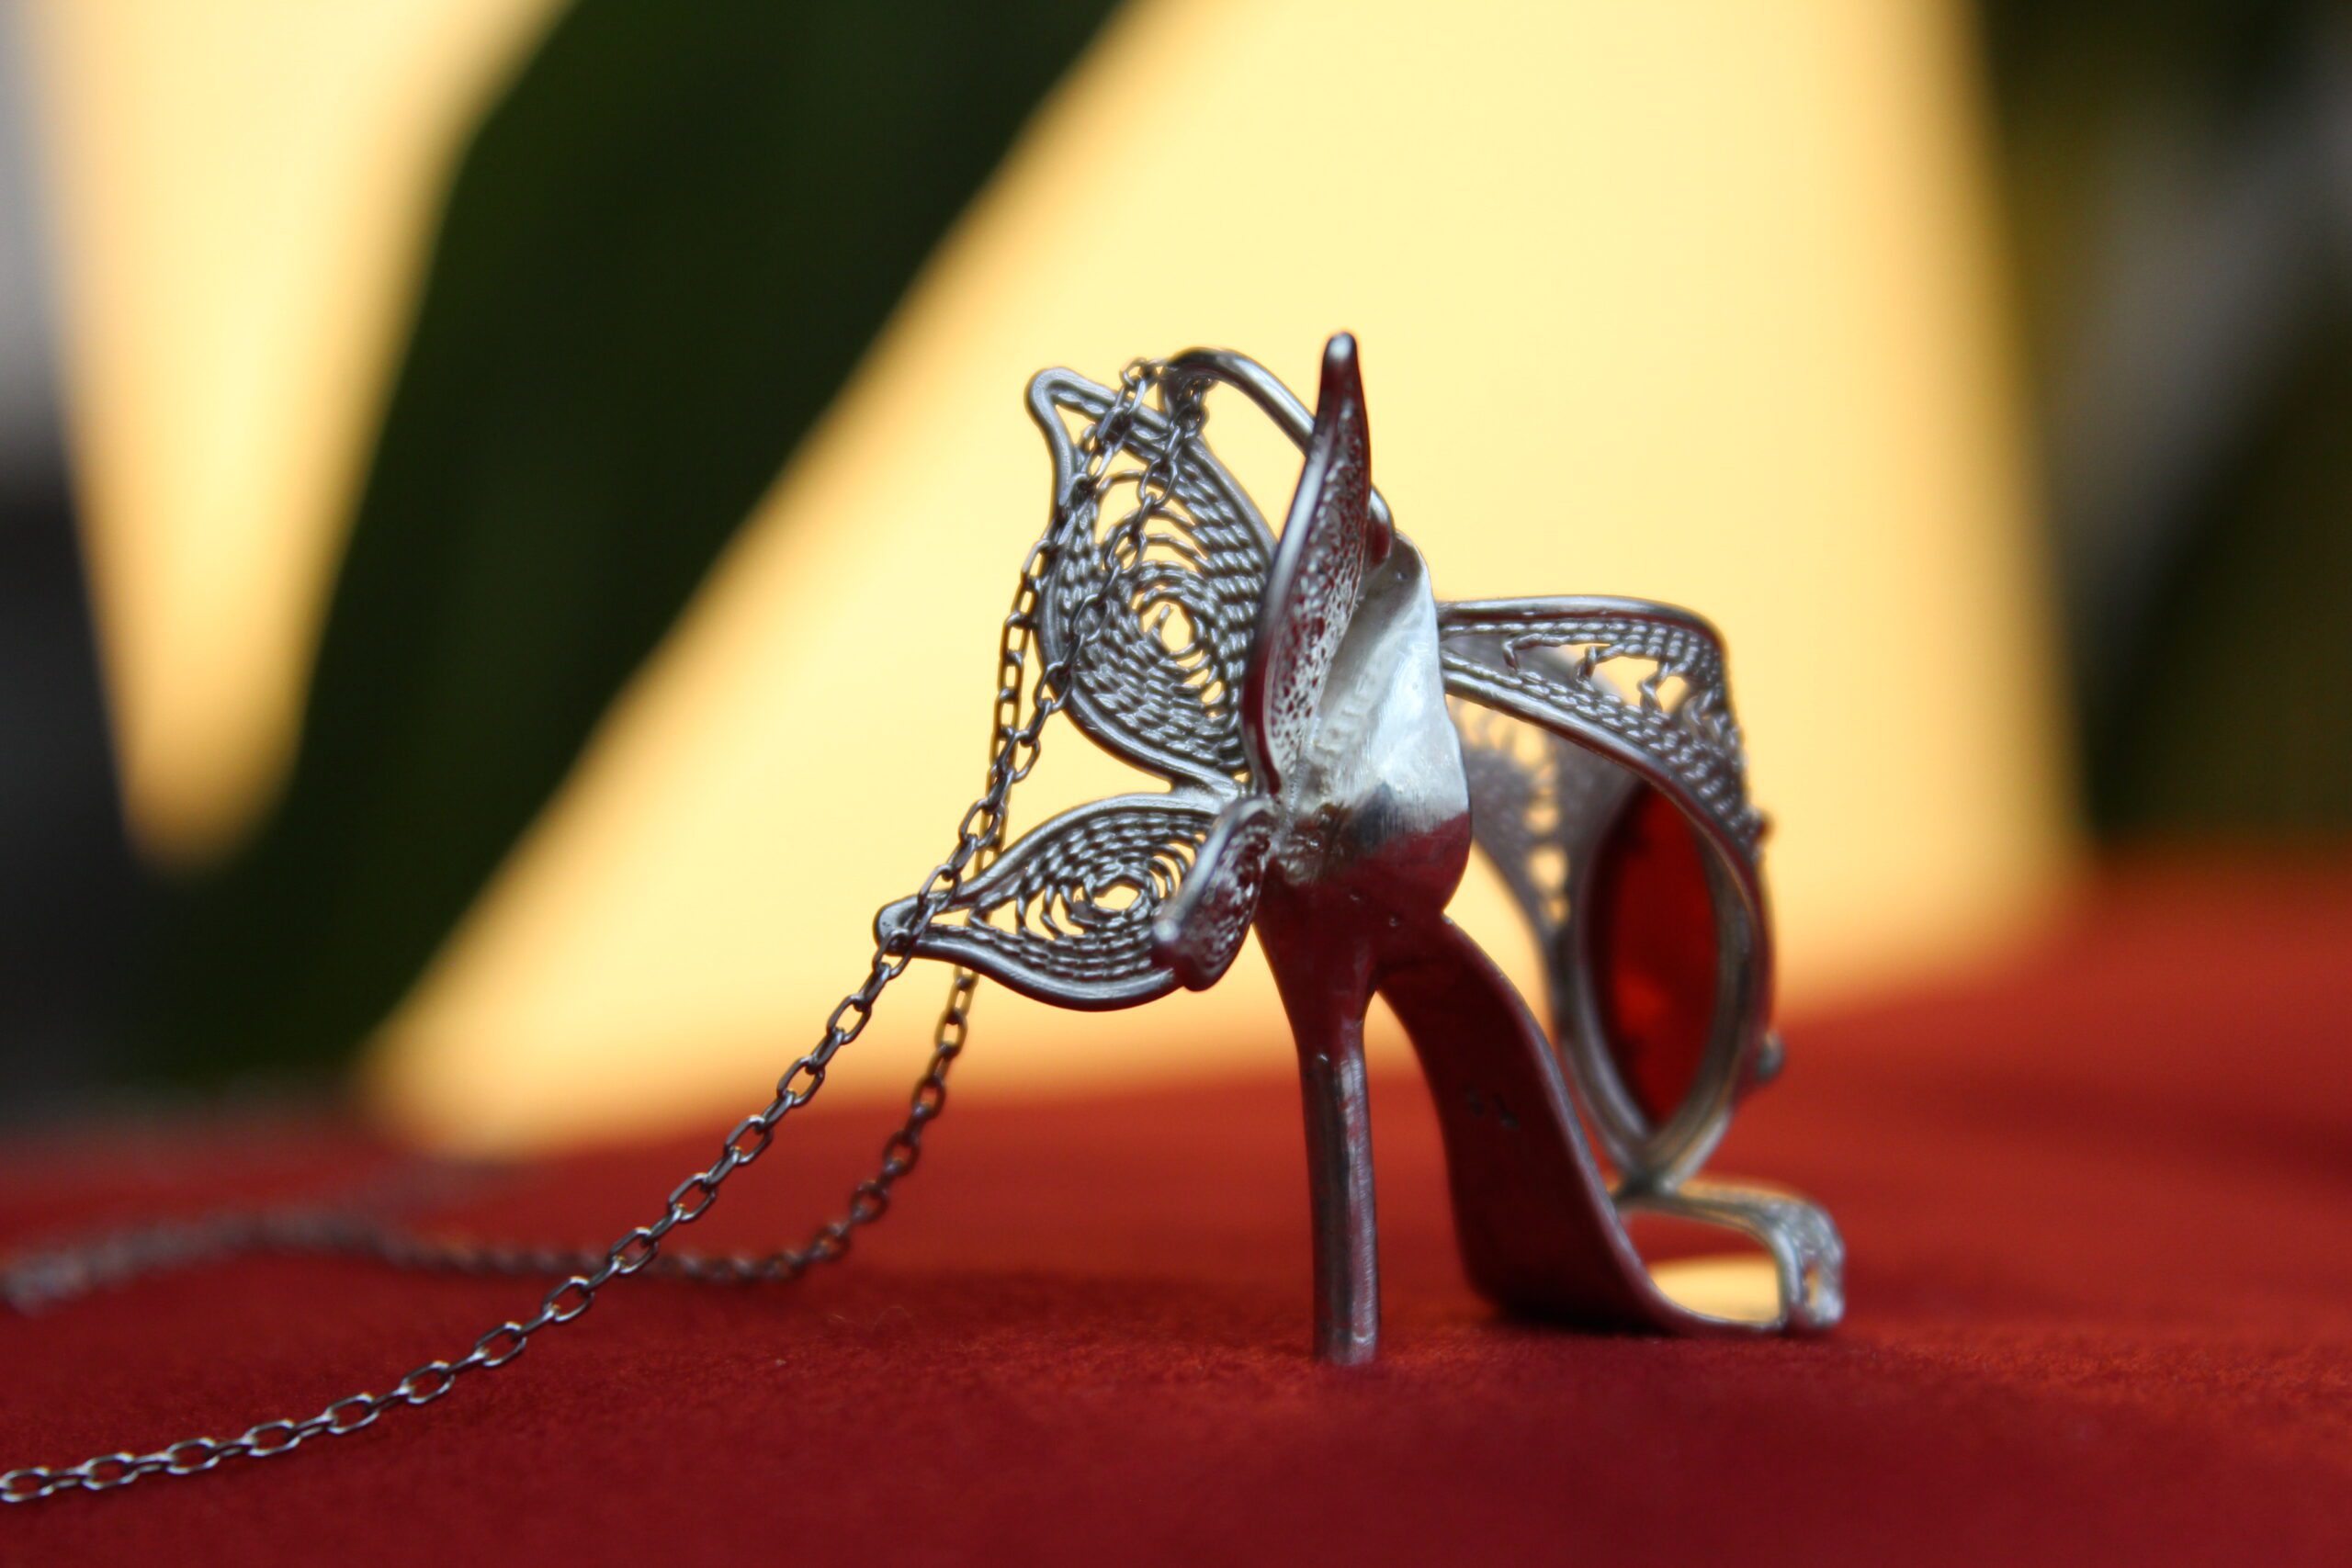
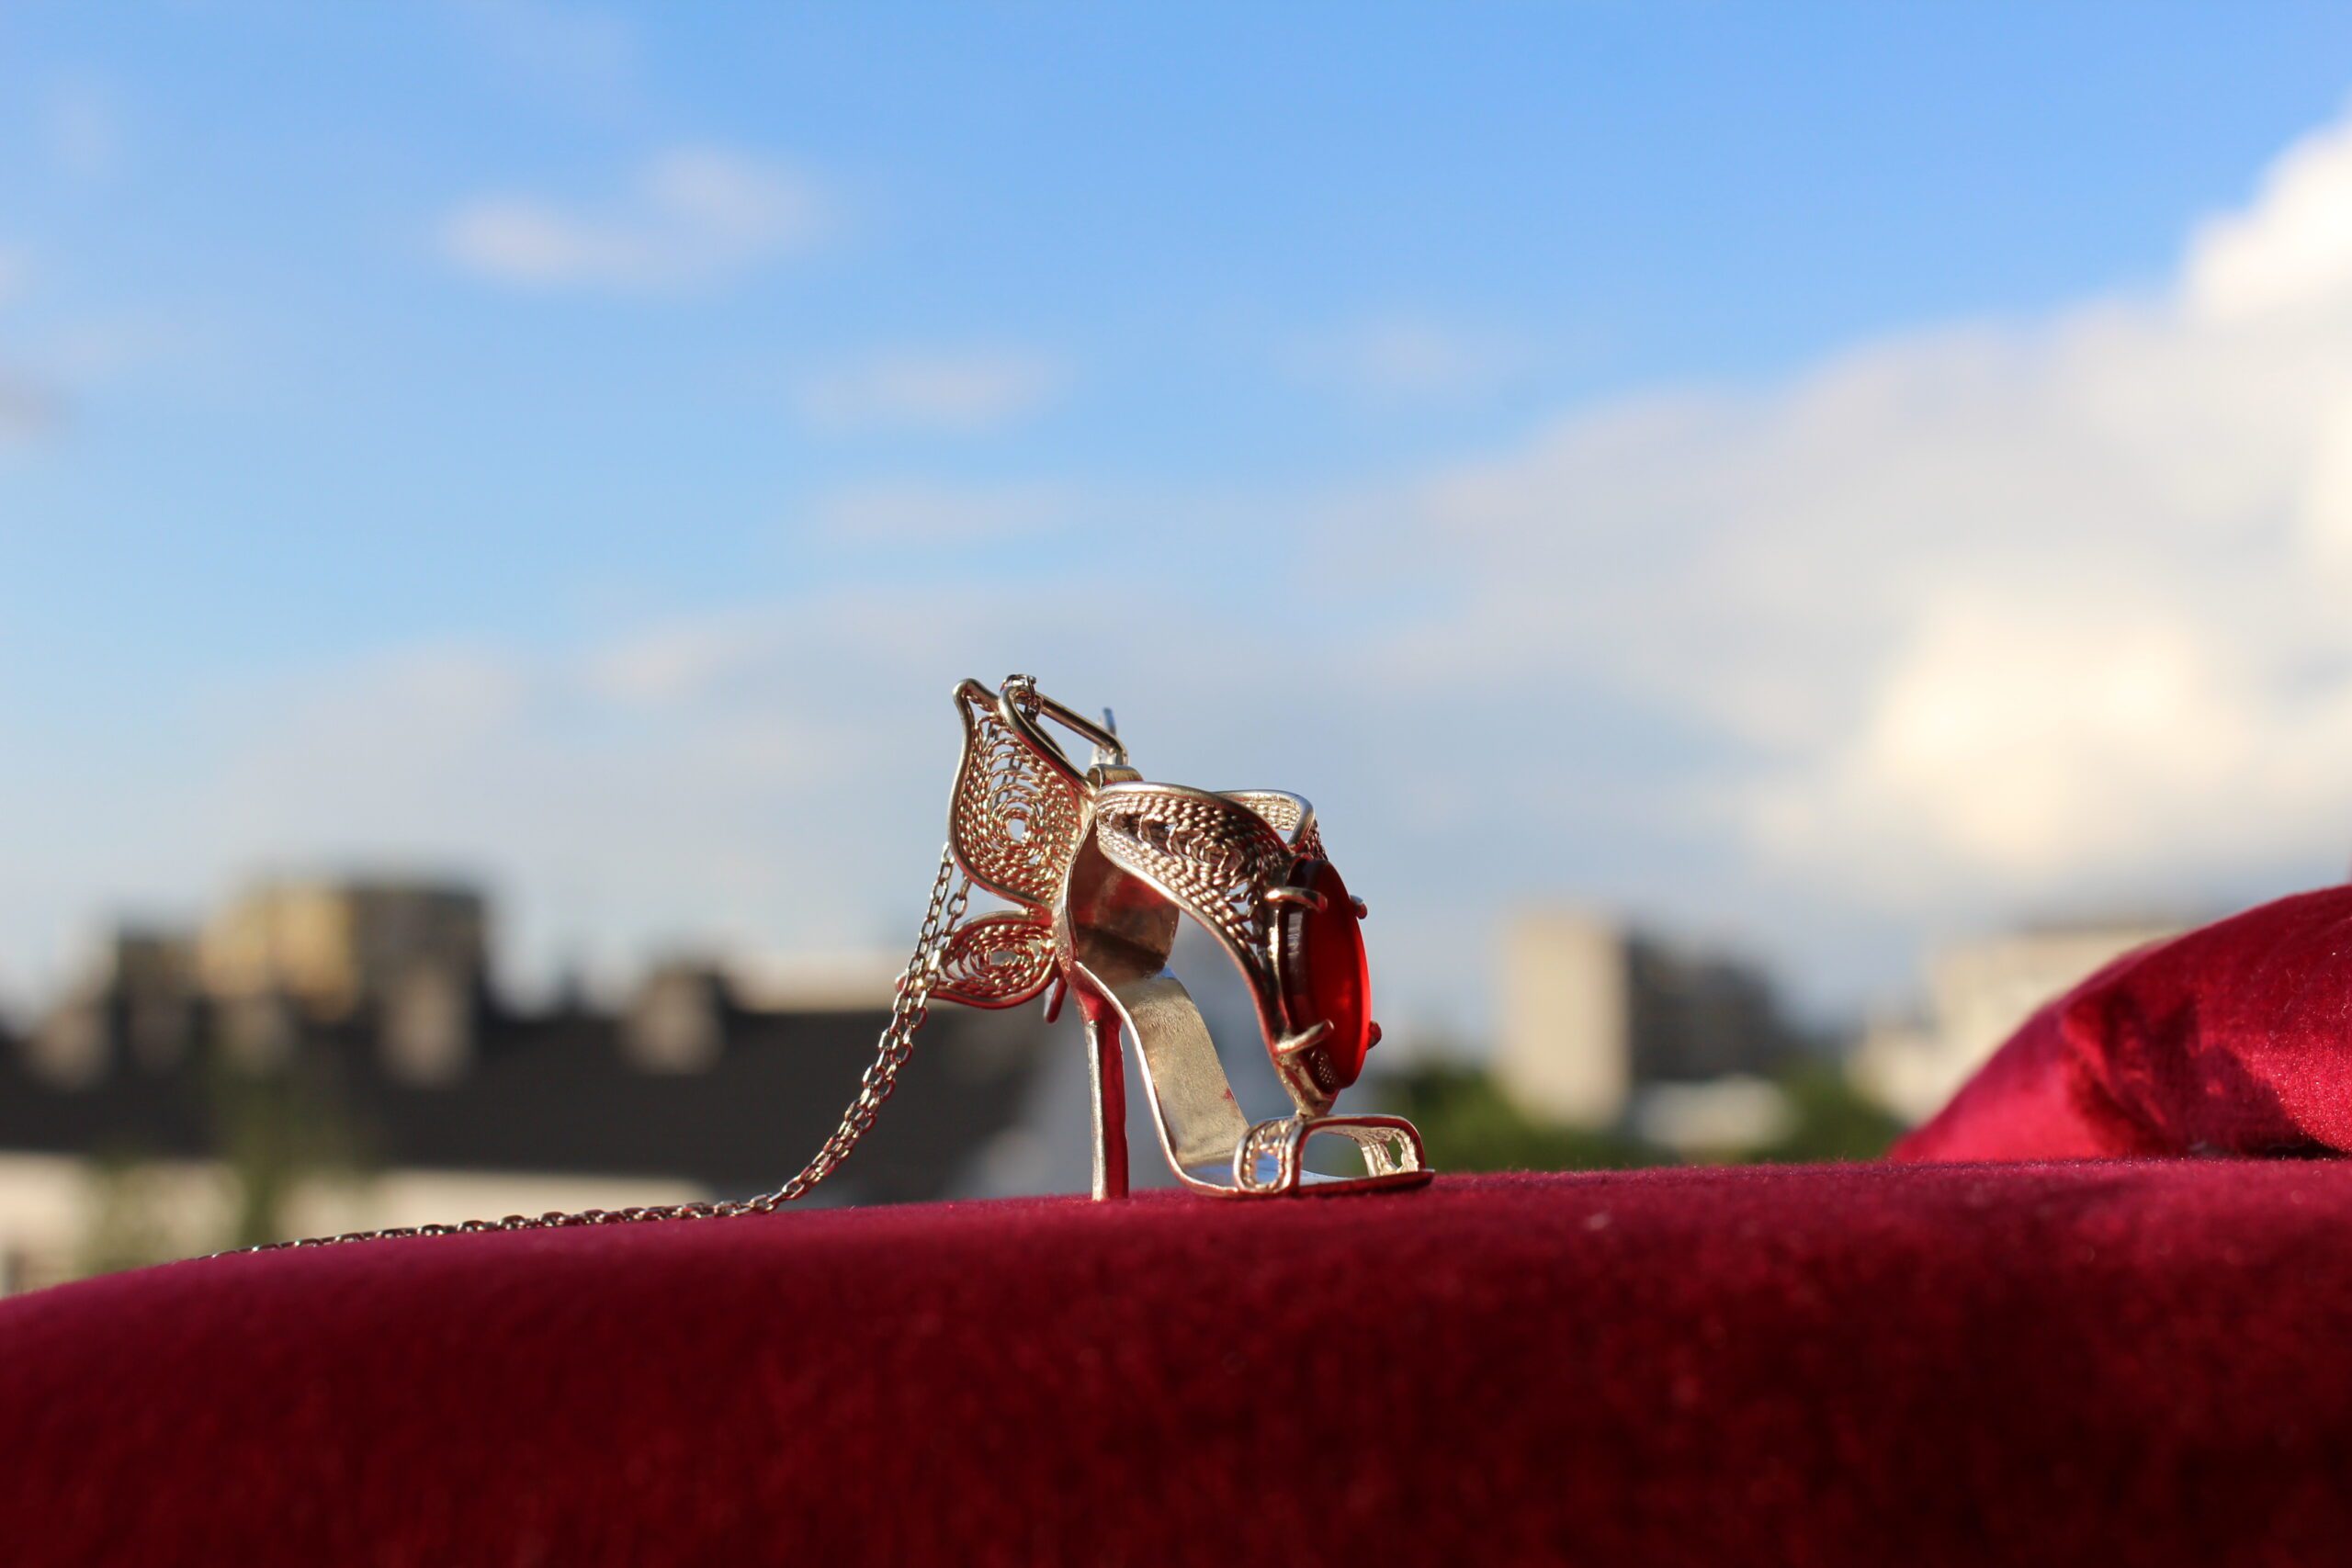
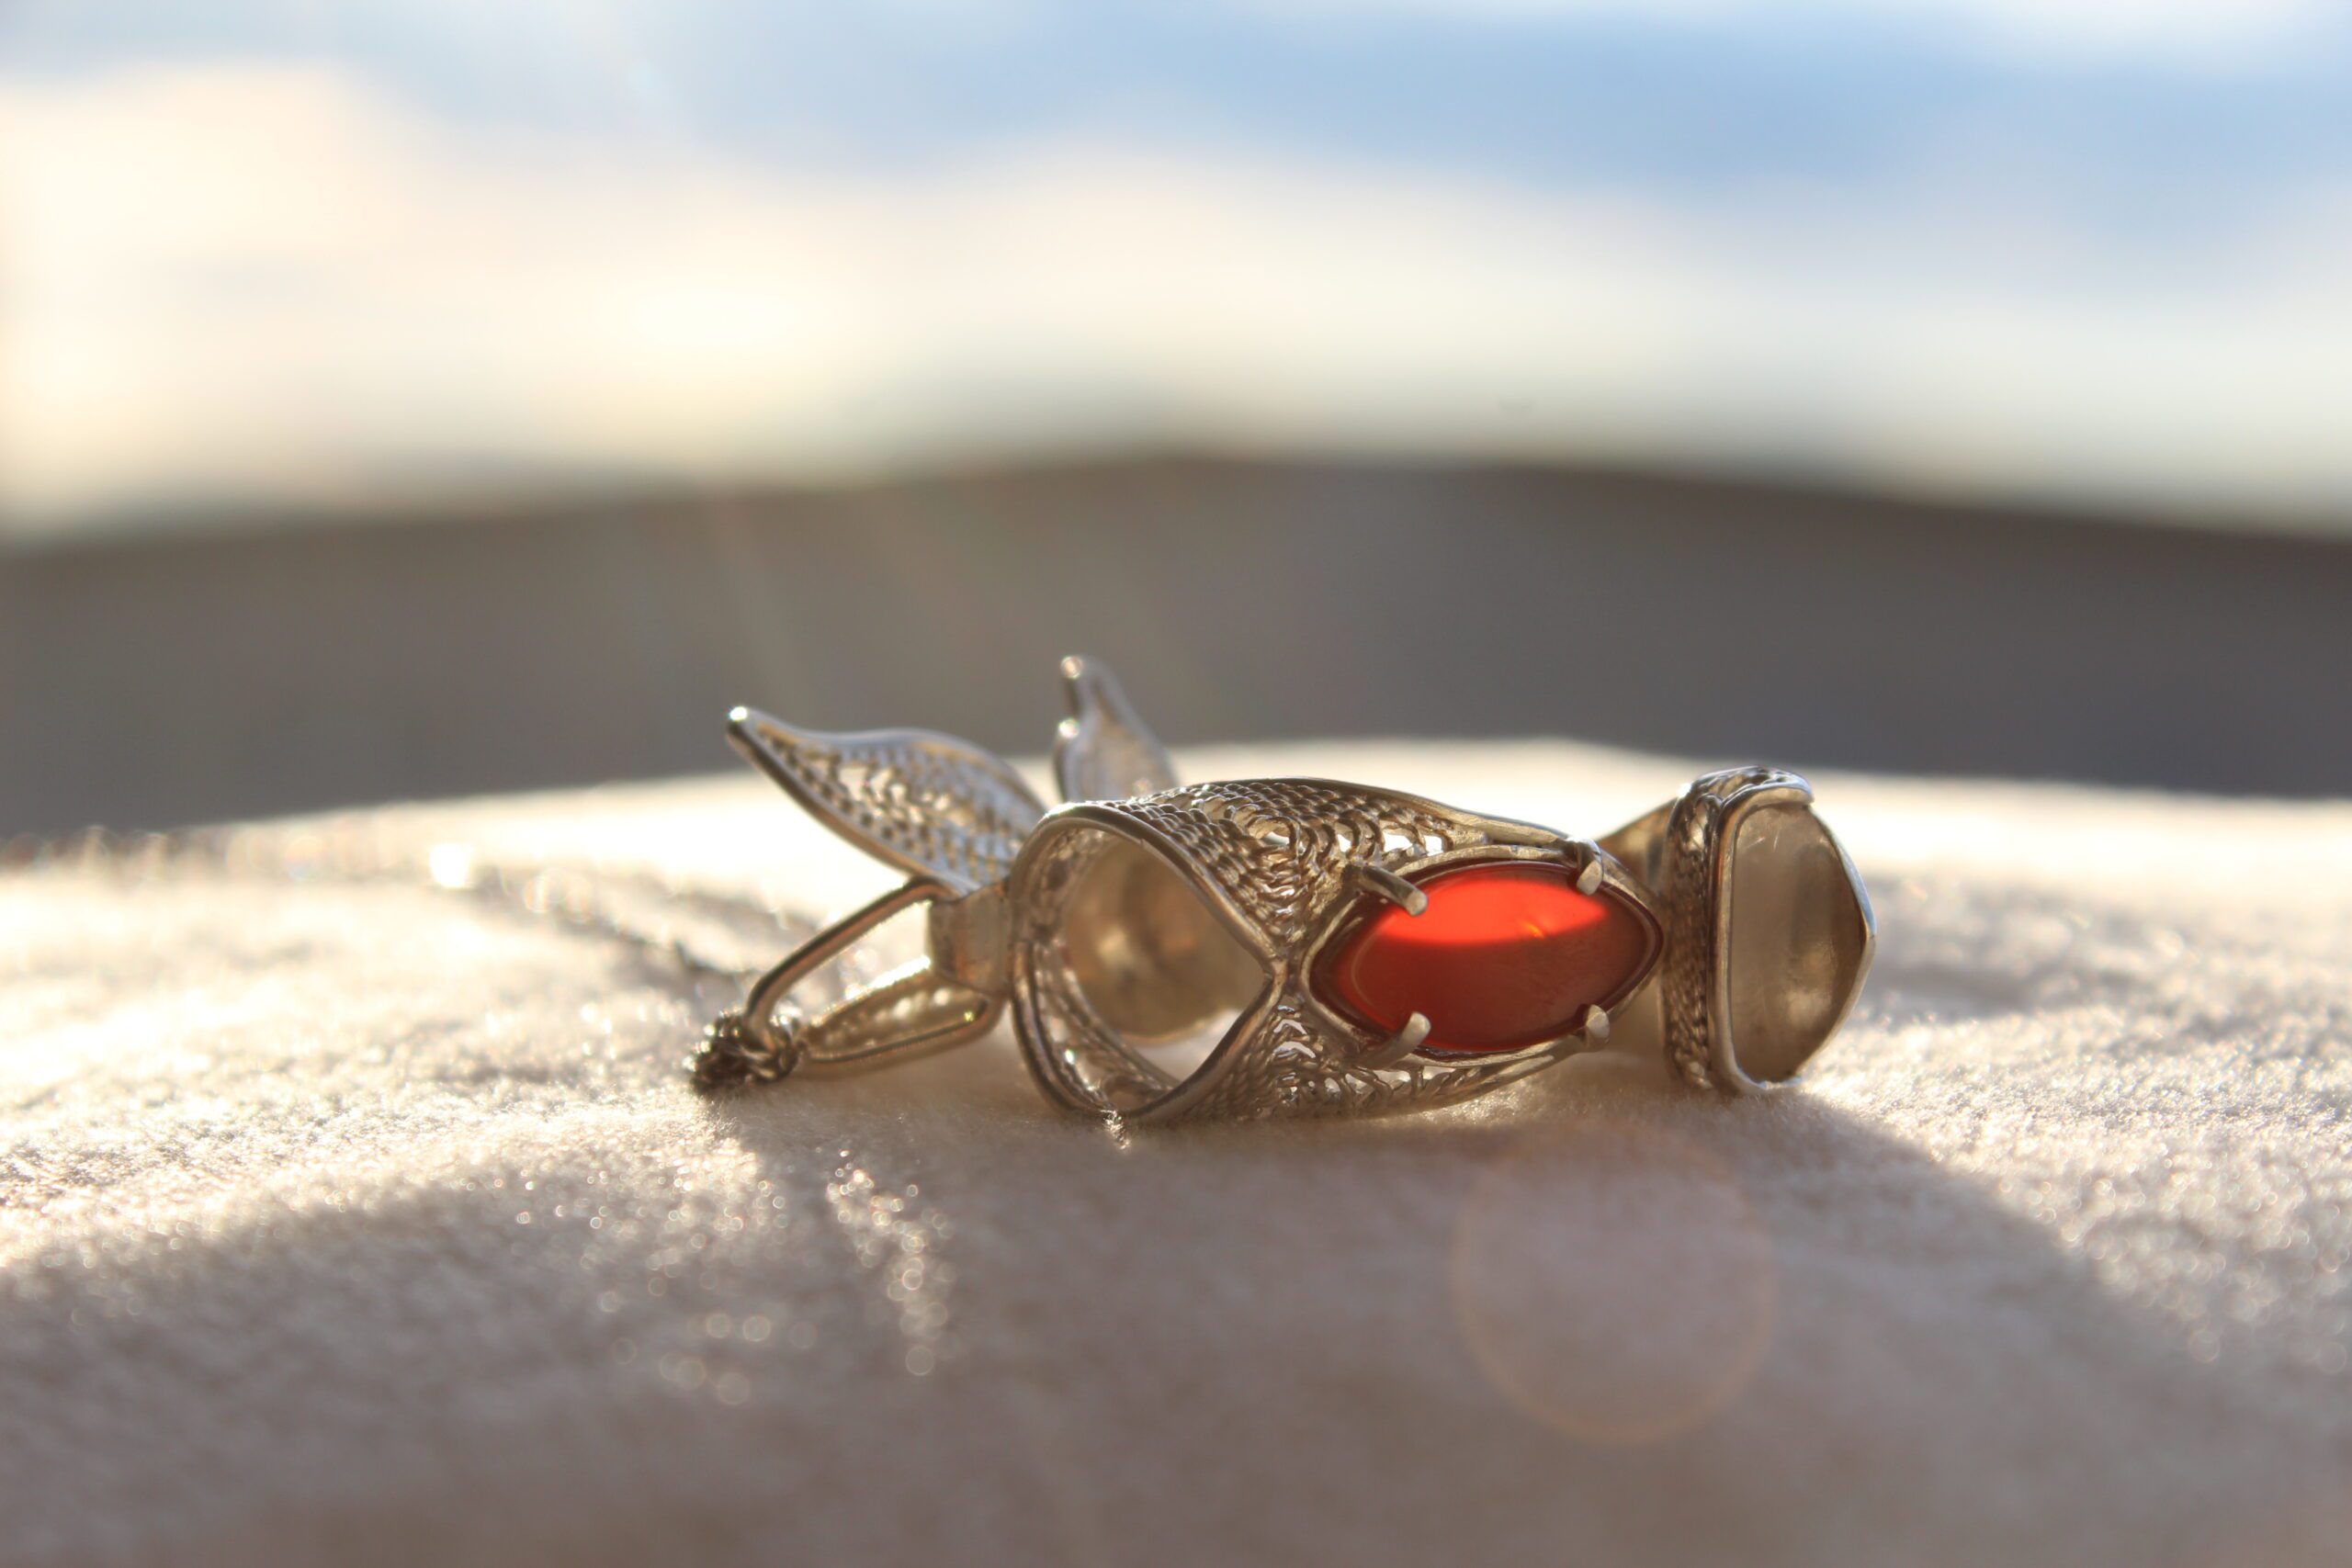
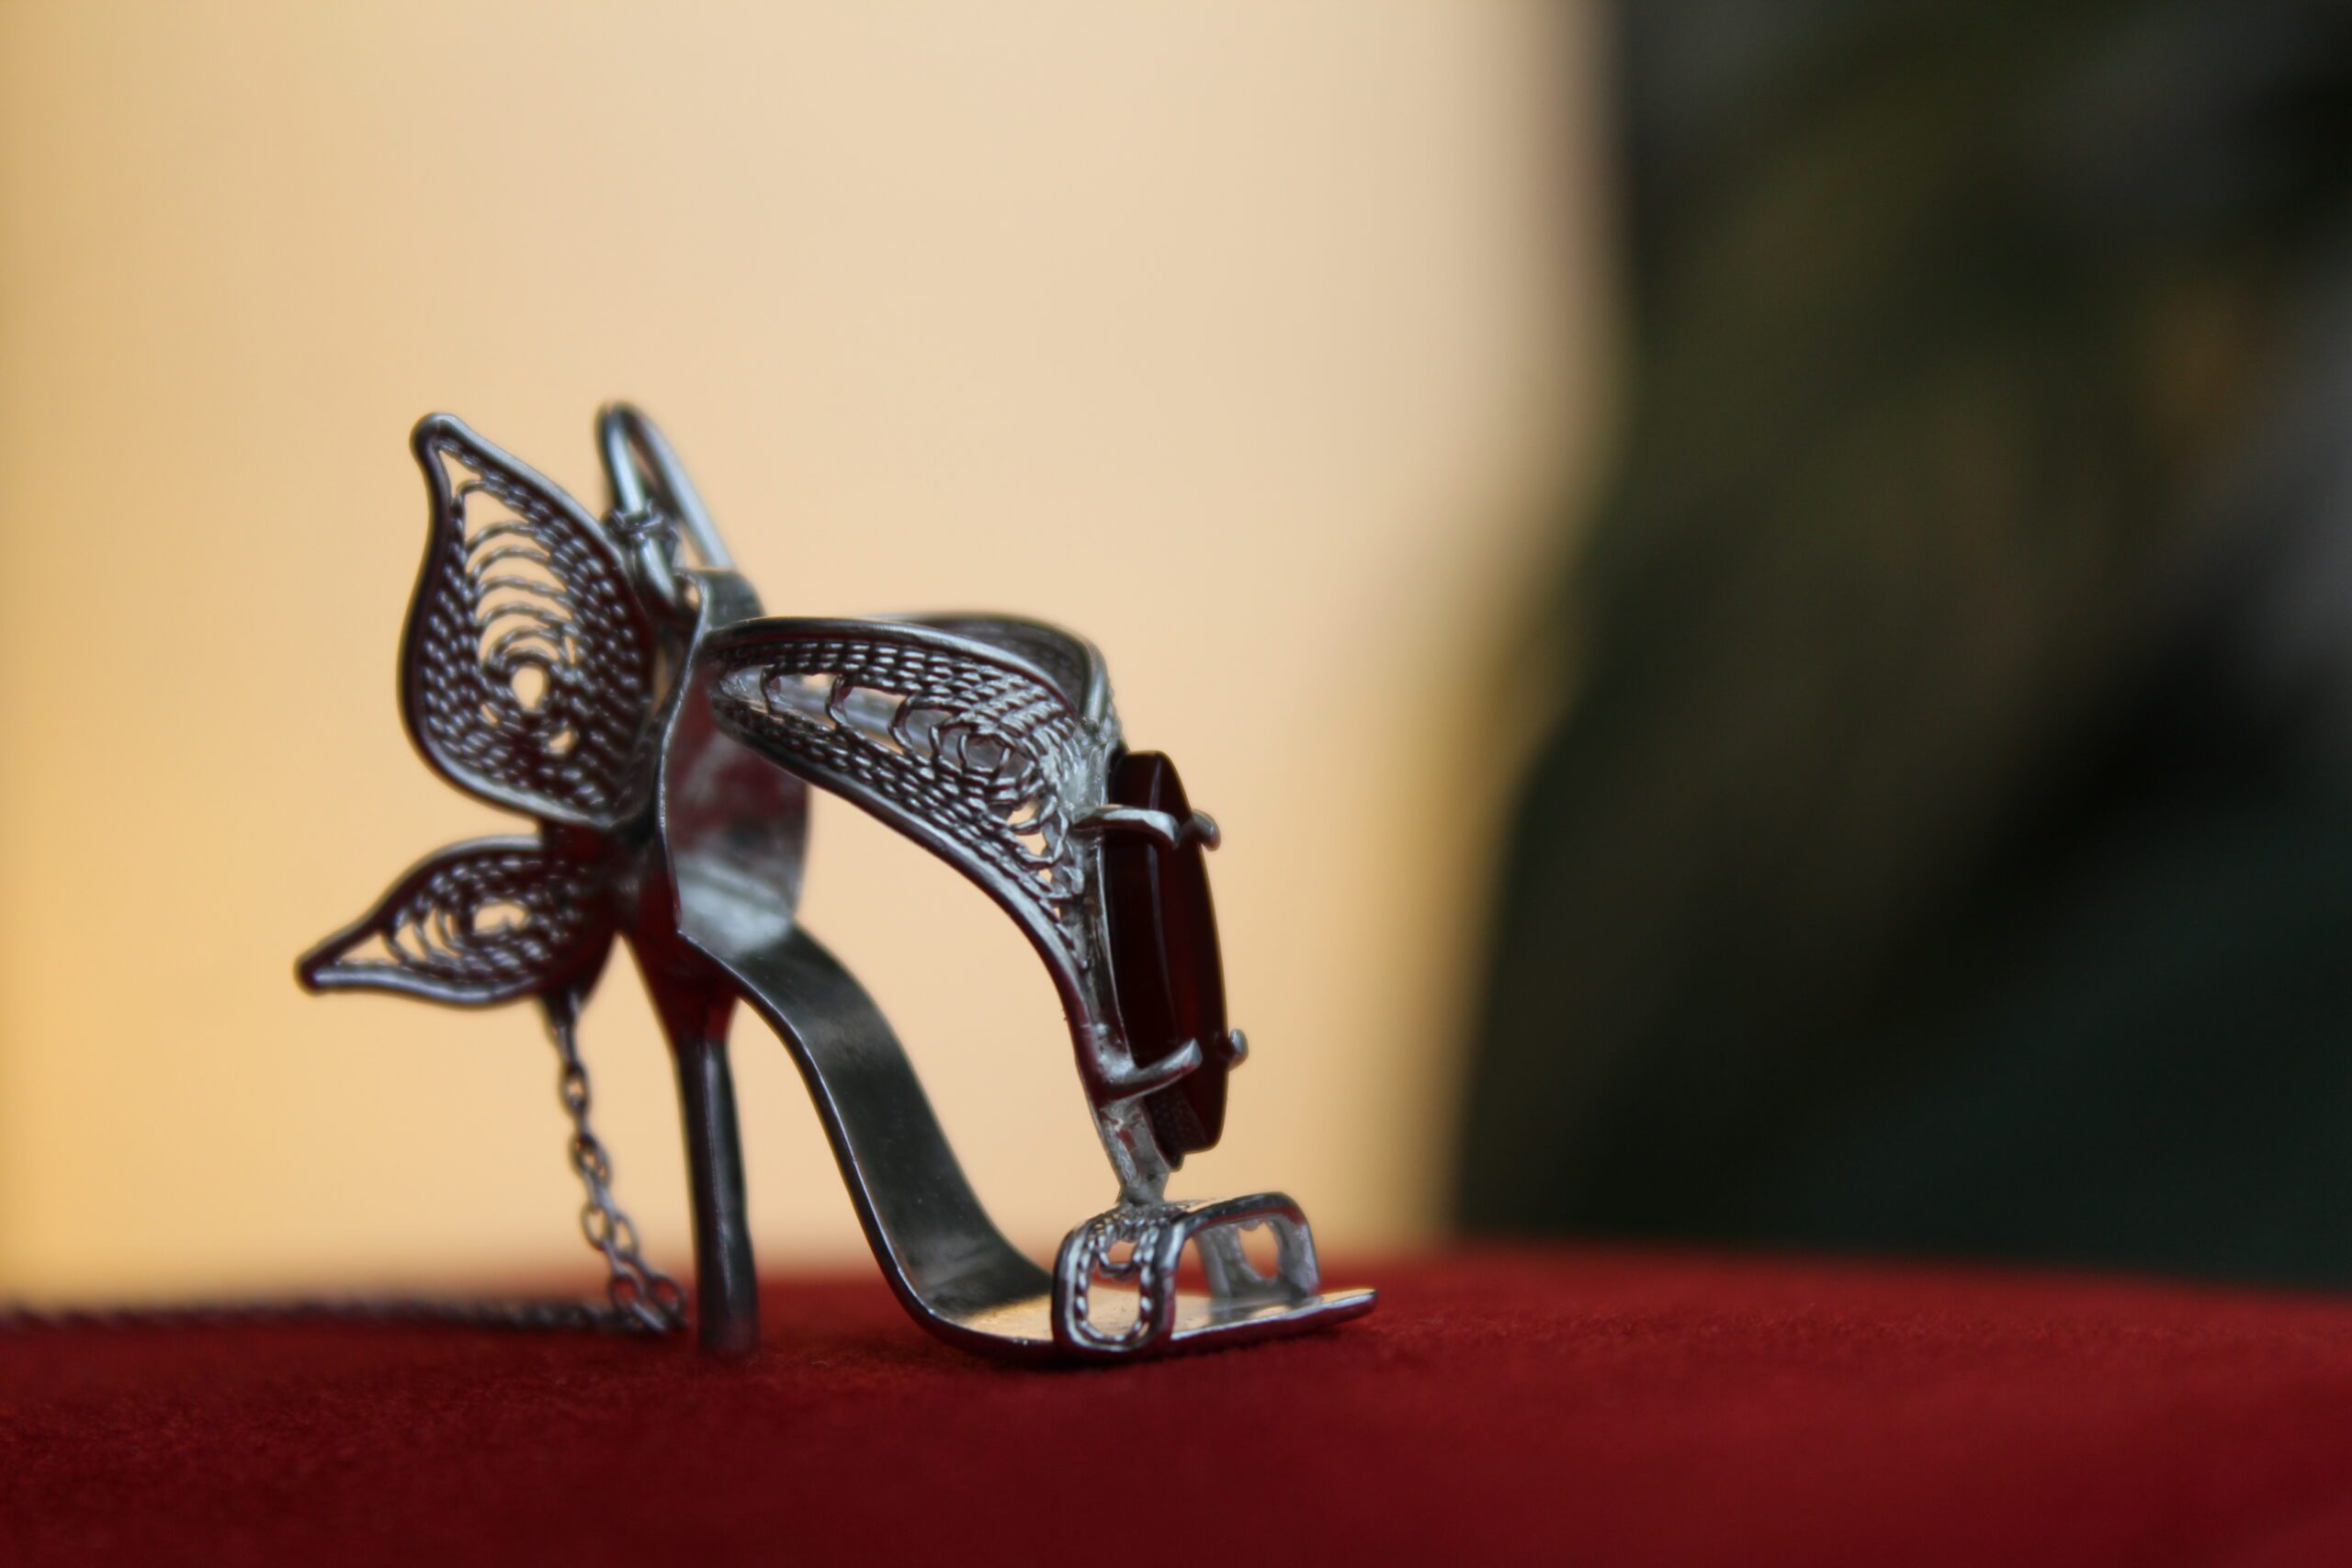
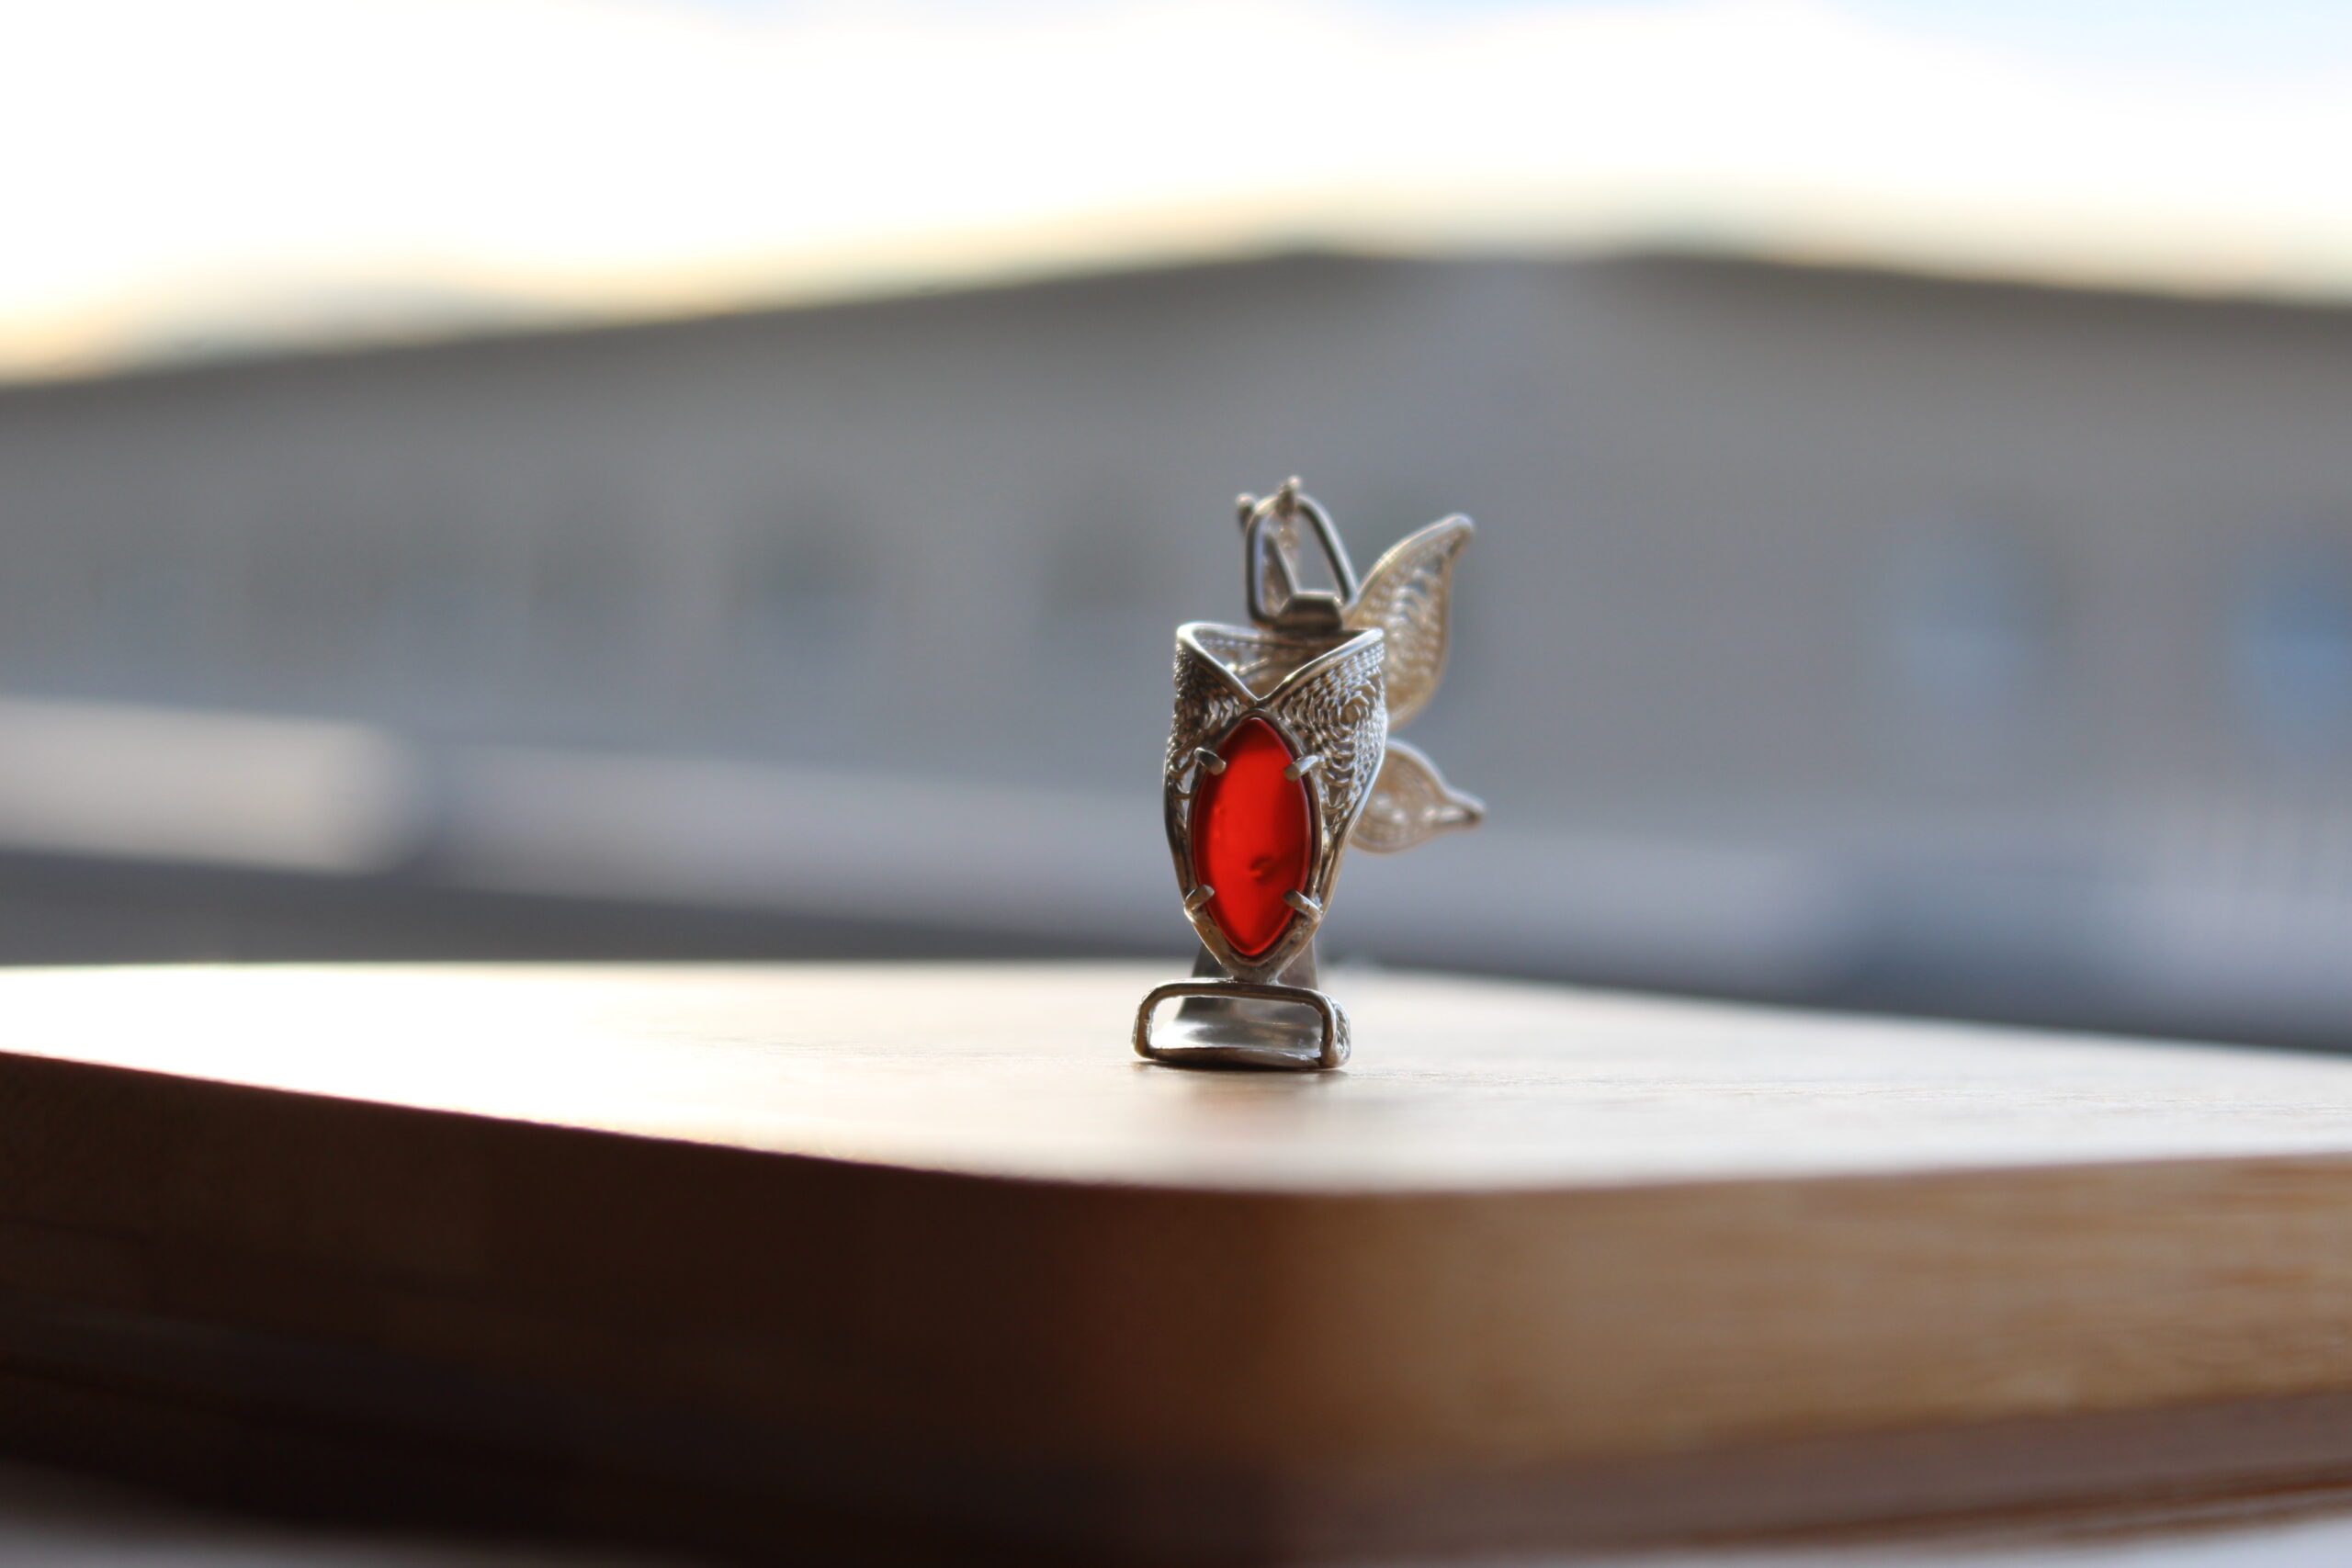
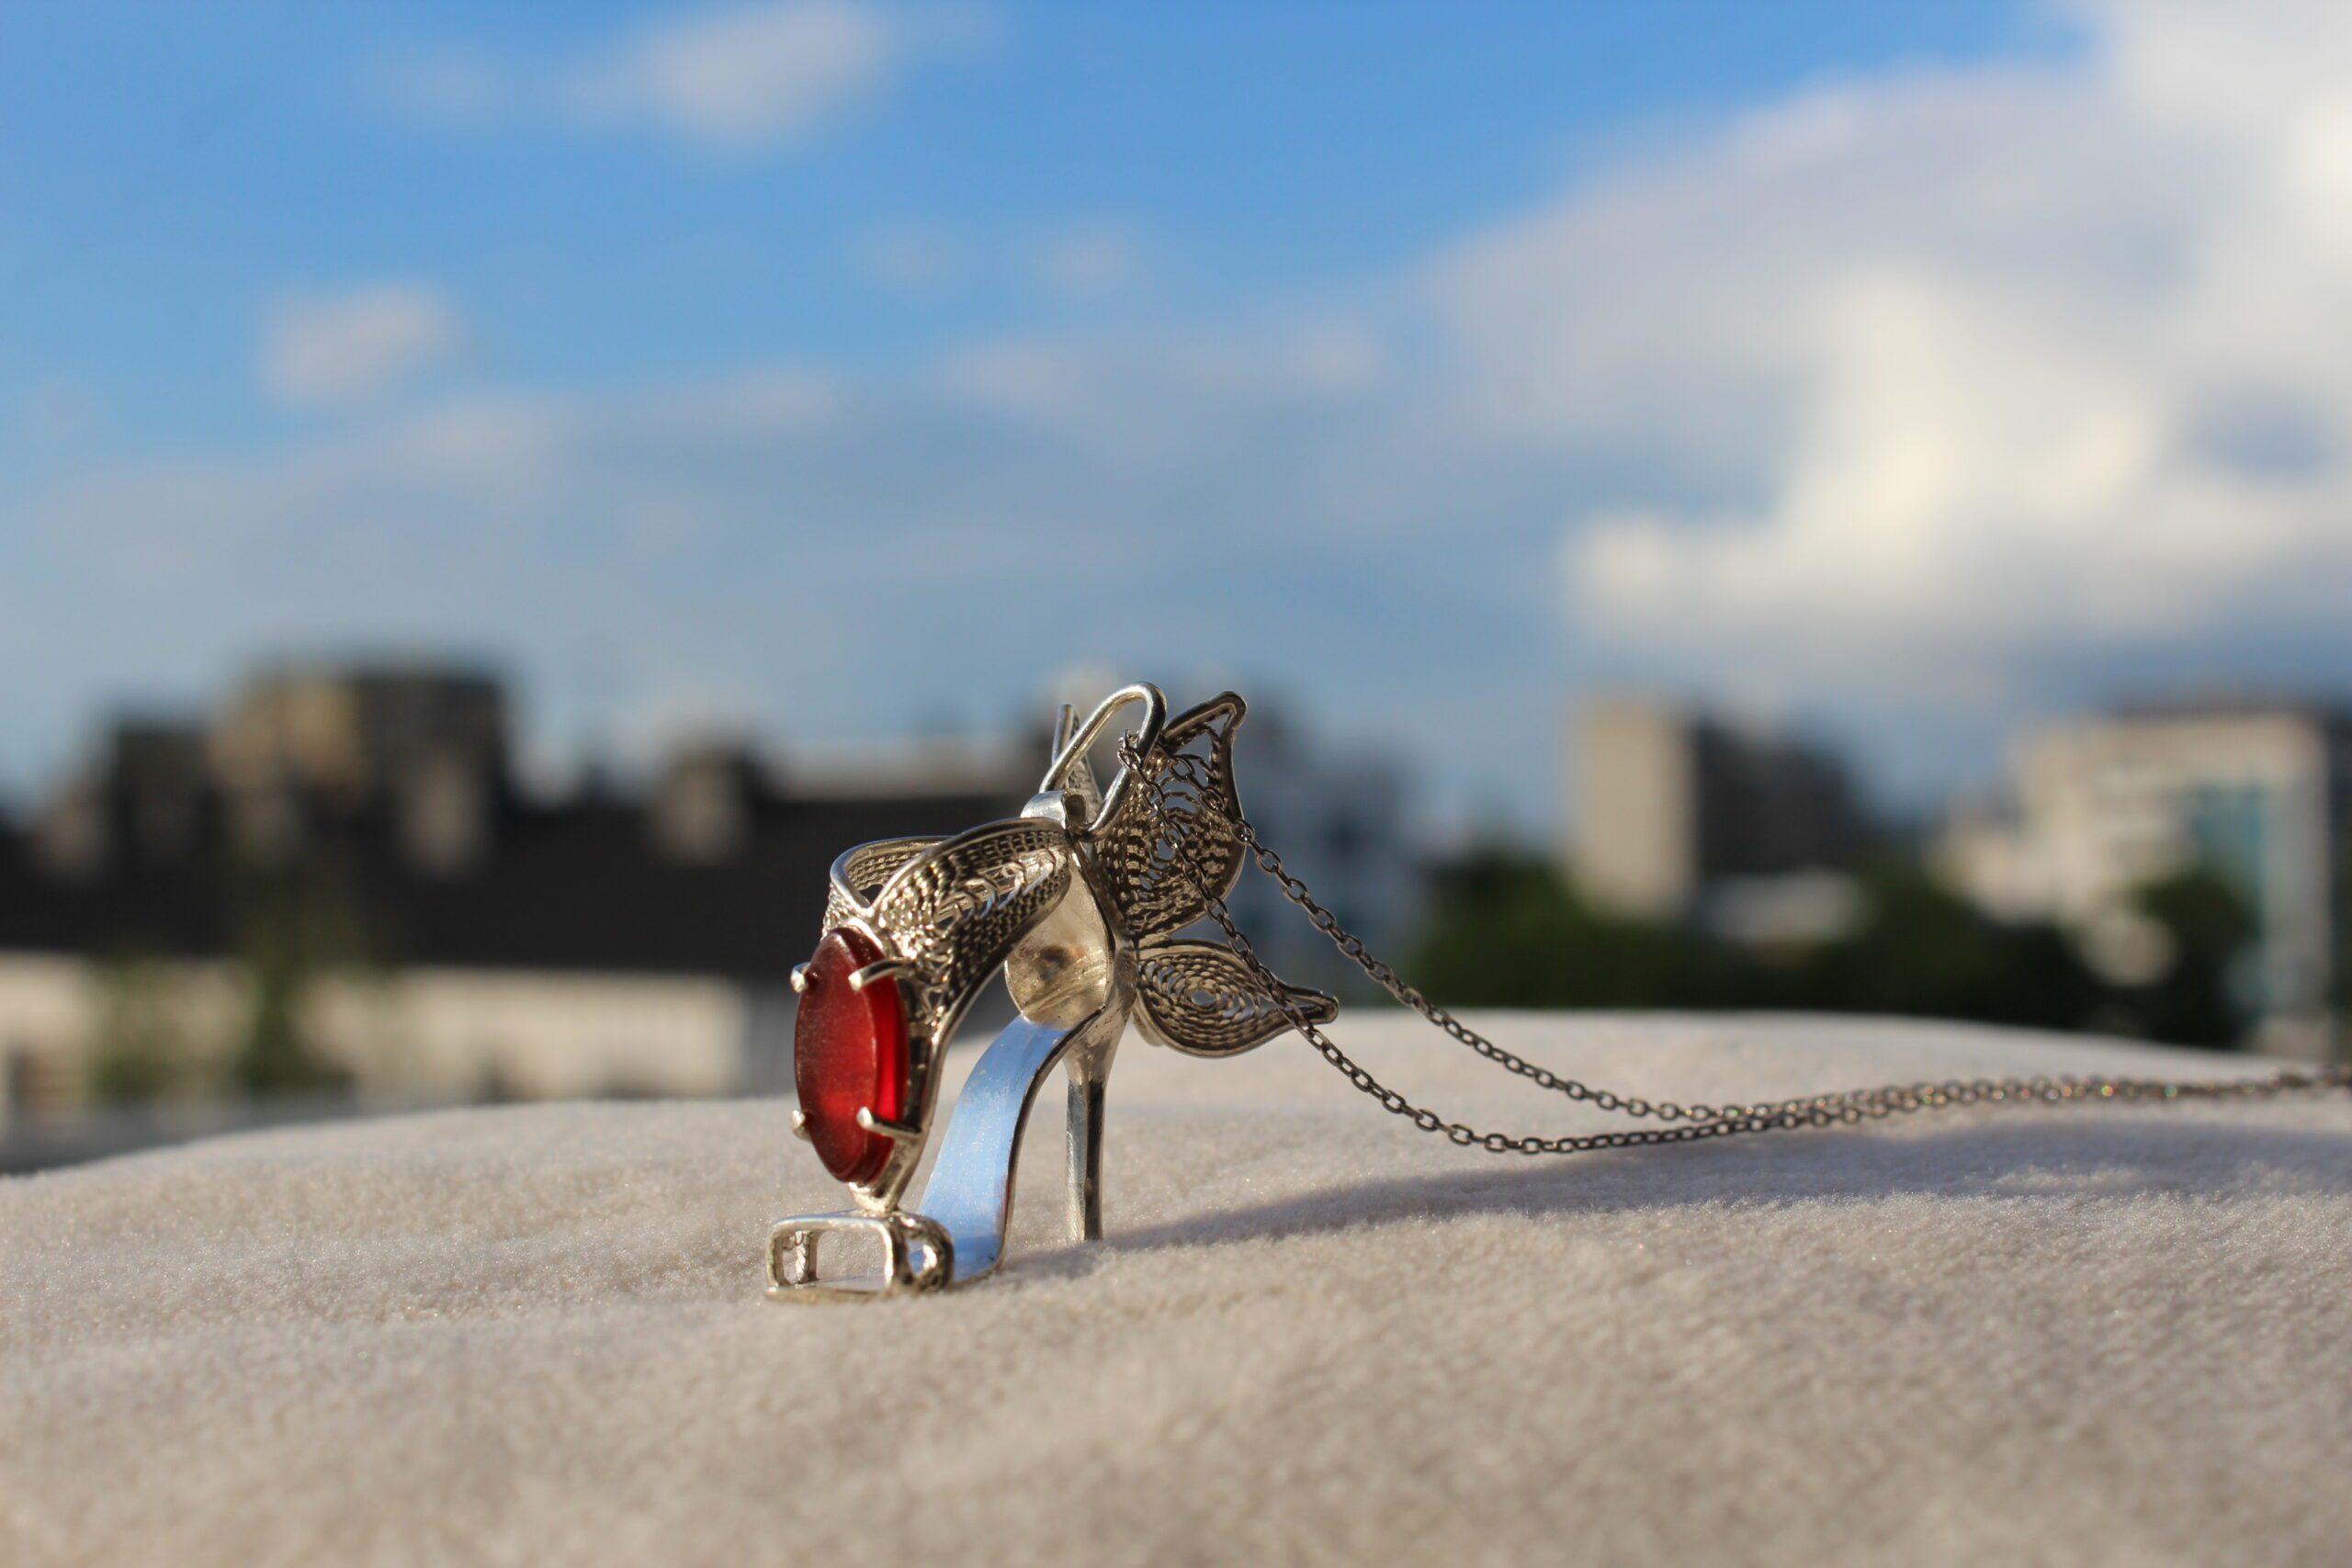
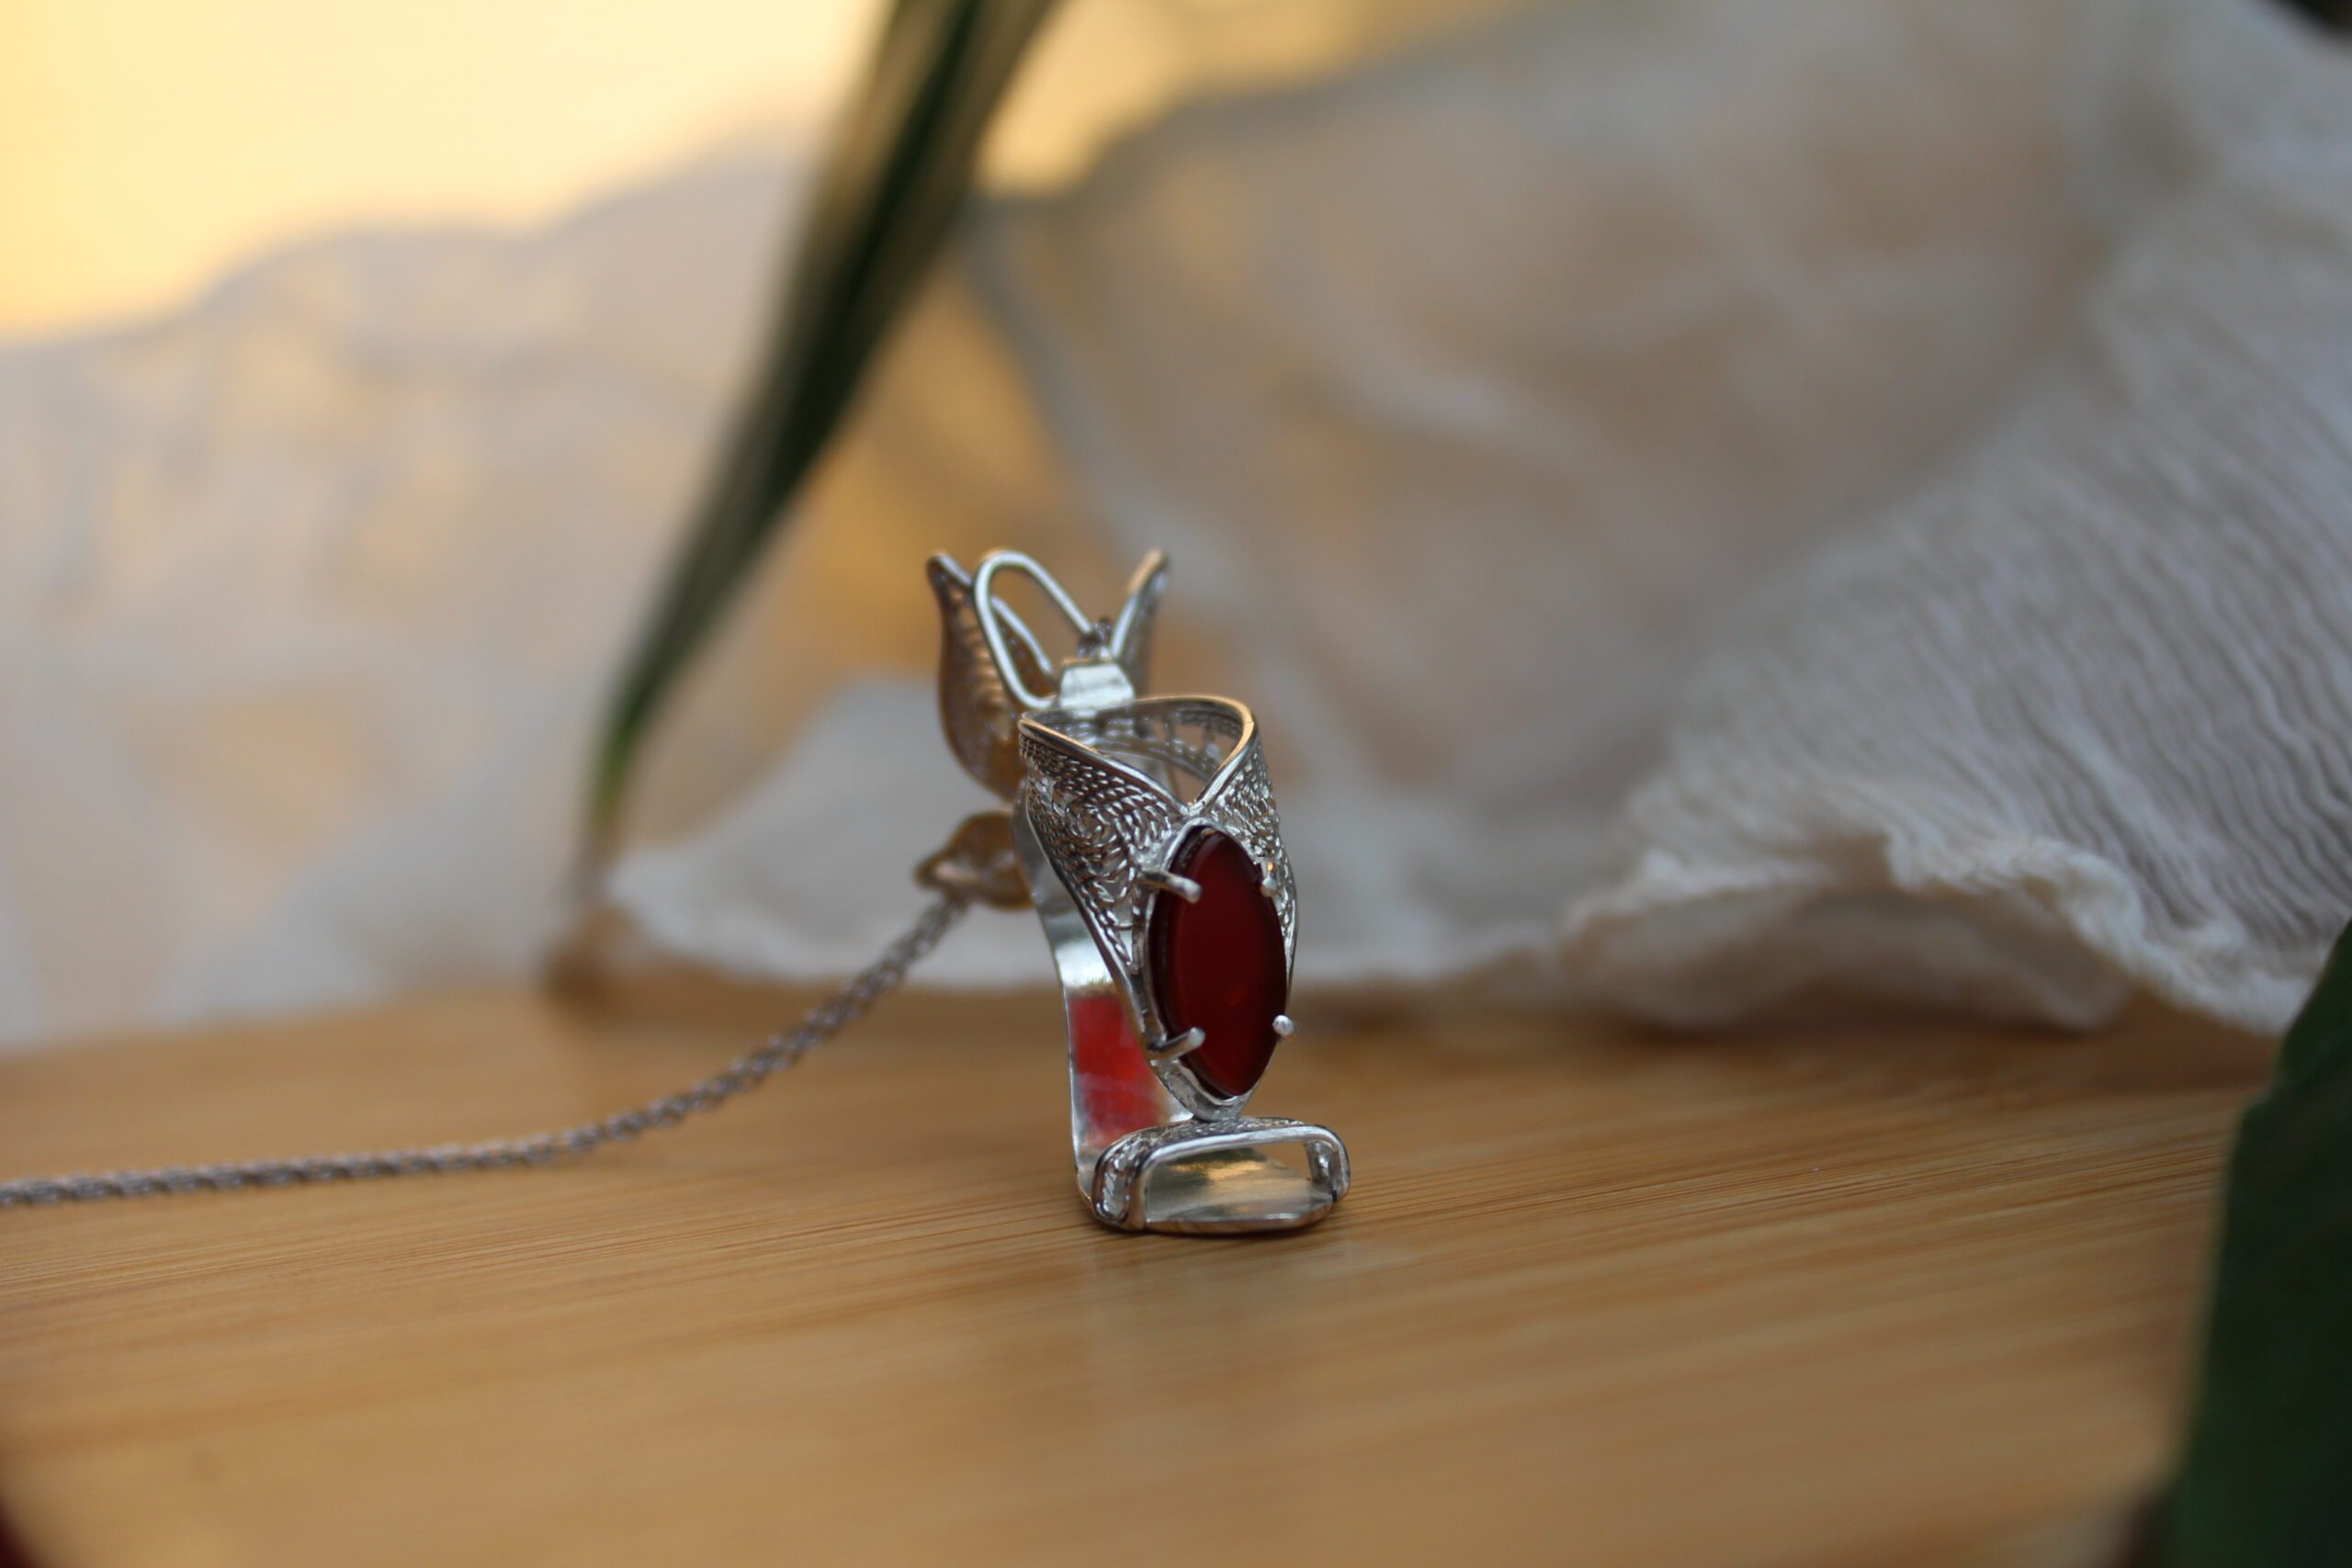
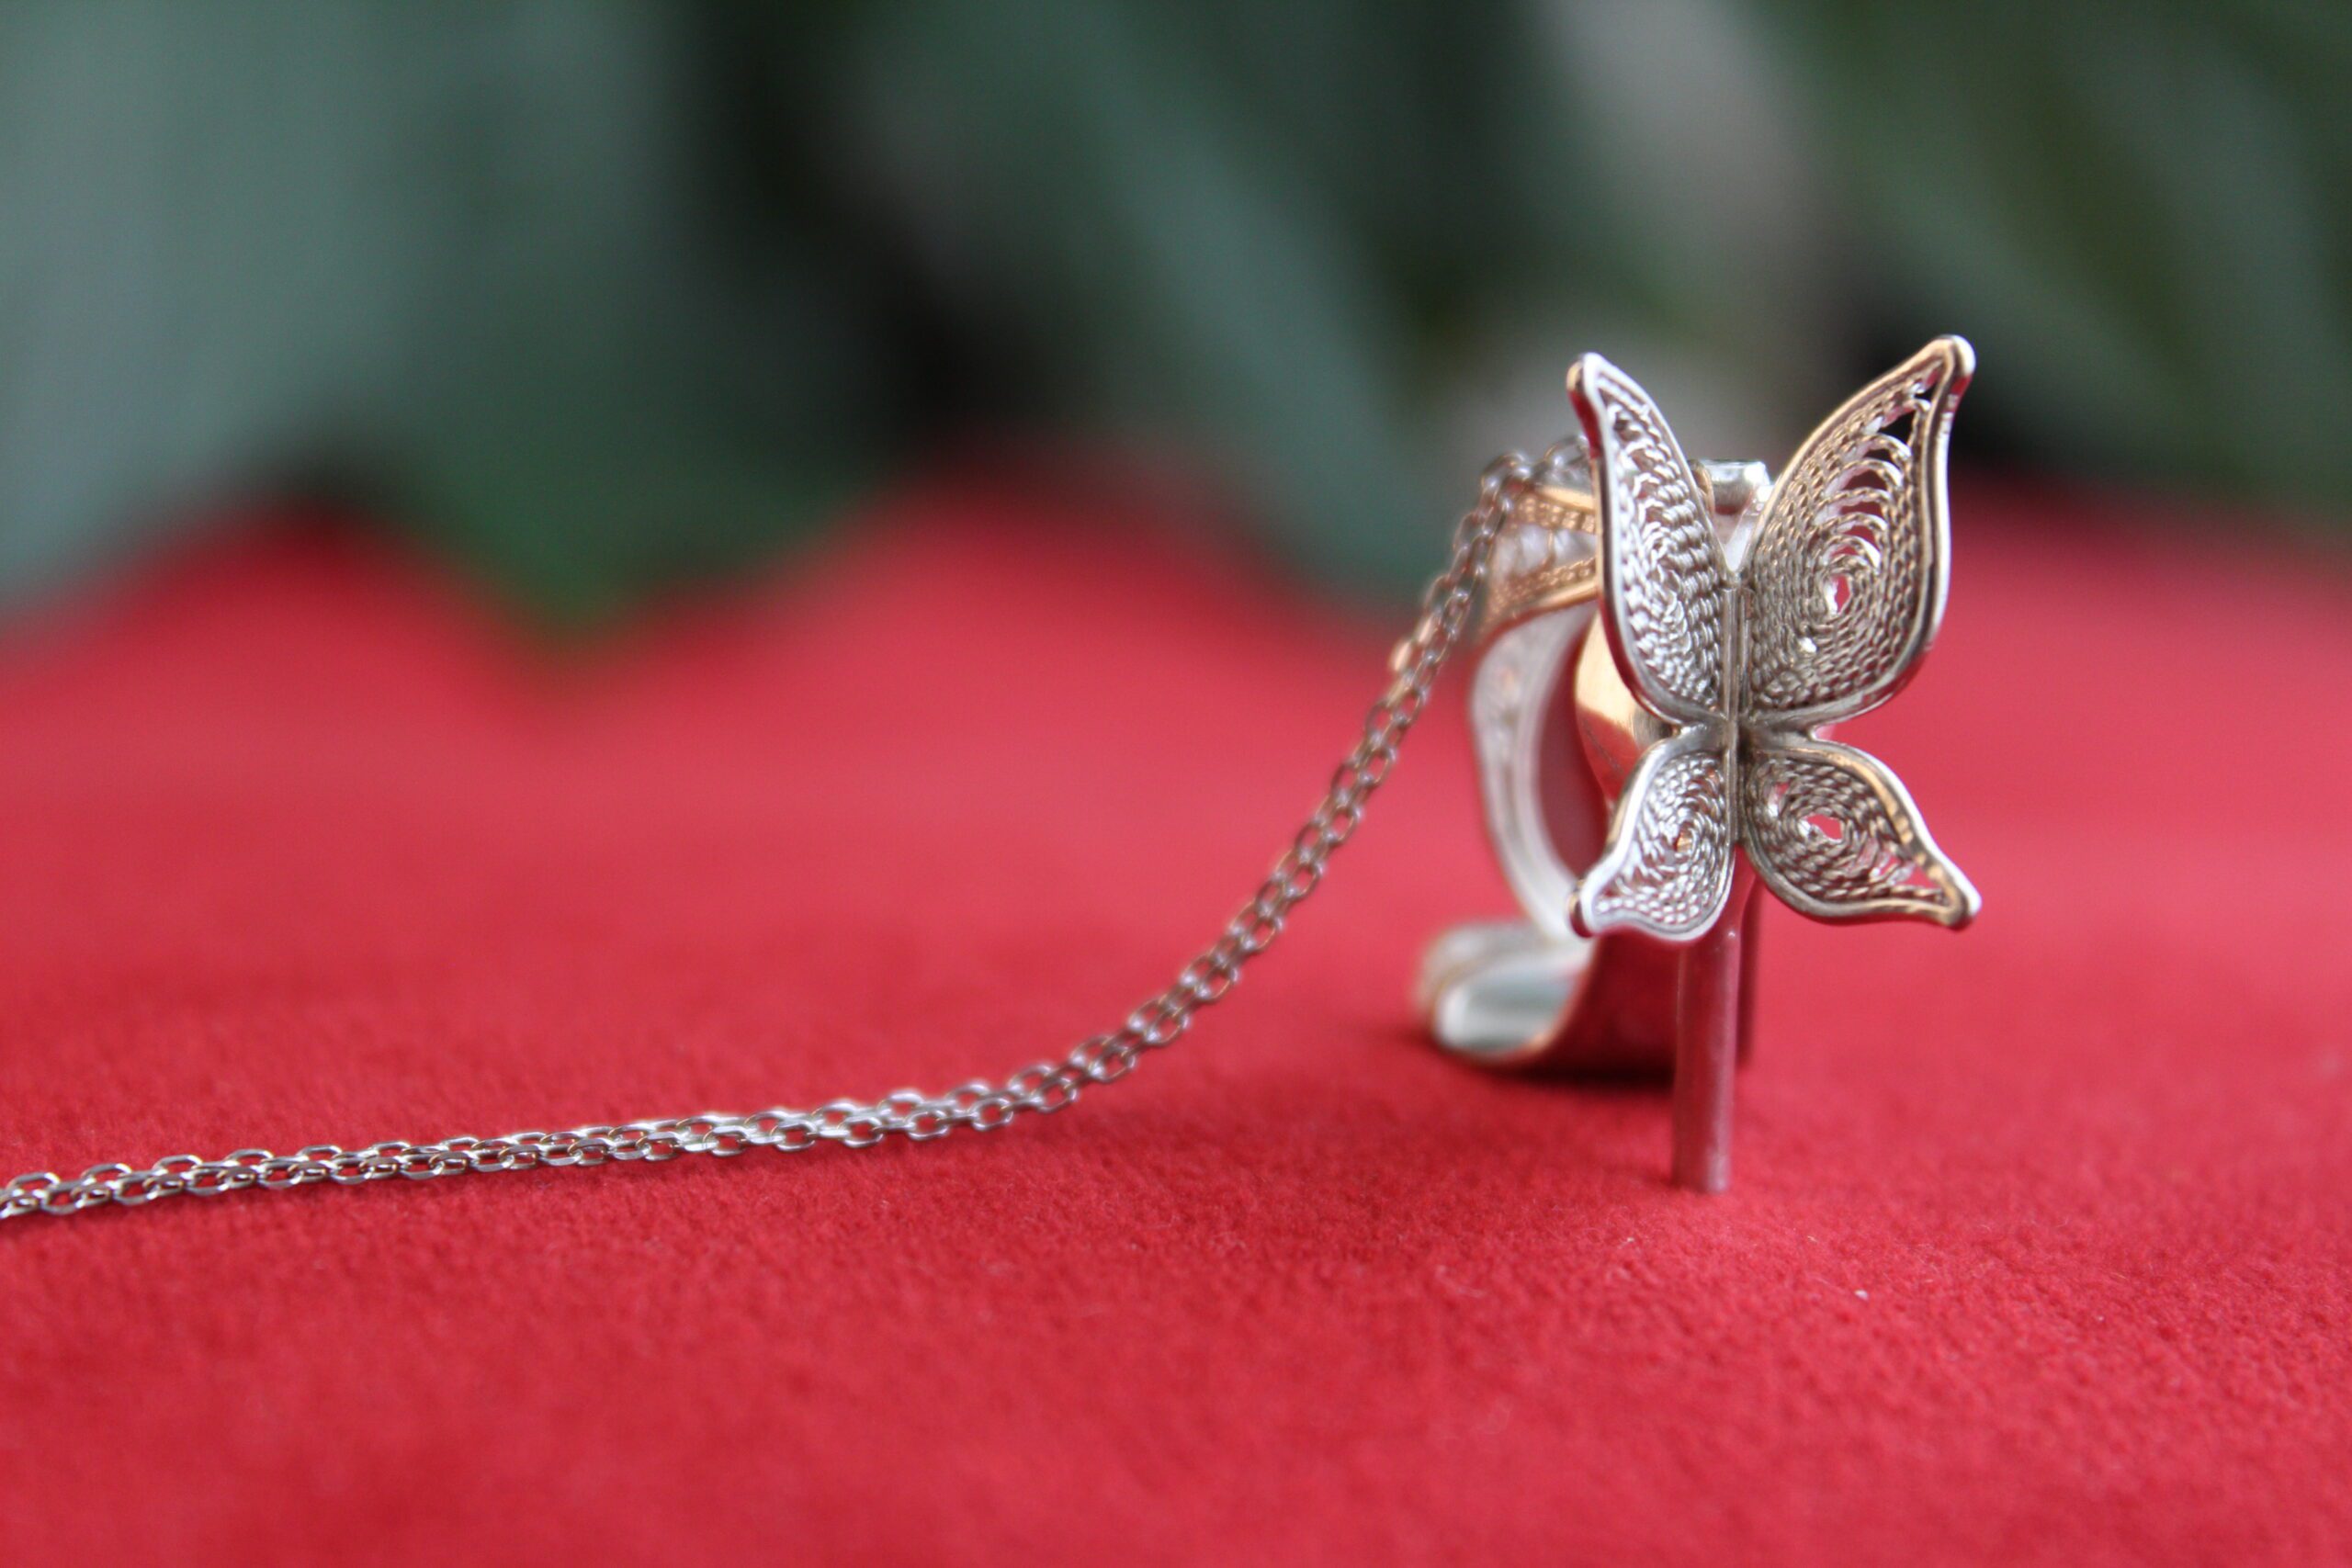
Photoshoot
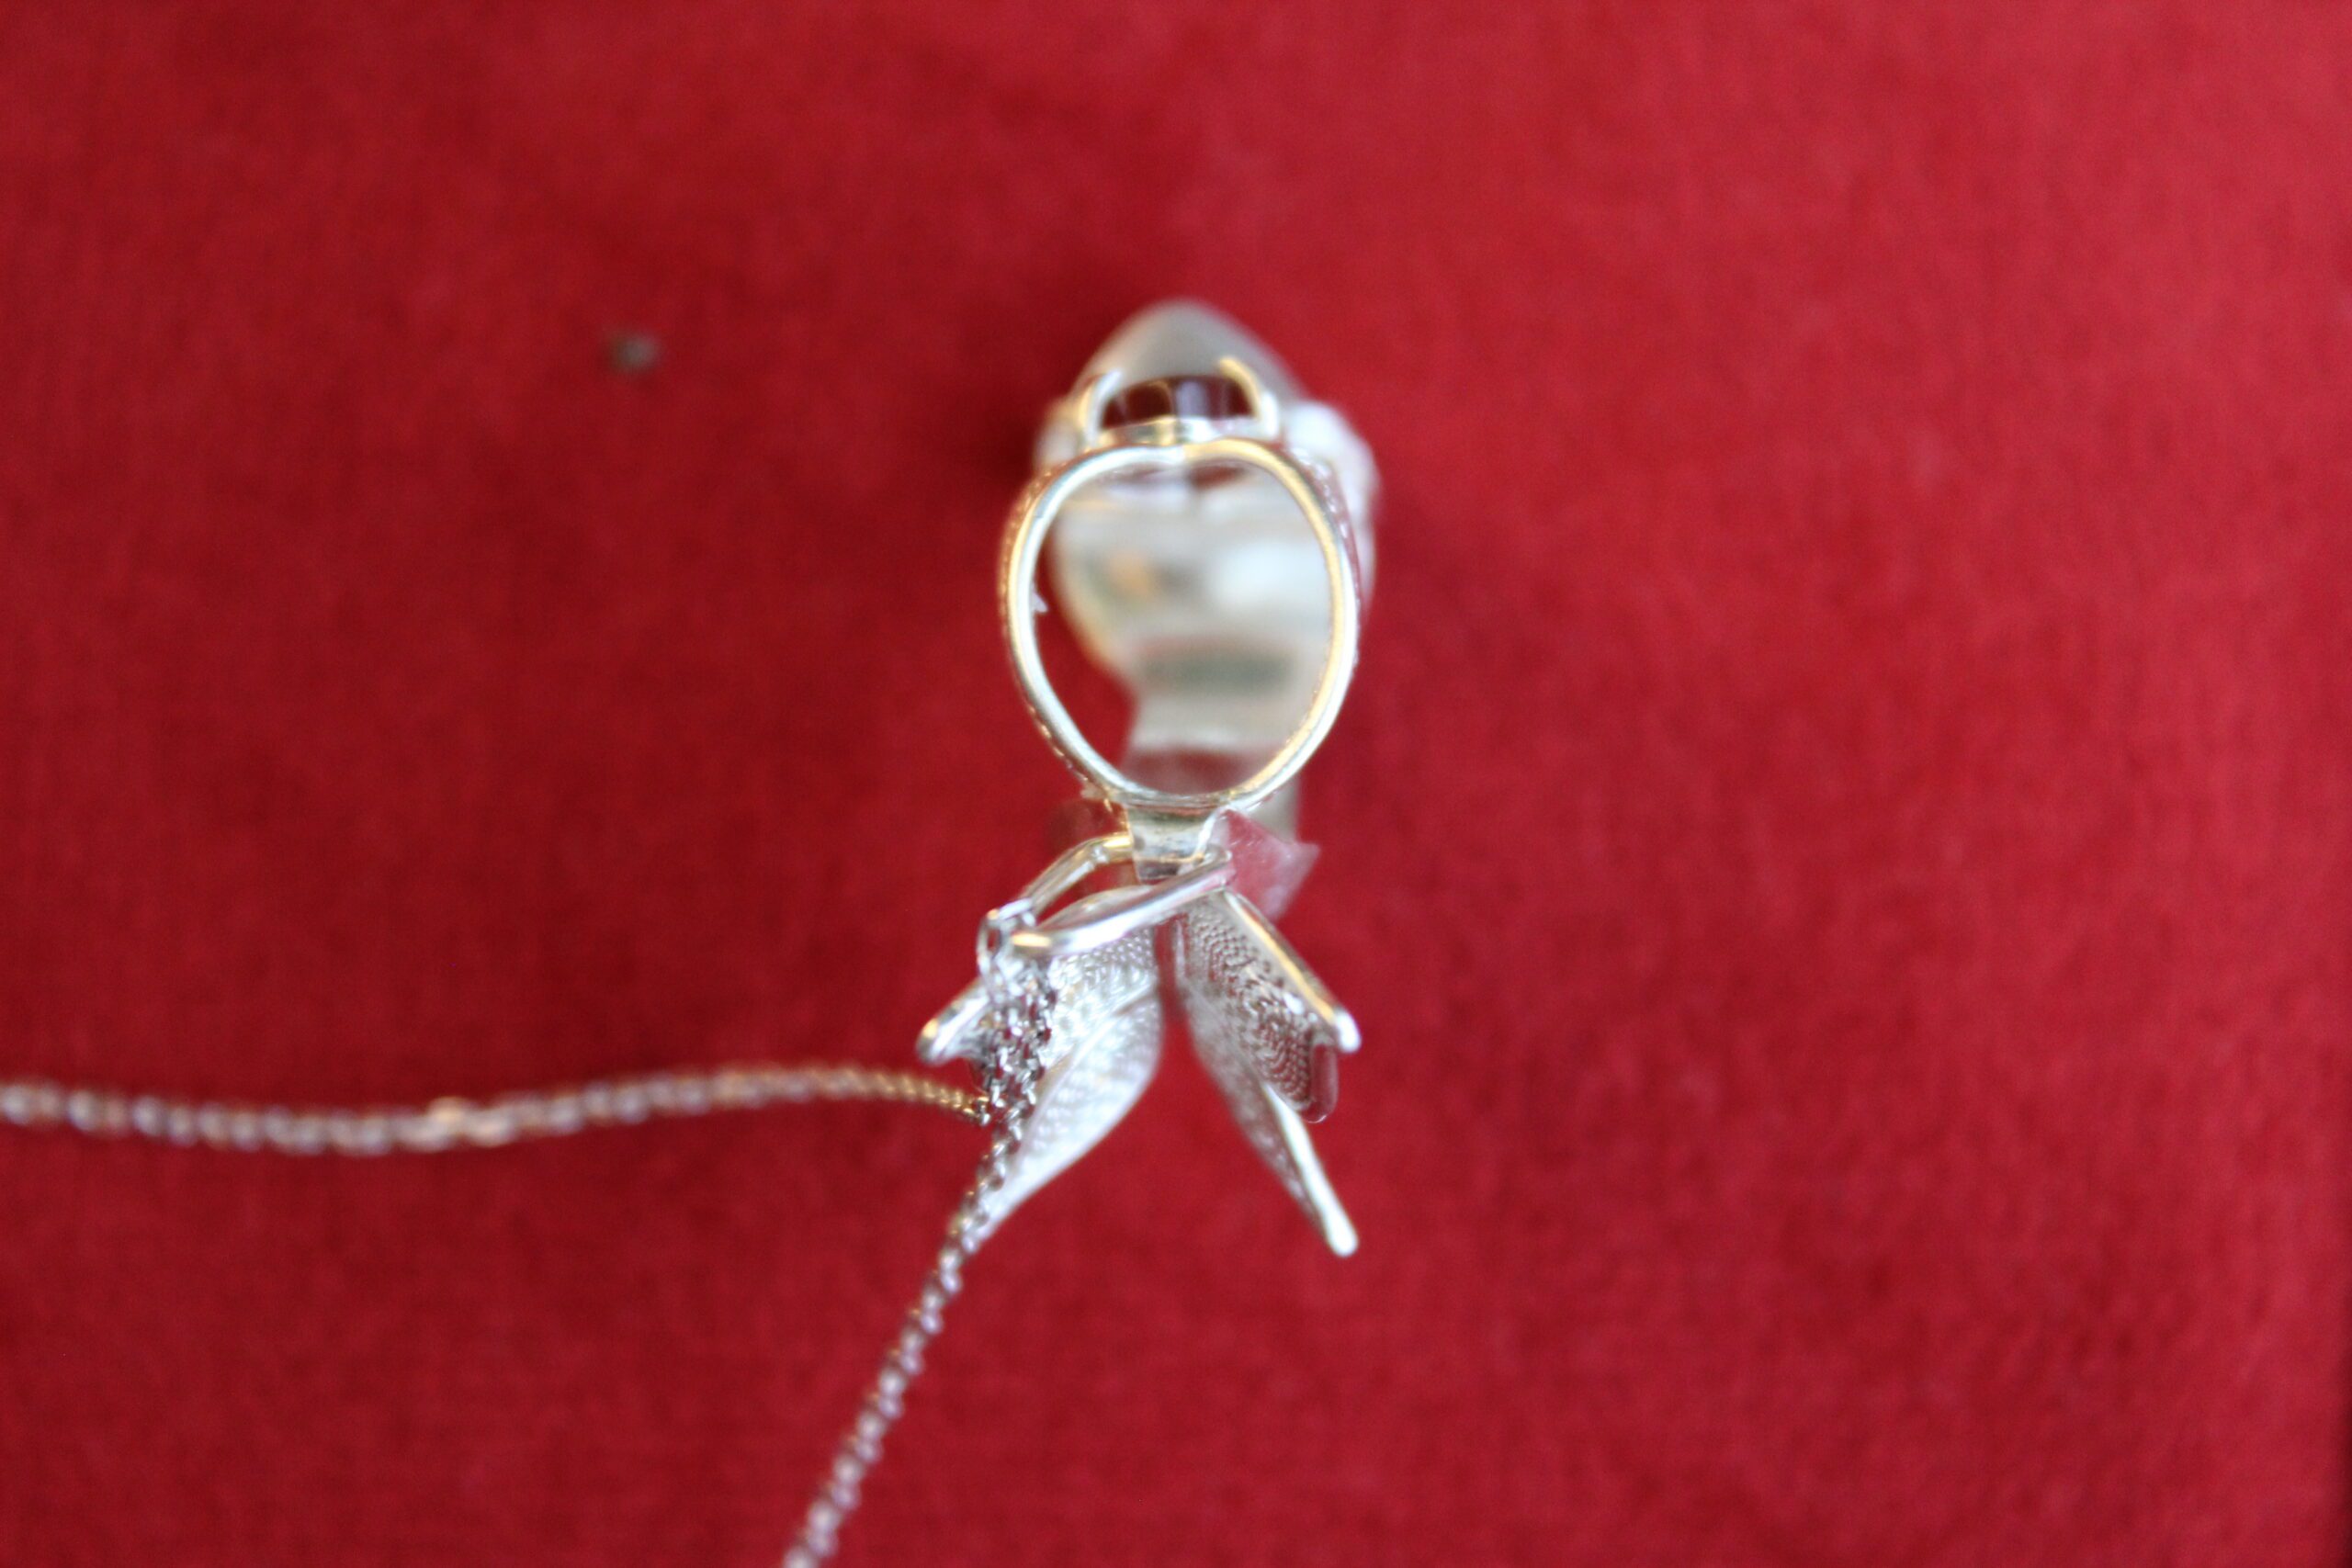
Many thanks to my lovely wife for taking those unbelievable pictures of the high heel filigree sandal pendant with a cornelian stone and silver butterfly. Enjoy!


Unfortunately, this item is not available for purchase. If you dream about something similar, please check my Etsy store or contact me through the form or on Instagram and let’s see what I can do 🙂
3 comments