Let me take you through a journey of handcrafting a silver camera pendant with a malachite and a rose quartz stones. Earlier I published stories about another Silver camera pendant and Old-fashion camera pendant as well as Square camera earrings. Make sure to have a look if you are into this kind of things.
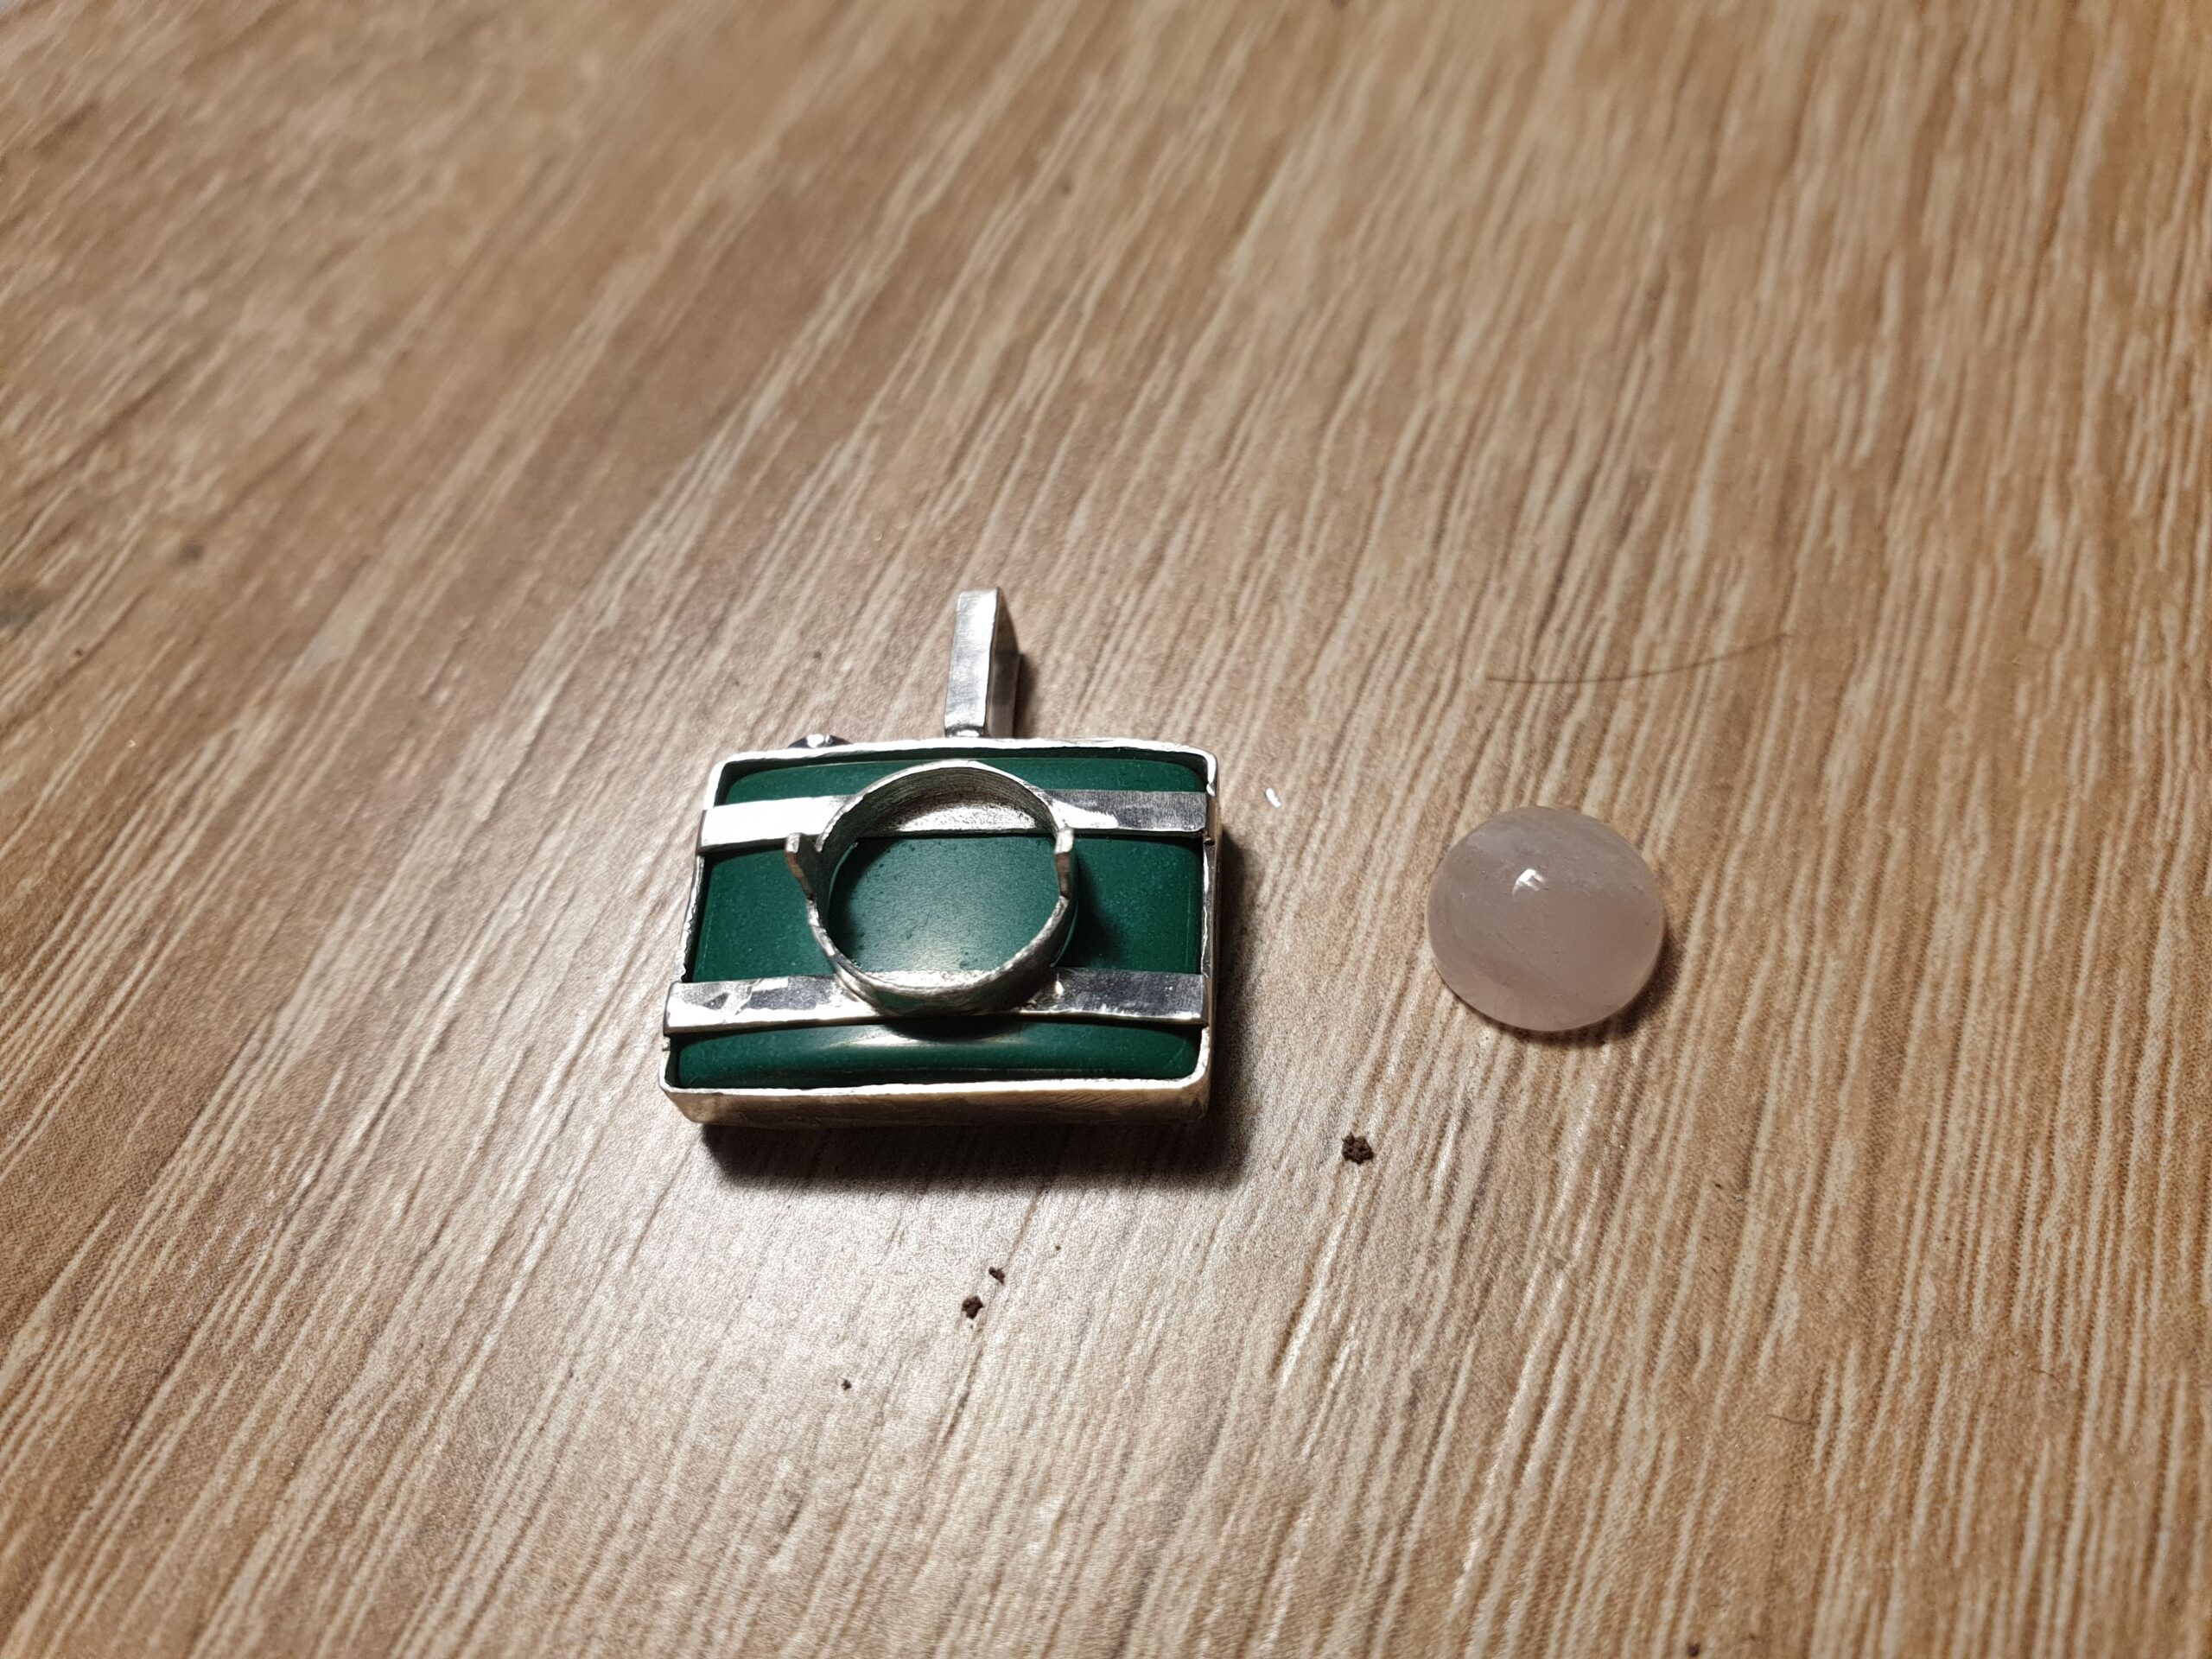
This particular story starts with a rectangular malachite stone, which I was lucky enough to dig out in one of the local mineral shops. It is not perfect for the design I had in mind as one of its surfaces is convex. Well, it is still better than nothing, right? Besides, it is not that easy to come across a clean straight rectangular stone these days. I decided to give it a try anyway.
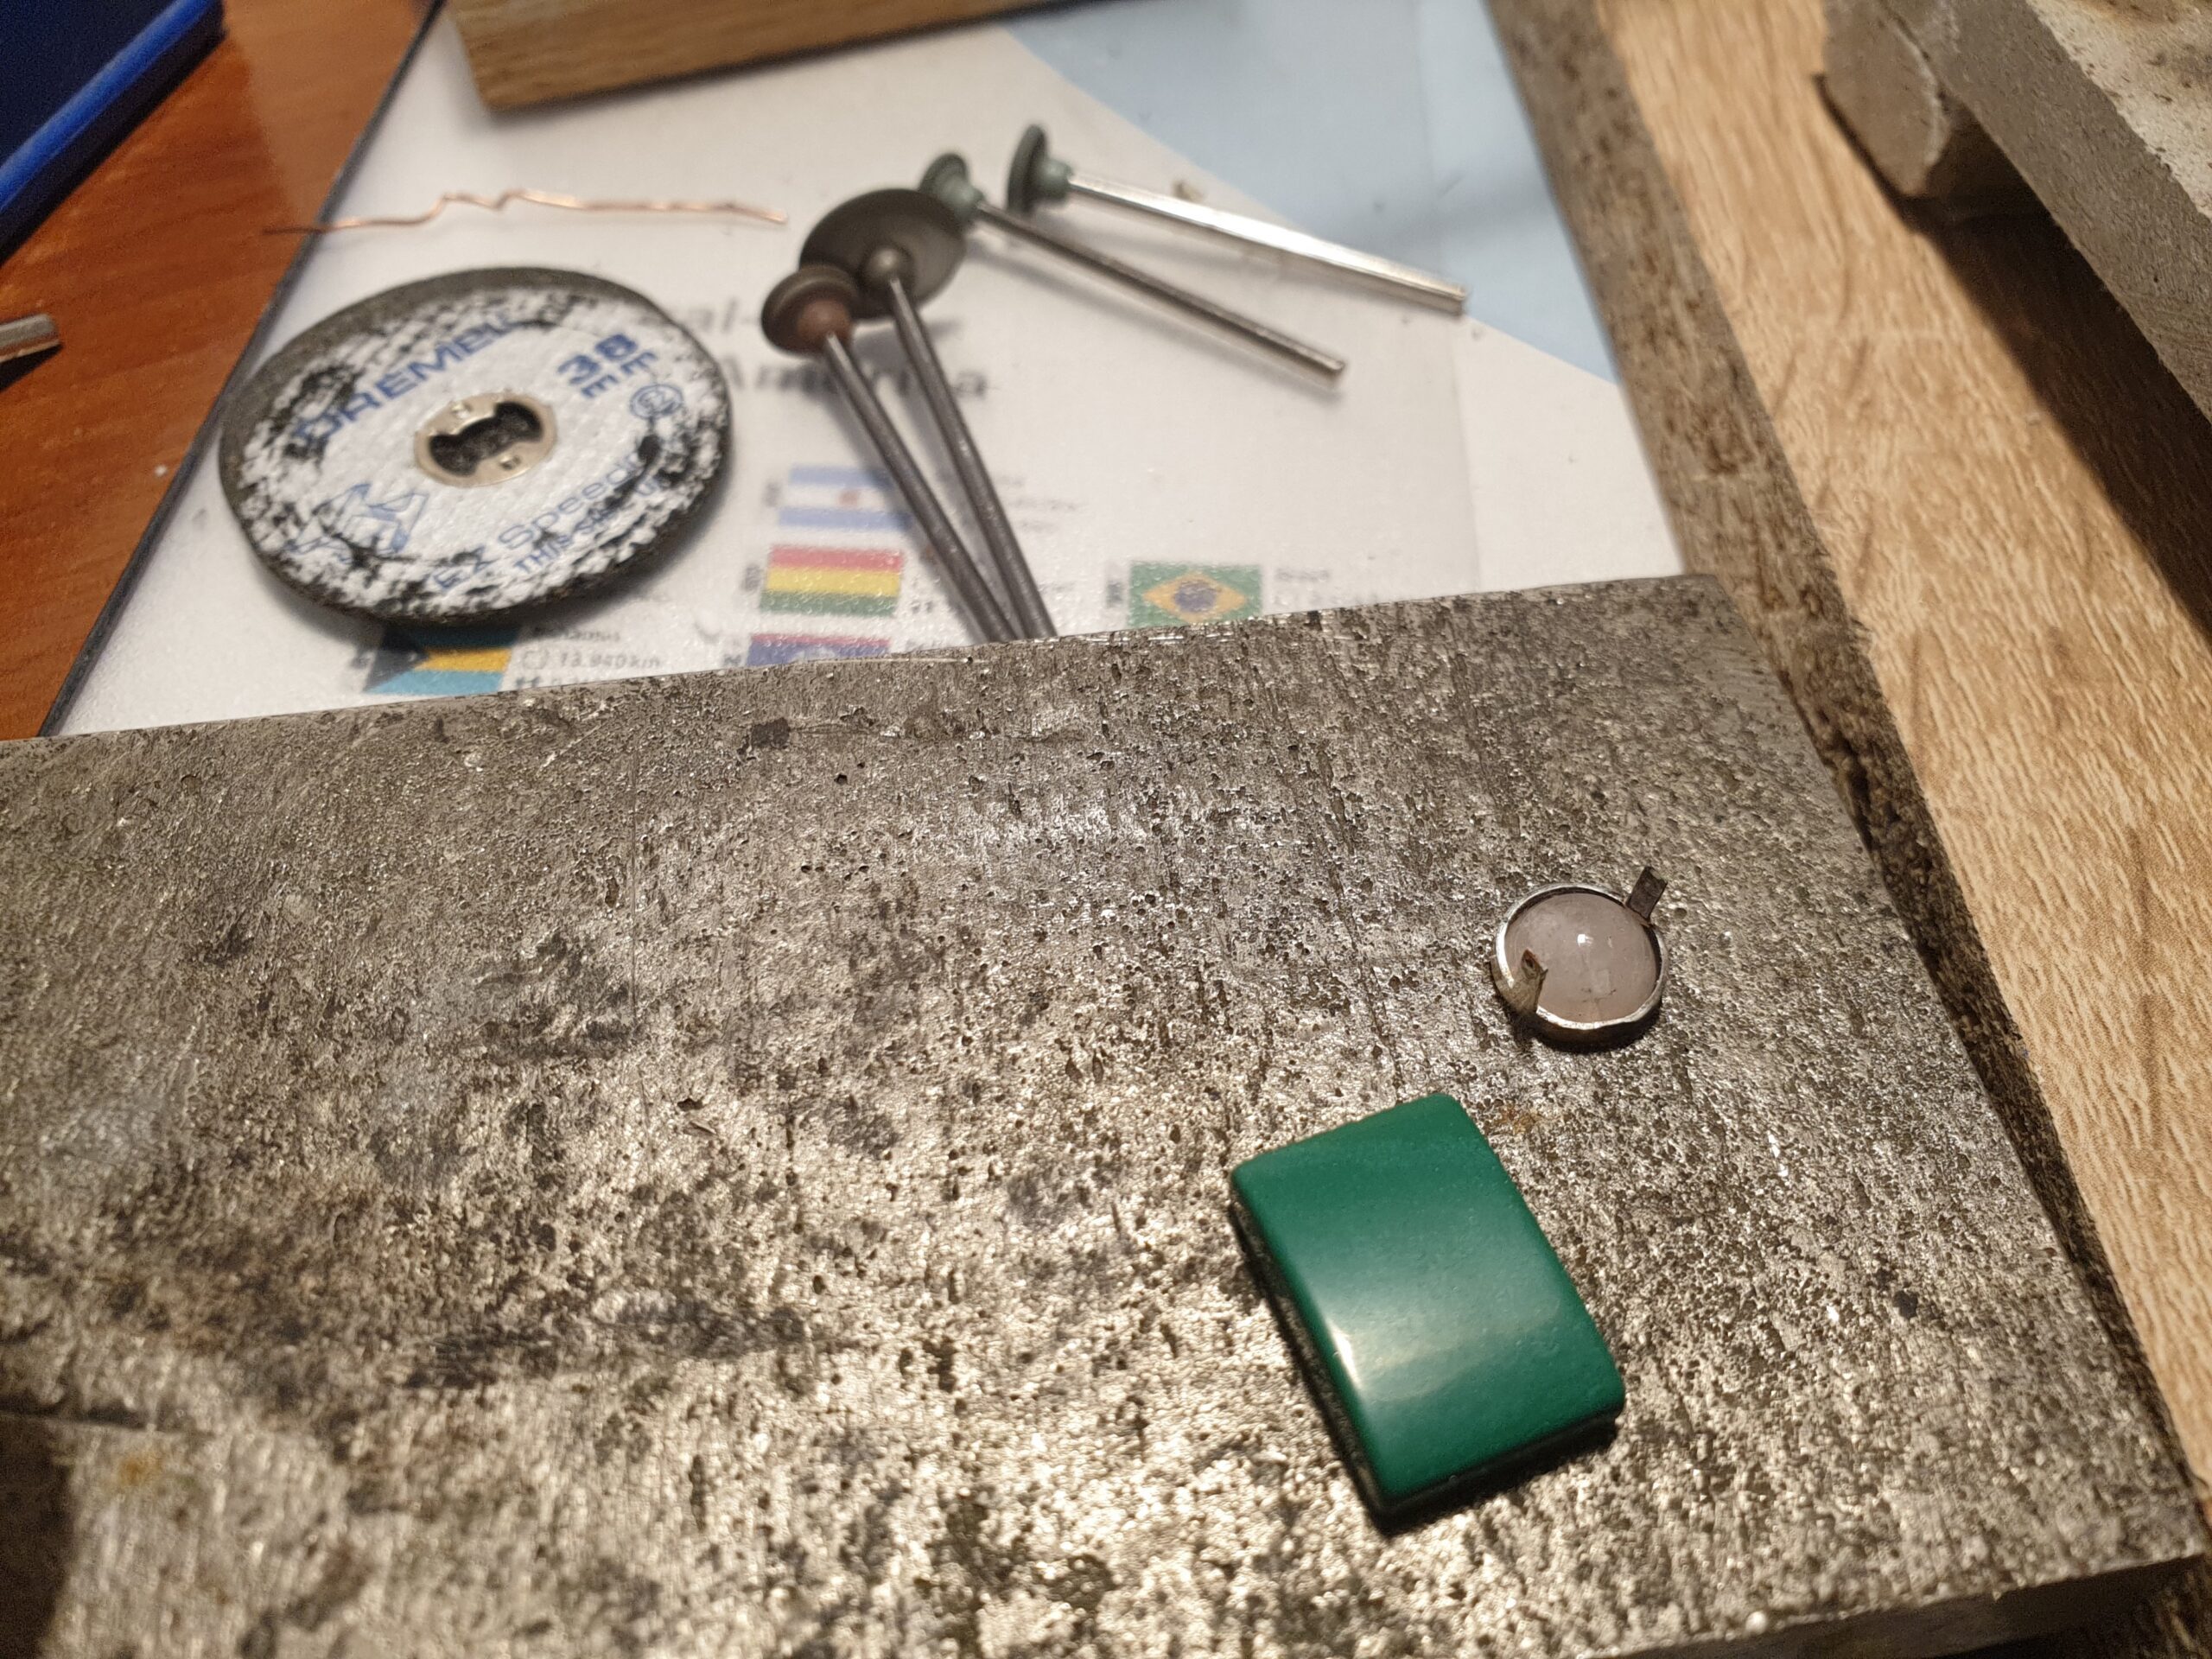
As my camera body is going to be bright green, I though that the lens might also get some colouring. There was a rose quartz cabochon lying around waiting for a perfect project to come by. We all know that the world is far from perfect, hence we should grab the opportunities as they come.
I made a simple round cast with two prongs out of a silver strip for my camera lens. There was no need for any back support as the camera body will hold the cabochon in place.
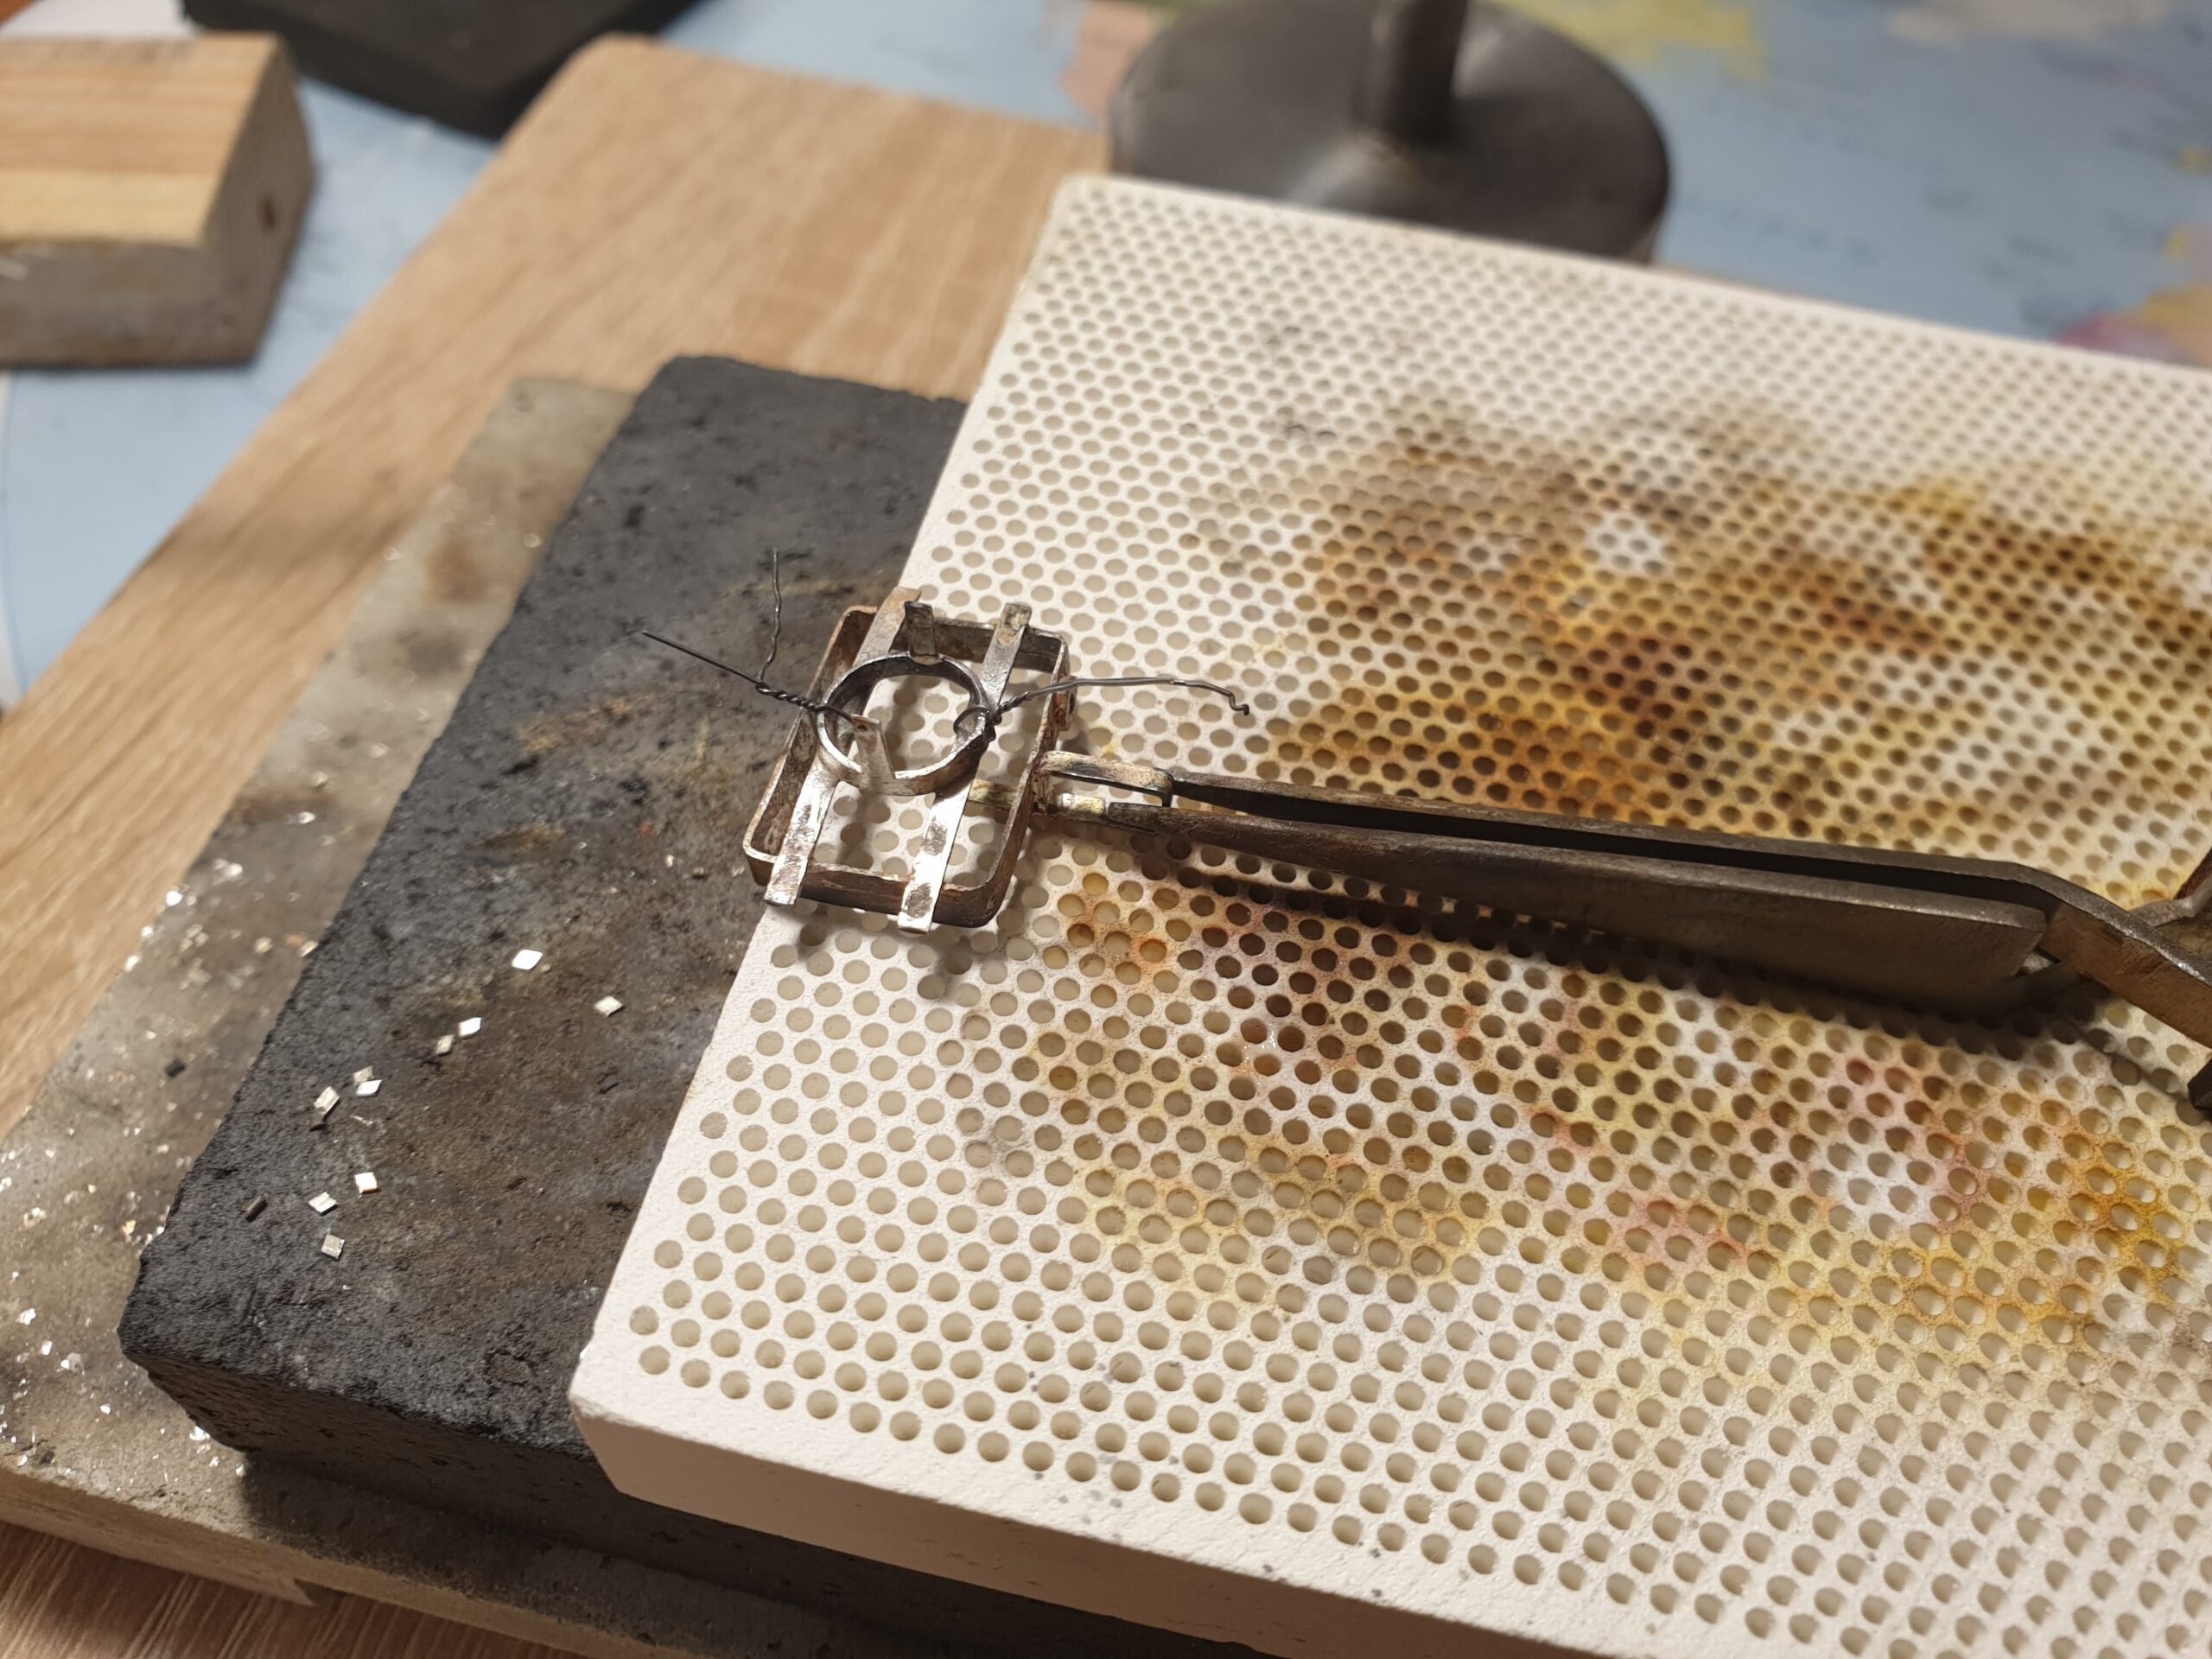
The body itself consists of a rectangular frame and two horizontal bands running across the whole piece. In order to fit the malachite I had to make two identical frames and solder them together afterwards. Only after that I realised that it would be way easier to do the soldering first to get a wider stripe and then bend it into a frame.
After hours of bending, fitting and soldering the back stone finally got into its rightful place nice and tight. I then added few prongs on the back to make sure it doesn’t go anywhere. Actually one of back prongs is an imitation of an on-camera flash, which in the same time is a pendant chain loop.
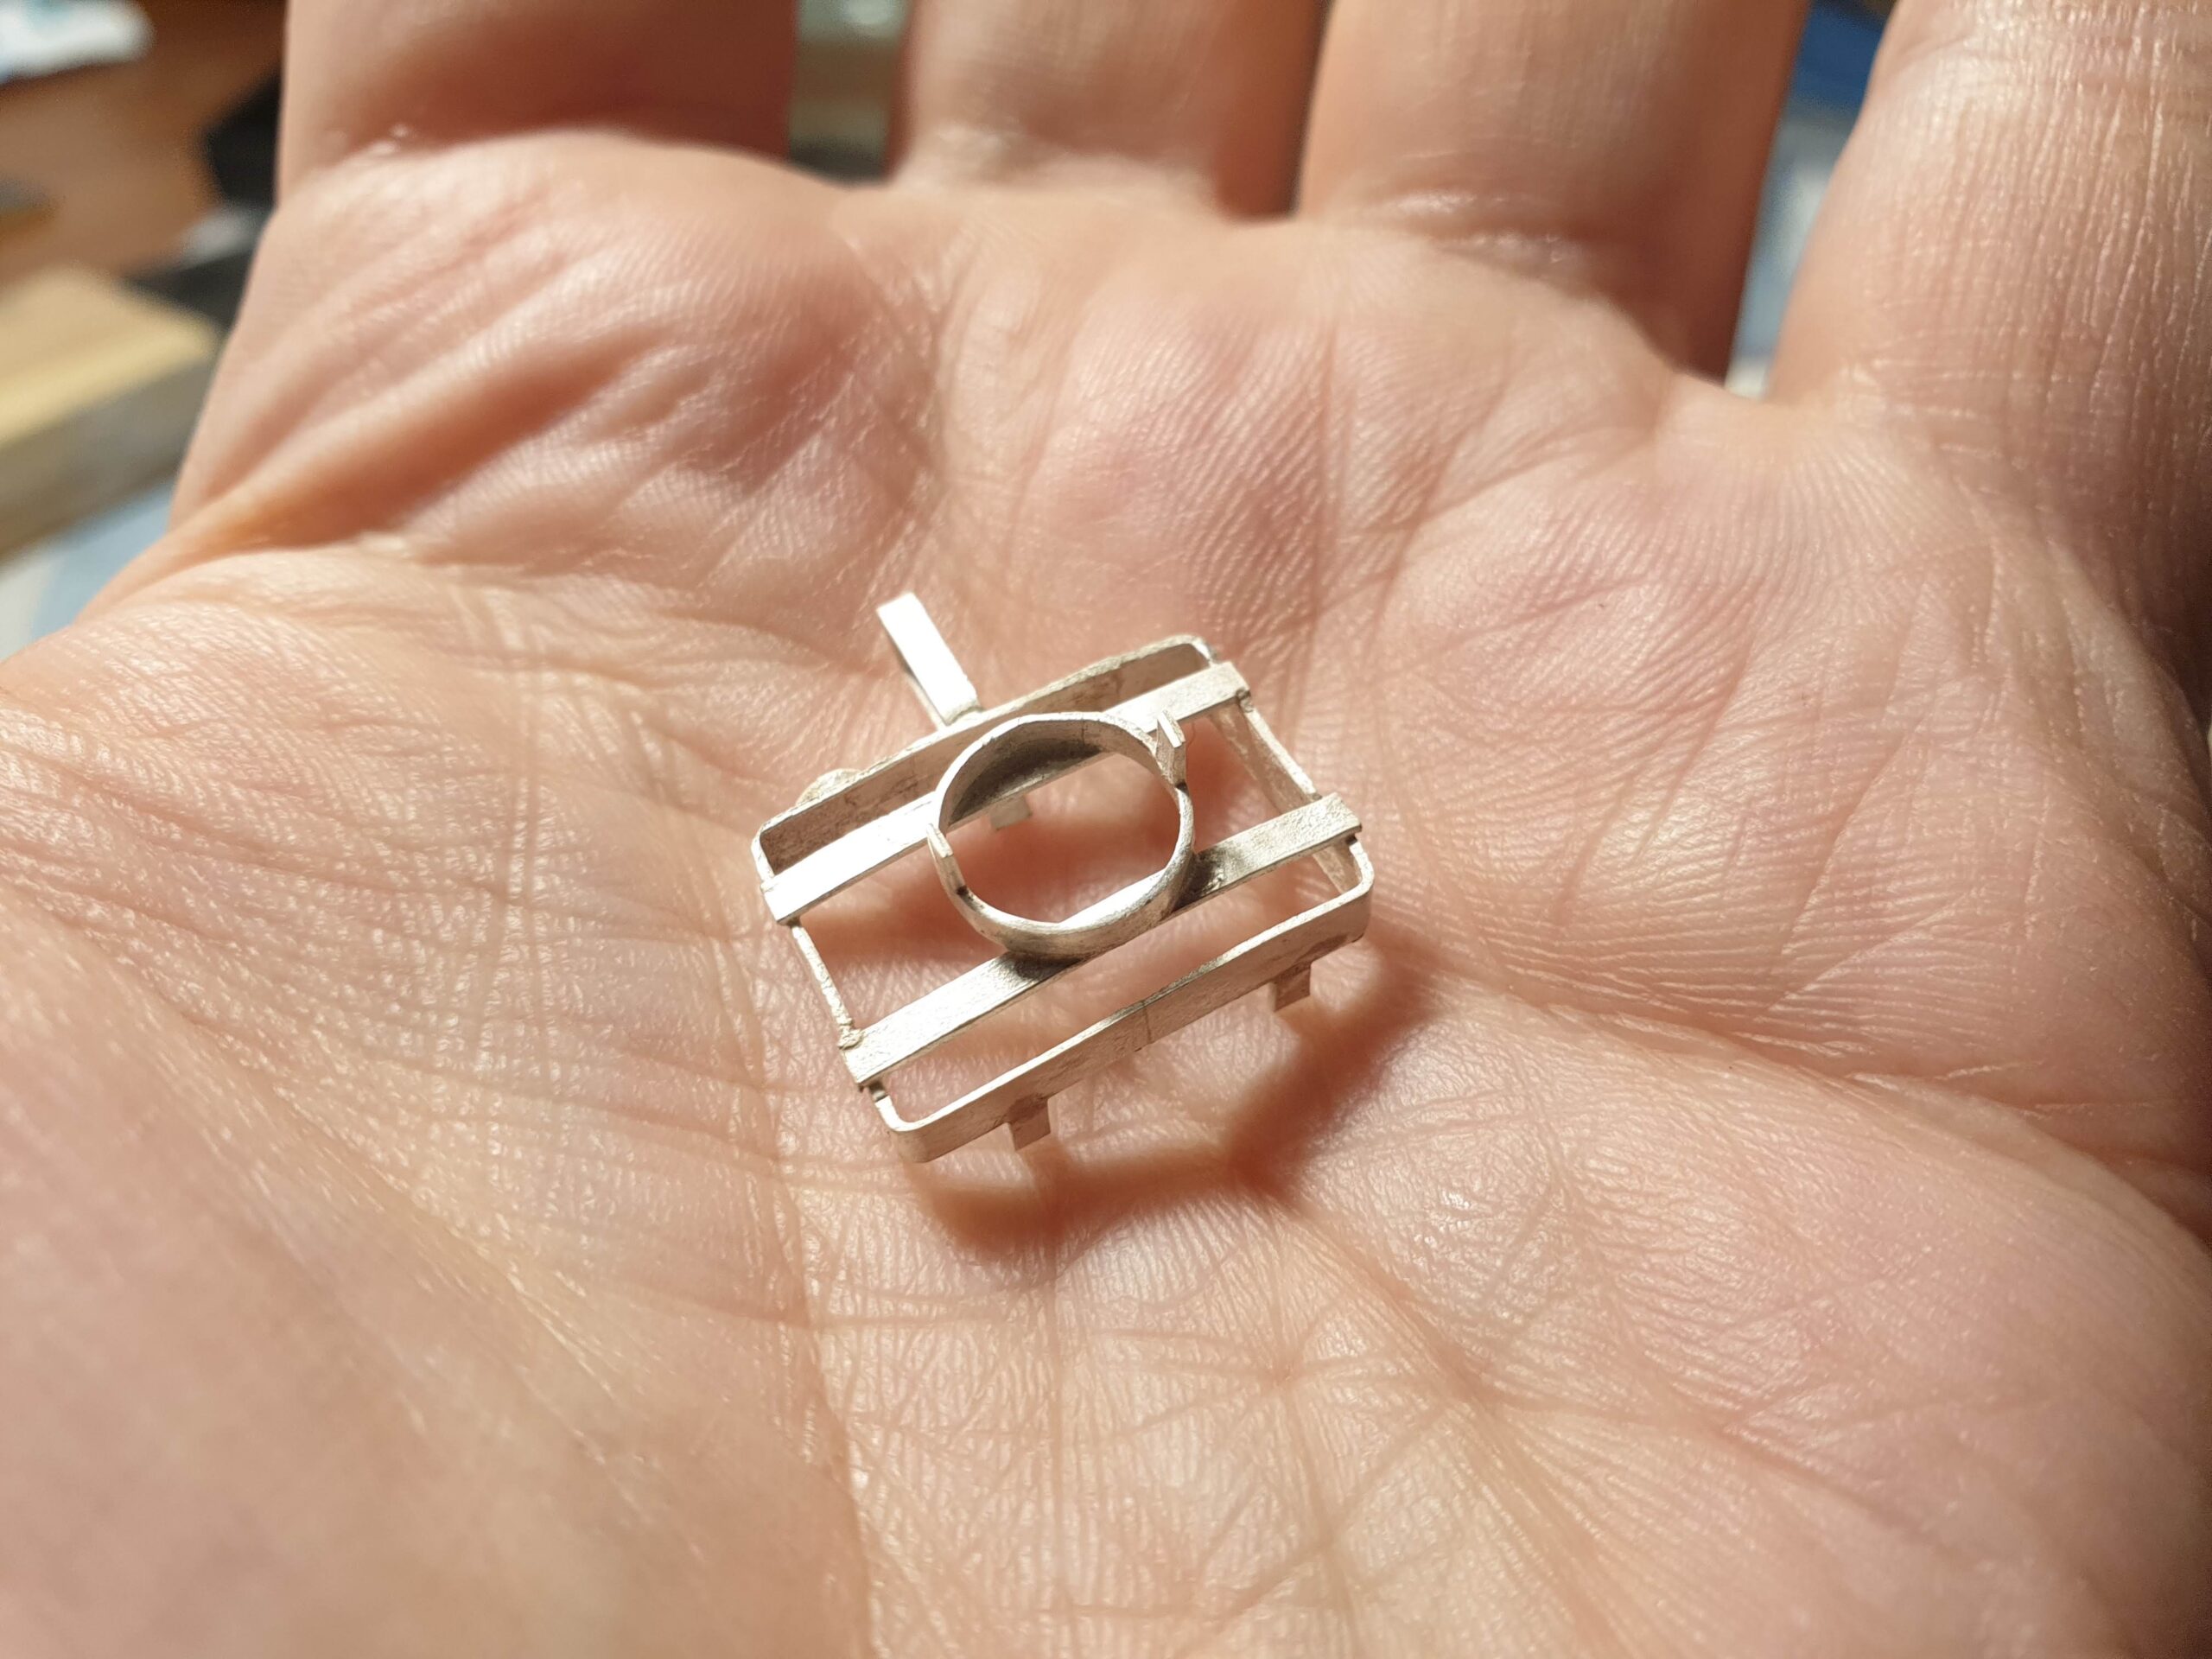
After all the soldering I removed the excessive pieces of stripes sticking out everywhere and give the whole piece a rough grinding round. It came out a bit different from what I was having in mind, but it does resemble a camera look.
Although non-functional, there is even a shutter button added on top of the camera body. Once grinding was done I did a first iteration of polishing with rubber abrasive brushes (they are amazing by the way) and set the malachite into the frame. All the fitting efforts payed off and the camera body is now fits snugly with the curved green stone.
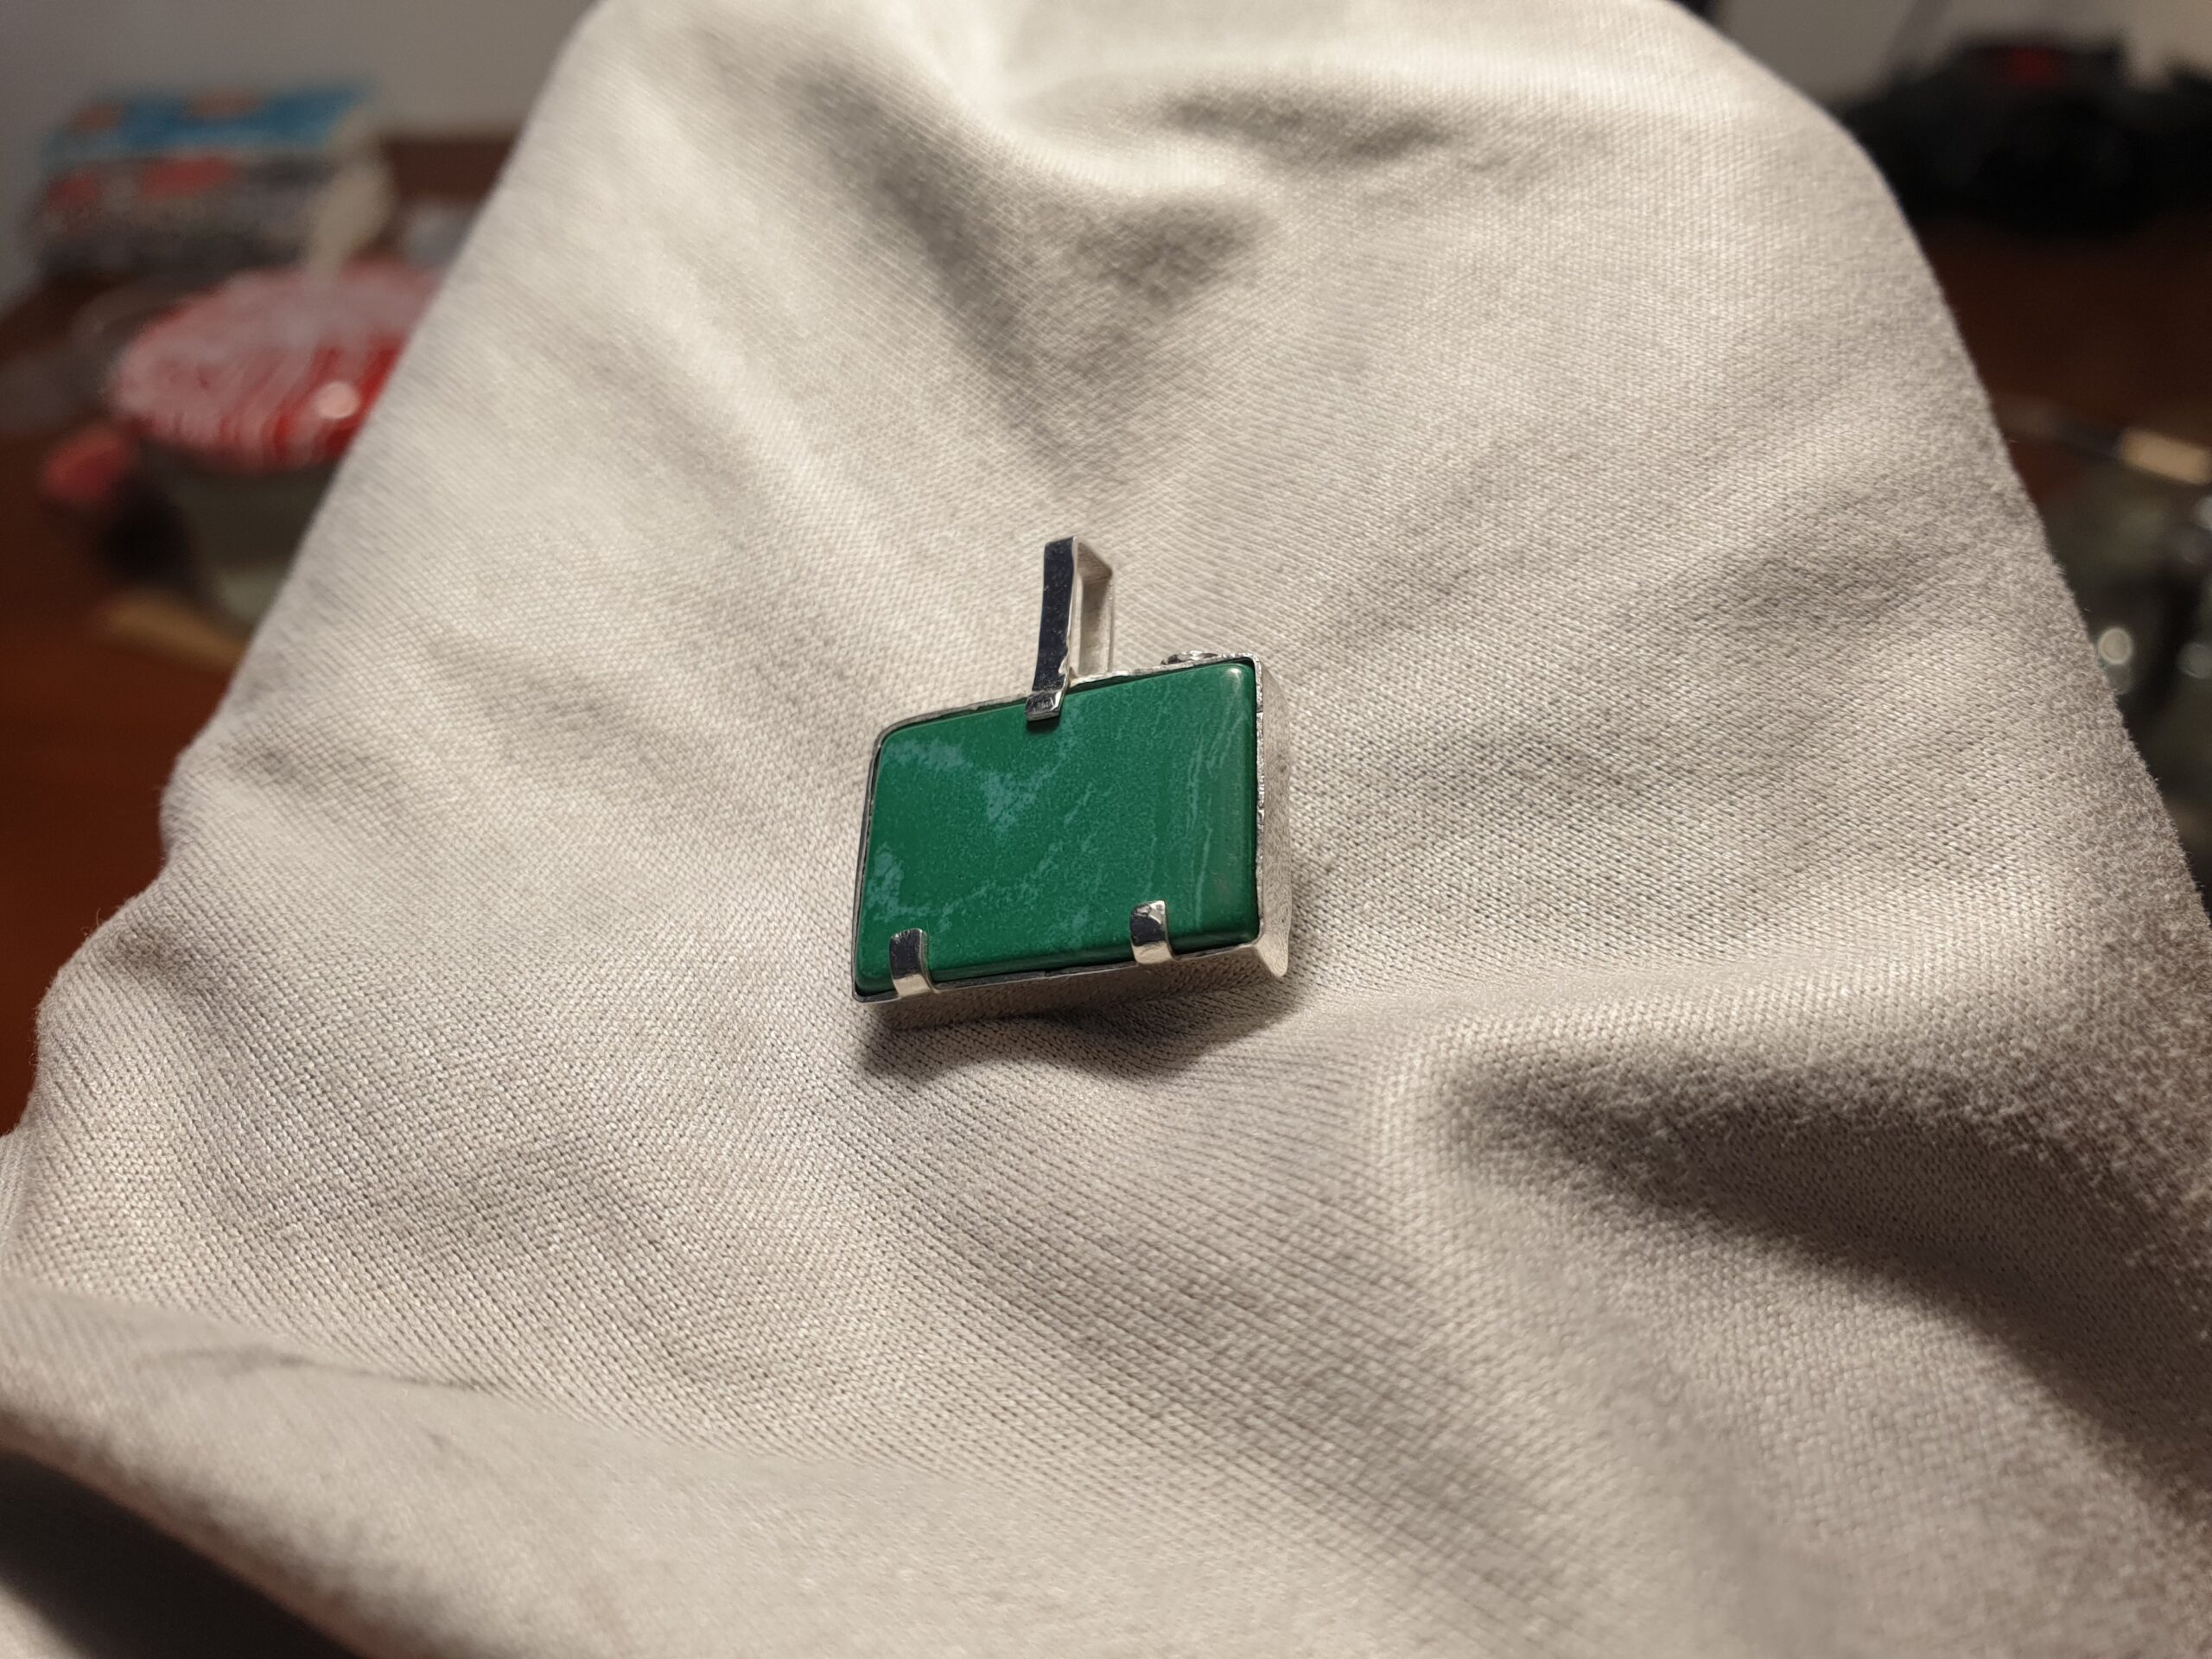
Simple things are usually learnt hard. I wanted to do some more polishing around the frame edges with the malachite in place. This is when I felt stupid not recalling that this mineral is not particularly stiff and scores only about 3,5 on the Mohs hardness scale. Luckily the scratches were not critical and I managed to buff them out so the back of the camera looks mesmerisingly smooth.
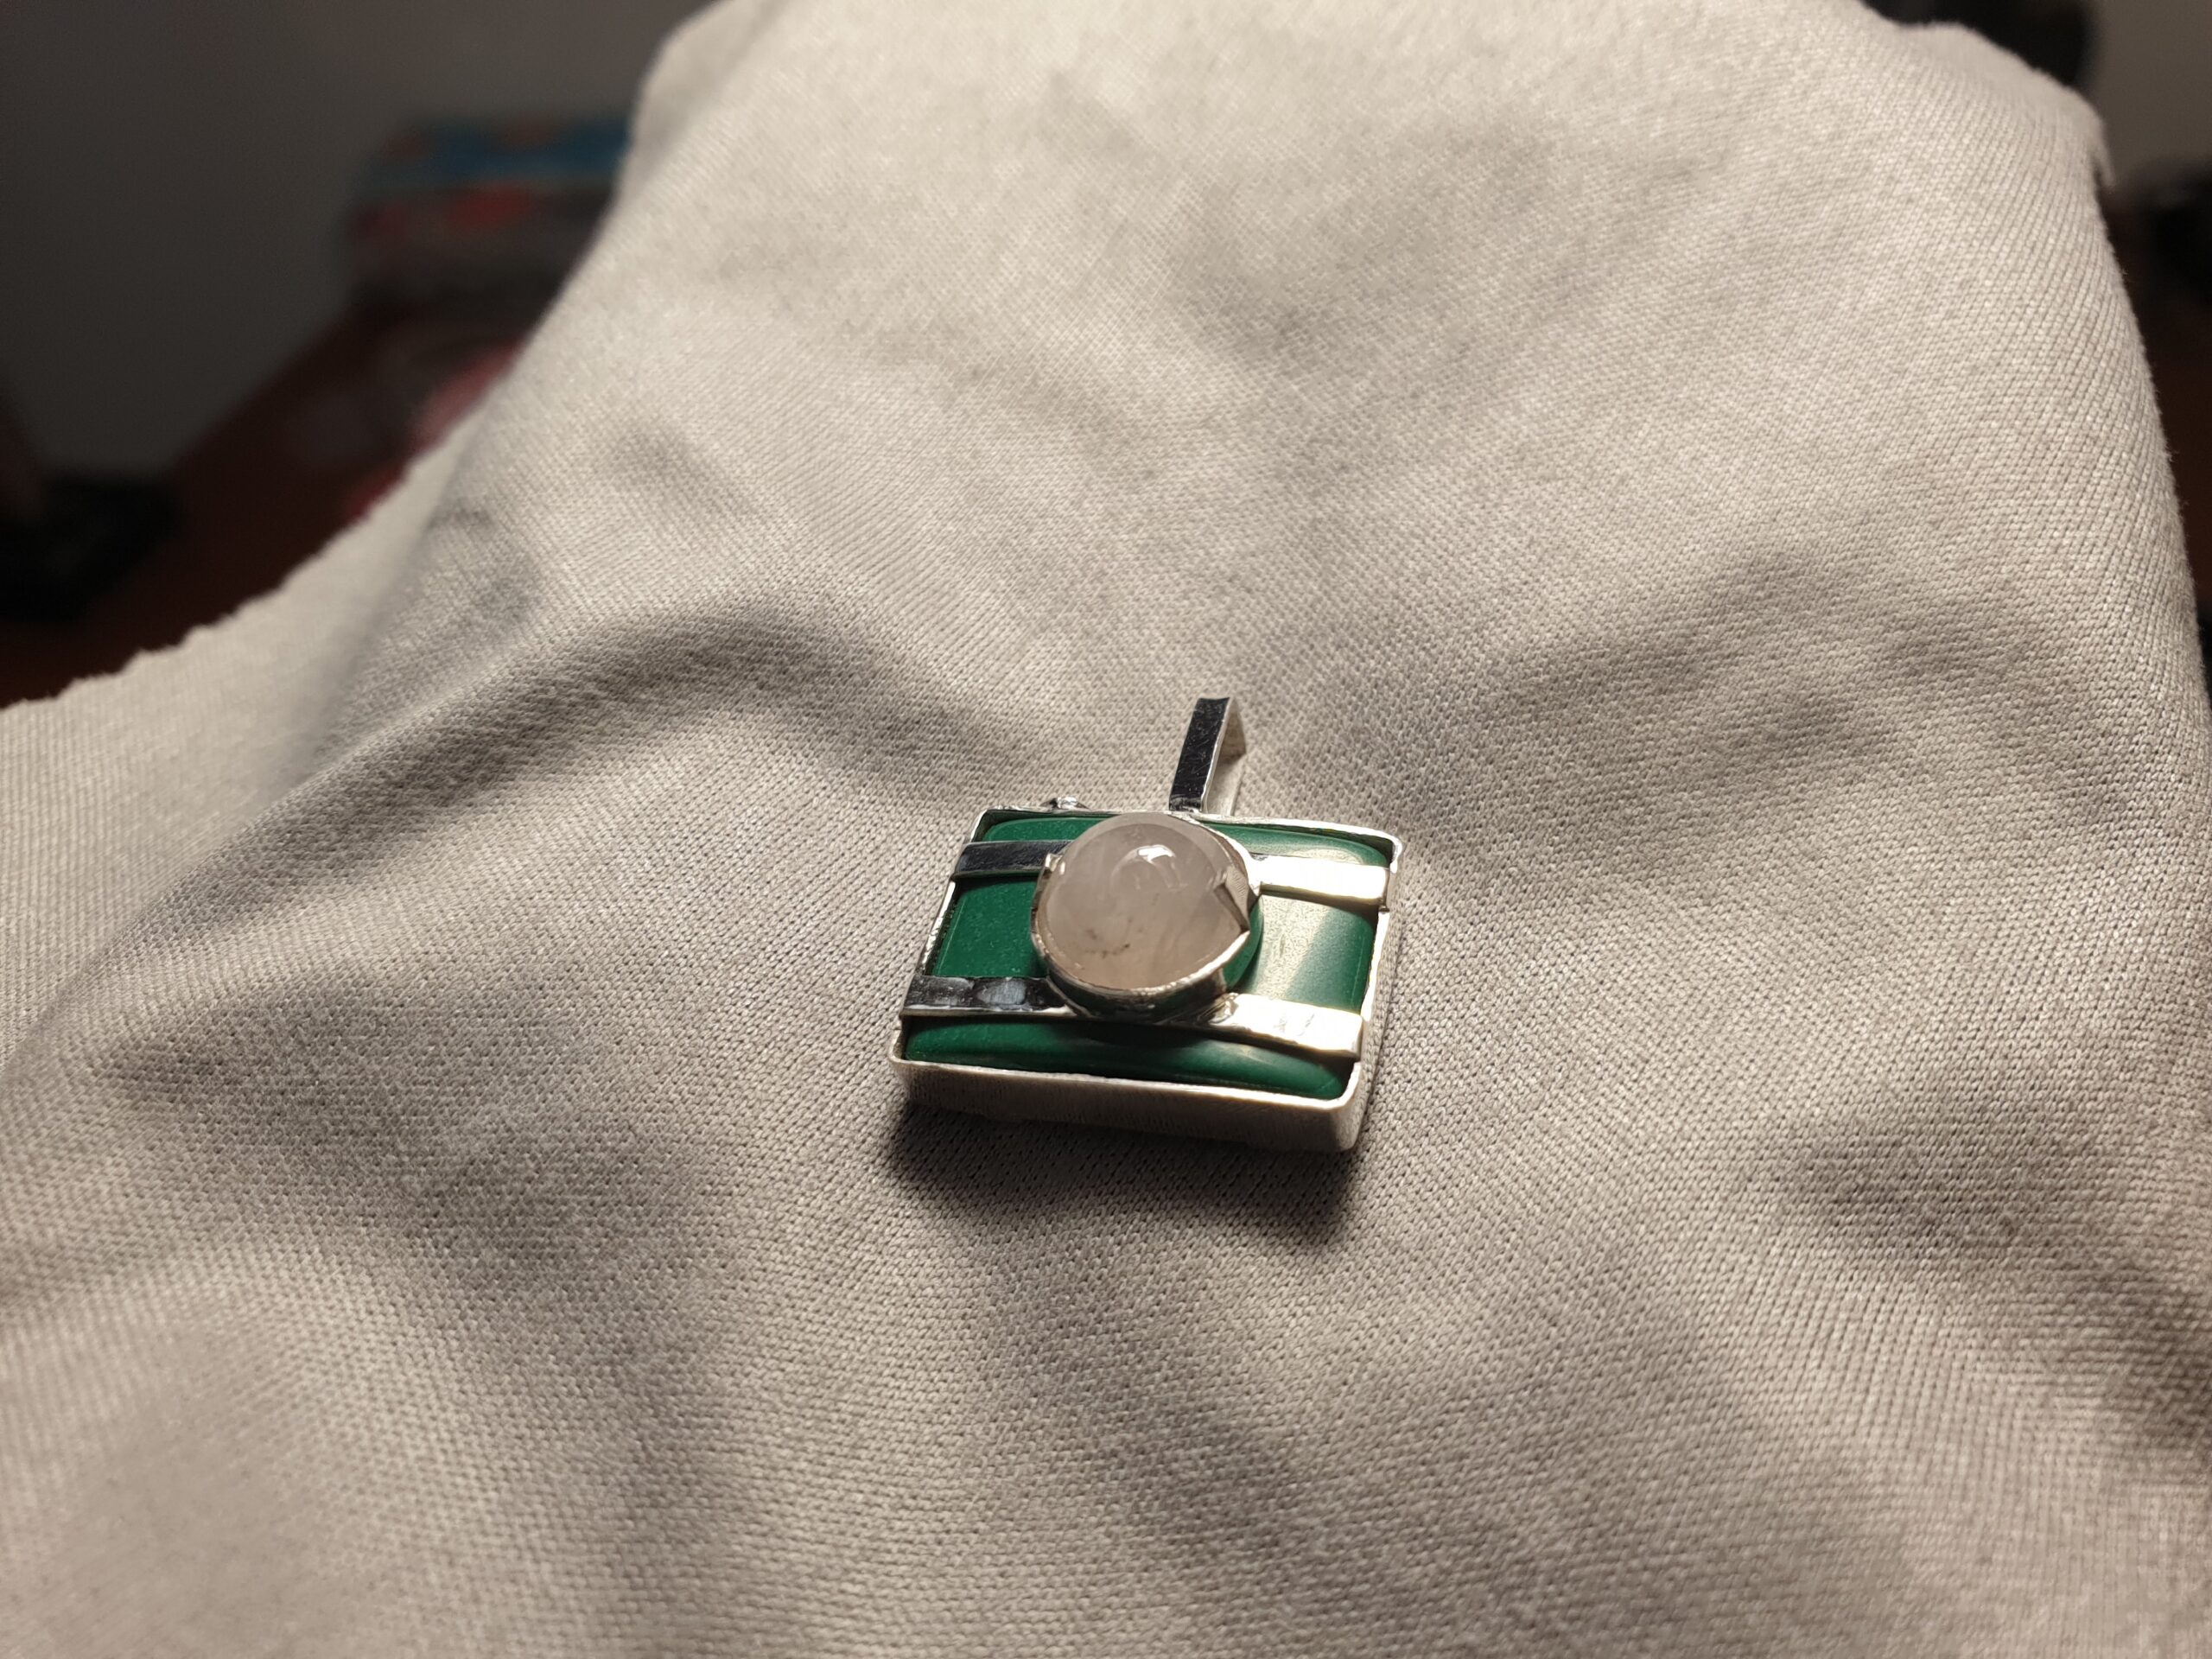
Setting the quartz was pretty straightforward using the two top prongs I set up at the very beginning. However, next time I’d rather spend few more hours to build a bigger cast for lens and set the stone from the inside as I did in my earlier Silver camera pendant. Even though it is much harder to produce I believe it worth the hustle.
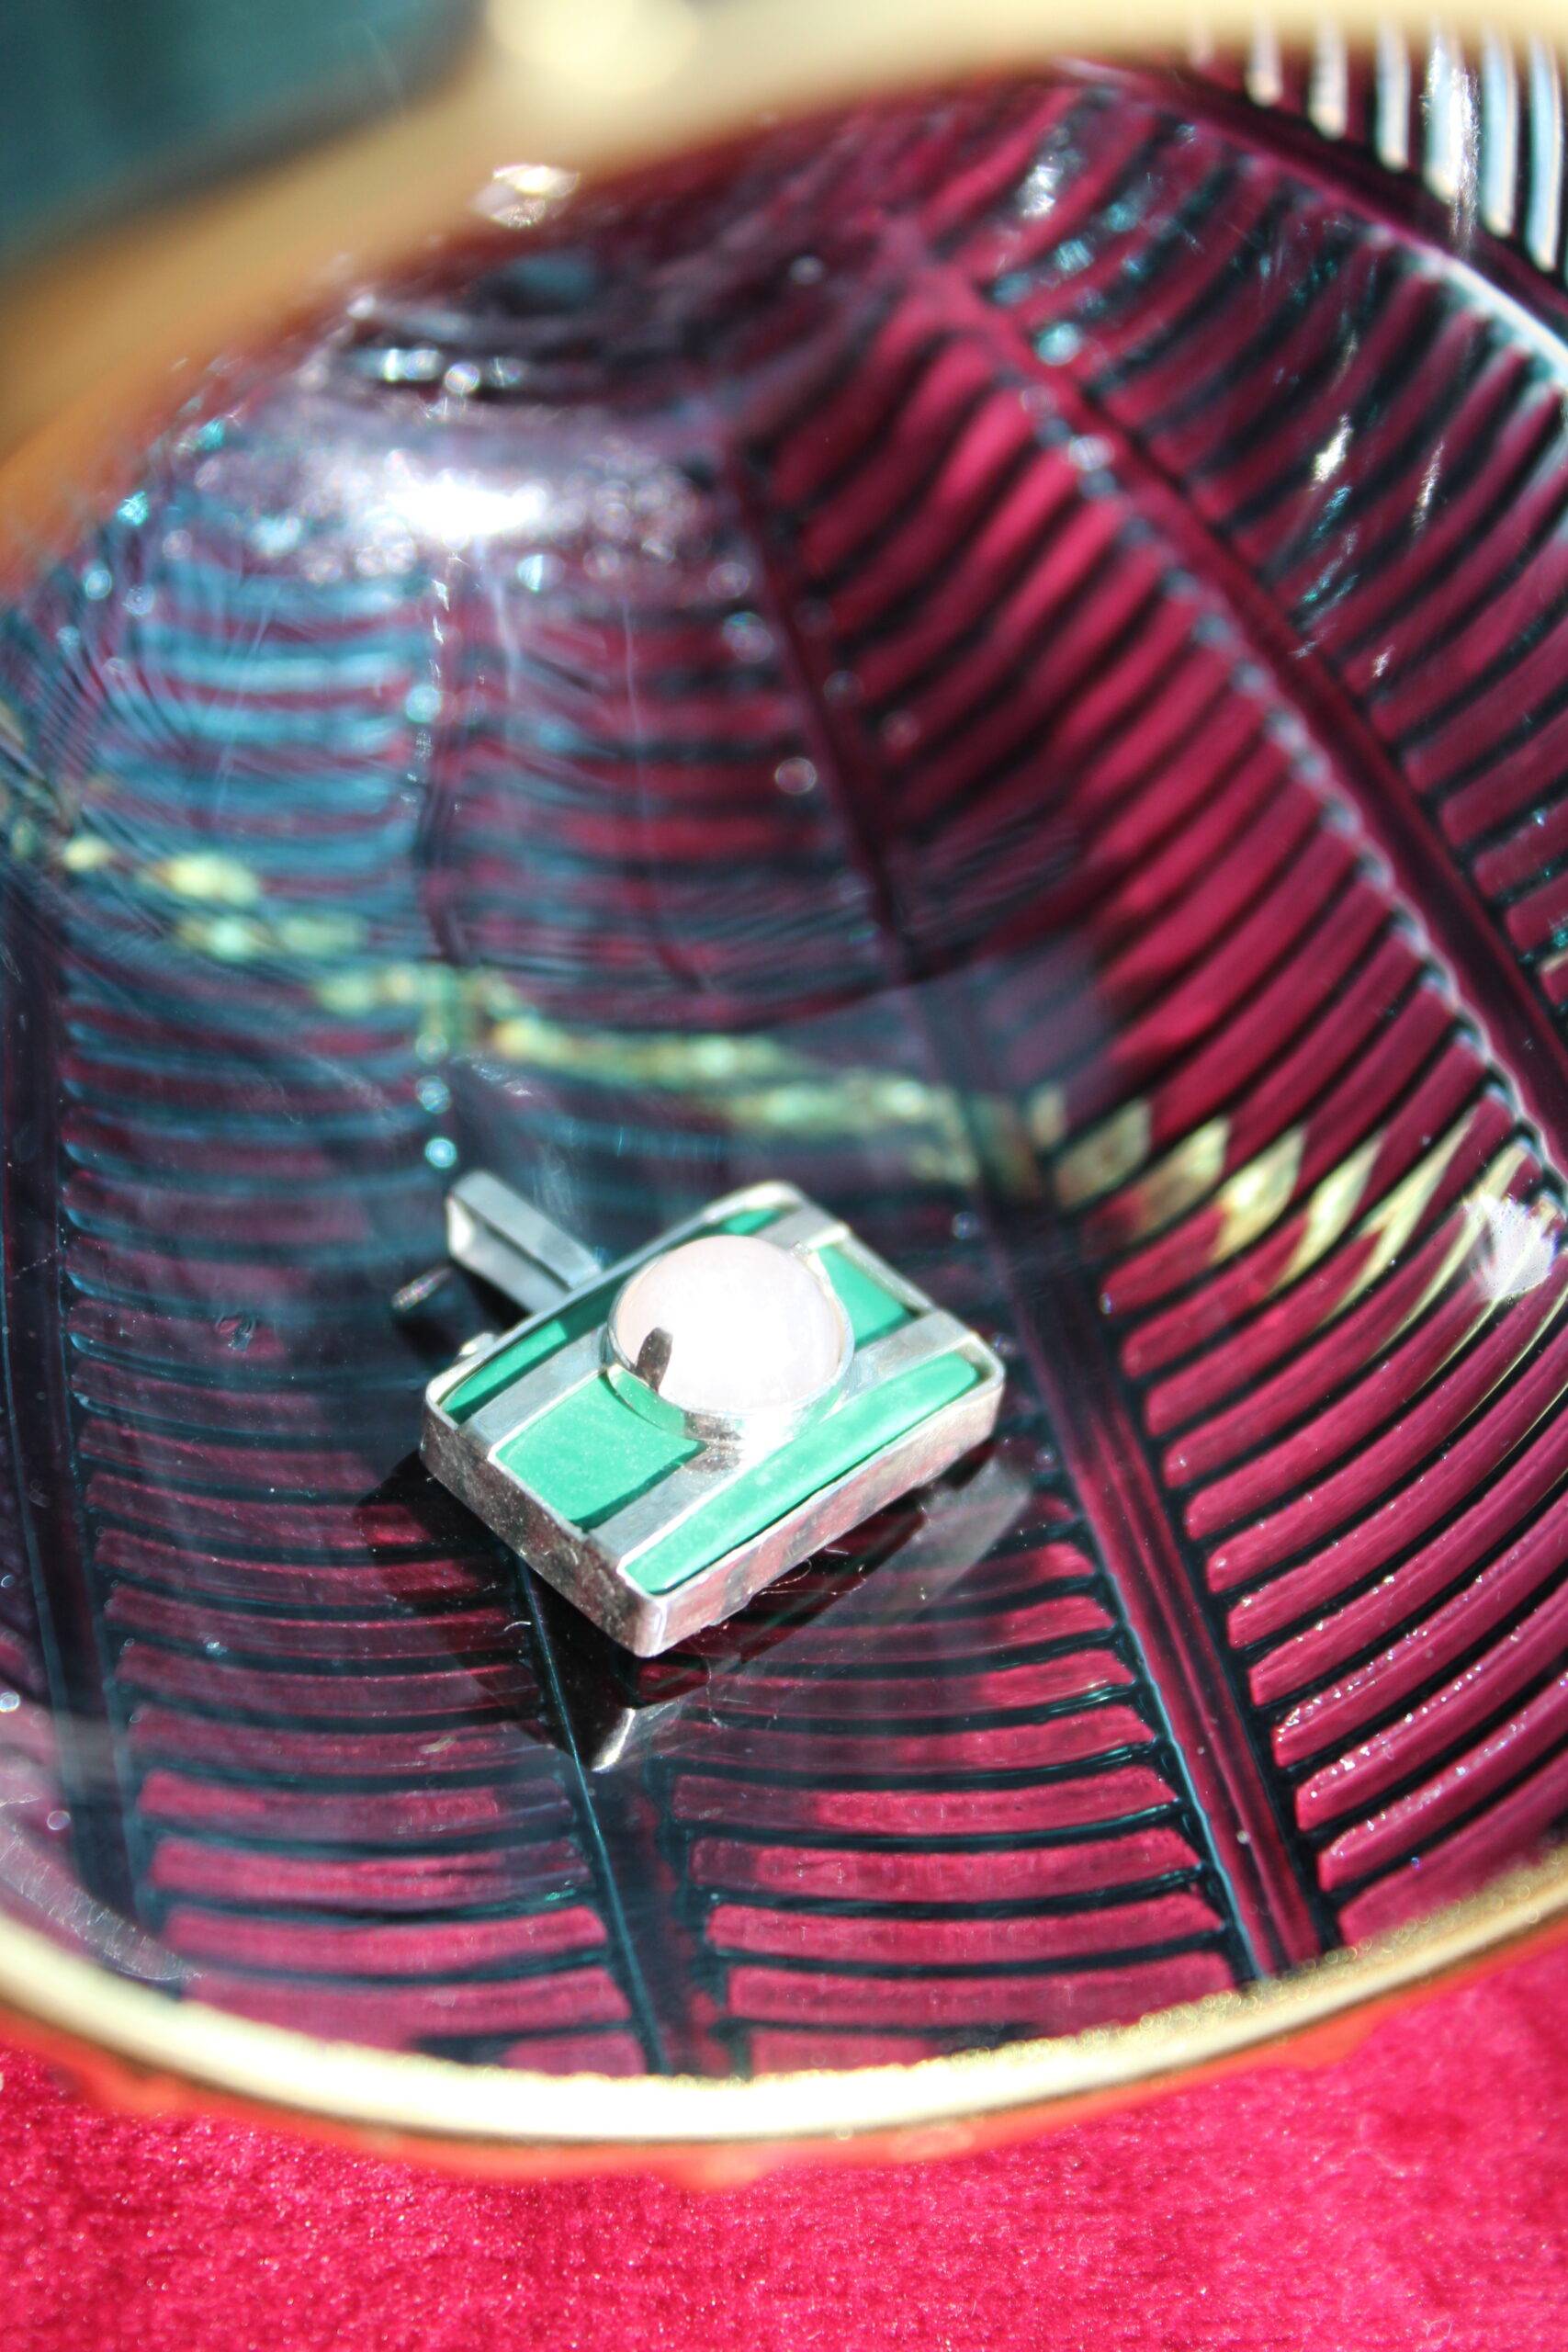
The final result might not deserve a central exposure in an art museum (depending on a museum probably though), but it still looks good and instantly reveals its inner meaning.

Unfortunately, this item is not available for purchase. If you dream about something similar, please check my Etsy store or contact me through the form or on Instagram and let’s see what I can do 🙂
If you like the article please post it on your favourite social media so I can get some motivation to proceed 🙂